In this article we’ll look at reducing dependence on CRM webhooks in AccessAlly. This is a great option that allows AccessAlly to do more in an offering so that your CRM setup requires less tagging and webhooks (which can fail or be limited by your CRM.)
ARTICLE CONTENT:
Watch the Video
You can watch the video version of this article or follow the steps outlined below.
Step 1: Your AccessAlly Offering
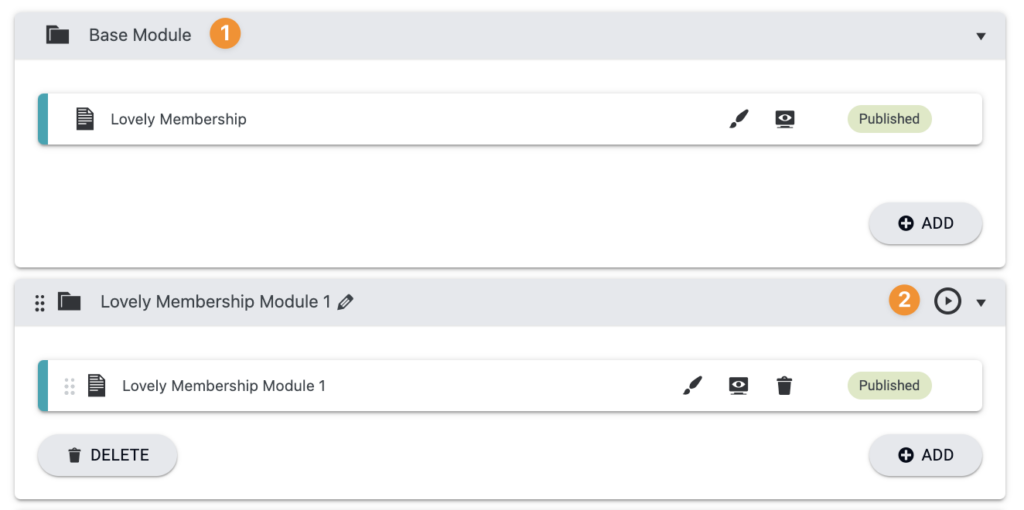
In your offering all base module content and any modules set to be instantly released will be given to the client when they sign up on an AccessAlly opt-in form or purchase on an AccessAlly order form.
In the example below the base module and module 1 content are granted for access from the order form or opt-in form.
Example of offering content tab.
Offering Release
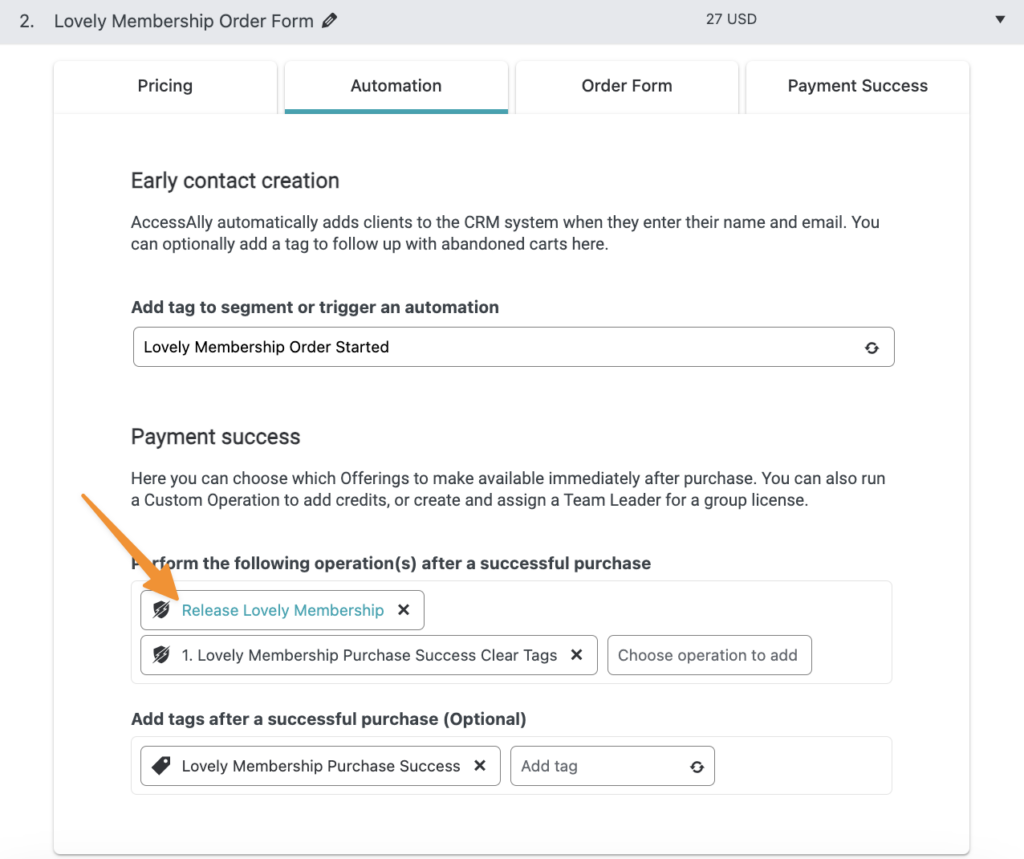
The offering release custom operation is designed to follow the timers in your content tab. This option is on your order forms or opt-in forms.
Example of AccessAlly offering release custom operation.
What does the Offering Release do?
This option allows AccessAlly to release the content and tag clients based on the timers in your content tab from right inside your site! This replaces using the CRM with tags and webhooks to release content there and sync it back to AccessAlly.
When someone purchases or opts-in now AccessAlly is doing the heavy lifting at the start and sending everything over to your CRM.
From the order form or opt-in the following items have already taken place and no longer needed in the CRM.
- Adding base module access tag
- Adding module 1 access tag
- Running the genpass webhook to create a user on the AccessAlly site and match the tags to this contact.
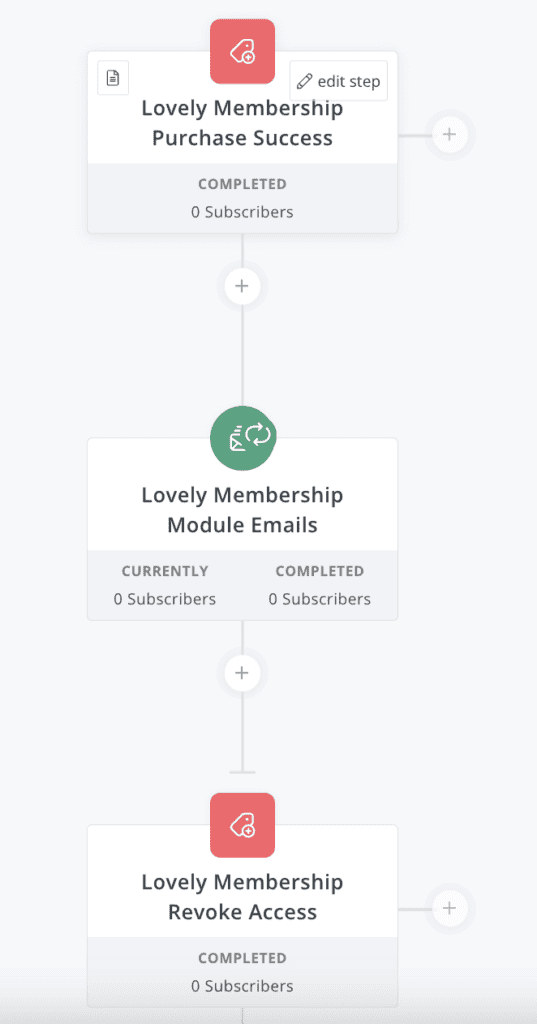
What your CRM automation looks like at purchase with this method:
- When the Purchase success tag is added to a contact
- Send a welcome email
- Delay to wait until the next module of content (example 7 days.)
Step 2: Your First Dripped Module Release
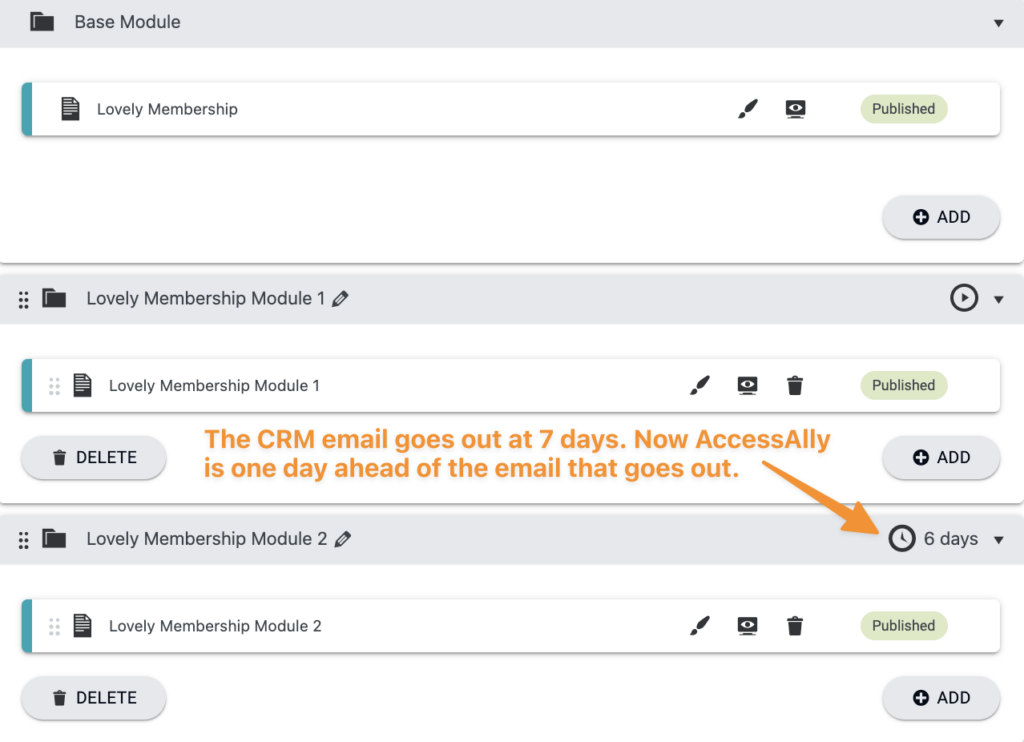
Now it’s time to set up the first module release timer for your dripped module content. With this first dripped module the timer should be set to release a day before the email goes out in your CRM.
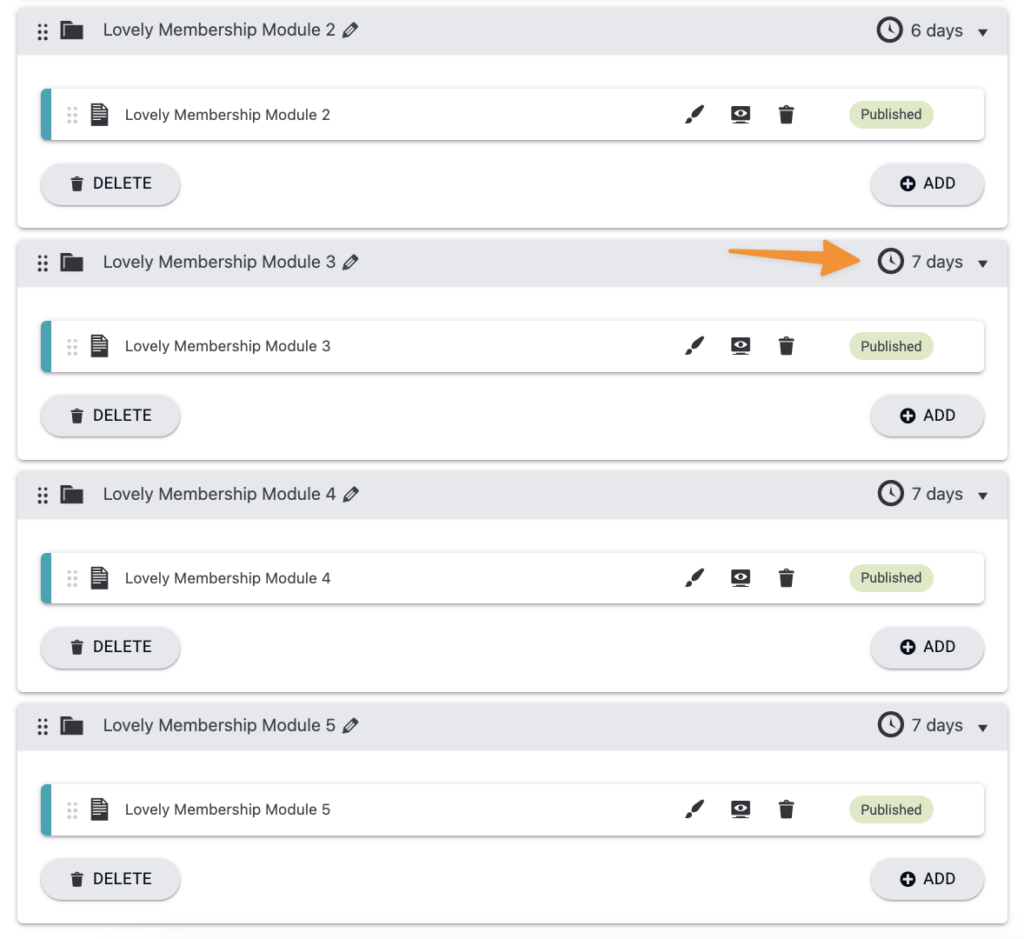
In this example, each dripped module is 7 days, but for the first dripped module – it is set to 6 days.
Why?
In your CRM automation you’ll send a module email every 7 days, and to kick this off, we need AccessAlly to do this before your CRM email goes out. If it’s set to the same day the timing may be off and they’ll visit – but, not have access!
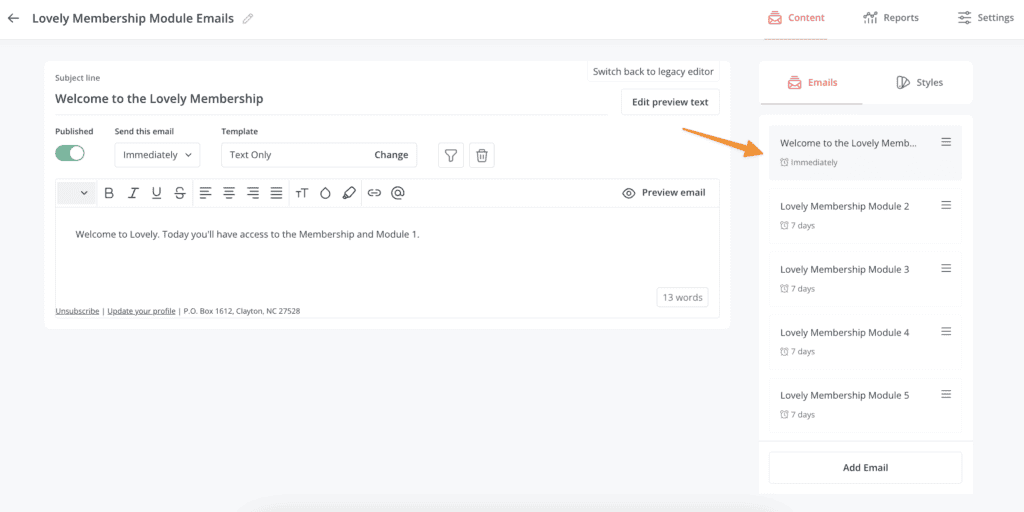
Example shown in Kit – automation setup.
Example shown in Kit – emails going out (no webhoooks or tagging needed!)
Step 3: Remaining Drip Release Modules
For all remaining modules you can set these to the number of days in-between (AccessAlly will automatically stay one day ahead.)
Step 4: Removing Tags Upon Purchase
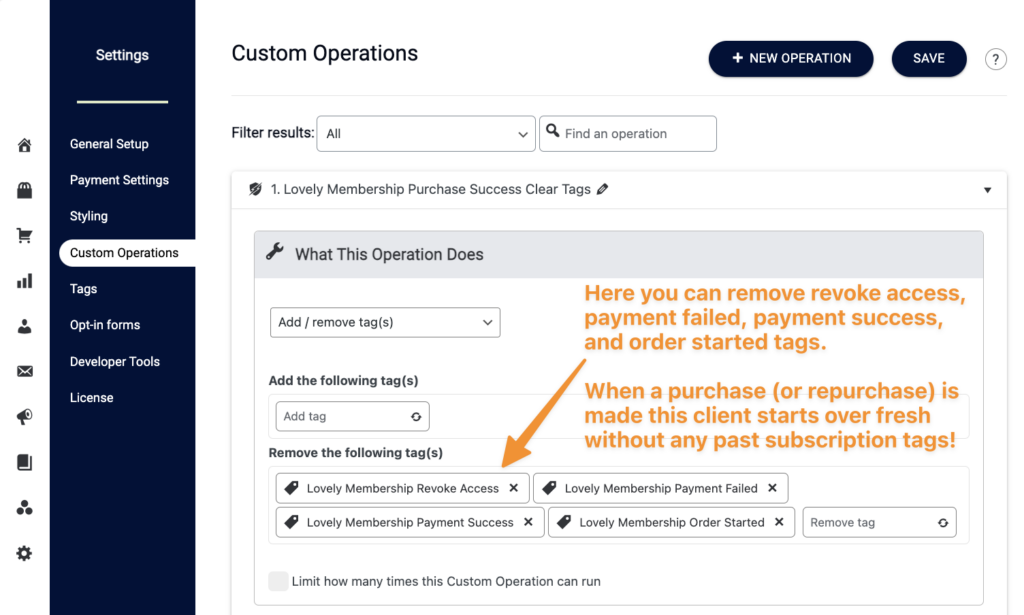
This is an optional step where you can remove tags if you have a subscription model where someone may have been revoked for failed payments or cancelled and purchased again.
Instead of removing lots of tags in the CRM automation upon purchase, this option allows you to clear out the tags in AccessAlly if past tags would prevent the client from seeing content (like revoke tags) or past tags for payment plans need to be removed (to start over fresh) with their new subscription.
Go to AccessAlly → Settings → Custom Operations. Create a new custom operation with the add/remove tags option.
With this option make sure you do NOT remove the “Purchase Success tag” this tag is different from your Payment Success tag shown here.
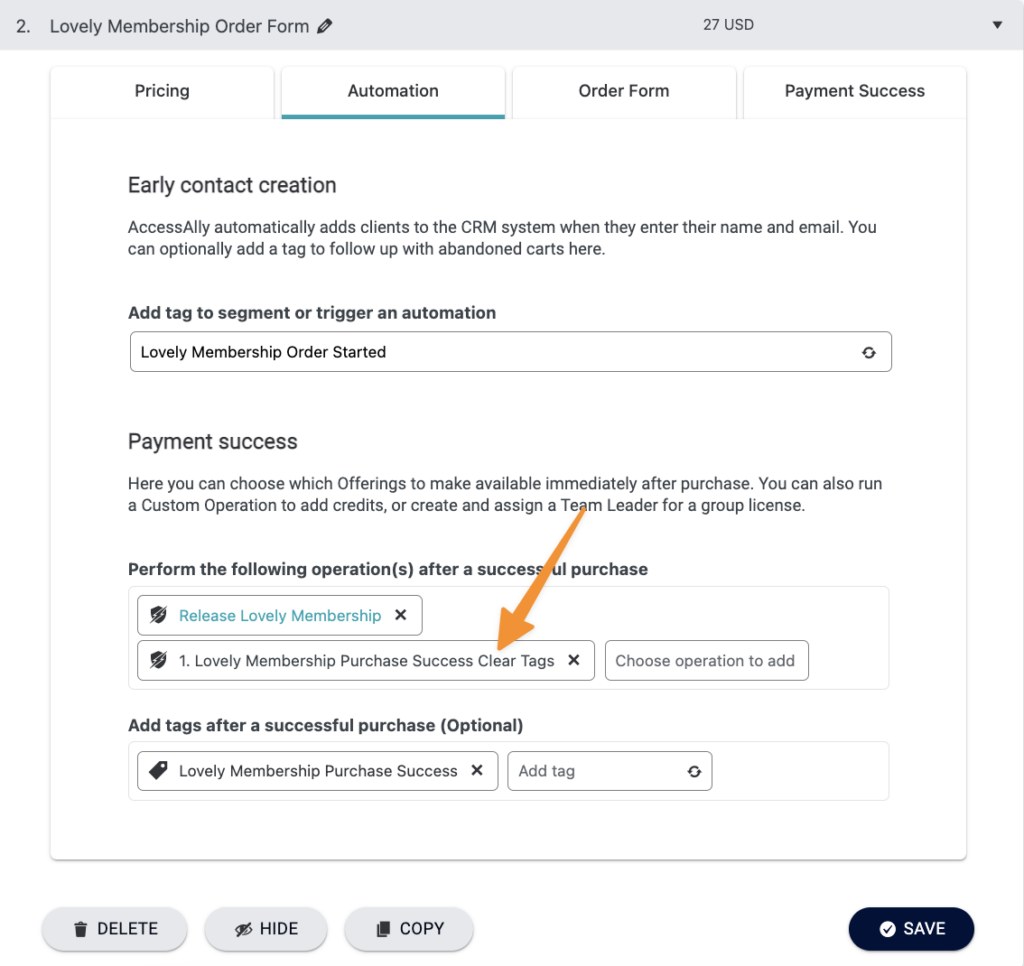
Add this custom operation to your order form.
This will automatically run in AccessAlly and sync to your CRM upon purchase from the order form. No webhooks or CRM automations required for this to work.
Step 5: Your Next Step
In addition to the emails for content delivery, you will need automations for failed and successful payments if sending these for subscriptions.
The process for these will still require tags and webhooks and you can see the set-up in the article below.

