AccessAlly comes with built-in translations, and you can switch the default language of your membership site. This is great if you want to do business in a language other than English.
However, you might want to be able to offer multiple language options on the same WordPress website.
That’s what this tutorial will cover: how to have a multilingual membership site, and take orders from the same AccessAlly installation in multiple different languages.
ARTICLE CONTENT:
WordPress Membership Multilingual Set Up
To offer multiple language options on the same site, you’ll need to install one of these recommended multilingual WordPress plugins:
- Polylang: Used by over 500,000 WordPress users, this is a free plugin that also has a premium version. It handles multiple languages on one WordPress site very well.
- WPML: An affordable paid multilingual plugin that handles having many languages on one WordPress site. It’s a robust offering with many bells and whistles.
How these WordPress multi-language plugins work is that they pull the translated versions of AccessAlly’s shortcodes, based on which language the page is set to.
For example, you might have a Team Dashboard page in French, and your English version would have the exact same shortcode. The multi-language plugin does the translation using AccessAlly’s different language versions.
Using Polylang to Create Different Versions of the Same Page
This tutorial will show you an example using Polylang, since it’s a free plugin that offers all of the functionality you might be looking for.
Once you’ve set up the different languages that you want to add to your membership area, you’ll create variations of each page for each language.
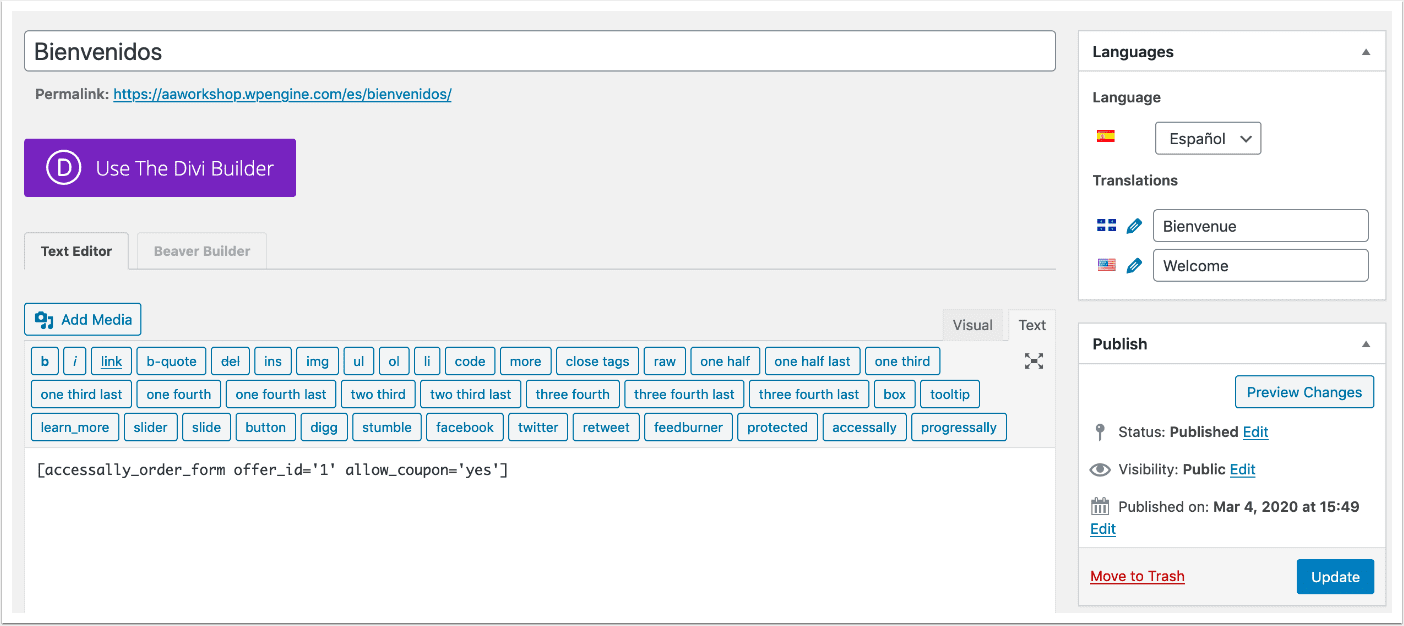
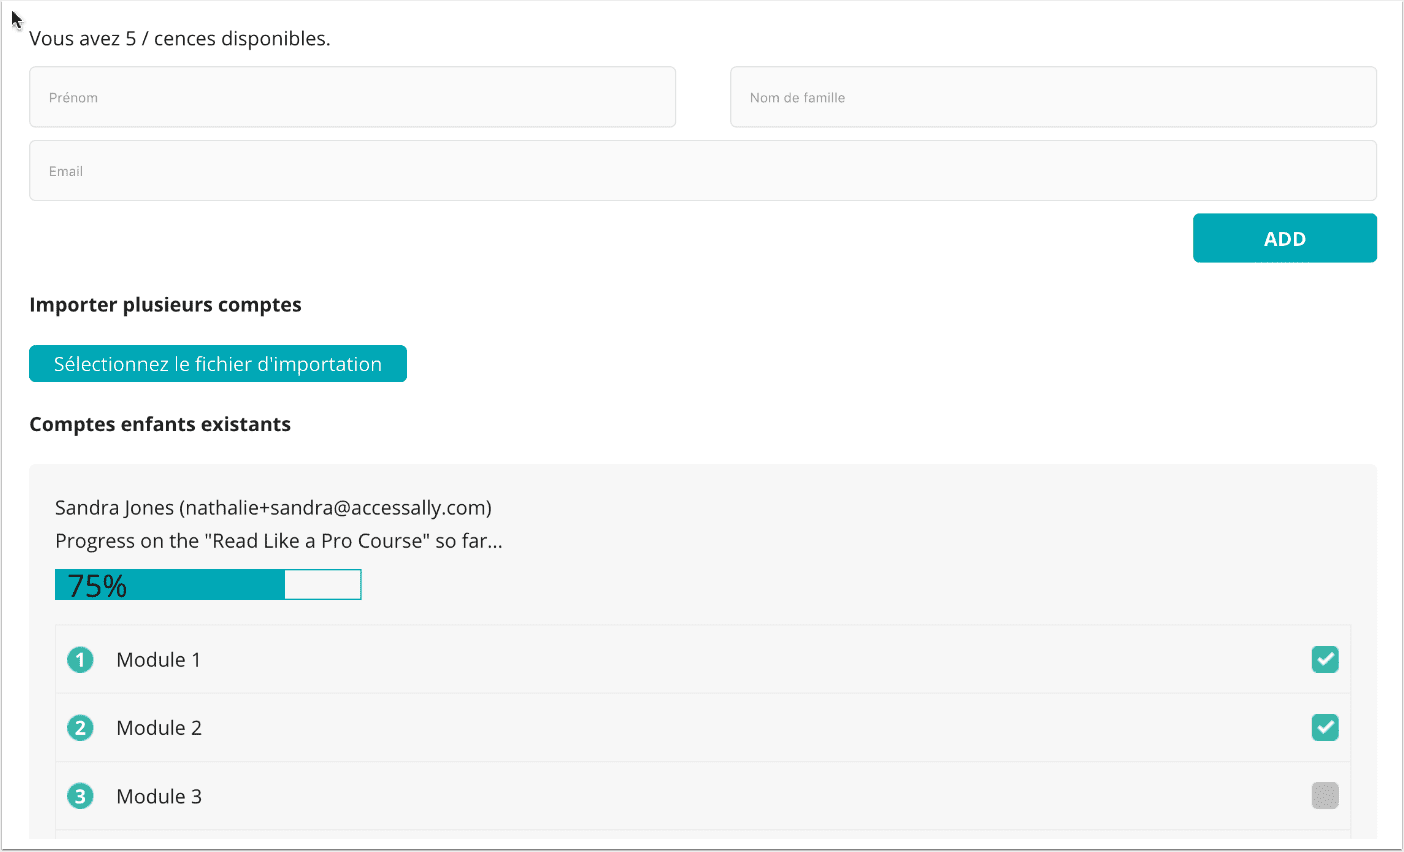
You can see that any text or videos you want to manually translate can be added to these separate pages. Members can swap between languages using the menu, which you can learn how to set up in the Polylang documentation.
Any AccessAlly shortcode you put into a translated page will show up with the appropriate language, assuming we have a translation available in that language.
Setting Up Multilingual Order Forms
The AccessAlly Order Form shortcodes will automatically show in the designated language. In this example we’re seeing a Spanish order form:
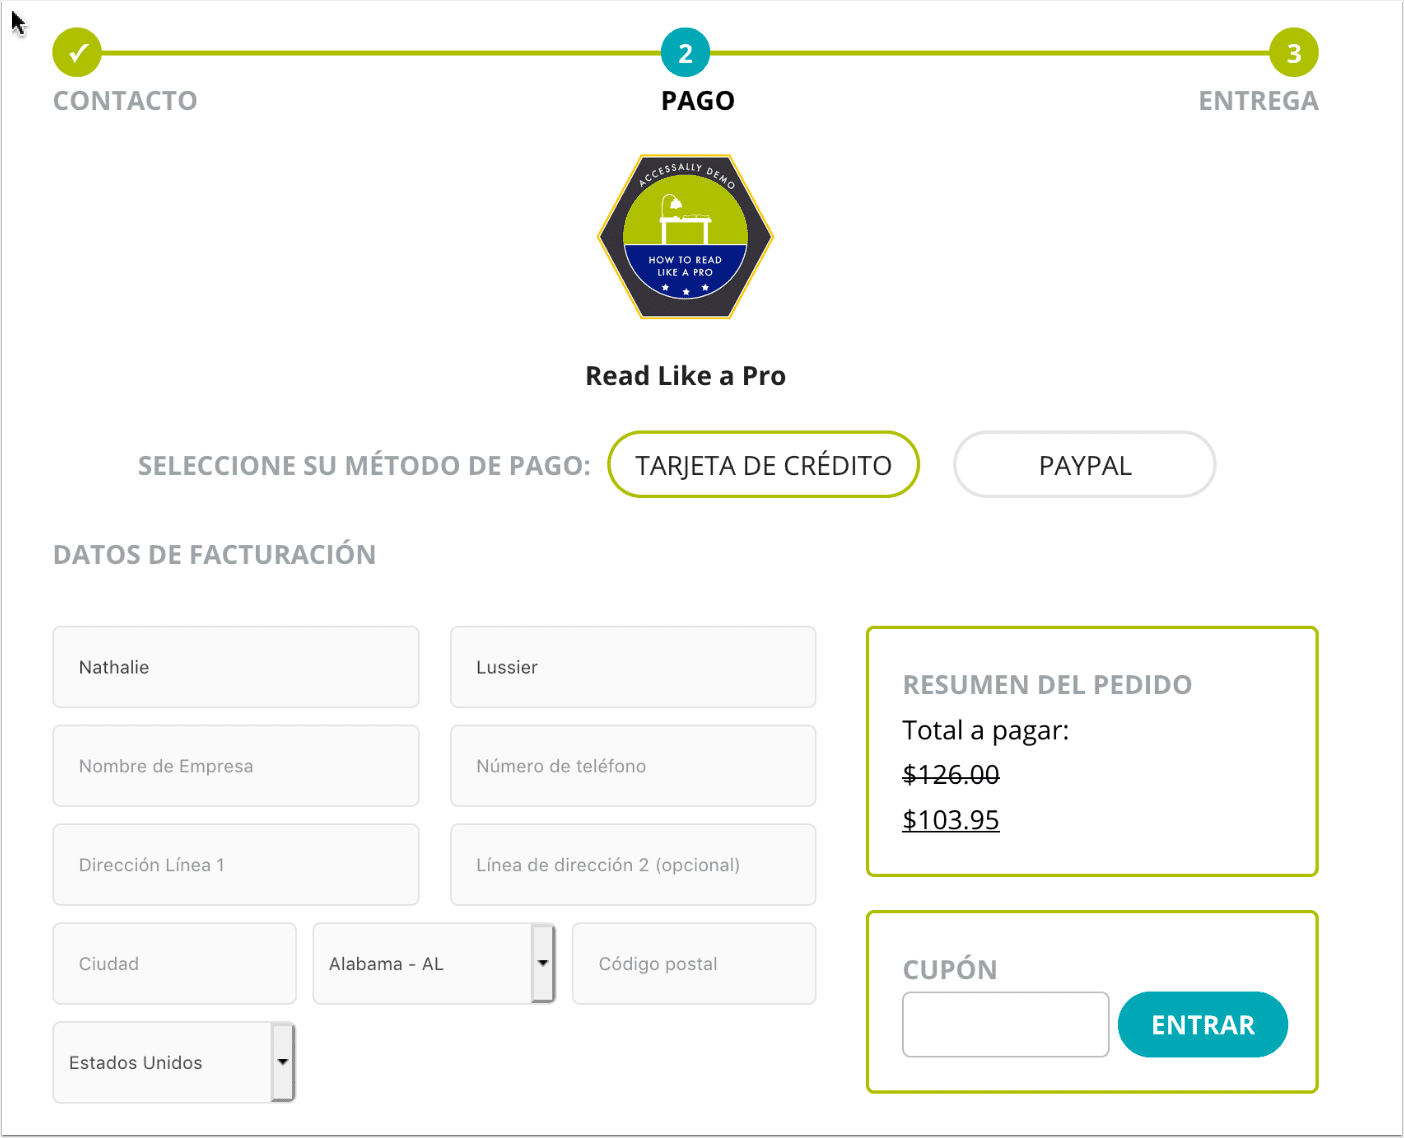
You could create a different Offer or Order form for each language, in order to have translated Course Titles and Descriptions. However, that might mean creating a lot of order forms if you have many products or want to offer many languages. It also complicates tagging and follow-up automation.
Instead, you might consider setting up a Custom Field that tracks a customer’s preferred language. The benefit here is that you can use the same Order Form/Offer, the same tags, and use the logic in your CRM to follow-up in the correct language.
Here’s how you’d add a Custom Field for Language in your order forms in AccessAlly:
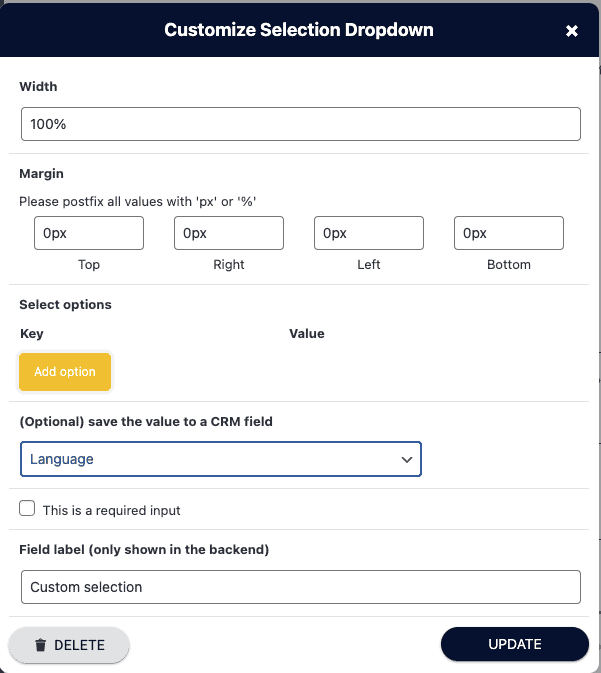
In this screenshot we’re using a built-in Language field (only available in Infusionsoft/Keap), but you’ll likely need to create your own Language Custom Field in your CRM.
Here’s a refresher for how to create a custom field in your CRM. You’ll want to create the field before you try to add it to your order forms.
You decide where you want to place the field. It might make sense to put it on the payment details section, or the first contact section.
Then when someone is checking out and purchasing your courses, they can select their language and get entered into the correct follow up email sequence.
Setting Up Your Multilingual Follow-up Email Campaign
Once you have your multilingual membership site and order forms, you’ll want to make sure that customers get communications based on their preferred language.
You can do that using a Custom Field in your CRM, and including it in an order form or giving people a chance to edit their language preference in their profiles.
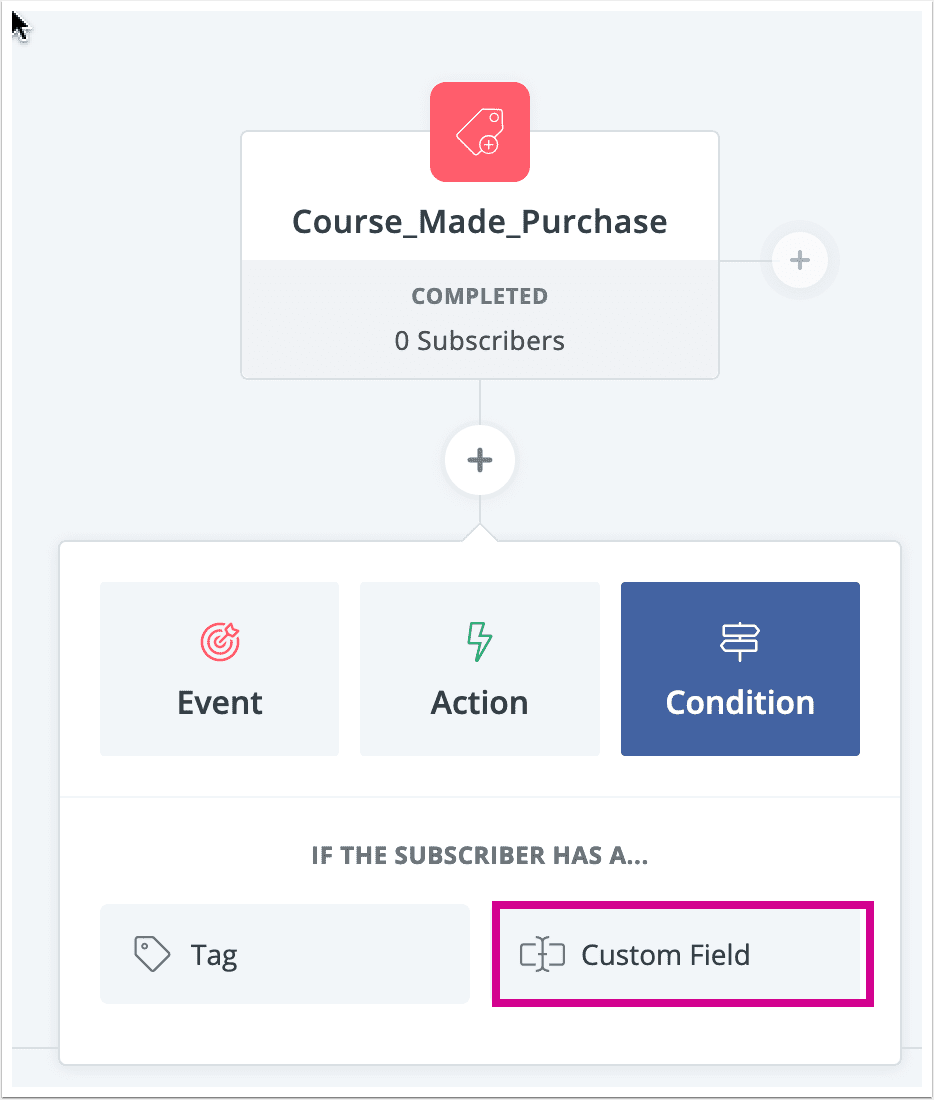
Here’s how to set up the email campaigns in each CRM based on a “Language Custom Field”. Follow this tutorial to learn how to create a custom field.
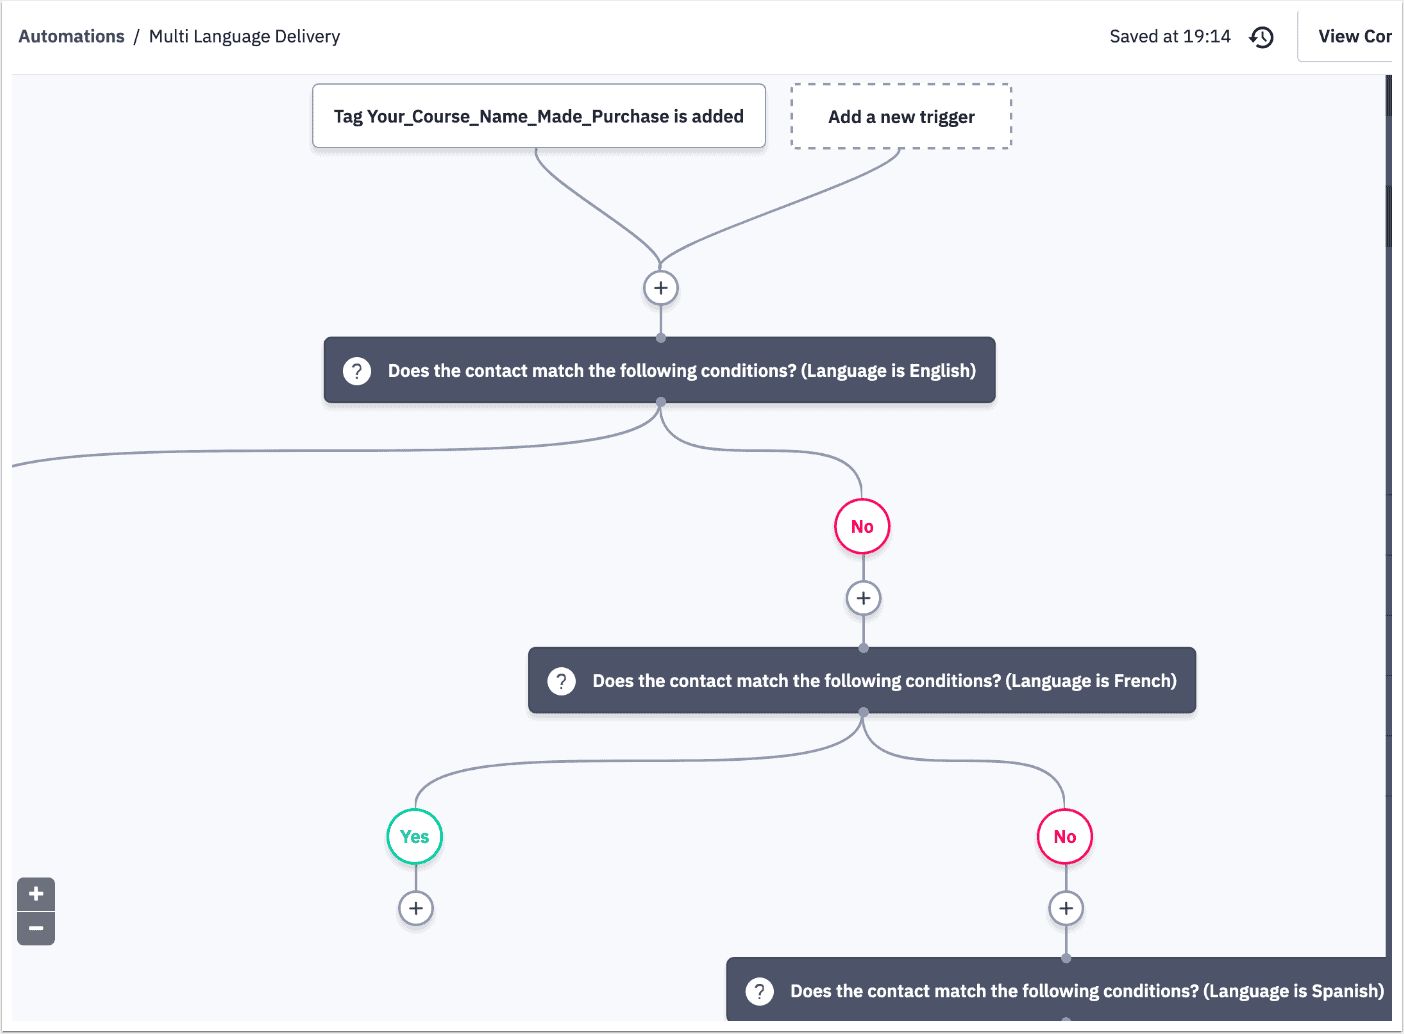
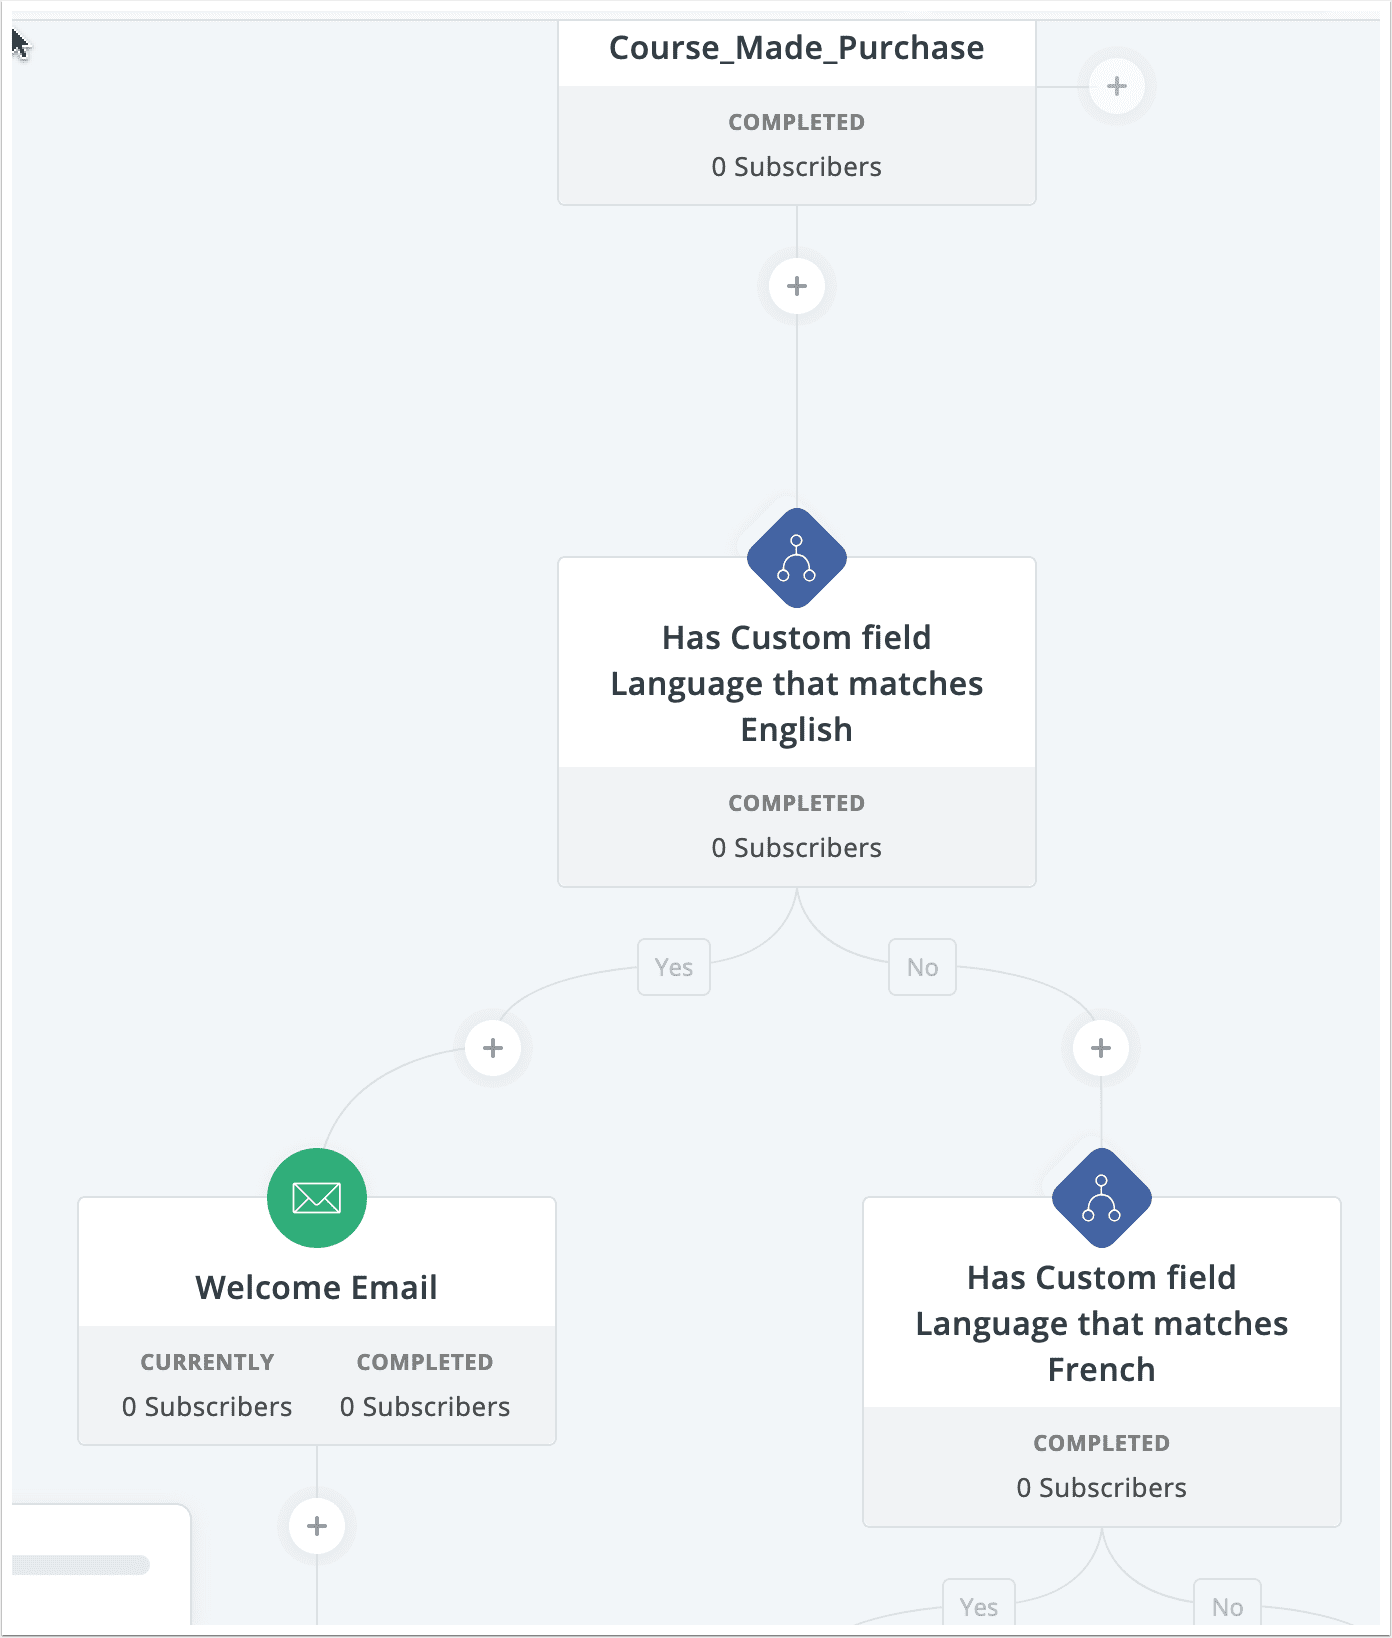
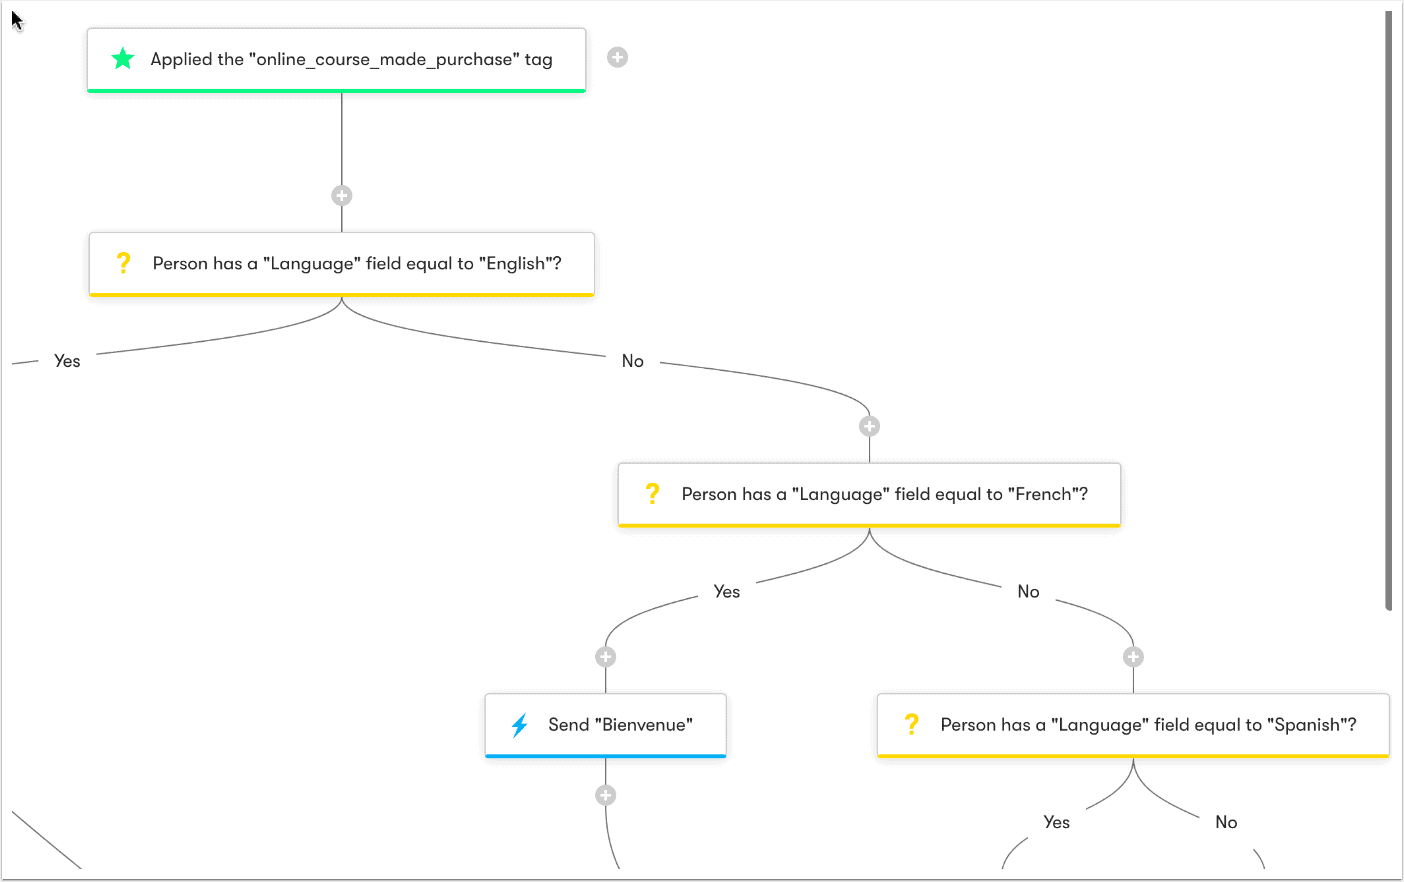
In your ActiveCampaign automation, add a Condition for If/Else after the initial Made_Purchase trigger tag.

Use the Custom Contact Fields to create a filter:
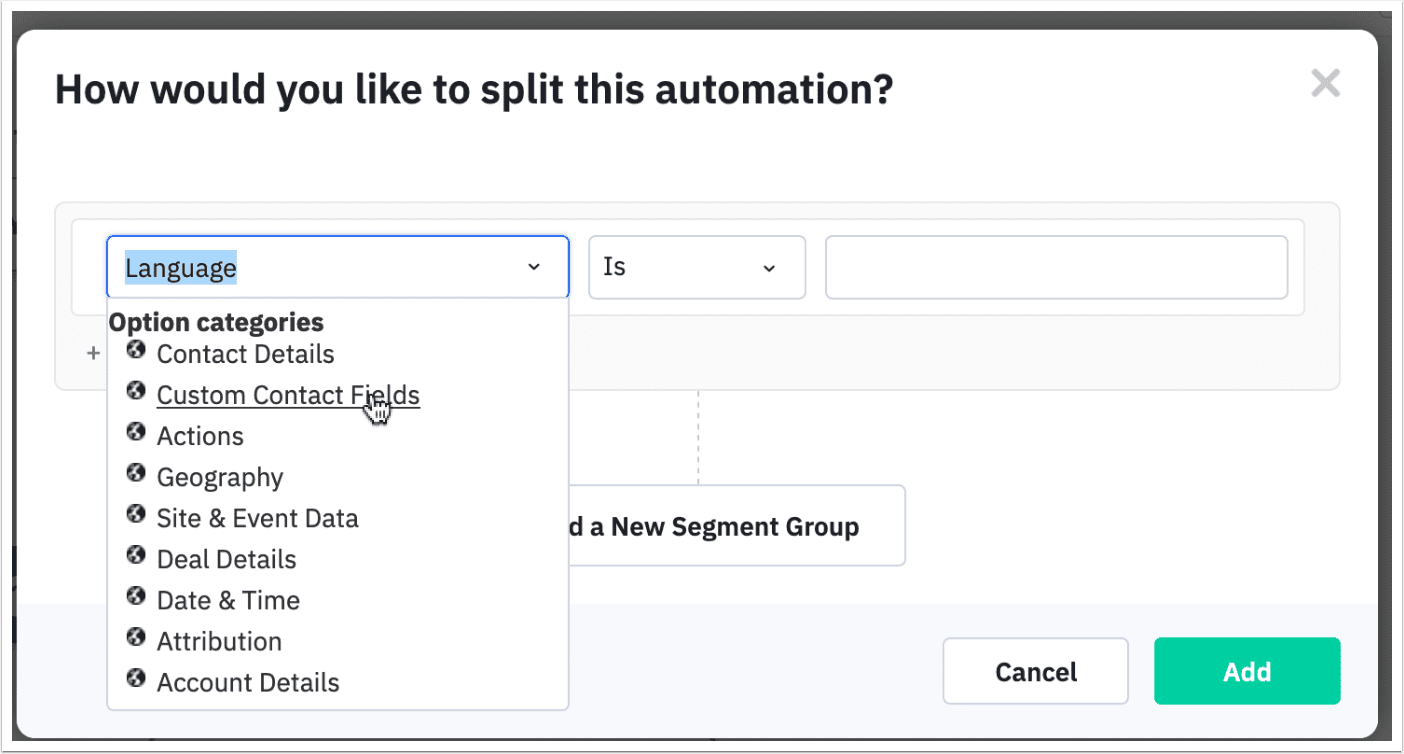
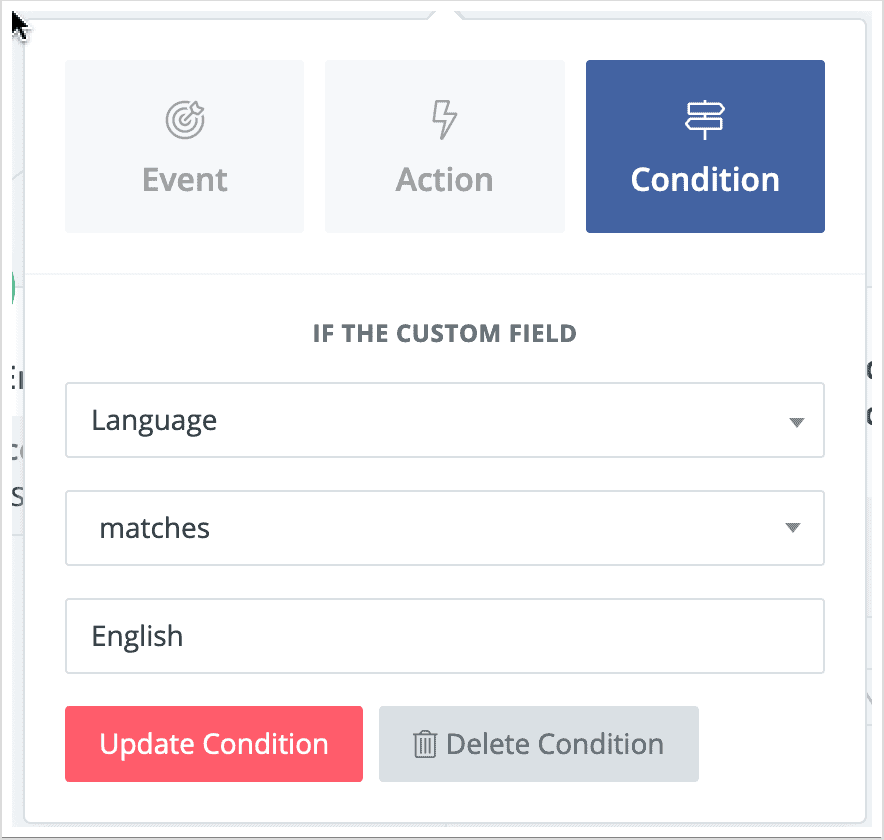
Select the Language Field you created and pick the language. Here you’ll go one language at a time.
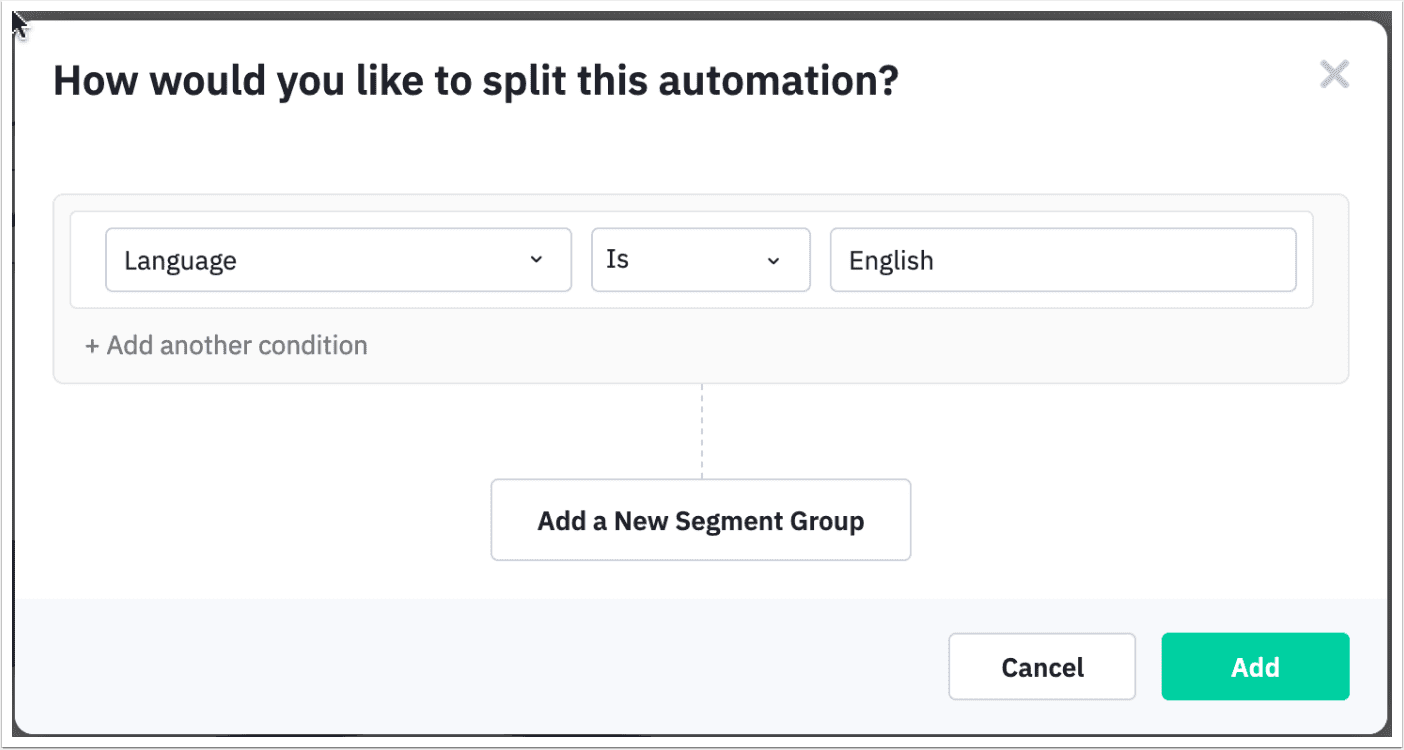
Then you’ll repeat the same condition for the next language, so the logic will check the Language custom field for each language until it finds the right one.
At this point you’ll be able to include the follow-up and welcome emails in the correct language in each branch.
In your Kit automation, add a Condition after the initial Made_Purchase trigger tag.
Select the Language Field you created and pick the language. Here you’ll go one language at a time.
Then you’ll repeat the same condition for the next language, so the logic will check the Language custom field for each language until it finds the right one.
At this point you’ll be able to include the follow-up and welcome emails in the correct language in each branch.
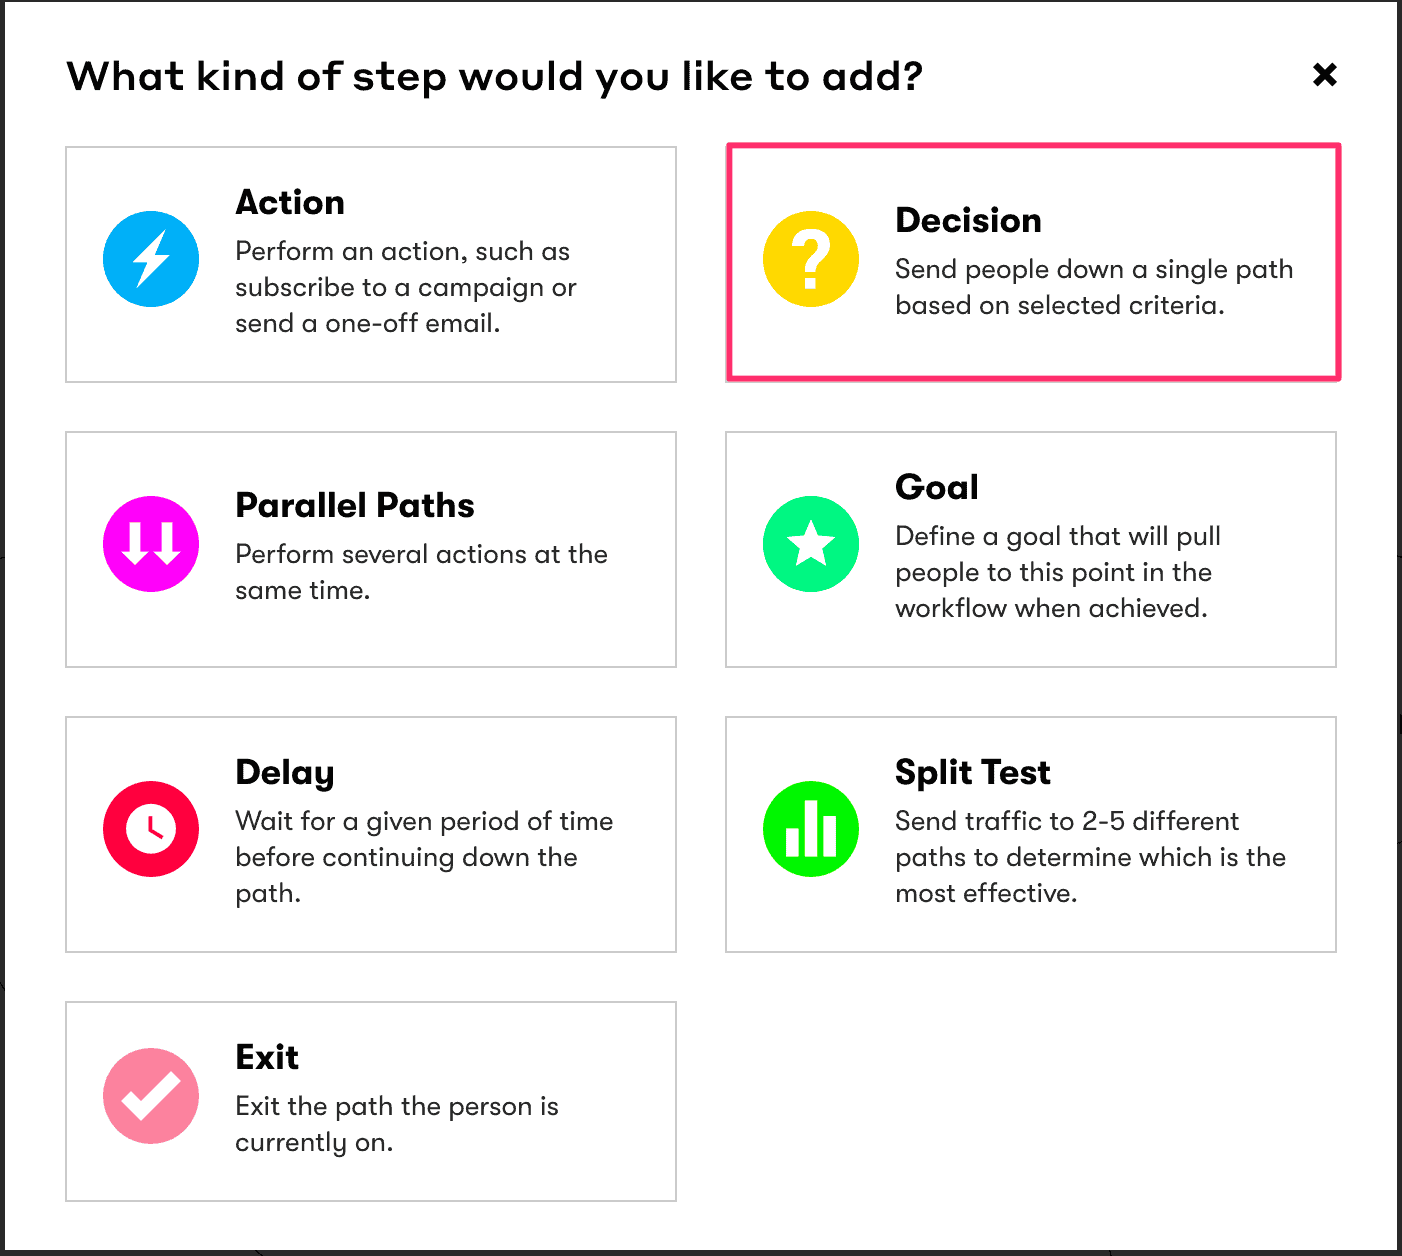
In your Drip Automation Workflow, you’ll add a “Decision” after the initial Made_Purchase trigger tag.
Select the Language Field you created and pick the language. Here you’ll go one language at a time.
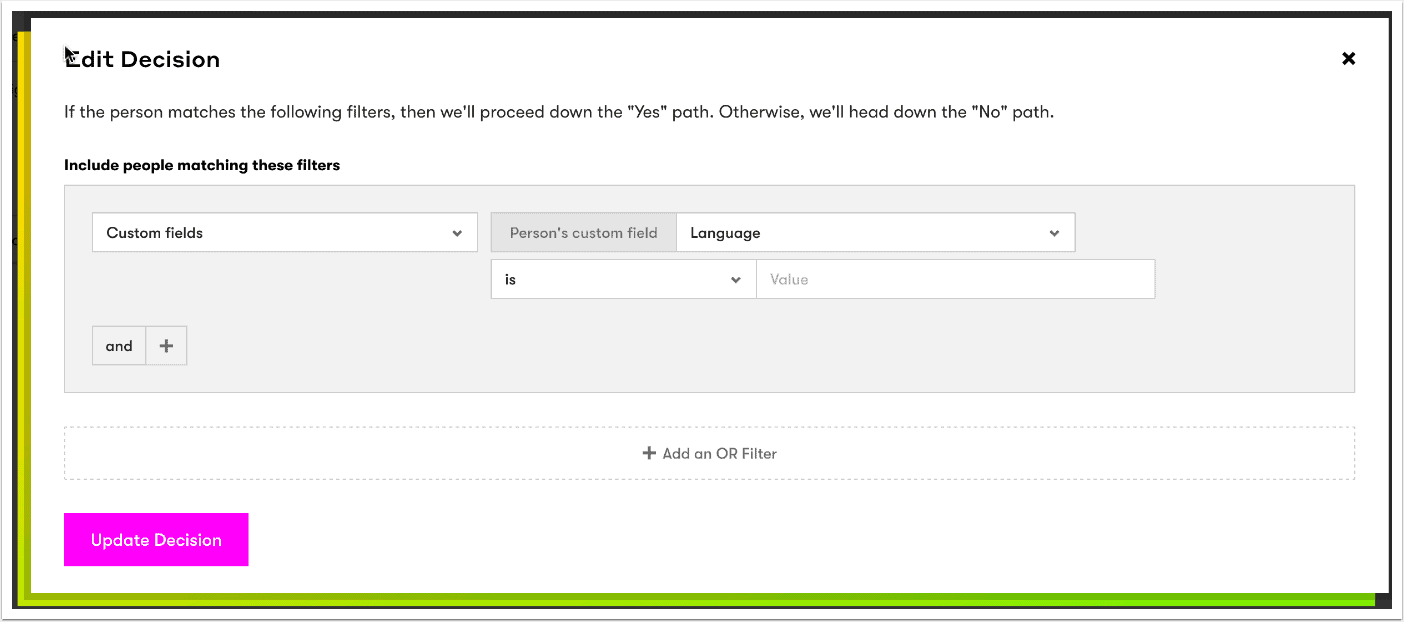
Then you’ll repeat the same condition for the next language, so the logic will check the Language custom field for each language until it finds the right one.
At this point you’ll be able to include the follow-up and welcome emails in the correct language in each branch.
In your Infusionsoft or Keap Campaign, you’ll add a “Decision Diamond” after the initial Made_Purchase trigger tag. The way to create this is to set up more than one Sequence and link the applied trigger to them.
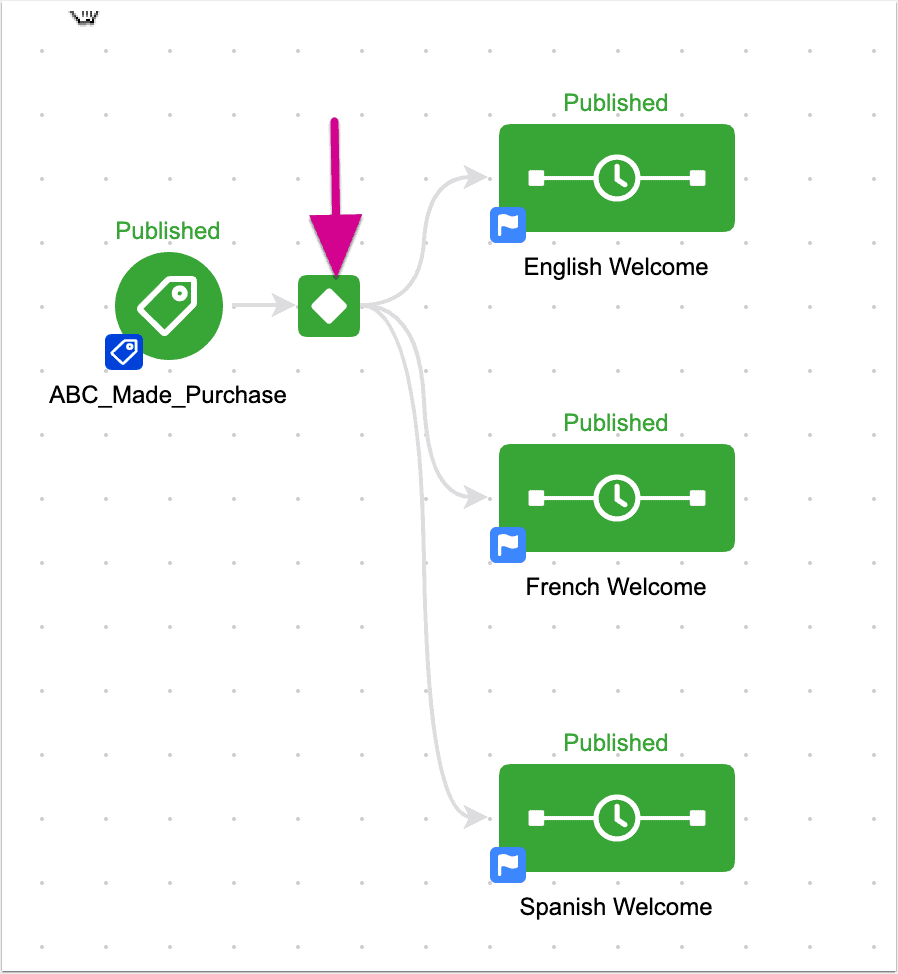
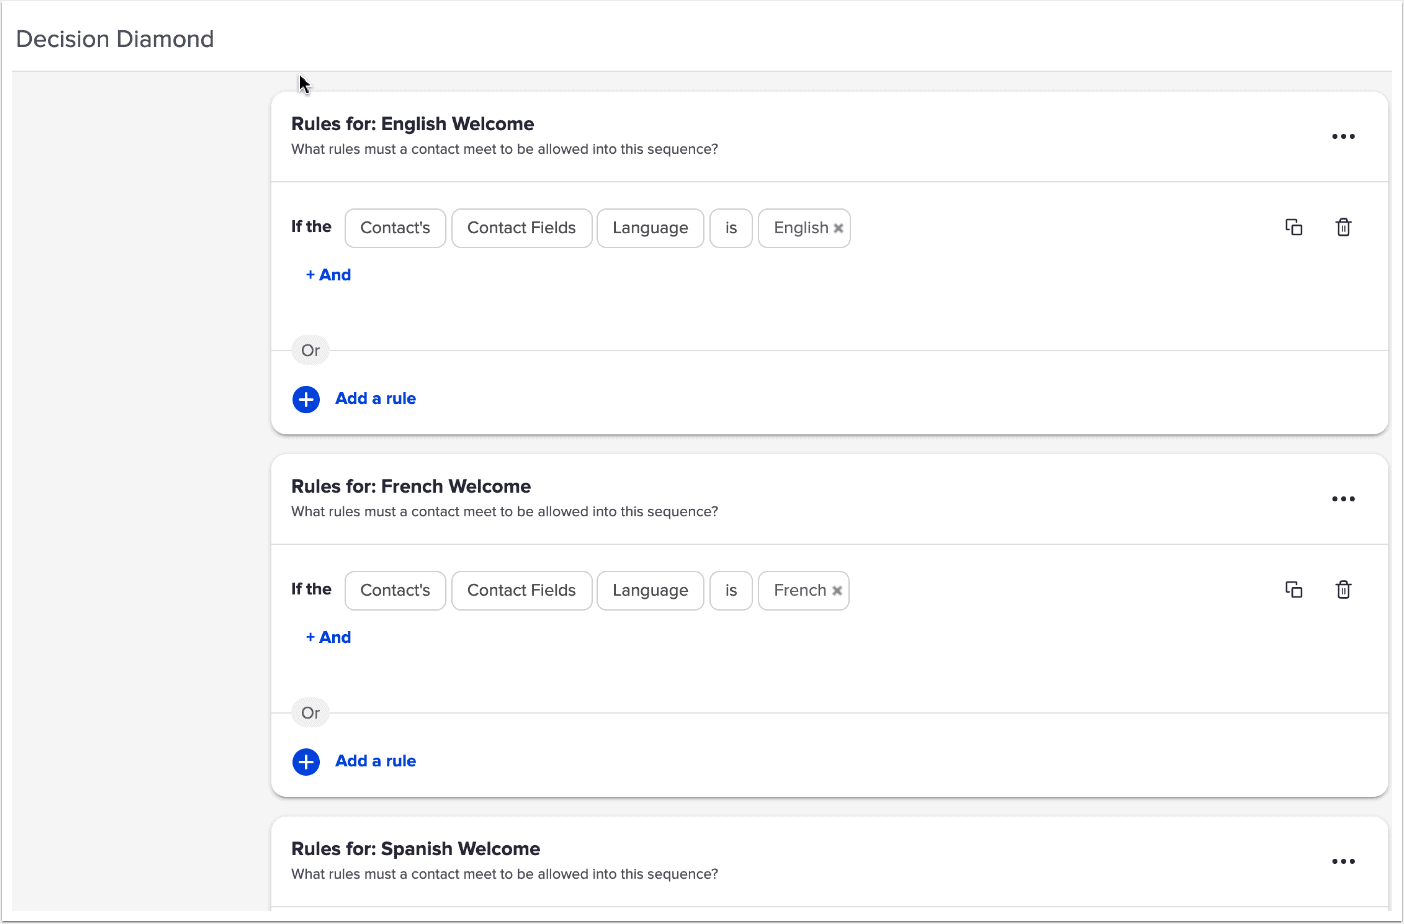
You can double click on the Decision Diamond to set the criteria for how the campaign will sort people based on their language. Infusionsoft has a built-in field for Language, so you don’t need to create a custom one.
In your Ontraport Campaign, you’ll add a “Filter” called CONDITION after the initial Made_Purchase trigger tag.
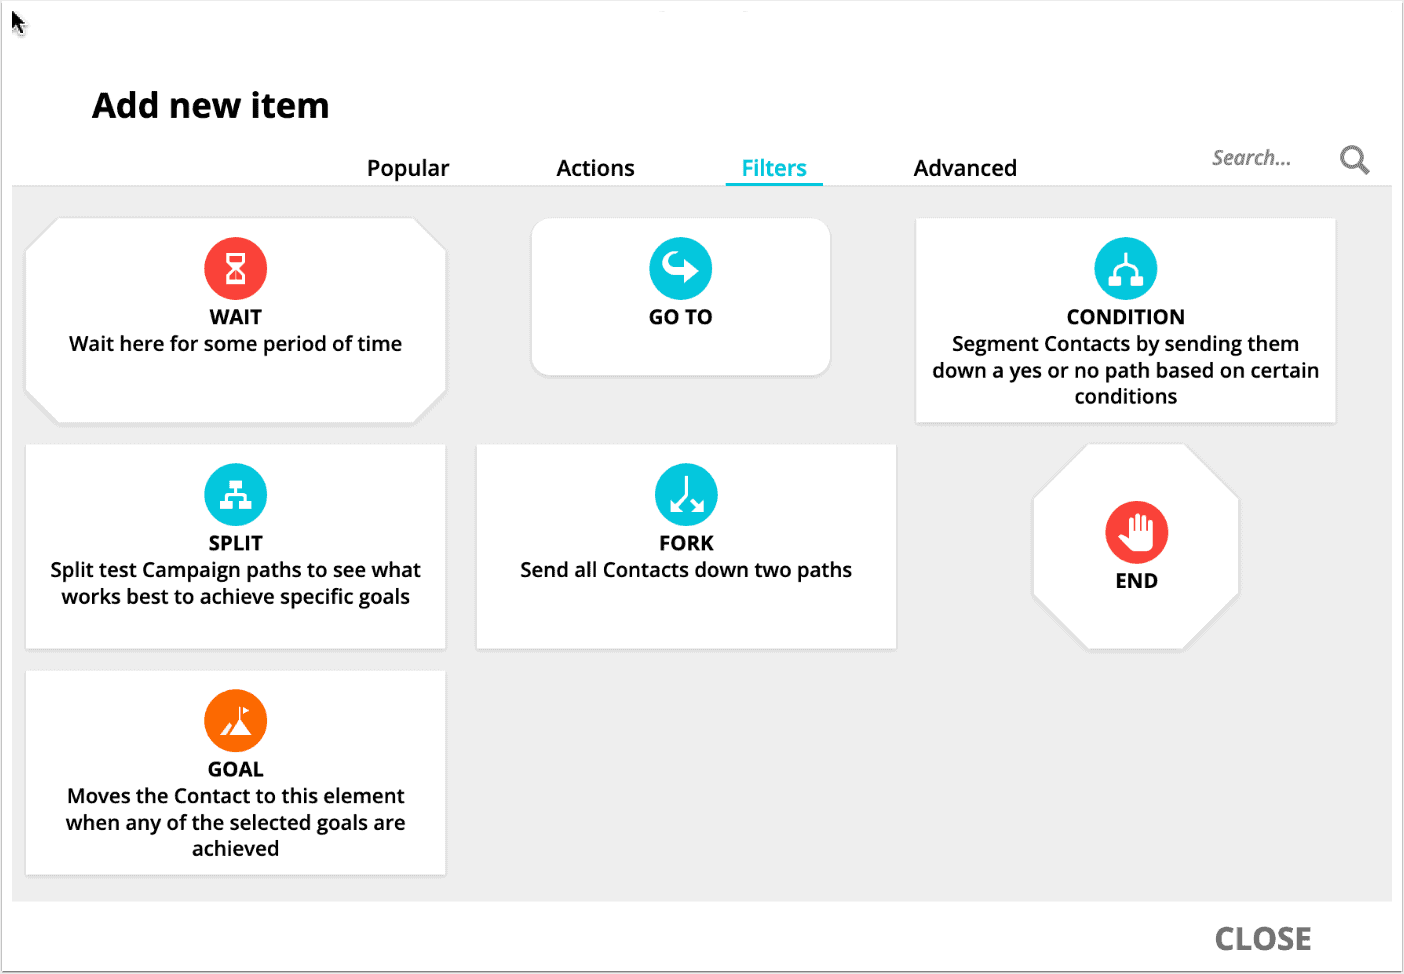
The condition will be “Field is this value”.
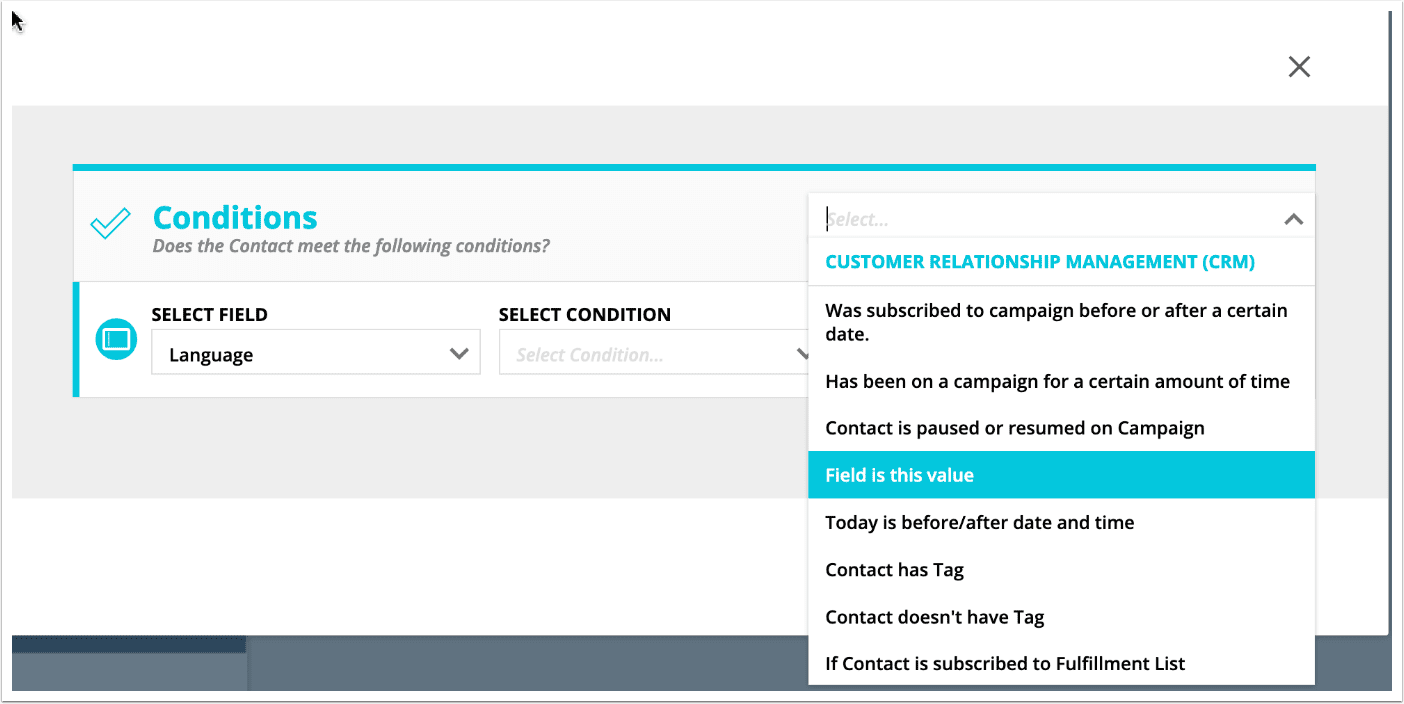
Select the new “Language” field that you created, and set it to your first language.

Then you’ll repeat the same condition for the next language, so the logic will check the Language custom field for each language until it finds the right one.
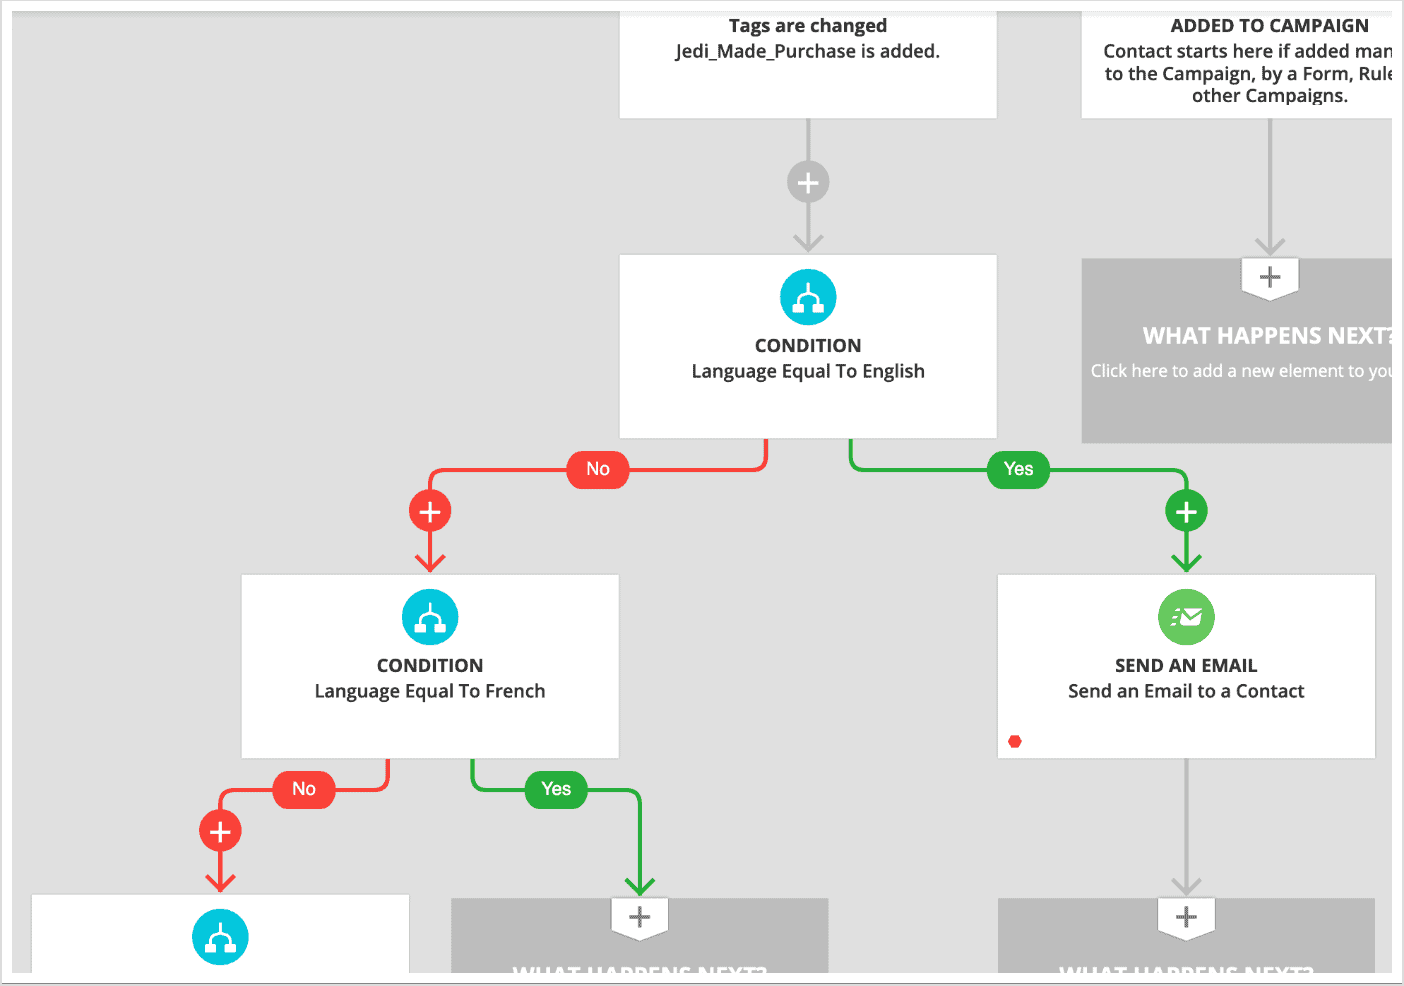
At this point you’ll be able to include the follow-up and welcome emails in the correct language in each branch.
