In this article, you’ll find the steps to remove access to a Team Center Offering for both the Team Leader and Team Members they’ve added. There are two options available; having a Site Admin delete the team in AccessAlly, or having the Team Leader delete the team.
This setup allows you to retain client records in your CRM.
NOTE: Simply “deleting” a team leader account will NOT affect the team member accounts. If you delete a team leader, whether in AccessAlly or your CRM, the team members will continue to exist with all permissions intact.
ARTICLE CONTENT:
Option 1: Site Admin Deletes Team Leader’s “Team Account”
This option is taken by an Admin User on your WordPress site.
- Navigate to AccessAlly → Teams tab
- Open the dropdown for the Team Program the leader is in
- Find the leader, click the Manage Team button
- Scroll down and click the Delete button
- A popup confirmation will appear, with a message, press OK to delete the leader & their member accounts.
- A deleted team leader & their team members, will continue to be users on your site. This option removes their access to your team center offering.
Option 2: Team Leader Self-Deletes Their Team (for CRM Integrated Sites)
This is a self-serve button-click option so a Team Leader can delete their own team account. This option works when a Team Leader presses a button, in your site, that adds a tag to run a CRM automation.
Step 1: Create a Unique Tag
The tag will be used with a custom operation. The tag is used to note that the leader selected to delete their team account.
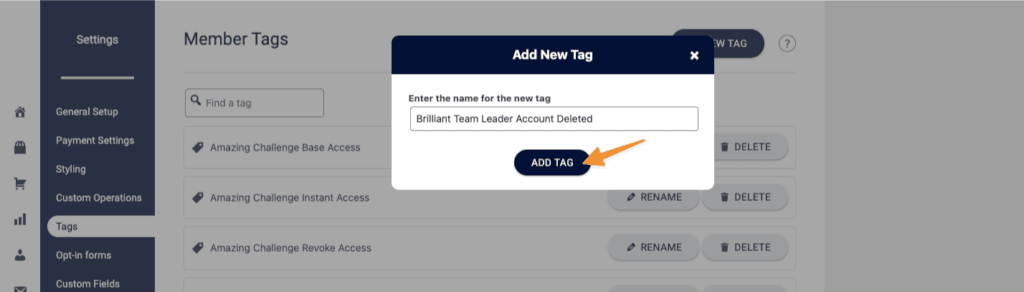
- Go to: AccessAlly → Settings → Tags
- Click “+ New Tag” button.
- In the popup window, give your tag a descriptive name, and click “Add Tag” button.
- The tag you created, can also be used with a CRM integrated site, to send a confirmation email.
Step 2: Create a Custom Operation Button
- Go to AccessAlly → Settings → Custom Operations
- Use “+ New Operation” button
- Select “Add / remove tag(s)“
- Add the unique tag you created
- In the “How this operation is triggered” section, check the box by enable members.
- Customize the button text, confirmation message, and success message text.
- Use the “Copy to Clipboard” button to get the shortcode.
- Save your custom operation on the top right.
- Paste the button shortcode on the Team Leader Administration Dashboard page (found in the Team Leader Content Tab of your Team Center Offering.)
Step 3: Create a CRM Automation (That Starts with a Tag)
This automation is used to delete the Team Leader’s Team.
The CRM automation you create needs to include:
- The unique “Delete Team Leader” tag which starts the CRM automation.
- The “Delete Team” webhook from your custom operation. Go to AccessAlly → Settings → Custom Operations → Open your operation → Navigate to the Trigger this operation section.
- Use the “Copy to Clipboard” button
- Paste this into as a webhook (or HTTP post option) in your CRM automation
%22%20transform%3D%22translate(1.6%201.6)%20scale(3.25781)%22%20fill-opacity%3D%22.5%22%3E%3Cellipse%20fill%3D%22%23fff%22%20rx%3D%221%22%20ry%3D%221%22%20transform%3D%22matrix(.44496%206.95689%20-52.75246%203.374%20157.7%208)%22%2F%3E%3Cellipse%20fill%3D%22%23d6d6d6%22%20rx%3D%221%22%20ry%3D%221%22%20transform%3D%22matrix(2.2911%2017.03561%20-108.611%2014.60702%2055.4%200)%22%2F%3E%3Cellipse%20fill%3D%22%23fff%22%20cx%3D%22246%22%20cy%3D%222%22%20rx%3D%2222%22%20ry%3D%225%22%2F%3E%3Cellipse%20fill%3D%22%23fff%22%20cx%3D%22157%22%20cy%3D%228%22%20rx%3D%2244%22%20ry%3D%226%22%2F%3E%3C%2Fg%3E%3C%2Fsvg%3E)
The Delete Team Webhook URL tells AccessAlly that all “revoke” tags (designated in this tutorial) should be applied to all members of a team, including the team leader. This effectively removes their access from the membership site. It does NOT delete their contact in the CRM or in WordPress.
Additional Details
Please note that “deleting a team” will only add the designated revoke tags, to remove access to your Team Center Offering.
If you wish for additional actions to happen like:
- Canceling a recurring subscription
- Removing access to multiple offerings
You’ll need to take additional steps to:
- manually Revoke Access to additional offerings from the Members tab in AccessAlly
- manually to cancel a subscription; in AccessAlly → Sales → Subscriptions
- via CRM automations to apply revoke access tags for additional offerings
- via CRM automations to run a cancel subscription webhook
