AccessAlly’s page permission settings are available on any post or page inside your WordPress site. This area controls whether a page is publicly visible (anyone online can see it), or whether it is only visible to logged-in clients.
ARTICLE CONTENT:
When To Use The Page Permission Settings
Any time you want to control access to a page on your site (in other words: limit who gets to view the content on the page), the Page Permission Settings should be carefully reviewed.
Two important things to note:
- It is highly recommended to create your pages inside the Offerings area as they will automatically be protected by tags and have conditional redirects added.
- Pages created outside of the Offerings area (manually) will need to have the page permission settings changed and/or conditional redirects added manually.
Where to Find the Settings
View a page in your site in admin mode and you’ll find these settings in the Access Member Permissions section.
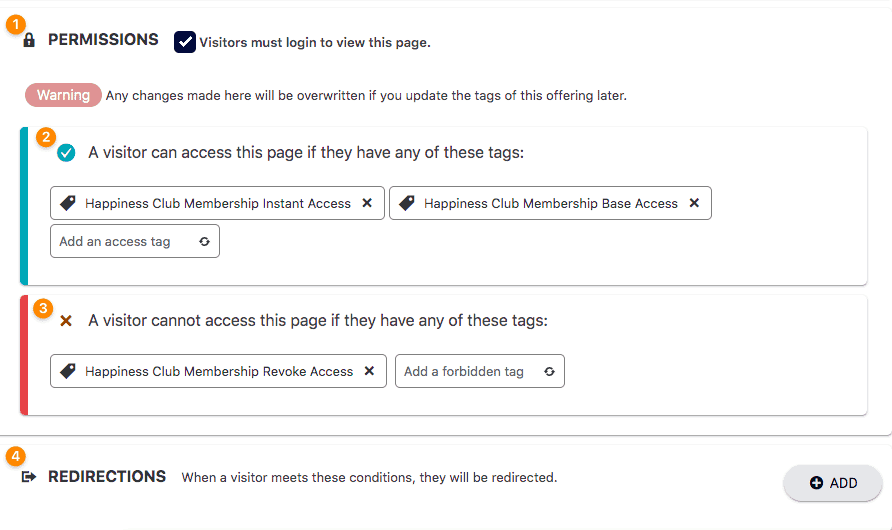
1. Visitors must log in to view this page.
This is the most basic level of password protection. An unchecked box means that anyone online can access the page without logging in … so if you’re creating an order form page, for example, you might not want the box to be checked.
If you check the box, then the page will only be visible to someone who is logged into your site with a valid username and password.
2. A visitor can access this page if they have any of these tags:
Users will be able to access this page as long as they have at least one of the tags in this section. So even if there are 10 different tags designated in this area, the user only needs to have one of those.
Tip: If a newly created tag is not showing up in the dropdown, click the refresh icon to force a sync with your CRM and refresh the list of tags.
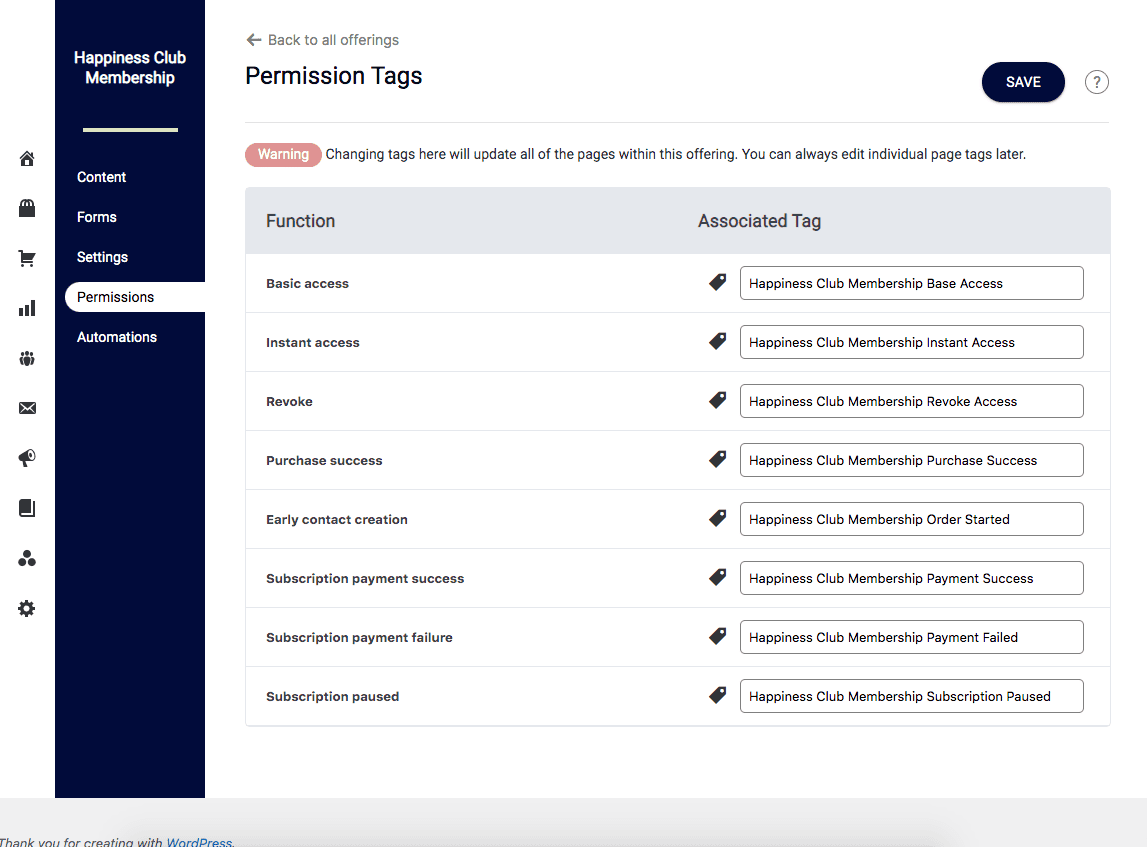
To see a list of the Permission tags used in your Offerings – go to AccessAlly > Offerings > the Offering you created > Permissions
3. A visitor can not access this page if they have any of these tags:
This tag is used in payment failure automations or after a refund has been issued for an offering. A visitor with this tag is unable to see this page.
4. Redirections:
When a visitor meets the conditions they will be redirected to a different page. This page is usually a sales page, order form, opt-in form, or login page.
Testing & Troubleshooting
After editing the permissions area on any post or page, it’s important to test to make sure you’ve set it up properly. To do so:
- Test tag requirements: Create a test user and assign any permission tags you require for a user to access the page. Once this is done, try accessing the page. If the user cannot access the page, (1) check that the tags are properly added to the account. If they are, (2) re-check your permission set up on the page itself. Conditional logic can be easily mixed up.
- To test conditional redirects, alter the tags on your test user so that the user should NOT have permission to access the page. Then, with the test user login, try to access the page to make sure you are being redirected to the right place. (Repeat the process as needed, changing tags on the test user to fit whatever scenario you’ve set up conditional redirects for.)
- To test simple password protection (no tags needed), open up the newly-created page in an incognito window. You should be redirected to the login page.
How to Manually Add (or Remove) Tags for a User in AccessAlly
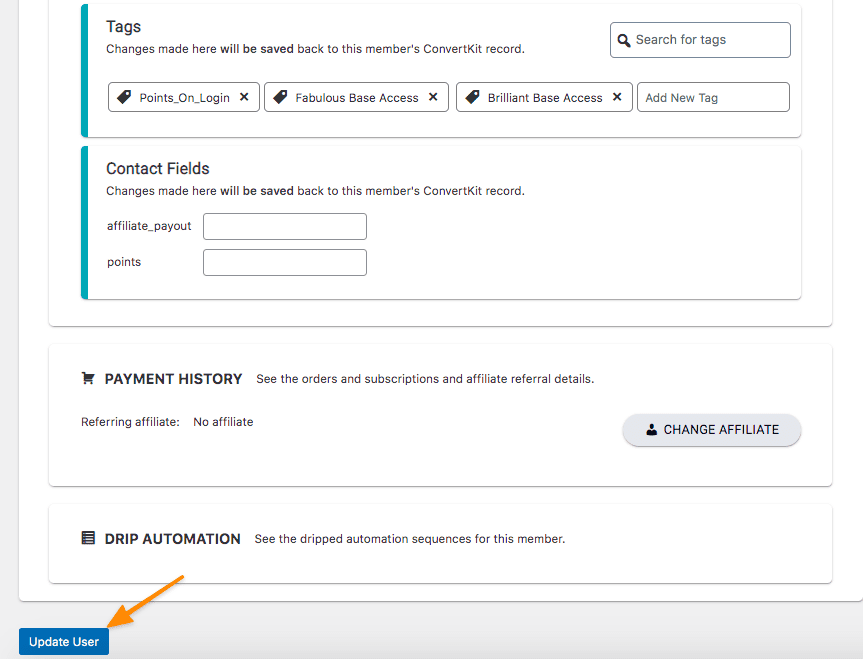
When a tag is added or removed in the AccessAlly Membership Information area, clicking Update will save this new information to AccessAlly and your CRM.
Please note that this is different than adding a tag to your user in your CRM, since that process requires you to manually sync/update the information with AccessAlly
Walkthrough
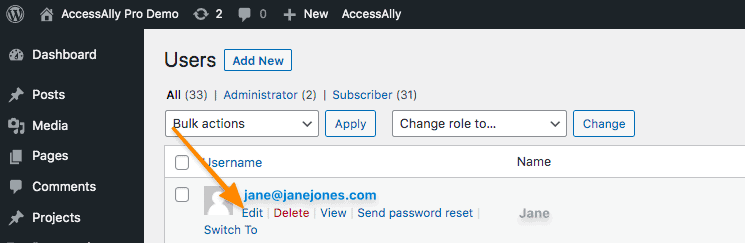
Go to Users > All Users from inside your AccessAlly site
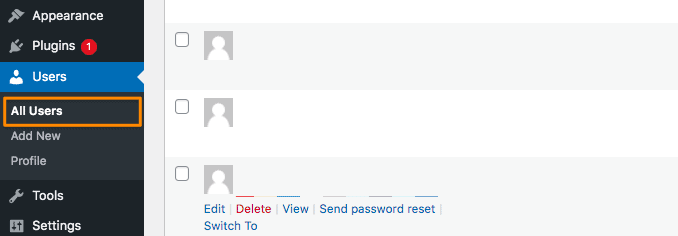
Use the Search box to find the user by name or email address

Click Edit to edit the user
Click the AccessAlly tab, then locate the Add New Tags section under Permissions – it’s important to note that the user needs to be connected to the CRM in order for the tags to be stored in the CRM contact record for this user.
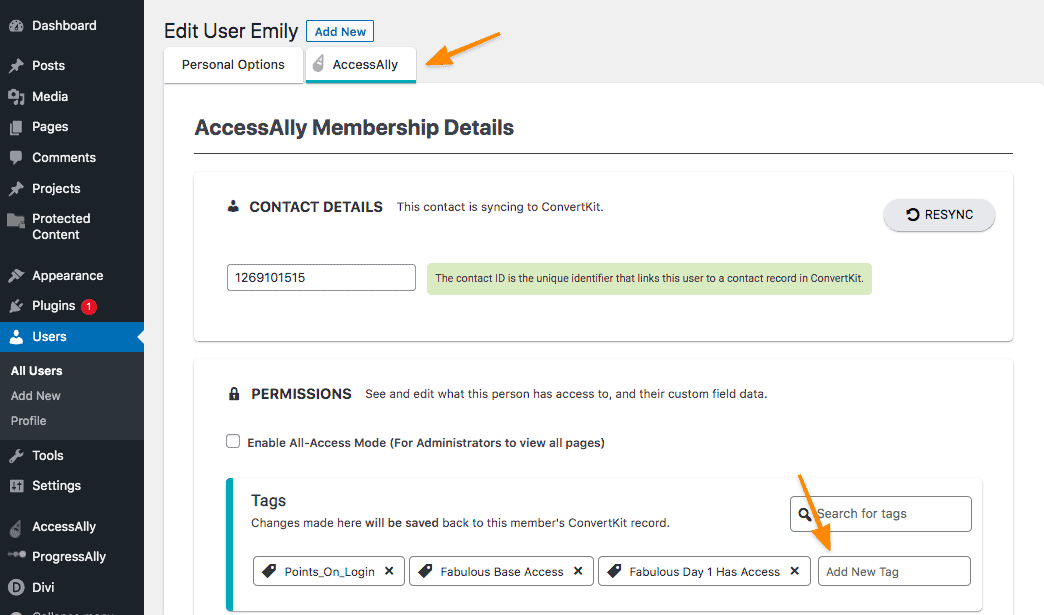
After adding and/or removing the desired tag(s) for this user, click the Update User button. Once the update has been saved tag(s) added here will also be synced and appear in the CRM for this contact.