ARTICLE CONTENT:
Initial Menu Options
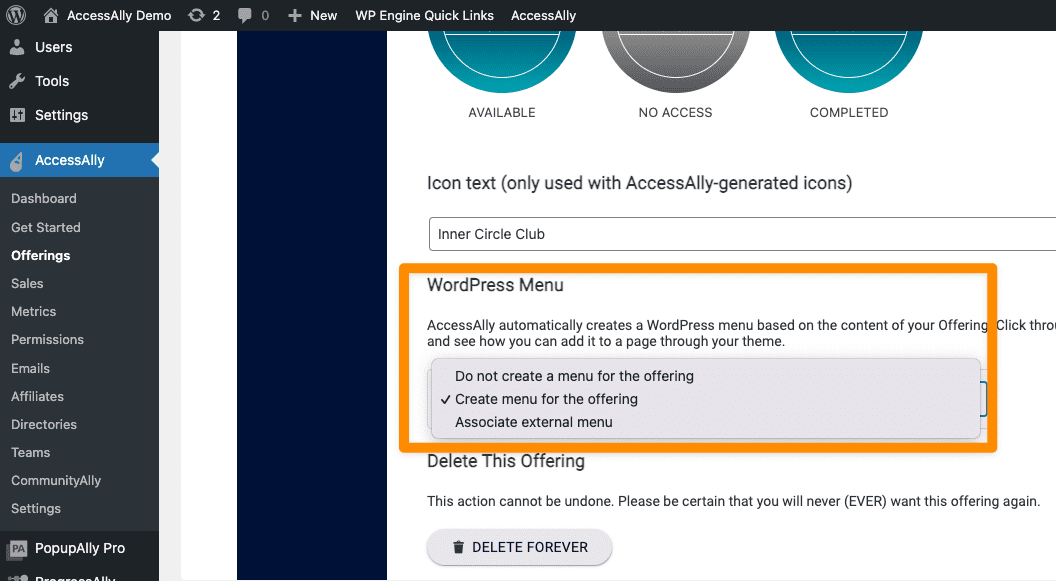
When creating an offering in AccessAlly you will be presented with three initial options for the menu area. These options are shown in the Settings tab of your offering.
- Do not create a menu for this offering – no menu will be created for this offering upon clicking the SAVE button. This option works best for offerings with a single page that do not need a menu.
- Create menu for the offering (default option) – AccessAlly will create a WordPress menu based on pages as they appear in the Content Pages section of the offering. If you add new pages (or reorder them) the menu order will automatically be adjusted.
- Associate external menu (advanced option) – This option works best if you are creating a menu with custom coding or conditional tags. You will use WordPress to create your menu and add in coding. Future updates to the AccessAlly Offering will not affect (or change) the coding or order of your menu area.
While AccessAlly can create the WordPress menu for you, it is styled by your WordPress Theme and/or Page Builder.
Changing the Menu Settings of an Existing Offering
Once you save the initial offering you can make changes to how the menu is managed. Go to AccessAlly > Offerings > Click the Offering > Settings Tab
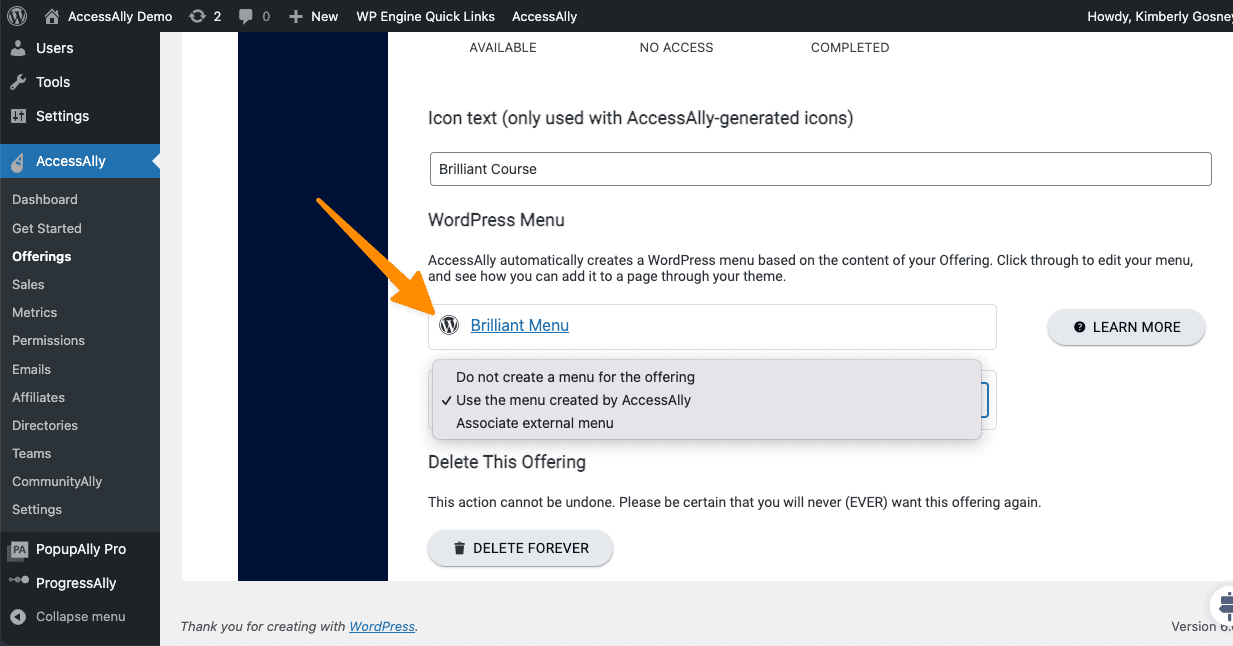
You will see the name of the WordPress menu assigned to the offering. If you would like to make changes to the menu area you can select:
- Do not create a menu for the offering – this will remove the menu shown for this offering. This option works best if you have one page offering that does not need a menu.
- Use the menu created by AccessAlly (default) – changes made in the AccessAlly Offering under the content pages section will affect the order of the pages on your WordPress menu. If you reorder or add new pages they will automatically be updated on your existing menu.
- Use an external menu (advanced) – this option allows you to choose a different menu that is already created in WordPress to go with this offering. This option is great if you are custom coding a menu using conditional tags. Changes to your AccessAlly offering will not affect the external menu you’ve created.
Menu Visibility of Pages
Pages on menus created via the Offerings section in AccessAlly are shown or hidden for each user based on the tag(s) they have or do not have yet.
This is helpful when you have a course where you are releasing one new module every seven days. A user with the Module 1 tag will see the menu link to the Module 1 page of the course, but future modules will be hidden from the menu because the user does not have the tags to see those modules yet.
Common Menu Issues & How To Fix Them
1. Course Pages Do Not Appear In the Menu
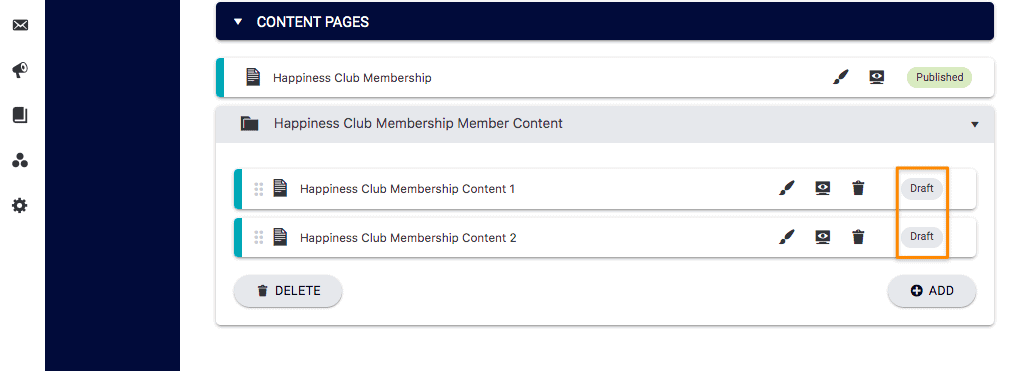
Are your pages in draft mode?
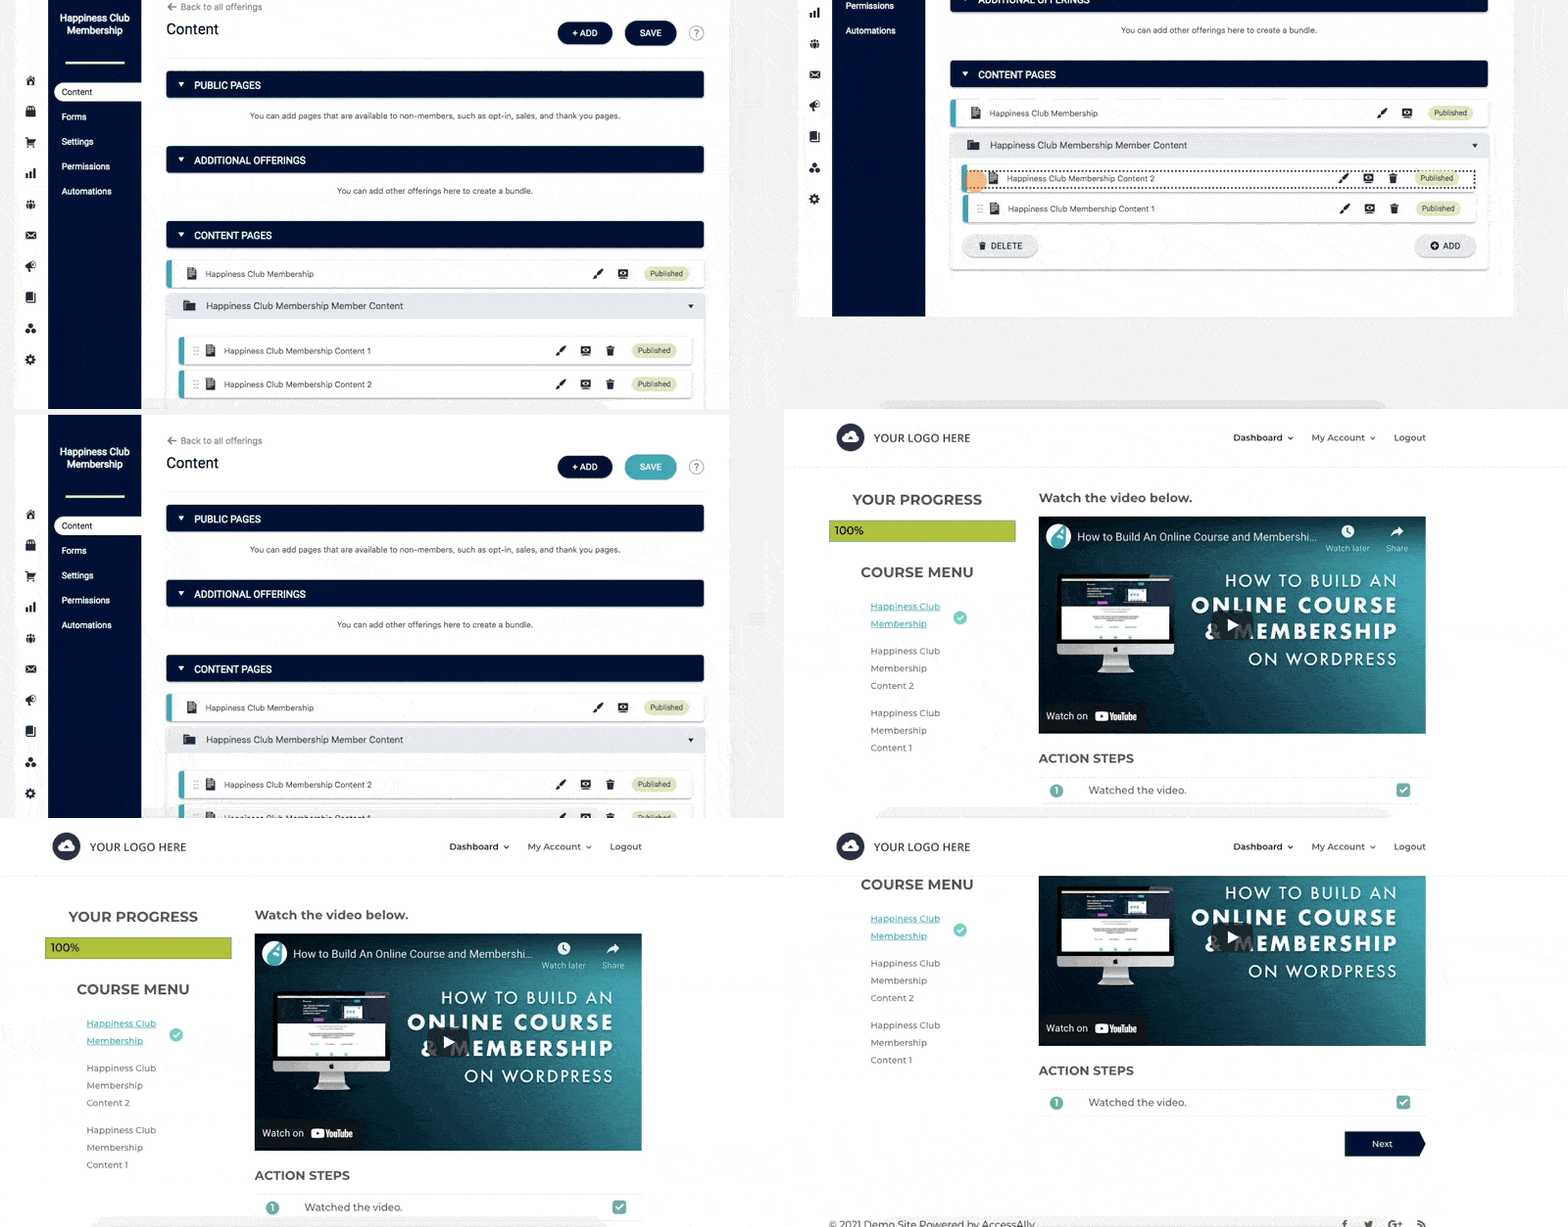
If your pages are not showing up in the menu area make sure all of they have been published. Once published, they will appear. The example below shows what draft pages look like inside your Offerings.
Does the user have the tag required to see the page?
AccessAlly only allows users to see menu items if they are tagged with the access tag a page is using. If the user doesn’t have permission to access “Module 2” of your course, they will not see that page appear on the menu.
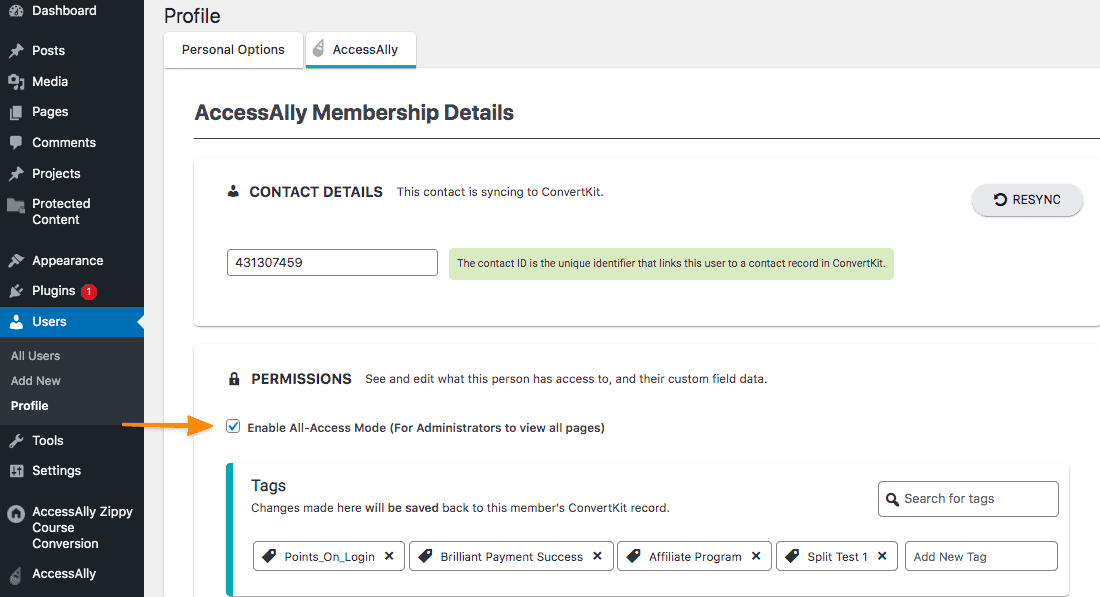
Admin users, by default, see all published pages (even if they do not have tags.) This is called All-Access mode. You can find this setting by going to Users > Profile and clicking the AccessAlly tab at the top of the page.
2. Completed Menu Item Checkmarks Are Missing
For AccessAlly Pro (ProgressAlly users) completion icons may be displayed with some WordPress themes and page builders.
![]()
To see if your WordPress theme and/or builder supports menu completed icons you’ll need a Progress Objectives checklist on the page and a WordPress menu with the pages in your offering.
Checkmark the items on your checklist and view the menu to see if that checkmark is shown like the example in the image above. If your page does not show the menu completed icon visit ProgressAlly > General Settings > Advanced and change the dropdown to Alternative Method and view the page again. If the checkmark is still not displayed your WordPress theme and/or Page Builder may not support this option.
3. My Pages Appear Out of Order on the Menu
If menu items are not in the correct order there are two places you can change them. By default AccessAlly adds pages to the WordPress menu in the order they appear in your offering. If you would like to change the order the pages appear in your menu you have two options:
- Change the order in the Offering. AccessAlly will update the order of the menu items in WordPress.
- Change the order in Appearances > Menus in WordPress. Changing menu items in WordPress will update the order in the AccessAlly Offering.
4. Long Sidebar Menu Area
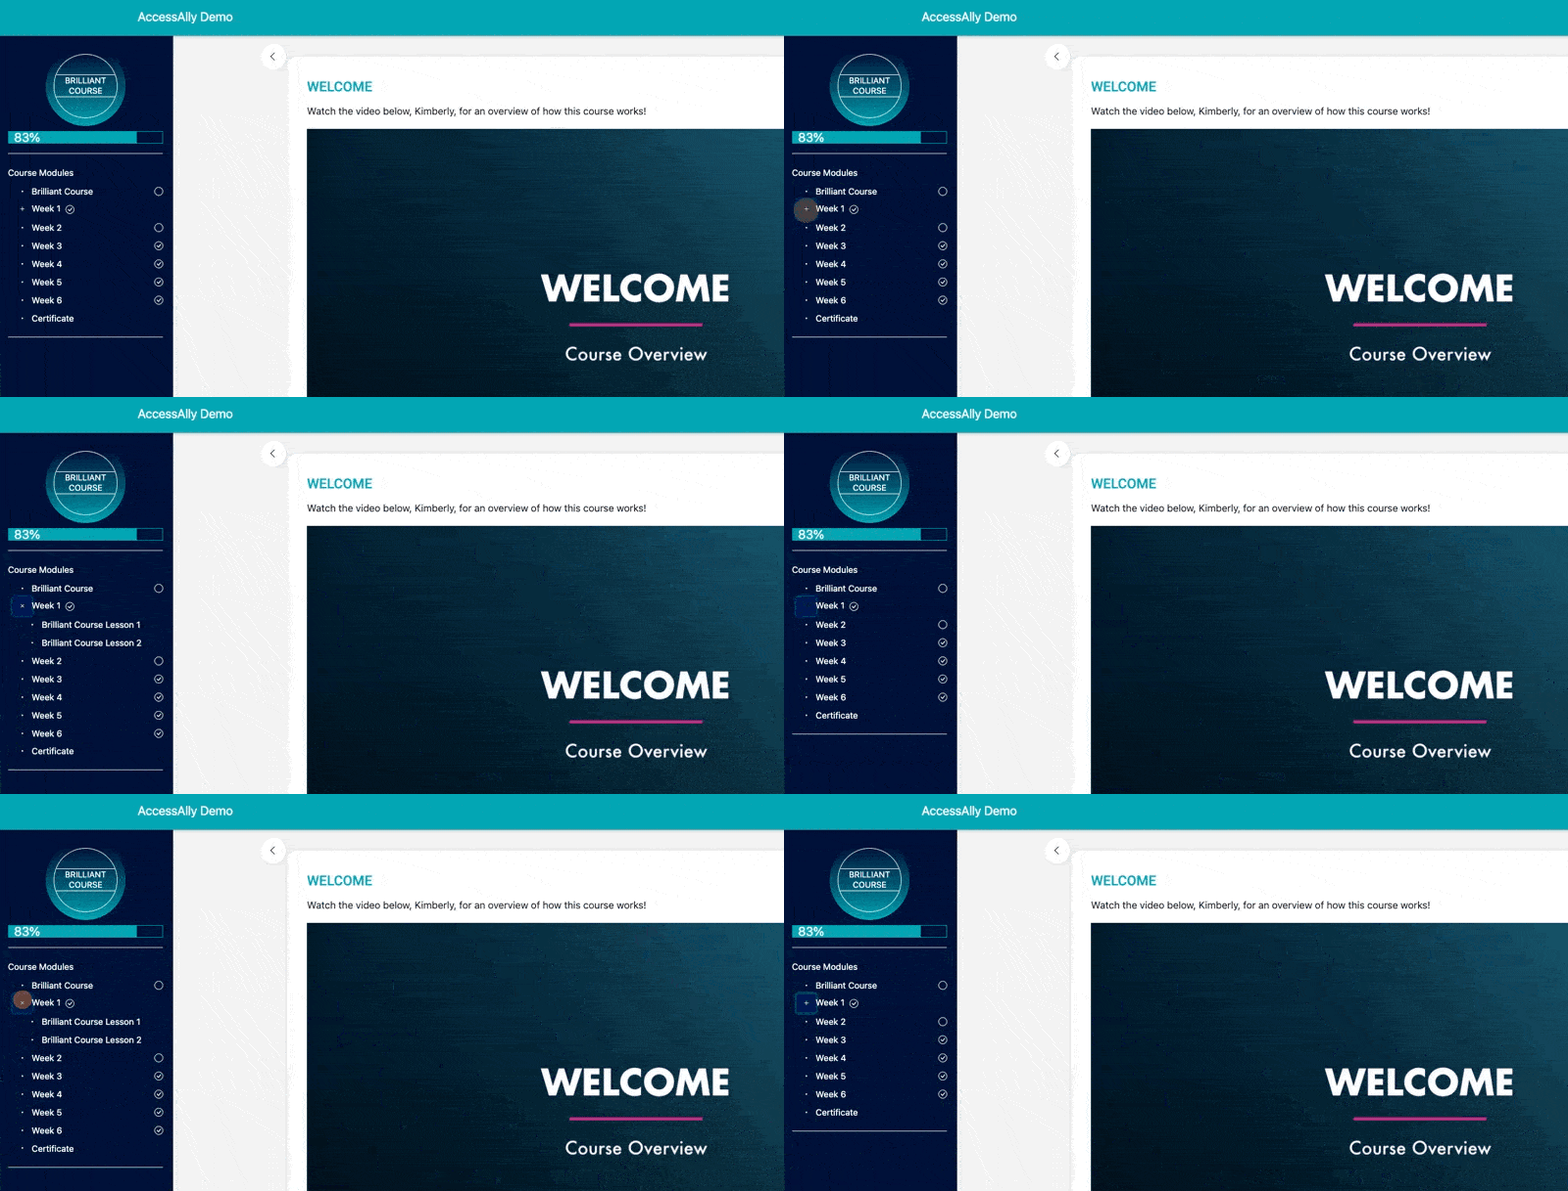
If you have a lot of modules and lessons within your program you may choose to nest the menu items to keep the sidebar menu clean and well organized.
You can do this using sub menu items in the WordPress.
Go to Appearance > Menus > select the menu. You can drag menu items to the inside if you would like a sub menu to appear.
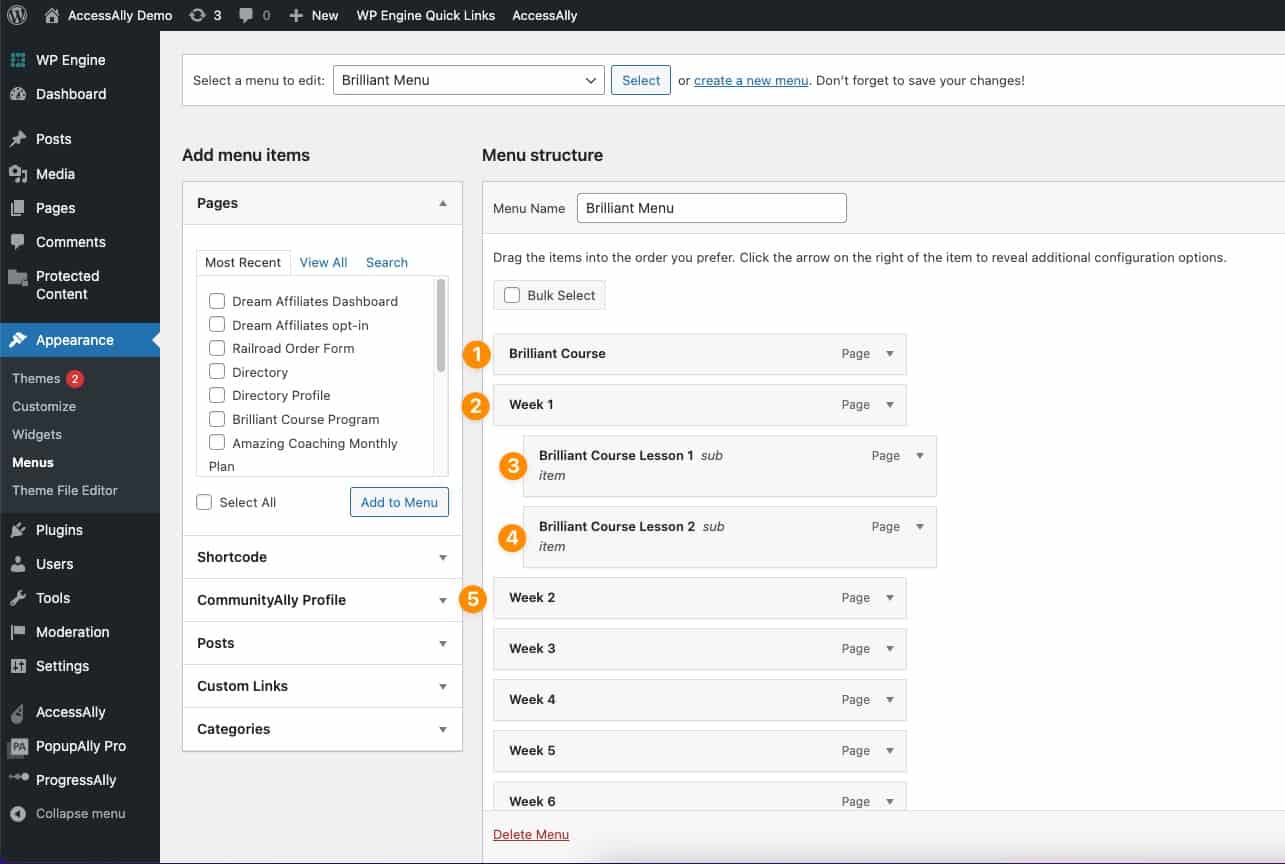
This allows for you to use your WordPress theme and/or page builder to display the sub menu items.
5. Unpublished Pages Appear In the Menu
Although AccessAlly does not allow draft pages to appear in menus, the default WordPress mode DOES permit unpublished pages to appear in menus. If there is a conflict and the draft pages are appearing in your menus, you may wish to utilize a third-party plugin tool like this one: https://wordpress.org/plugins/hide-drafts-in-menus/
Using Shortcodes to Show or Hide Menu Items
If you want to do some advanced things with your WordPress menu, like using AccessAlly’s conditional shortcodes then you will want to take a look at this shortcode in menus tutorial.

