Let’s get your Drip integration set up so you can make the most of that 2-way street communication!
If ever you get stuck, know that Drip has a great set of user manuals here.
ARTICLE CONTENT:
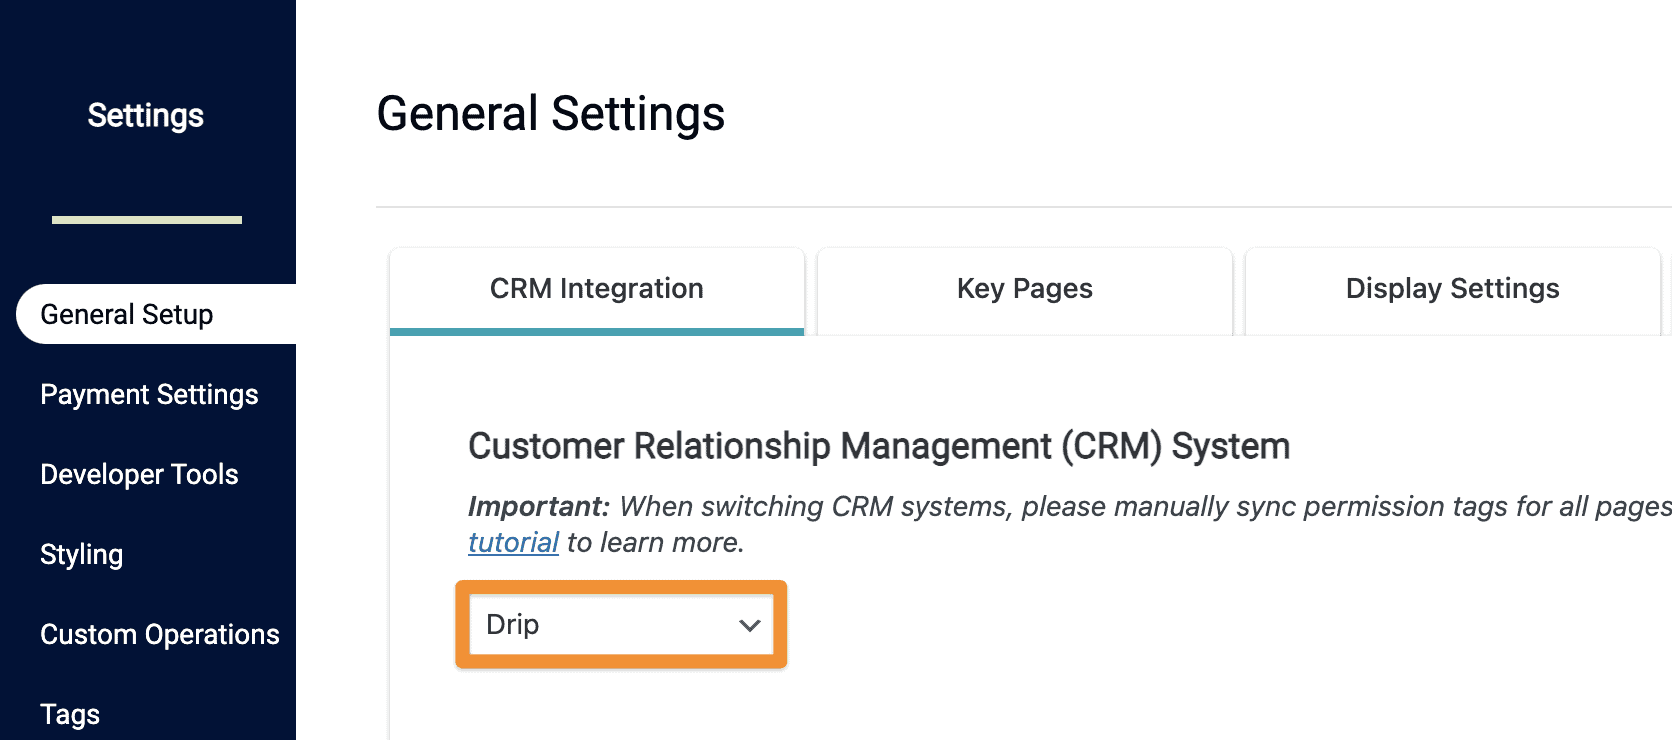
Step 1: In AccessAlly Settings -> General Setup
Select drip as your CRM. Hit save.
Step 2: Retrieve your API & Account ID Number
Next, you’ll want to retrieve your Drip API & Account ID Number.
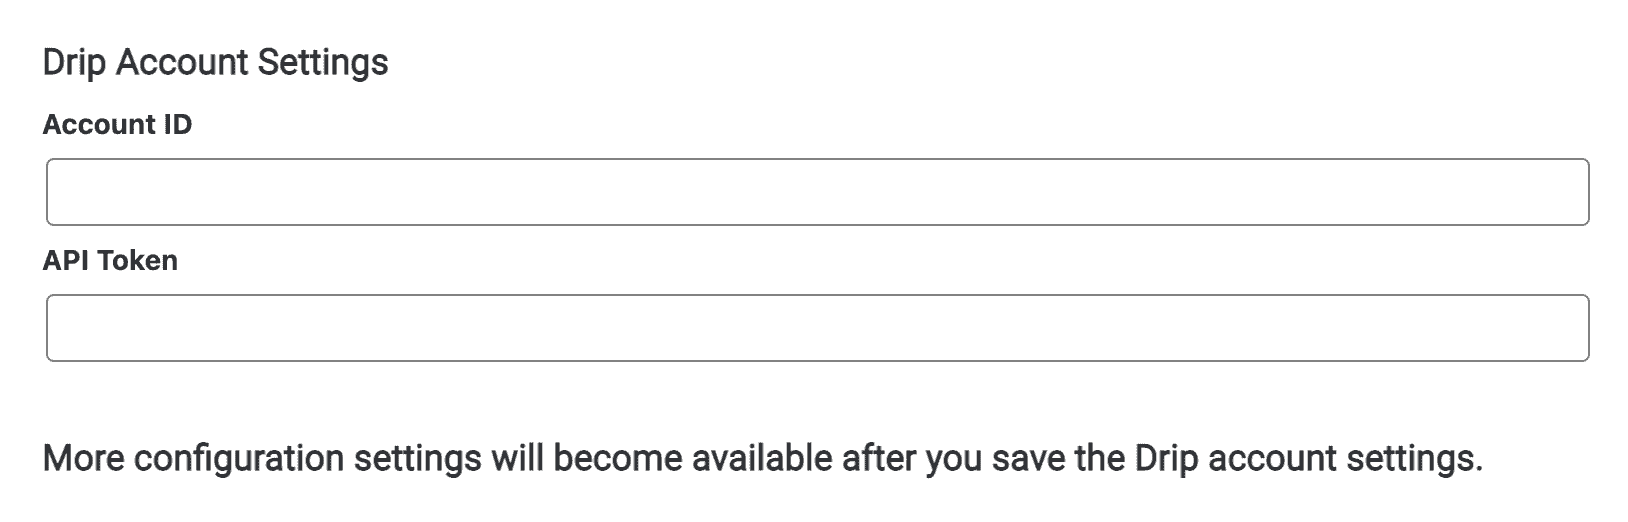
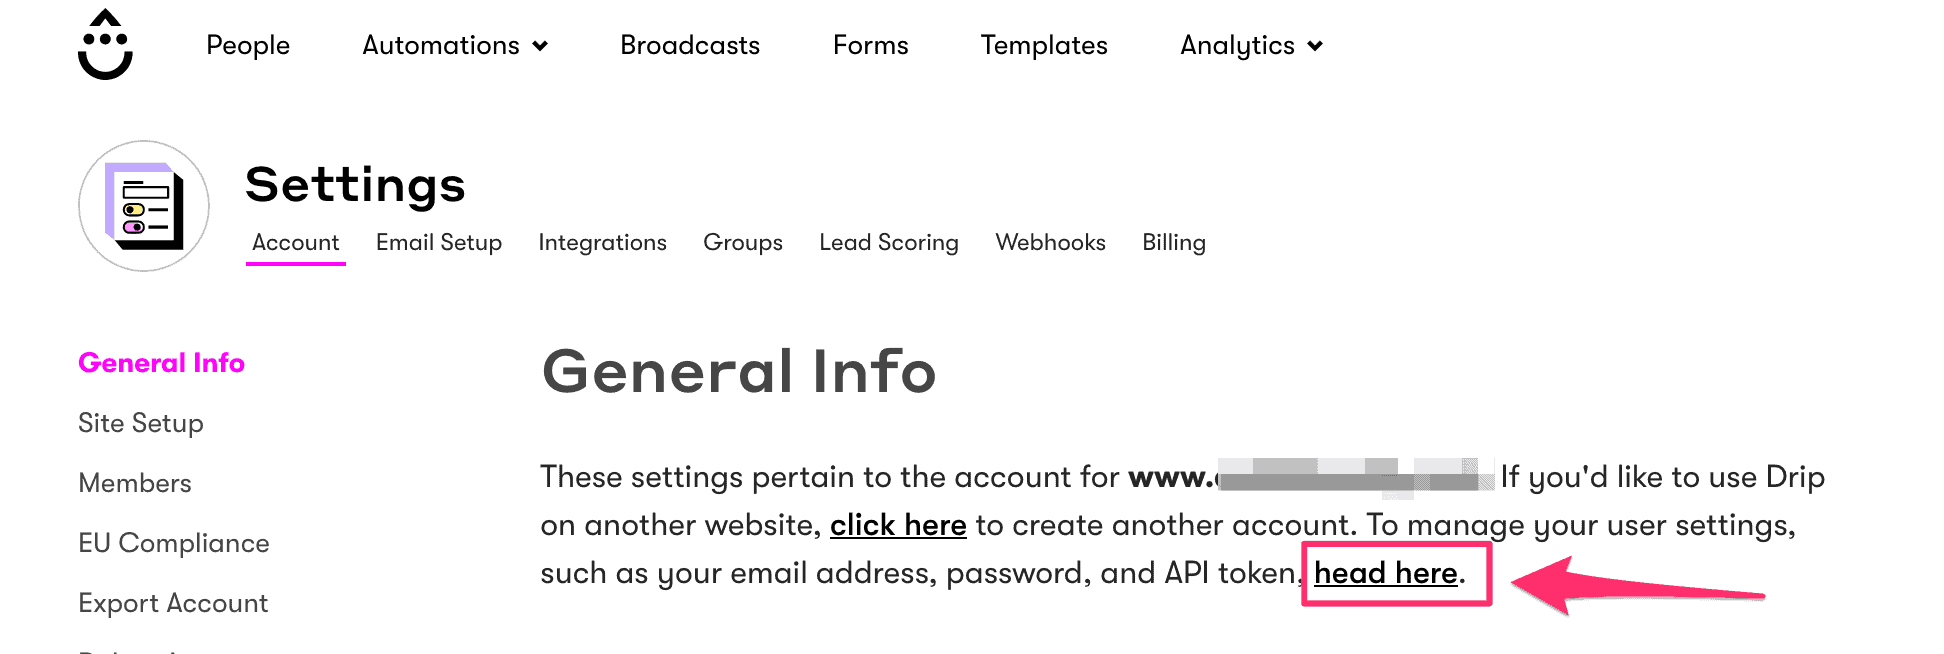
Account ID
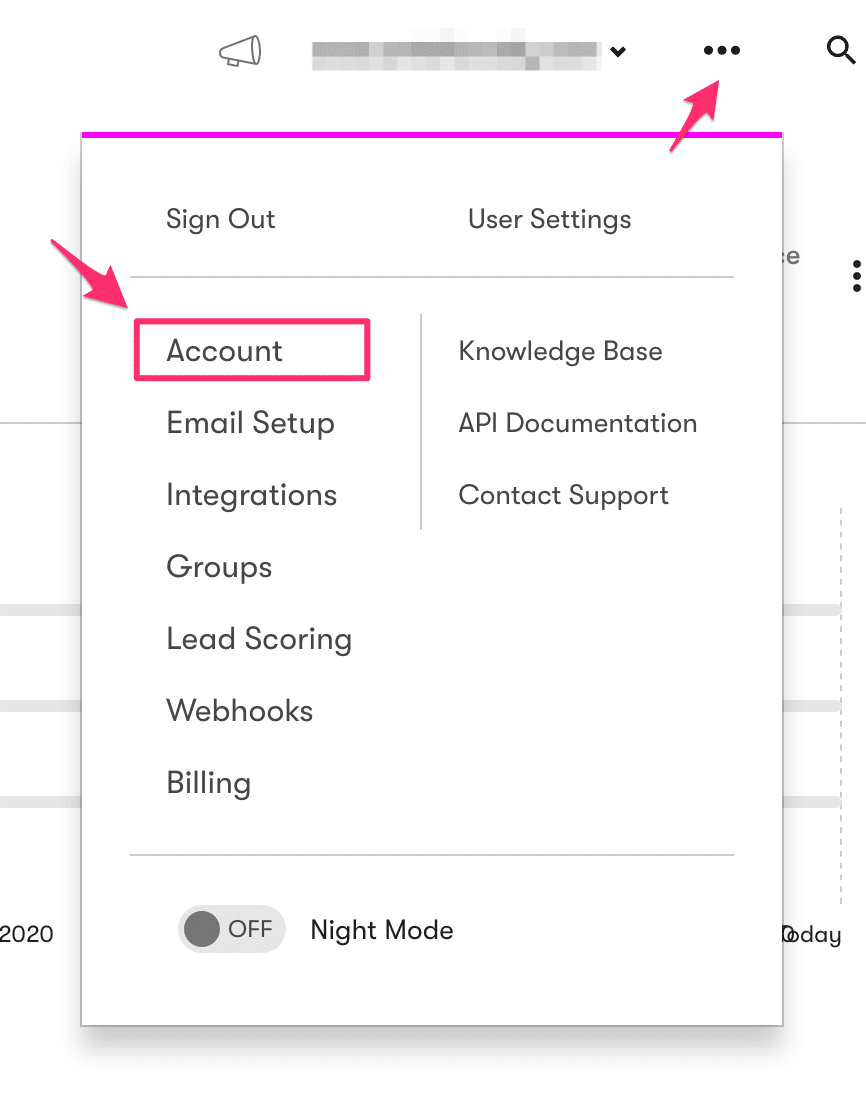
To locate your Drip Account ID, head inside your Drip dashboard, then go to SETTINGS > ACCOUNT.
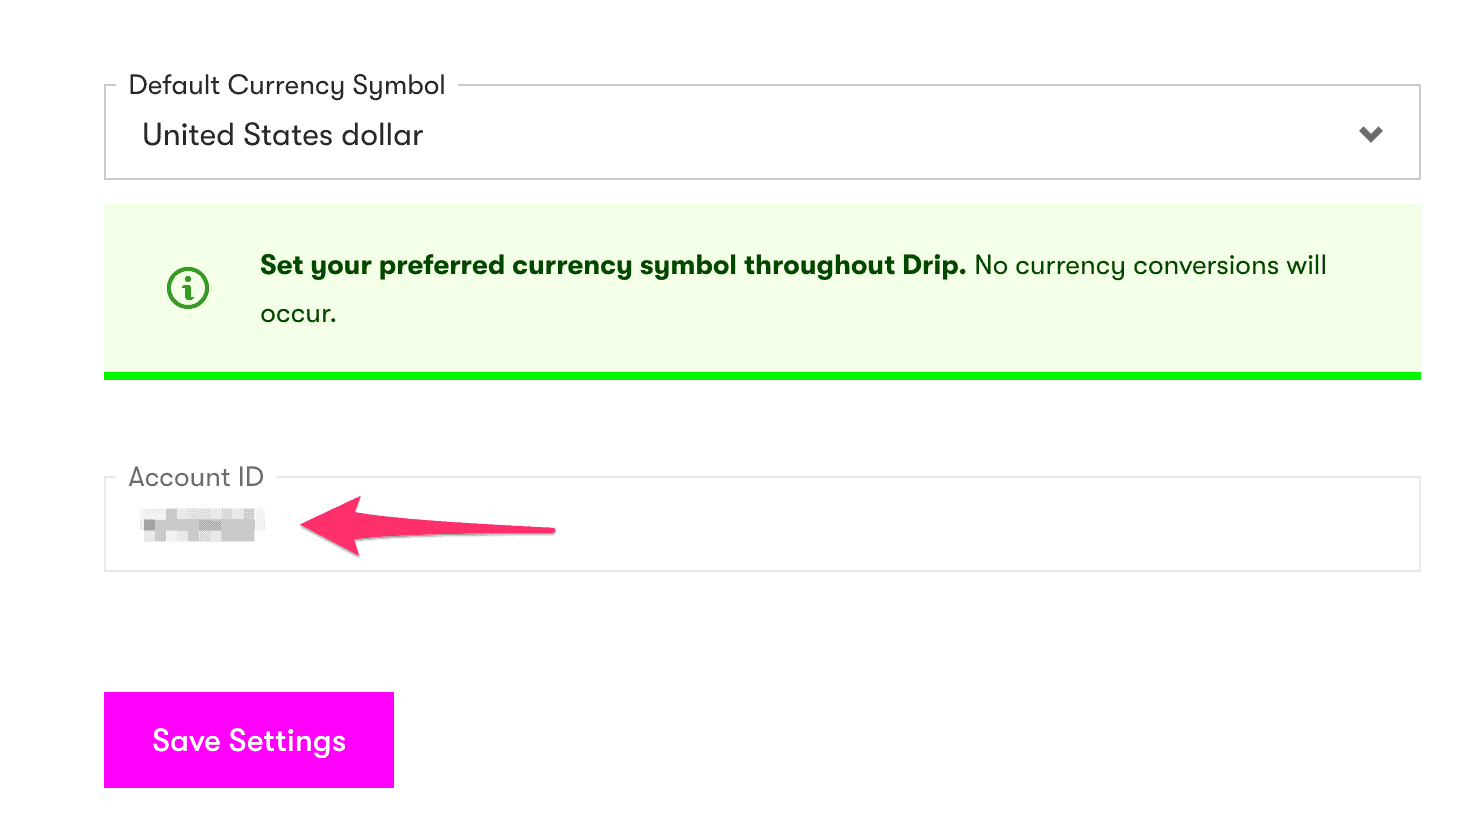
Then, scroll down until you find your Account ID. You can copy + paste this into your AccessAlly settings.
API Token
To find your API token, follow this link inside the general settings:
Then, scroll down to find your unique API token. You can copy + paste this into your AccessAlly settings.

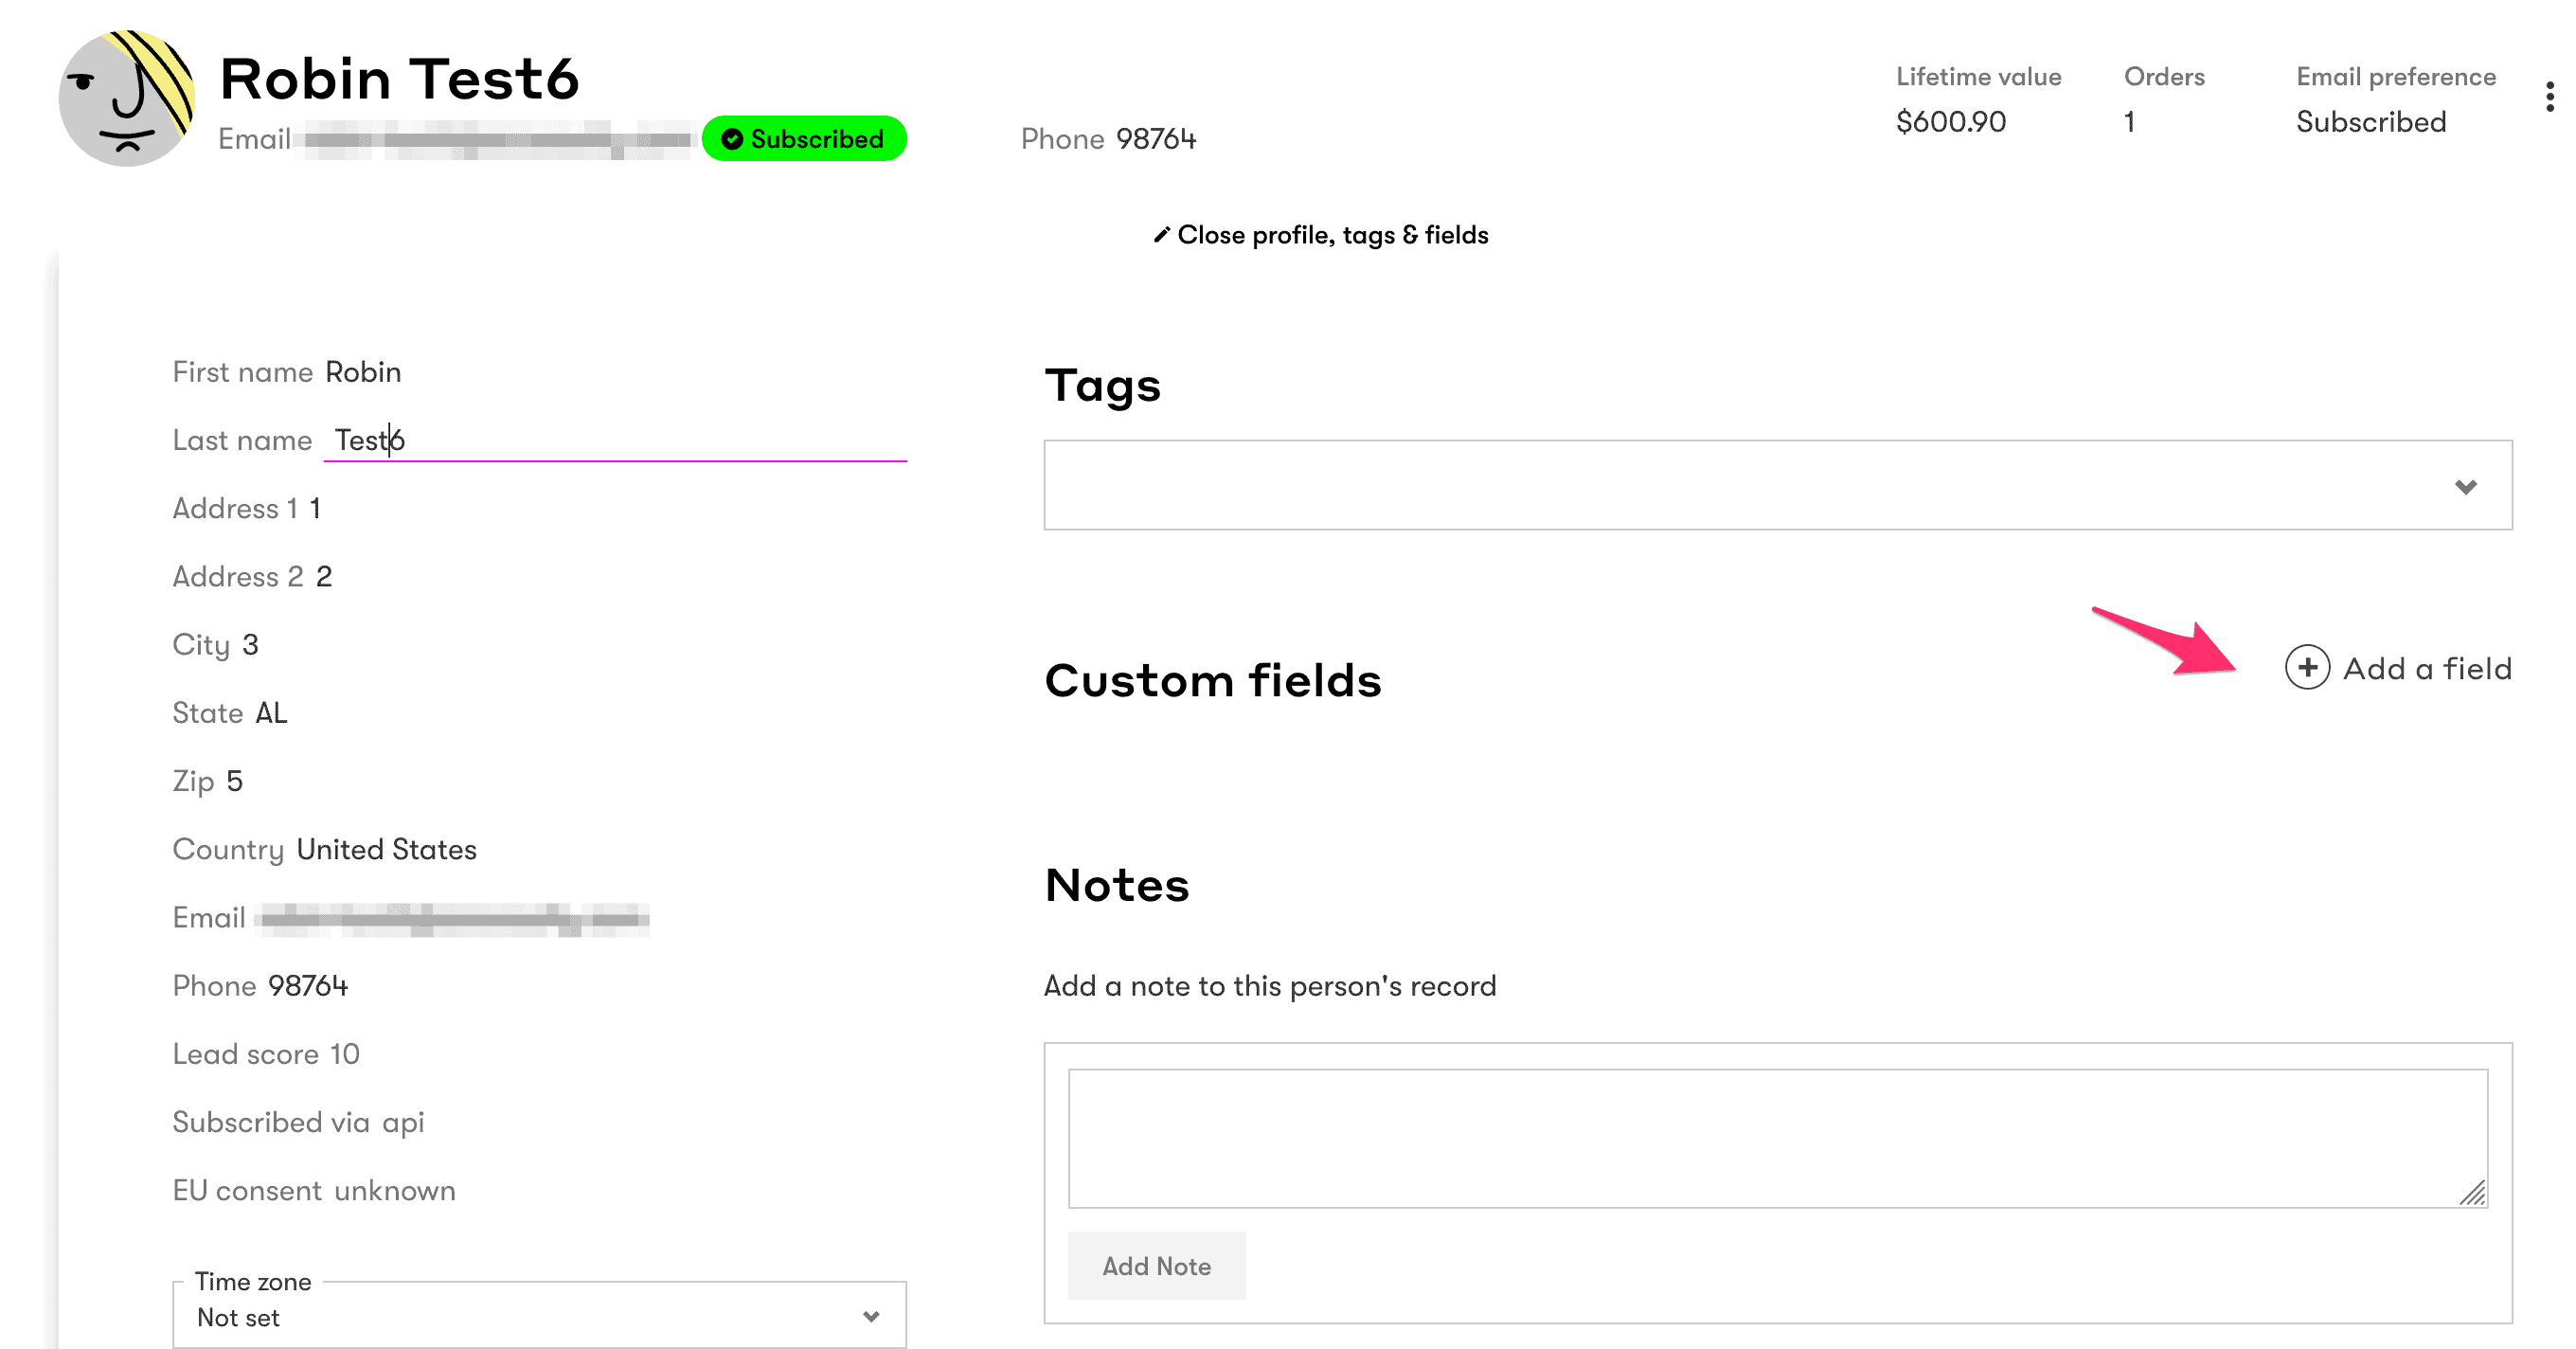
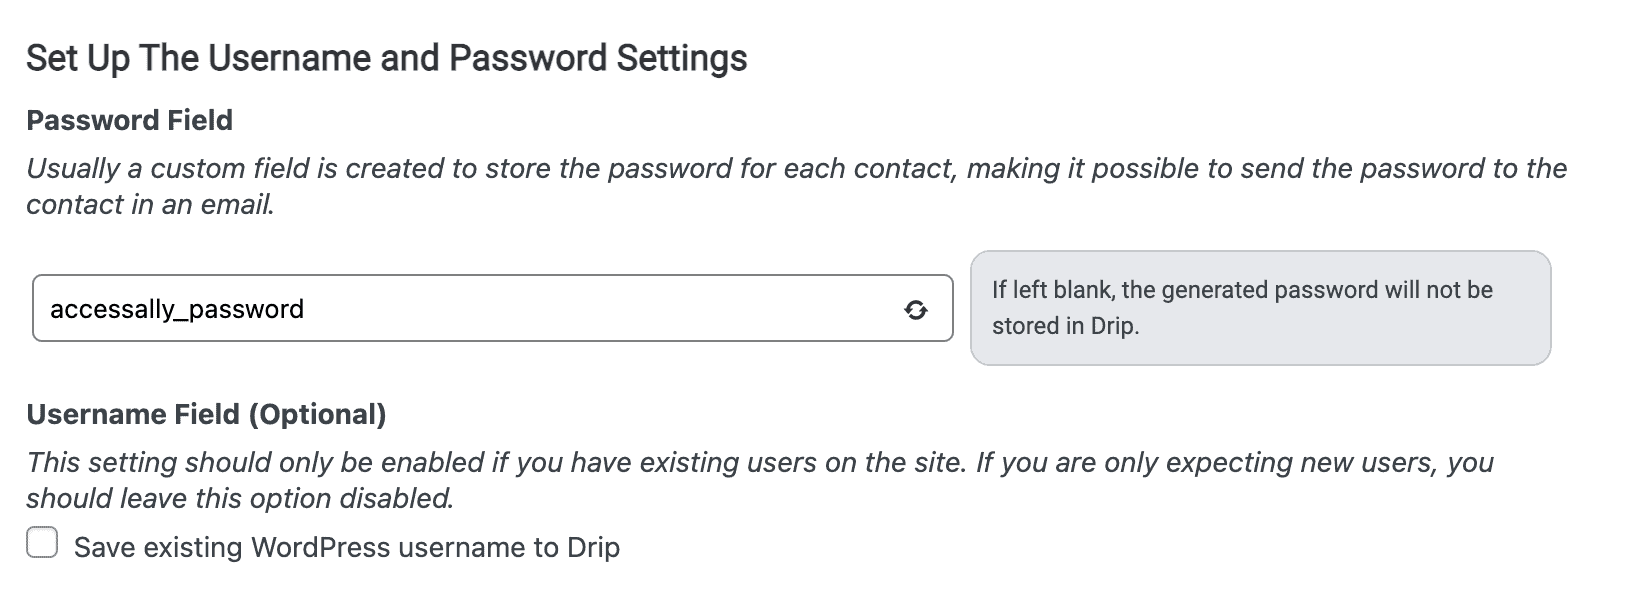
Step 3: Set Up Password Field
The easiest way to set up a custom password field inside Drip is to create a test user. Once you’re viewing a specific subscriber, you’ll see a small “Profile, tags, and fields” link in top middle.

Once you’re there, you’ll see all the details for this subscriber, and also where you can create new fields that will apply to all subscribers going forward.
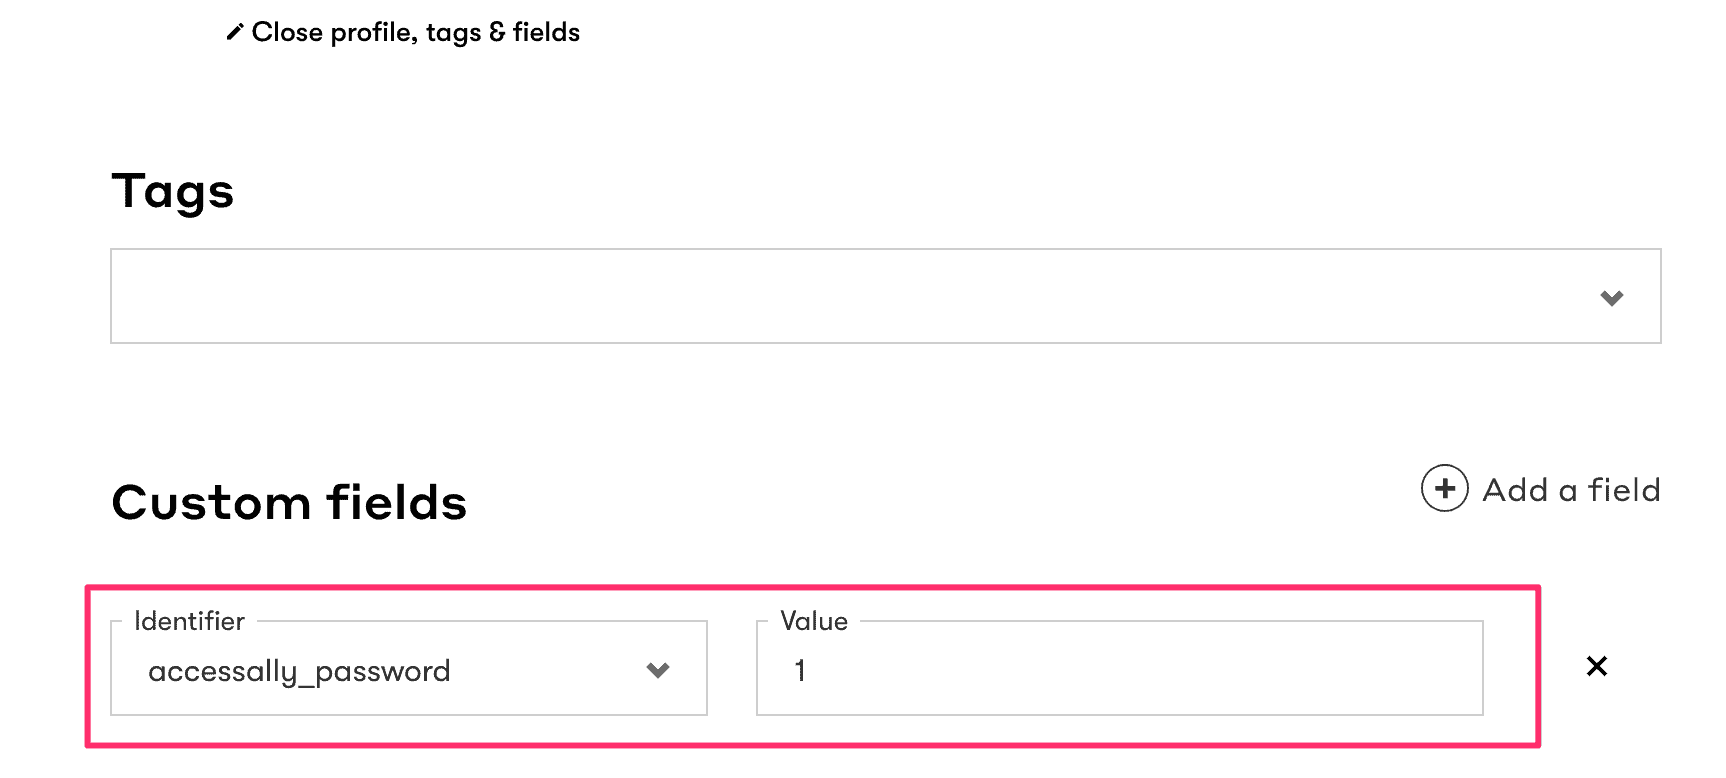
Click on “Add a field” and fill out the values as follows:
- Identifier: accessally_password
- Value: 1
Back inside the AccessAlly settings, you can hit “refresh,” then select the new custom password field from the dropdown.
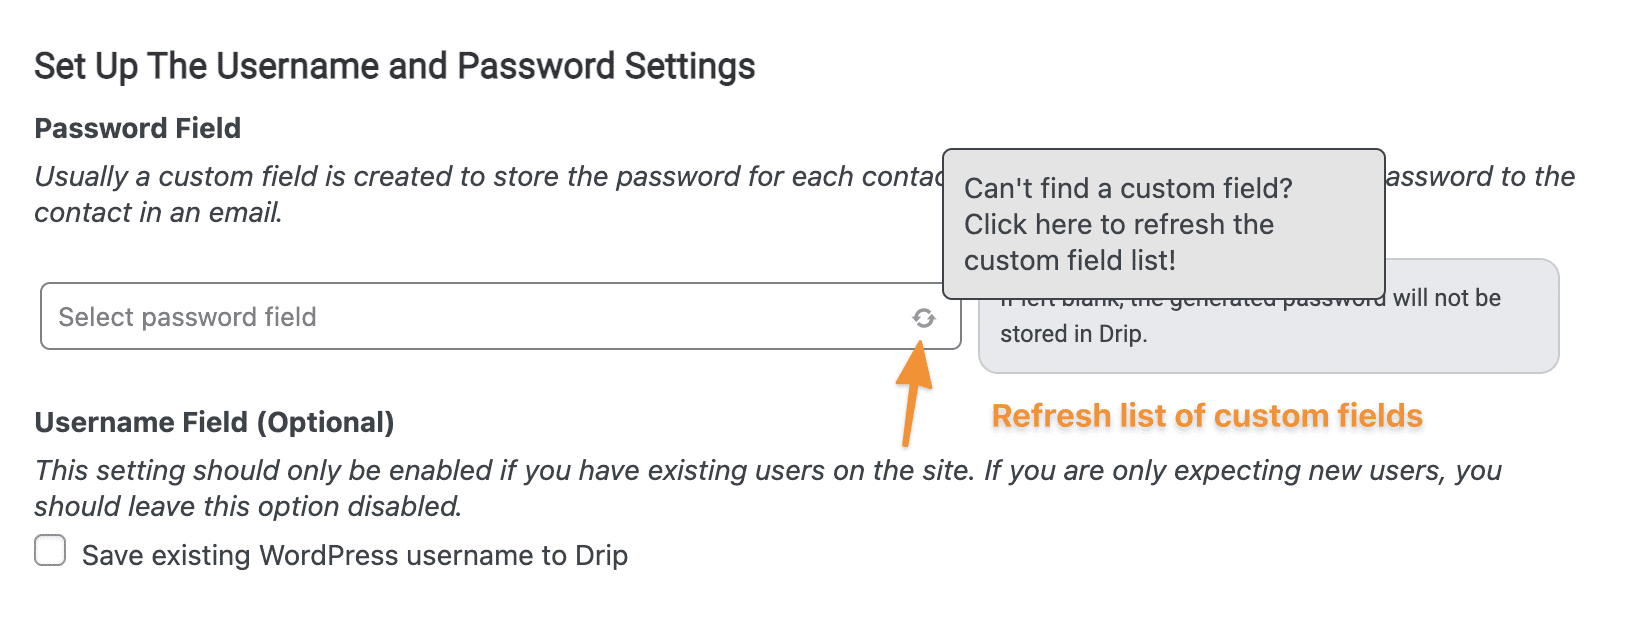
Now select the password field you just created. If you’re not sure if you want to save passwords in Drip, read this guide all about passwords.
Step 4. Create an Integration Specific Form
 Important Notice: As of August 2023, Drip no longer allows you to export HTML code for opt-in forms in new accounts.
This means you won’t get the full functionality needed to integrate your AccessAlly order forms with Drip.
The following tutorial will remain, for any Drip users who have legacy functionality.
It’s important to create a form that AccessAlly can use to add new contacts to Drip whenever they purchase or opt-in through AccessAlly.
First, click on Forms in the top navigation.

Choose to create a new form.

Name your form something that you will be able to find later. Choose the “Advanced” form option, since we just want a plain form and it won’t be used anywhere else.
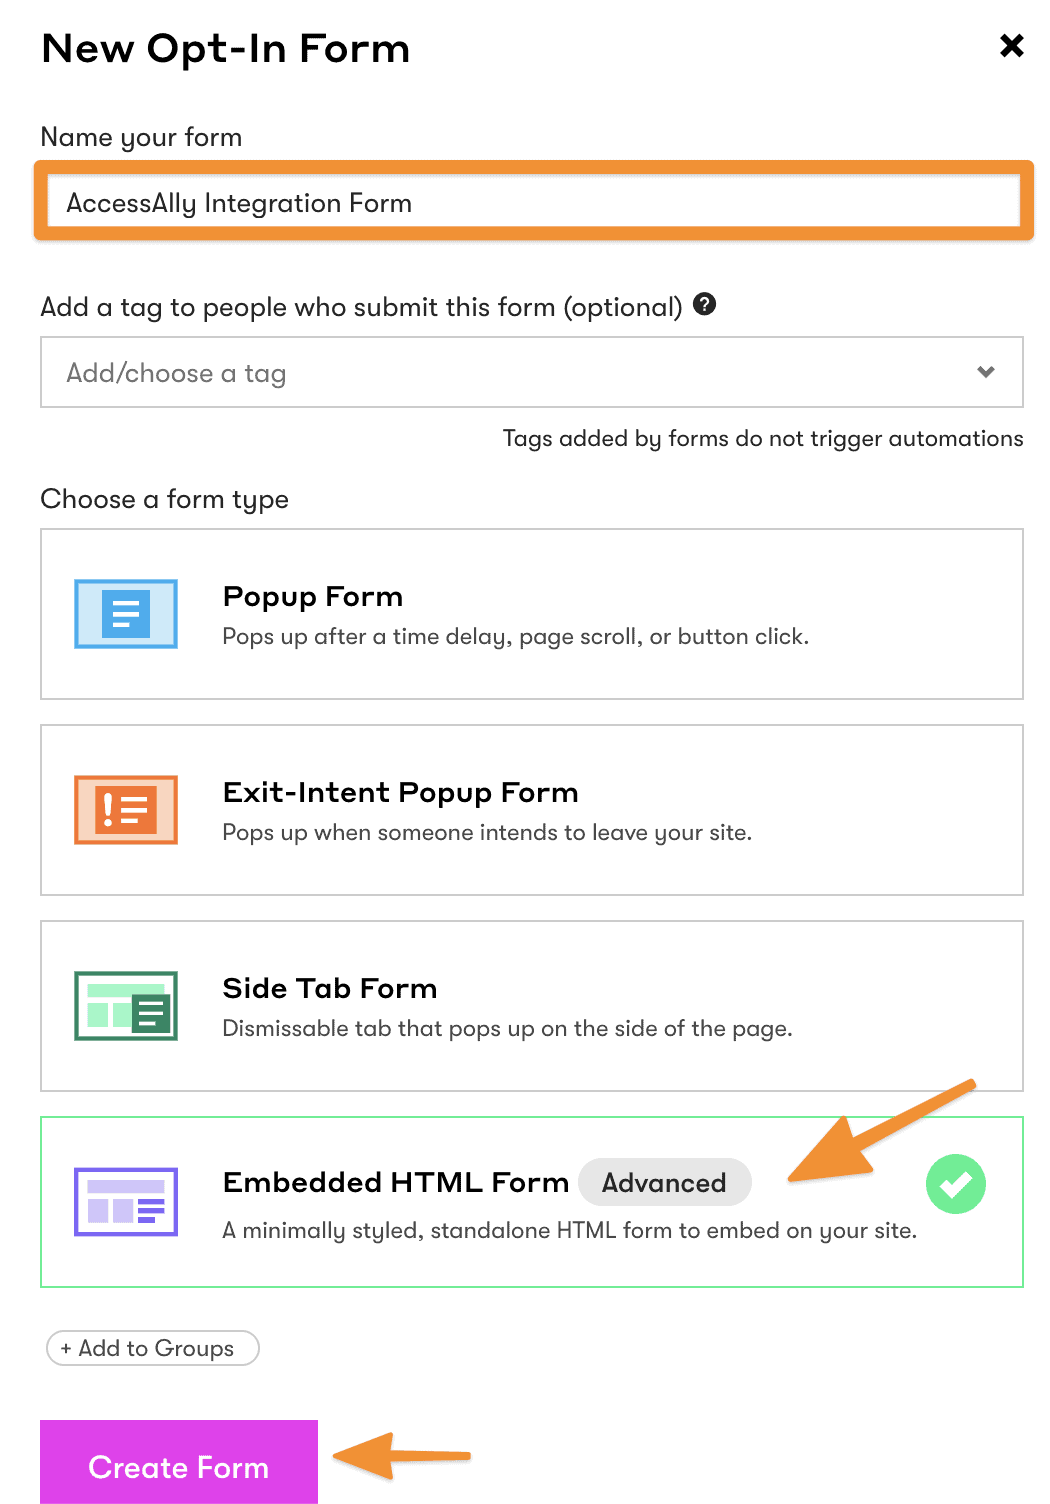
Make sure that you only use an Embedded HTML Form and Double Opt-in is disabled for this form.
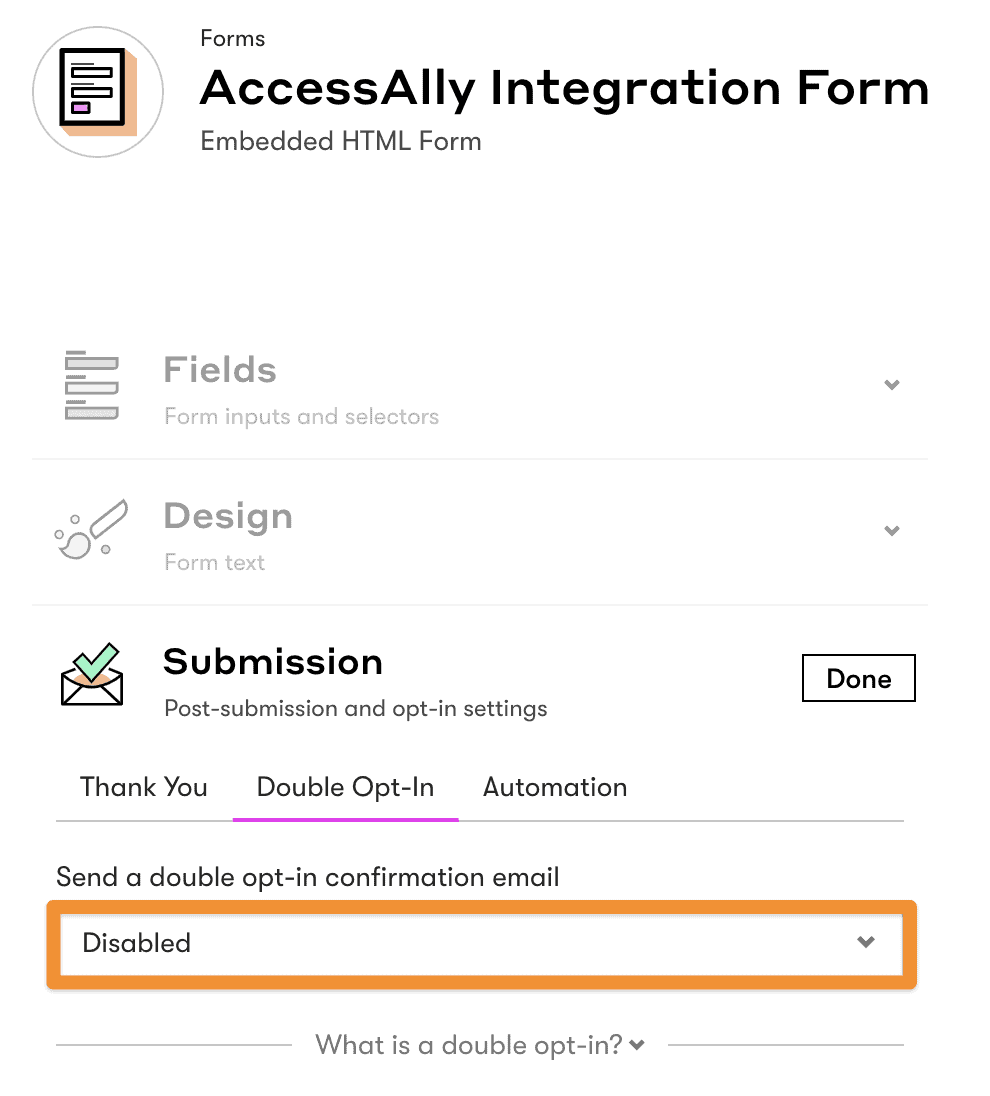
You’re done creating your form.
Now under AccessAlly > Settings > Payment Settings > CRM, choose the new Form you just created and hit save.
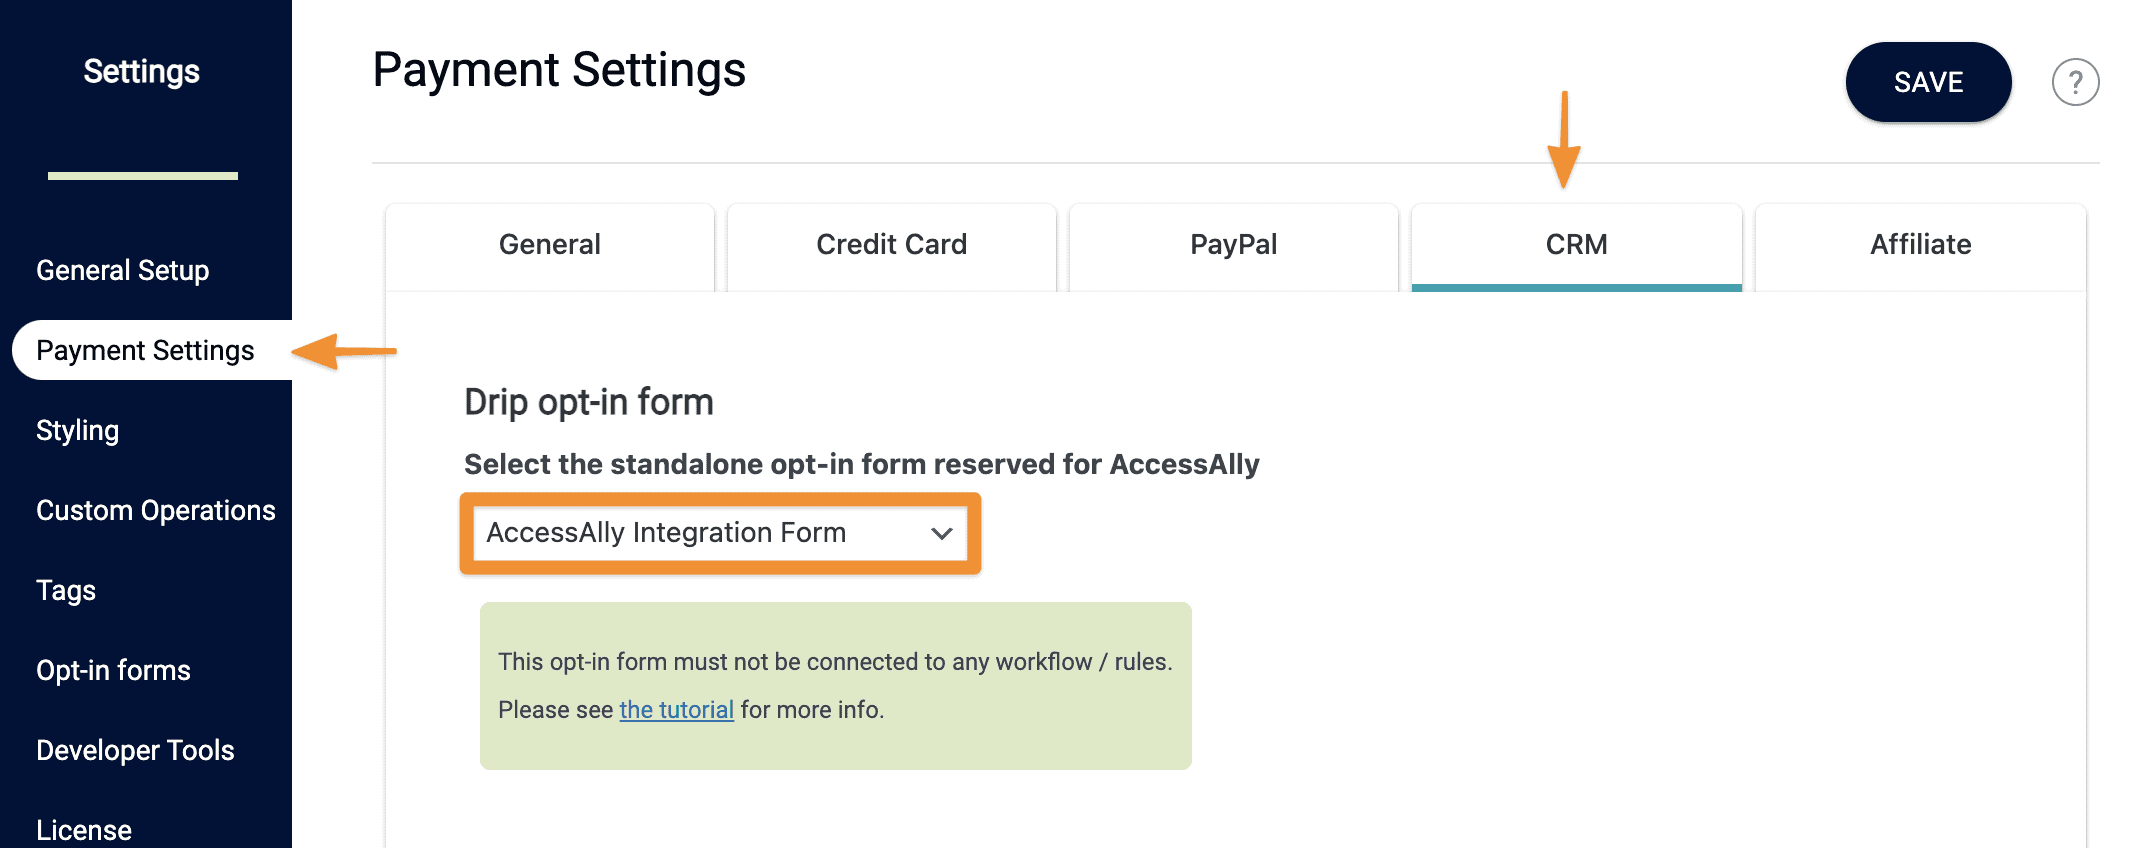
Now, your Drip account is properly integrated with AccessAlly and you’re ready to start creating and selling your offerings!
Test Accounts
For testing purposes, we recommend setting up two test accounts in Drip and AccessAlly:
- One with all access (likely your admin) — this can be accomplished by creating a special “master tag” in InfusionSoft that you include on all of your pages and courses. As you’re developing your membership site, you don’t want to be accidentally locked out of any pages.
- One with student access — this will allow you to see and test your courses from a student’s perspective, and can be tested in an incognito window/browser when you’re setting up your site.
