In this article, you will learn the steps to create upcoming payment reminder emails for AccessAlly Offerings in Keap.
ARTICLE CONTENT:
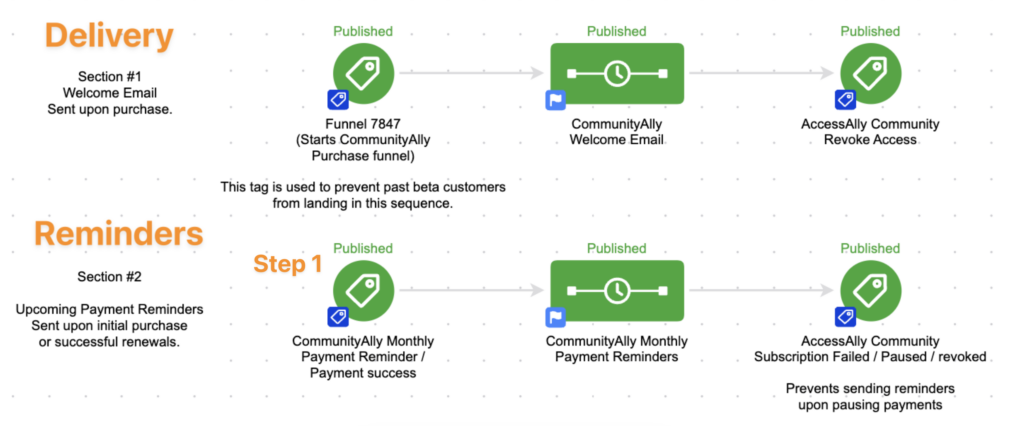
Step 1: Add Tags to Start Reminders
Open the Keap automation used deliver this Offering, add a new section by dragging a tag in, add the tags mentioned below to start reminders.

Tags added:
- Purchase Success Tag – starts reminders upon new purchase
- Payment Success Tag – starts reminders after each successful payment is made
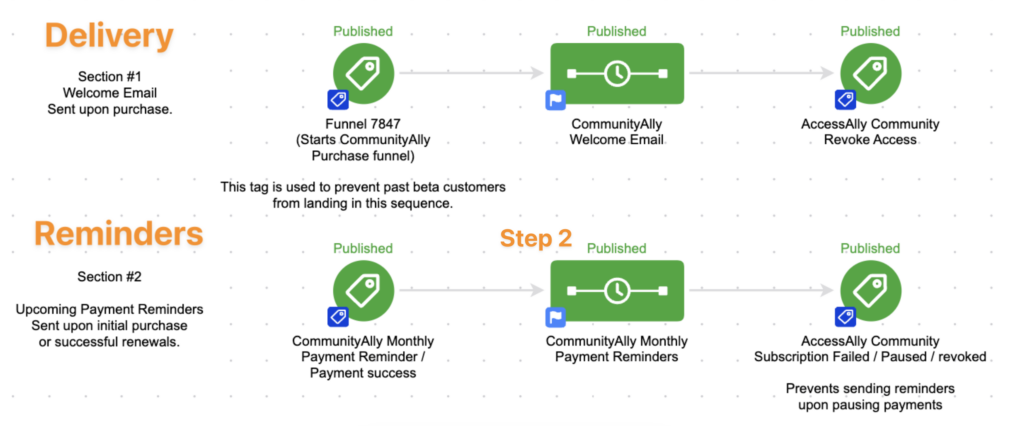
Step 2: Add Email Sequence
Now drag an email sequence to create your reminders.

Place the following items in your sequence.

- Remove tags:
- Remove the Payment Success tag
- Remove the Payment Failed tag
- Remove the Revoke tag
- Send HTTP Post:
- Add the update existing user webhook (found in the AccessAlly Webhook Generator.)
- Wait timer
- Select how long before the first reminder is sent (example a few days before next payment is due)
- Reminder Email(s) – you can send as many of these as you’d like.
- In an email template, write your reminder email copy. You can use custom fields in Keap to personalize the email.
- Add delays between emails
- Quick tip: Add a link in each email to the My Orders page on your site. This shows next payment due date, amount to be charged, and has a place to update the credit card used.
- Remove Tag:
- Remove the Payment Success tag, this allows it to be added again in the future.
- Send HTTP Post
- Add the update existing user webhook (found in the AccessAlly Webhook Generator.)
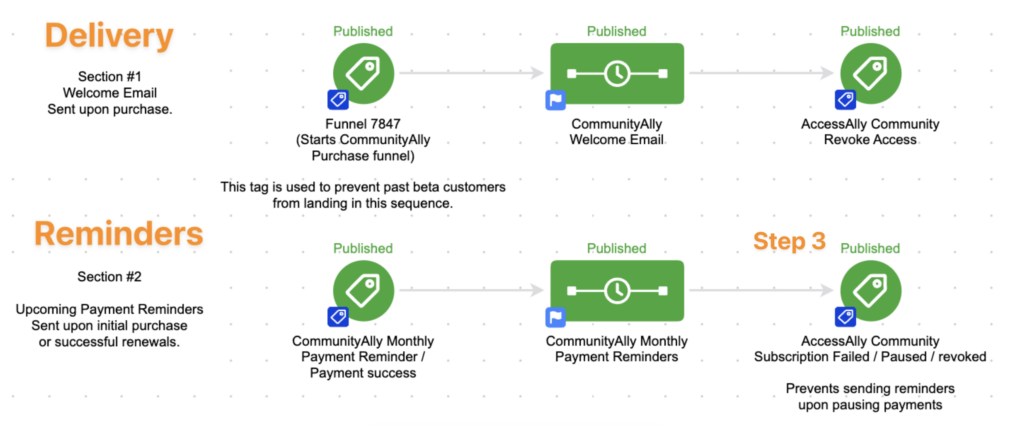
Step 3: Add Tags to Stop Reminders
Use a tag goal at the end of the reminders section to stop sending Reminder emails.

Add the following tags to stop sending reminders:
- Failed Payment
- Revoke
- Subscription Paused

