In this article you’ll create a tiered approach for employees at different levels within a company. Each level oversees the level below, while the top-most level sees progress of employees in all levels.
ARTICLE CONTENT:
Overview of Tiers
Want to know if this article is right for your business? Watch the video below. This video is very detailed as this is a complex scenario. If you have questions (after watching the video) contact us before getting started.
Plugins Used
We recommend using AccessAlly, ProgressAlly, and the User Switching plugin for best results with this article.
Terms Used
In this article the following consulting terms are used. Feel free to replace these with what works for the roles within the companies you serve. These roles will be used within two different teams inside AccessAlly.
- Company (employer that Partners, Managers, and Associates work for)
- Partners (Oversee Managers and Associates)
- Managers (Oversee Associates and report to Partners)
- Associates (Report to Partners)
Support Tips
Due to the advanced nature of this article when reaching out to support it helps us help you best if you share the exact step you are stuck on if you need support.
Team Program #1 – Offering
Go to AccessAlly > Offerings > + CREATE > Team Center > Use Template
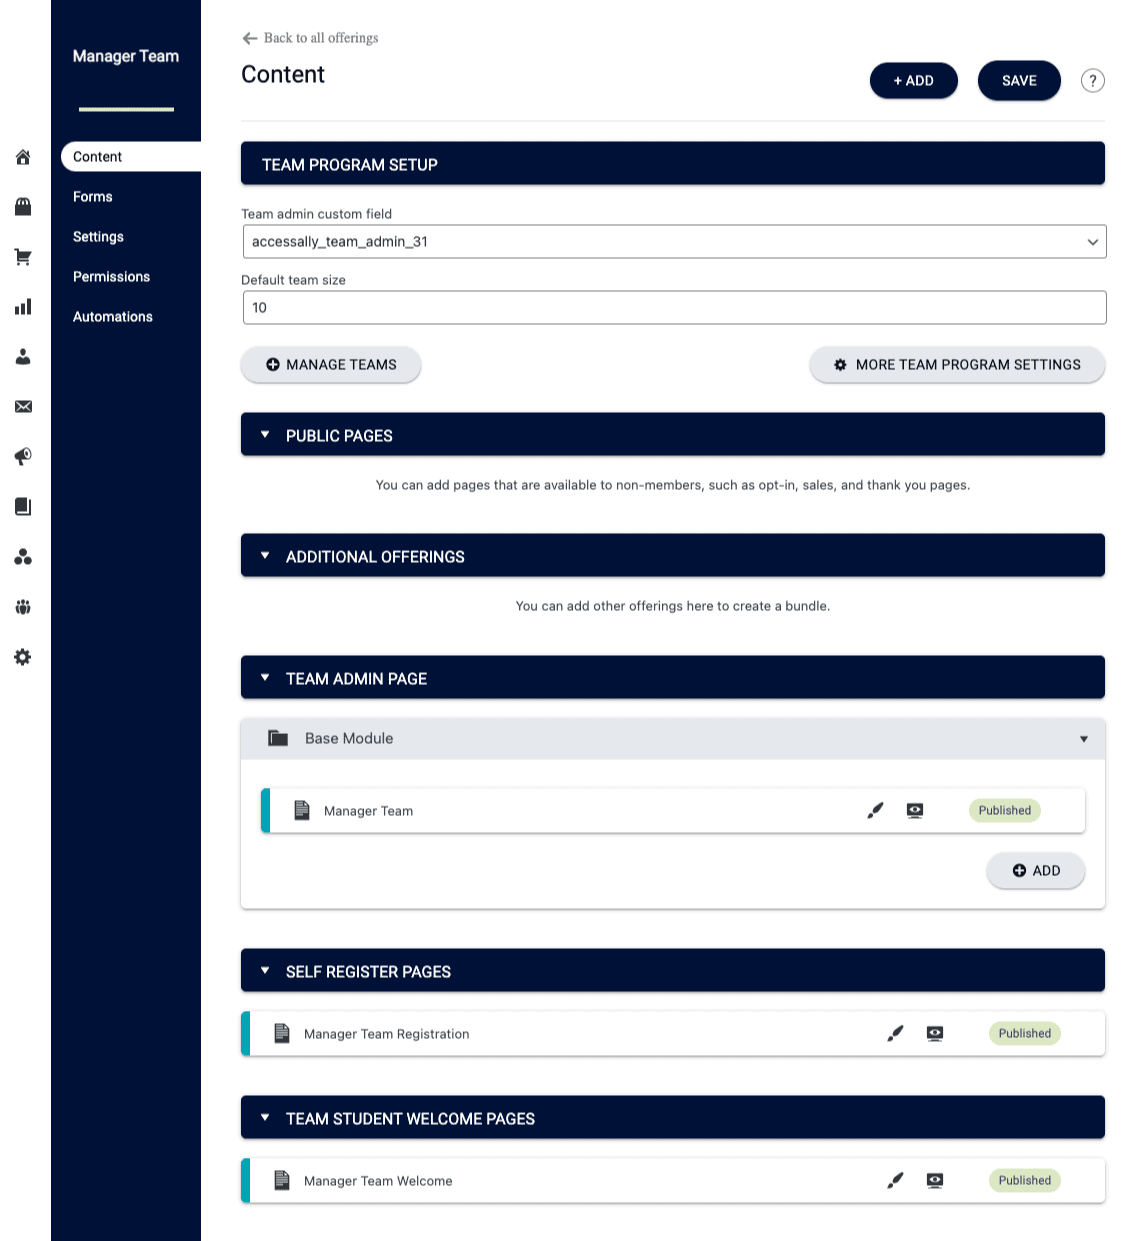
Offering Content Tab
This consists of three pages for the partner portal. Publish all pages. The first page is the base module where the partner can see managers and associates. There’s also a page for managers to self-register and a welcome page for new managers and associates to see after self-registration.
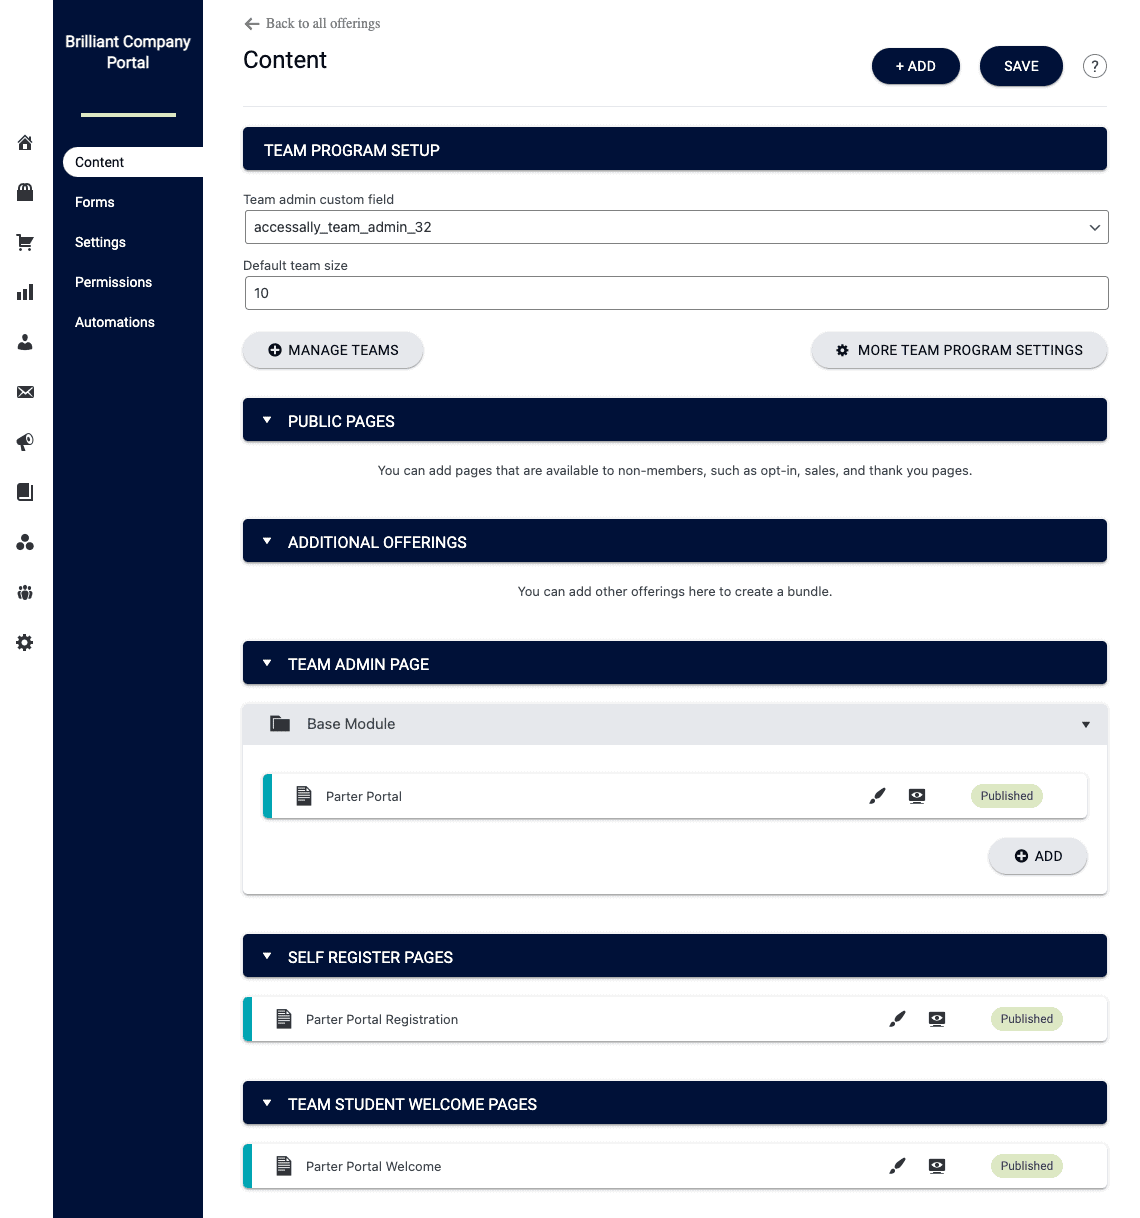
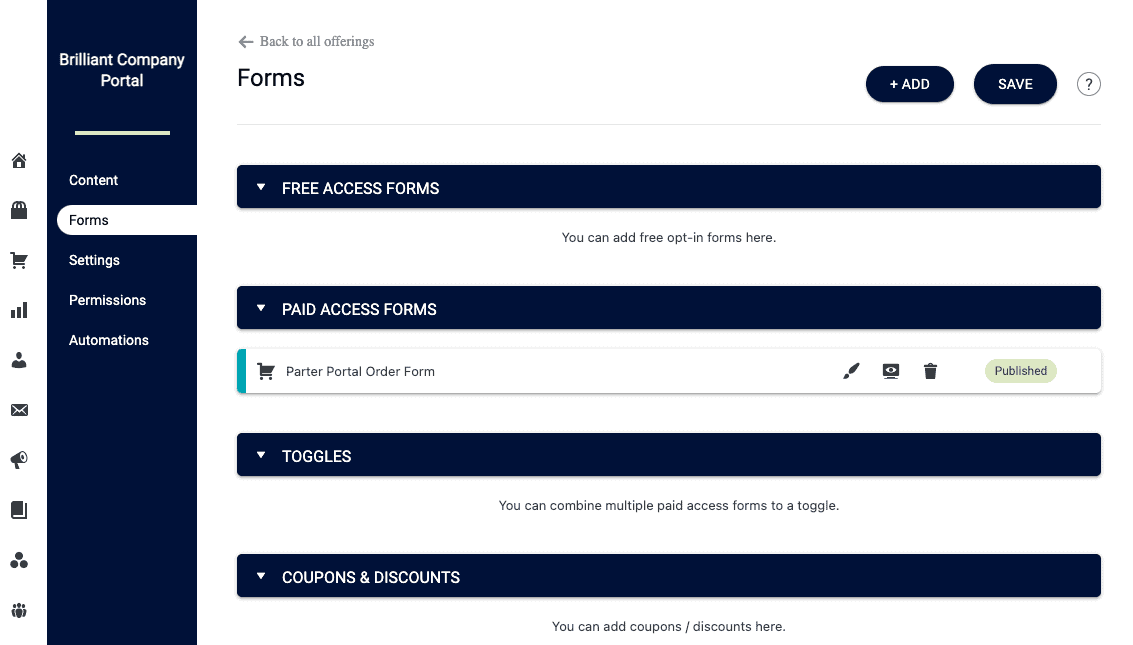
Forms Tab
This tab shows the opt-in form or order form used for a partner to get access to the portal.
Team Program #1 – Settings
Front end example: These are examples of the items you are building to create your team display.
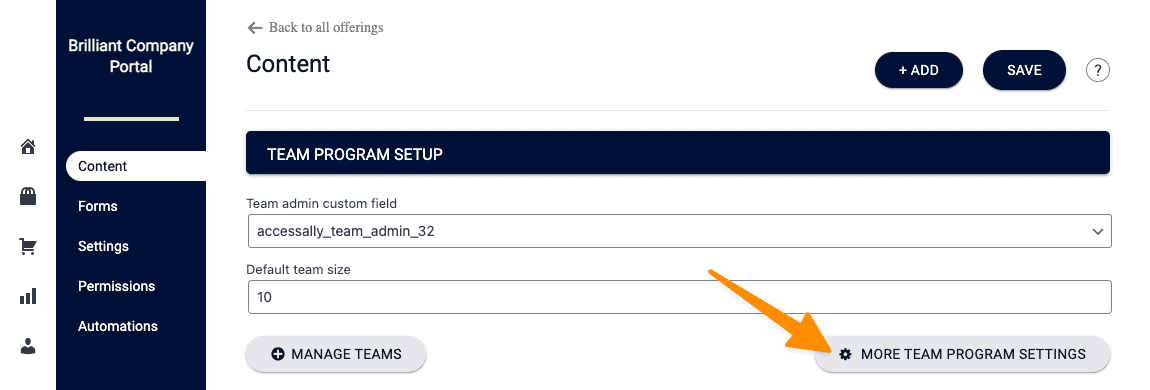
Behind the scenes: In the content tab click the more team program settings button.
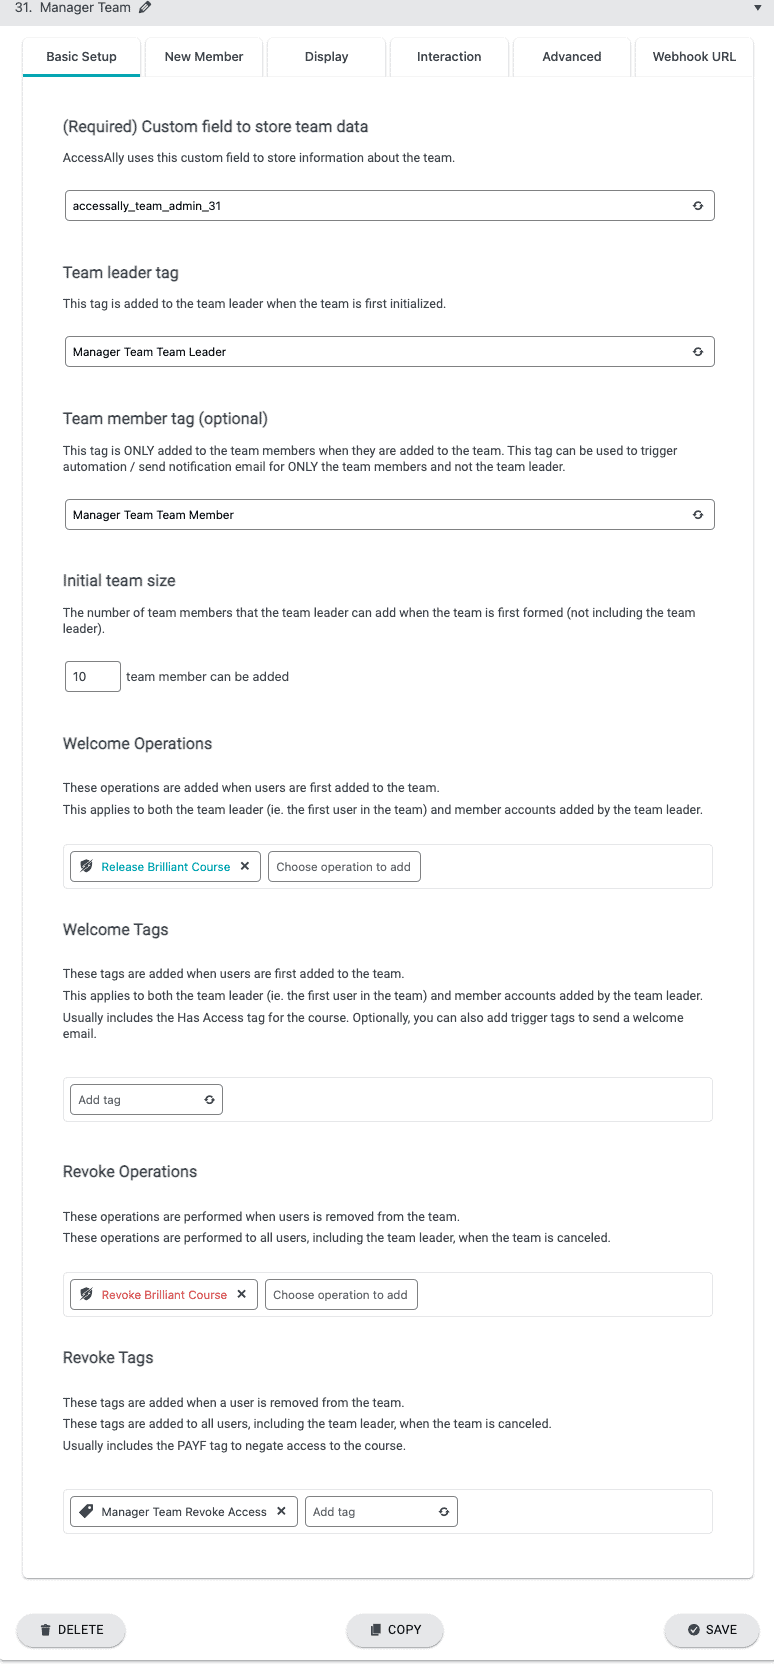
Basic Setup Tab
This tab will be pre-filled with the details about this team.
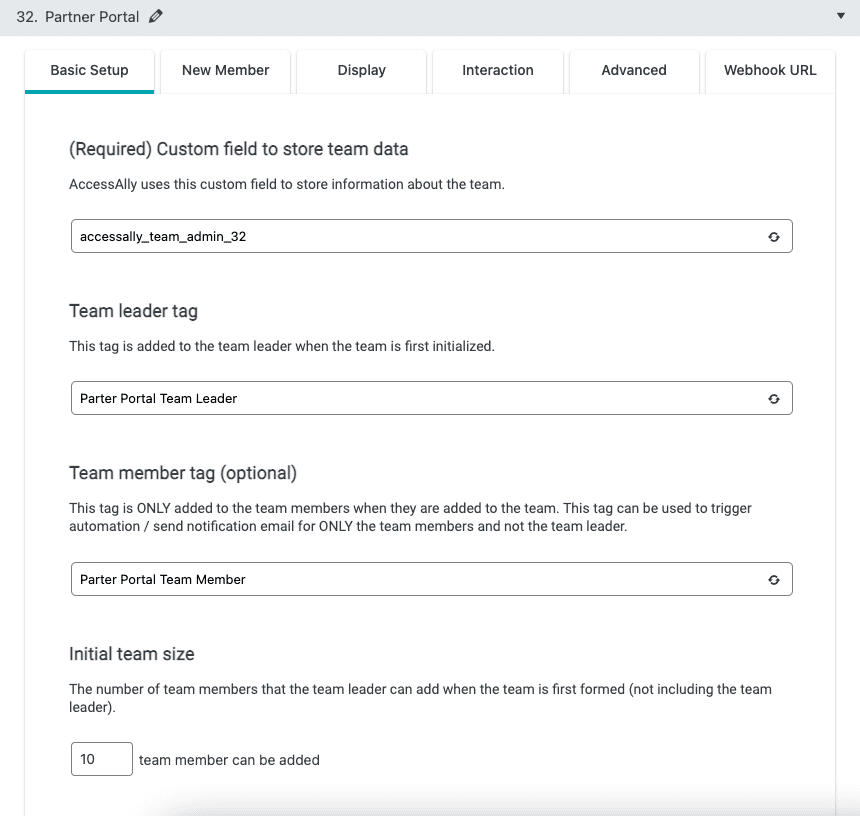
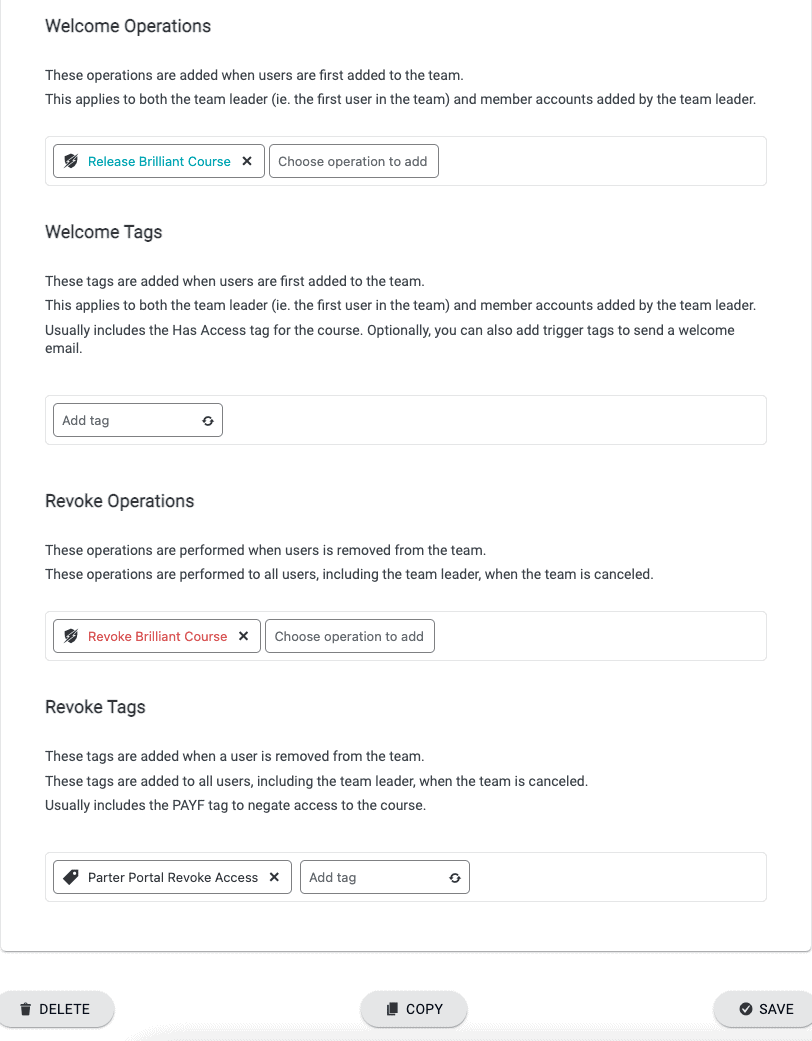
Scroll to the Welcome Operations section. If you would like to release an offering when members join the team you can do that here. If you prefer to add tags for access you can add those in the Welcome Tags section.
The Revoke Operations and Revoke Tags will remove access to an offering for members of the team.
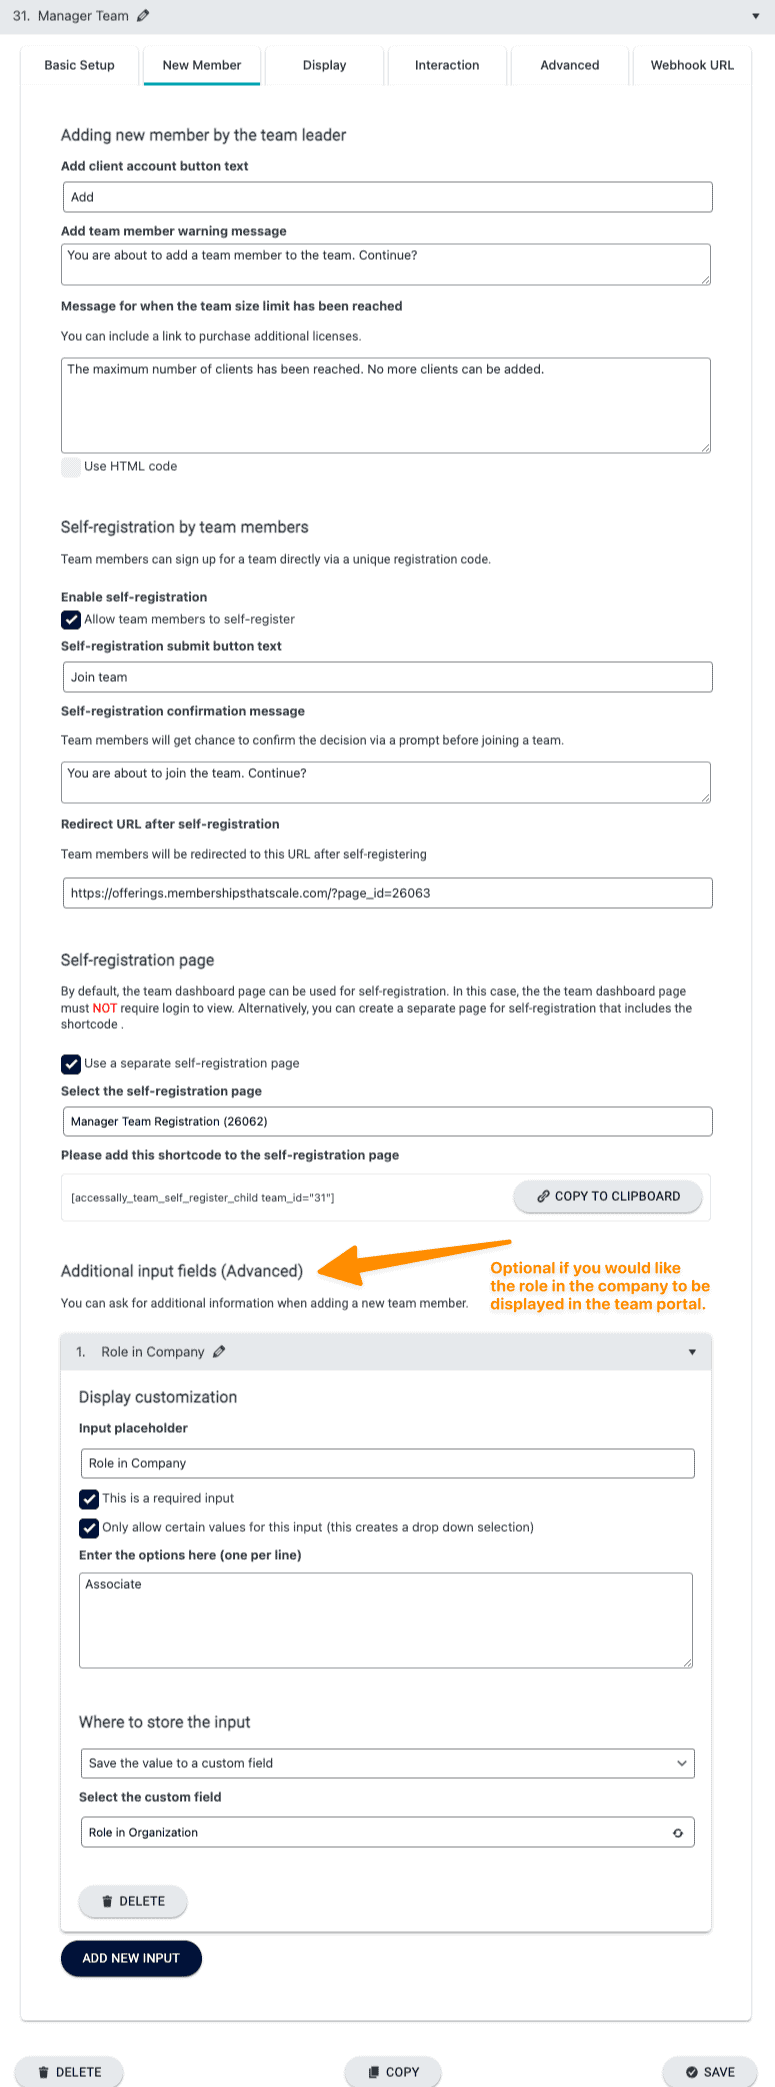
New Member Tab
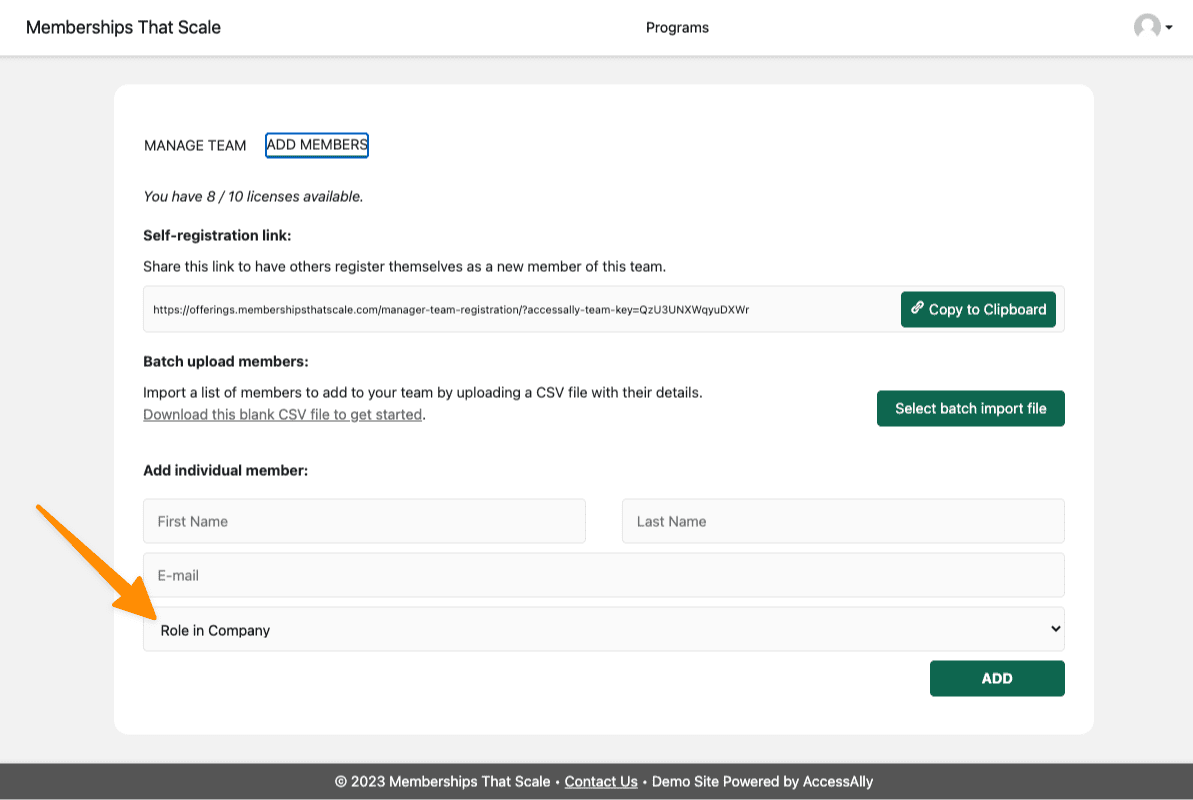
Front end “add members” tab view.
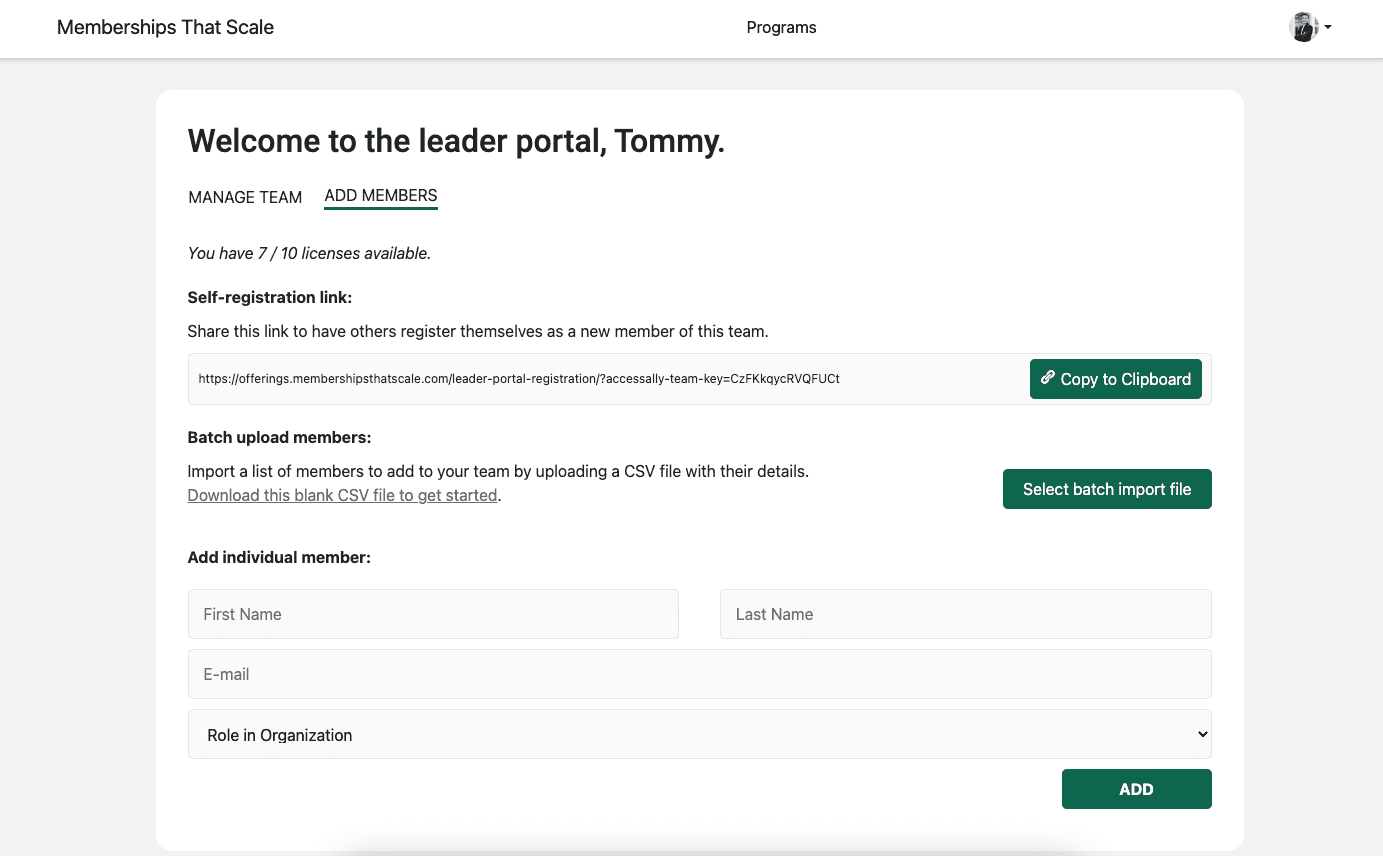
Behind the scenes setup with recommended options.
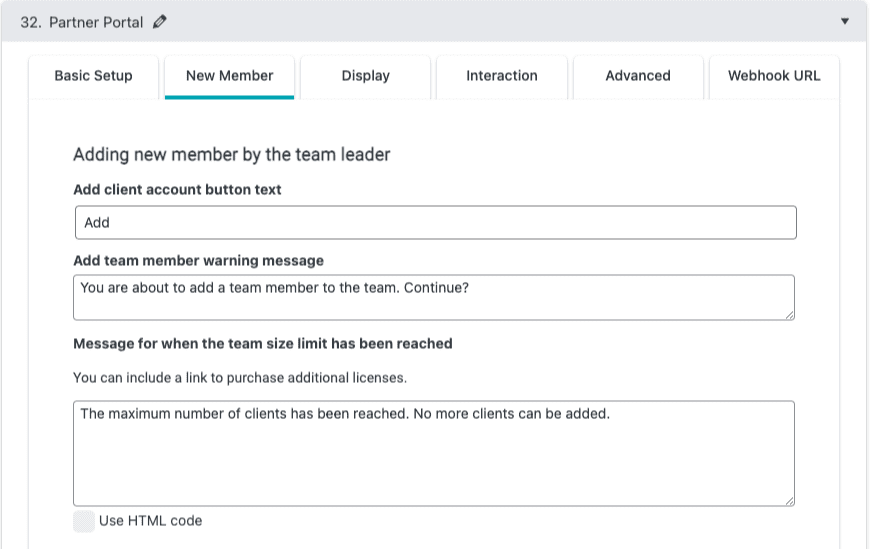
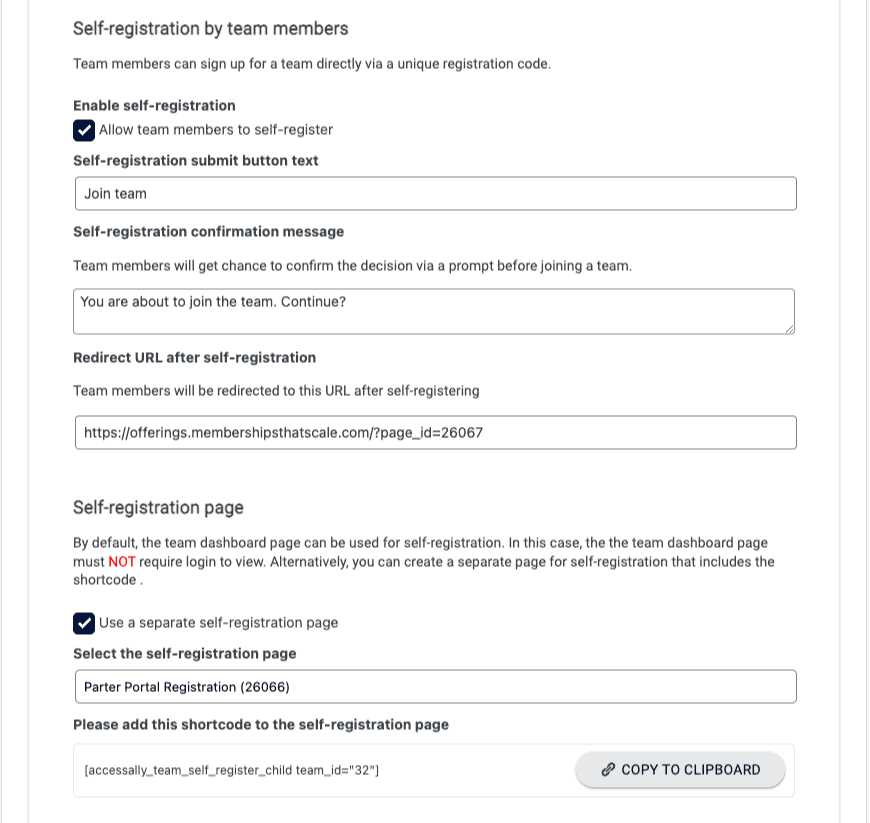
Optional – storing items in a custom field as members are added to the team can be helpful to make it easier to identify them on the administration dashboard.
In the front end view example this is used to create a dropdown with the role in company options.

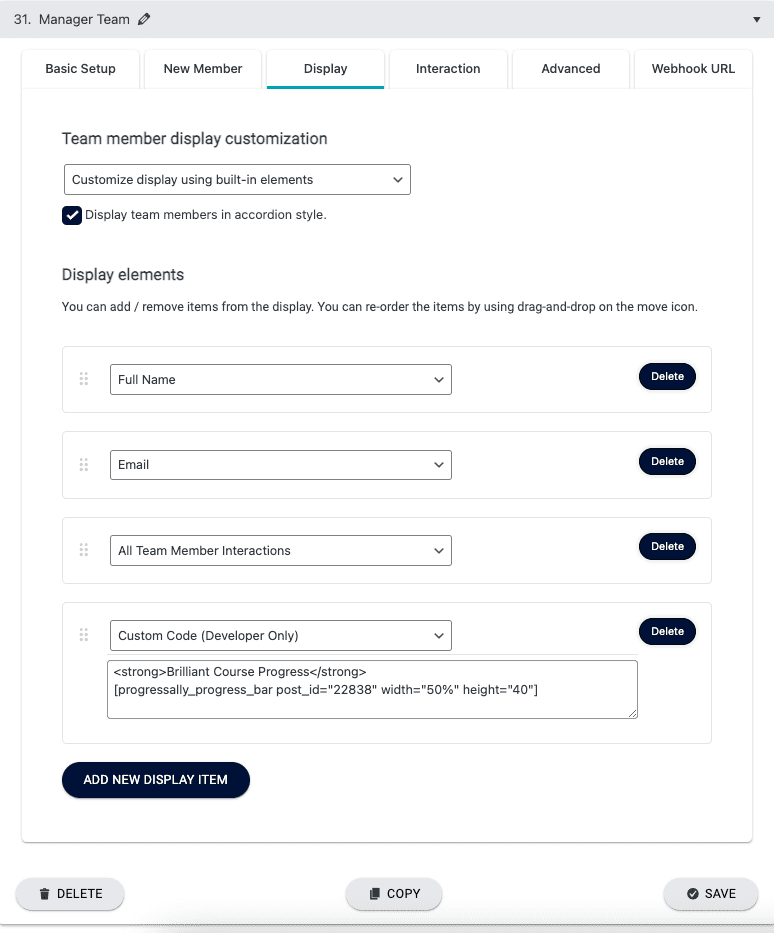
Display Tab
All team displays are unique and are built by you for the needs of the team. These will be visible on the front end to the partners and managers inside this team.
Front end example:
- Custom text section displaying the member’s role in the company
- Team member email address
- Team interactions
- Text based section showing name of course
- Offering progress tracking completion of the course the team has access to
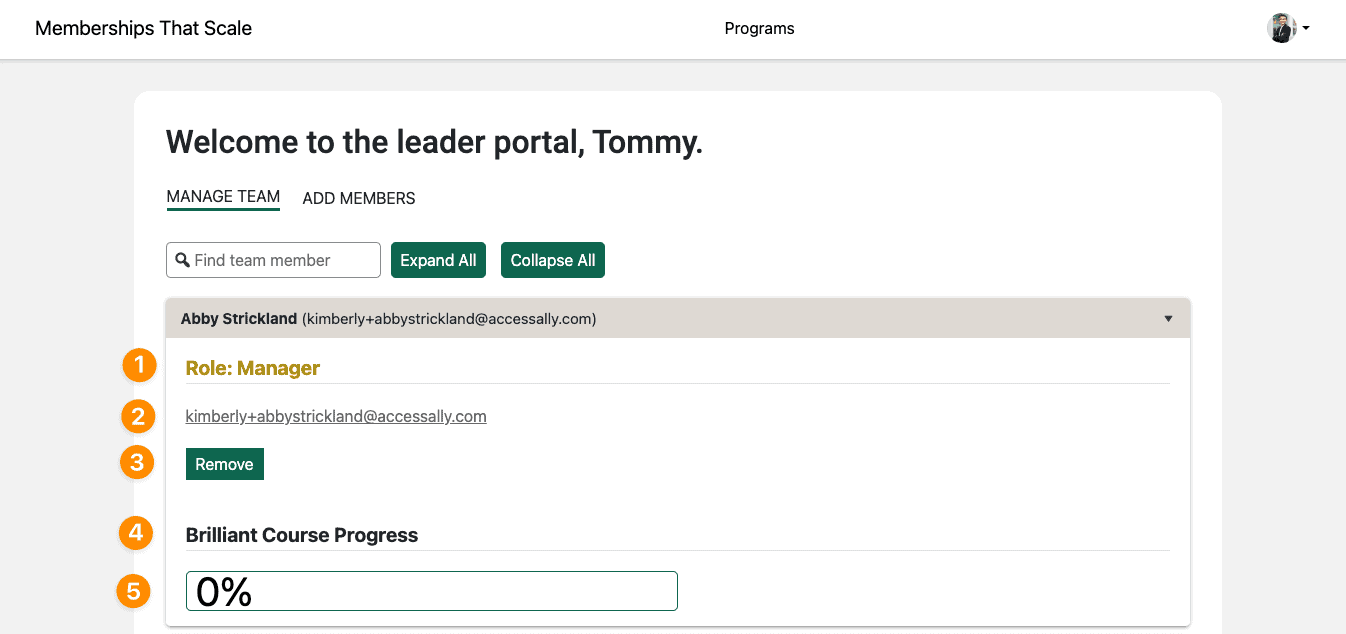
Behind the scenes setup:
It is recommended to choose customize display using built-in elements and to check the box to allow for accordion style display. Below you will see the five items shown in the image above and how they become part of the display.

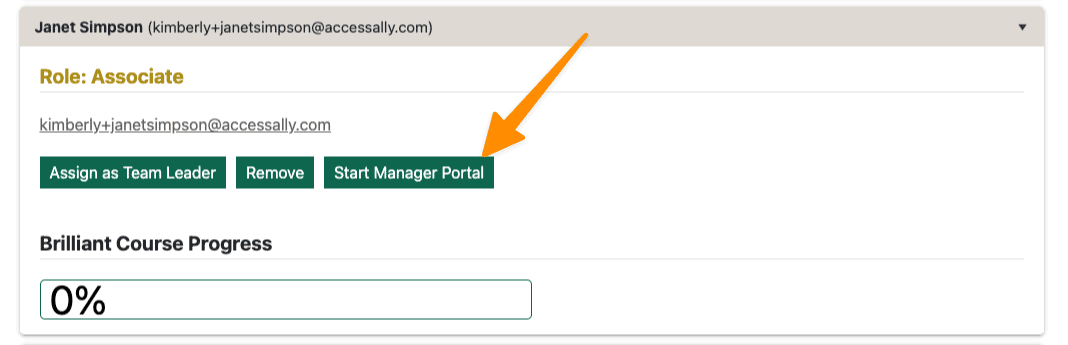
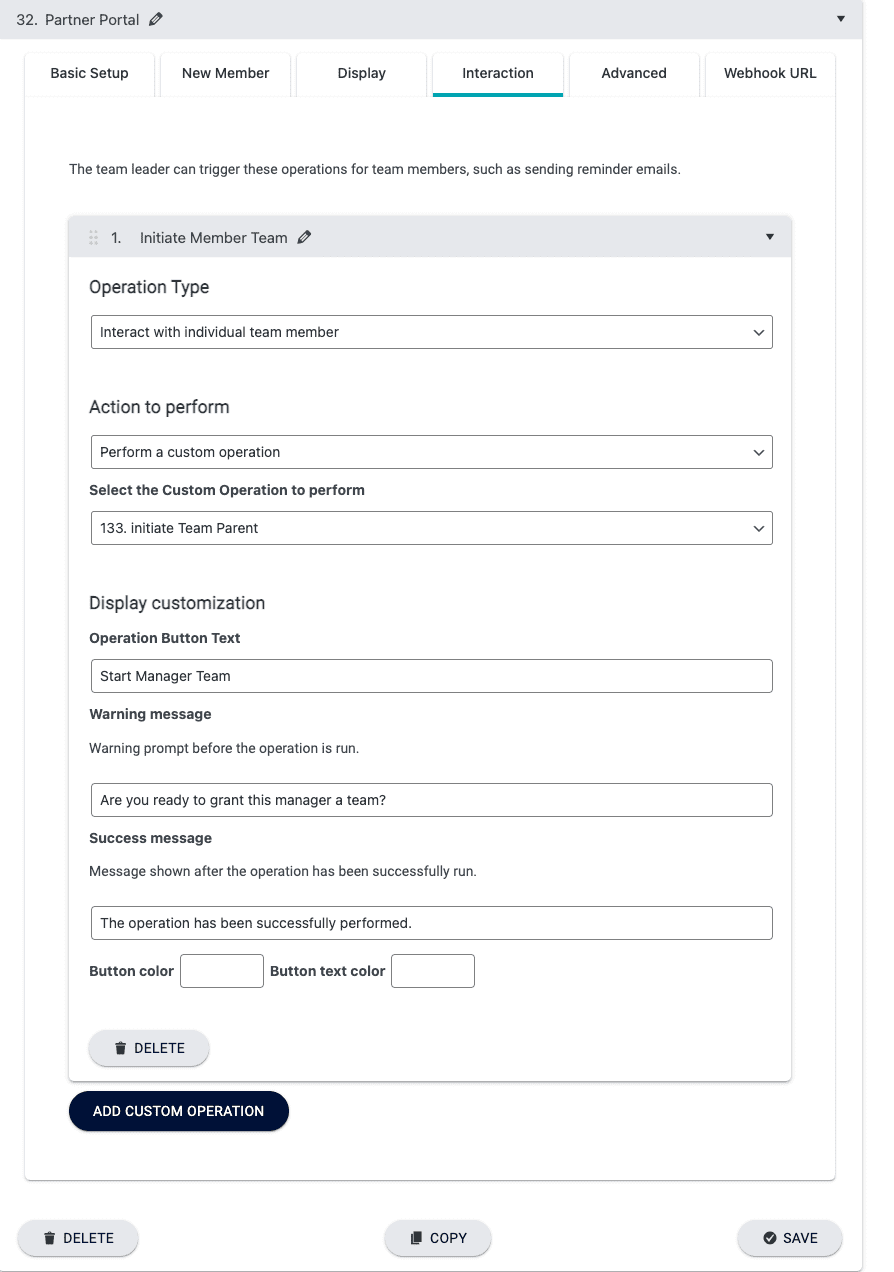
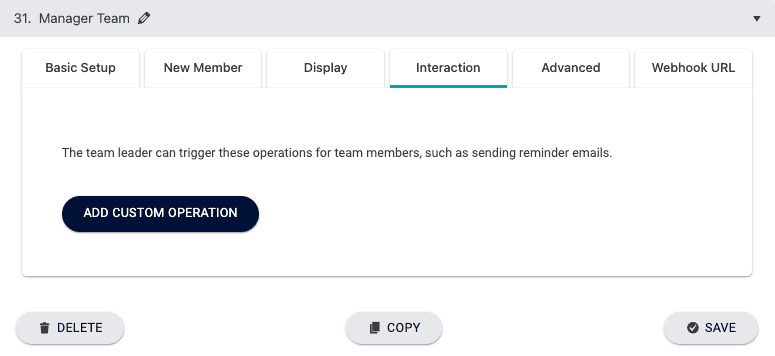
Interaction Tab
The interaction tab can be used along with tags or custom operations to allow the leader of the team to do something for one or more members of the team from the partner administration dashboard.
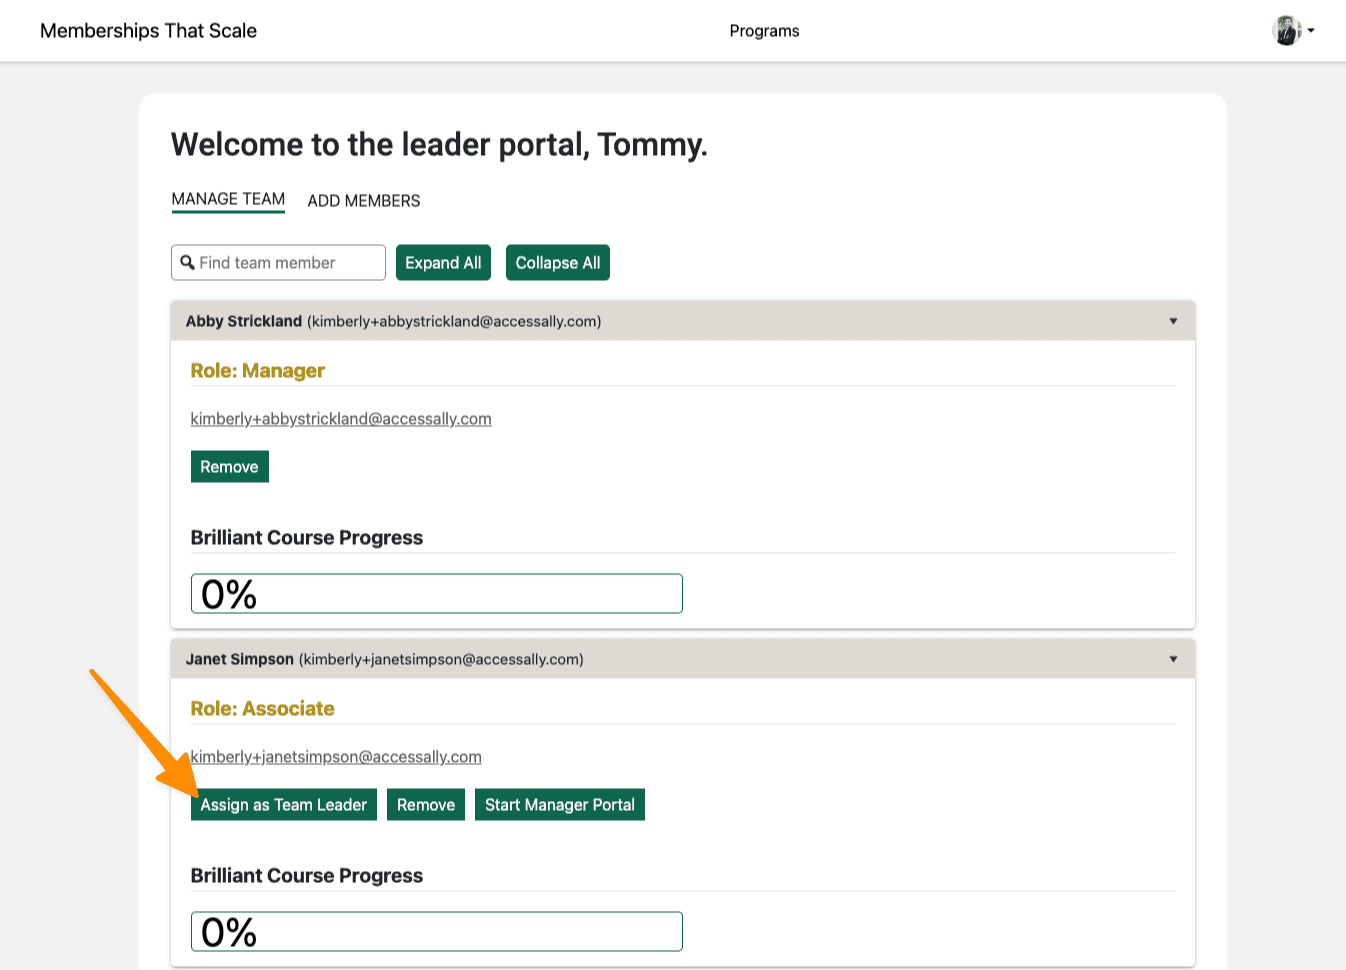
Front end example:
The partner can click a button to start a new team for the manager.
Behind the scenes setup:
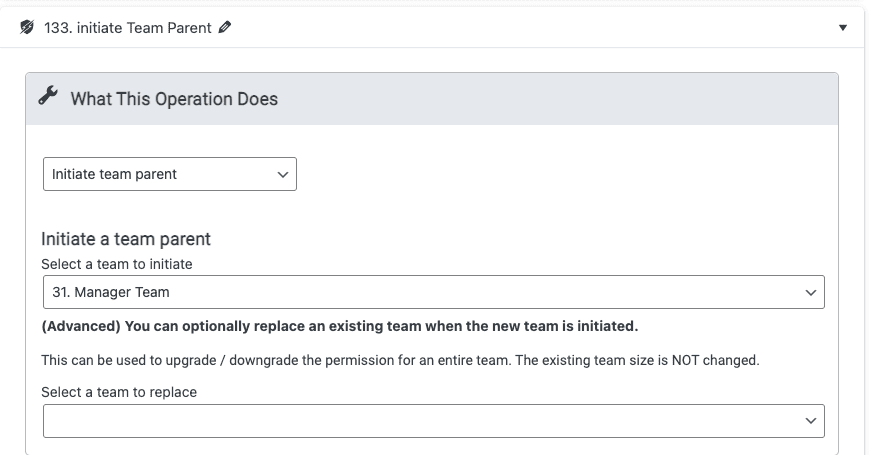
Before you can build this in the interaction panel you’ll need a custom operation to initiate a team parent. This is shown in the image below, but is not created until after you complete the setup of Team Program #2 later on.
Custom Operation View
AccessAlly > Settings > Custom Operations
Interaction Tab View
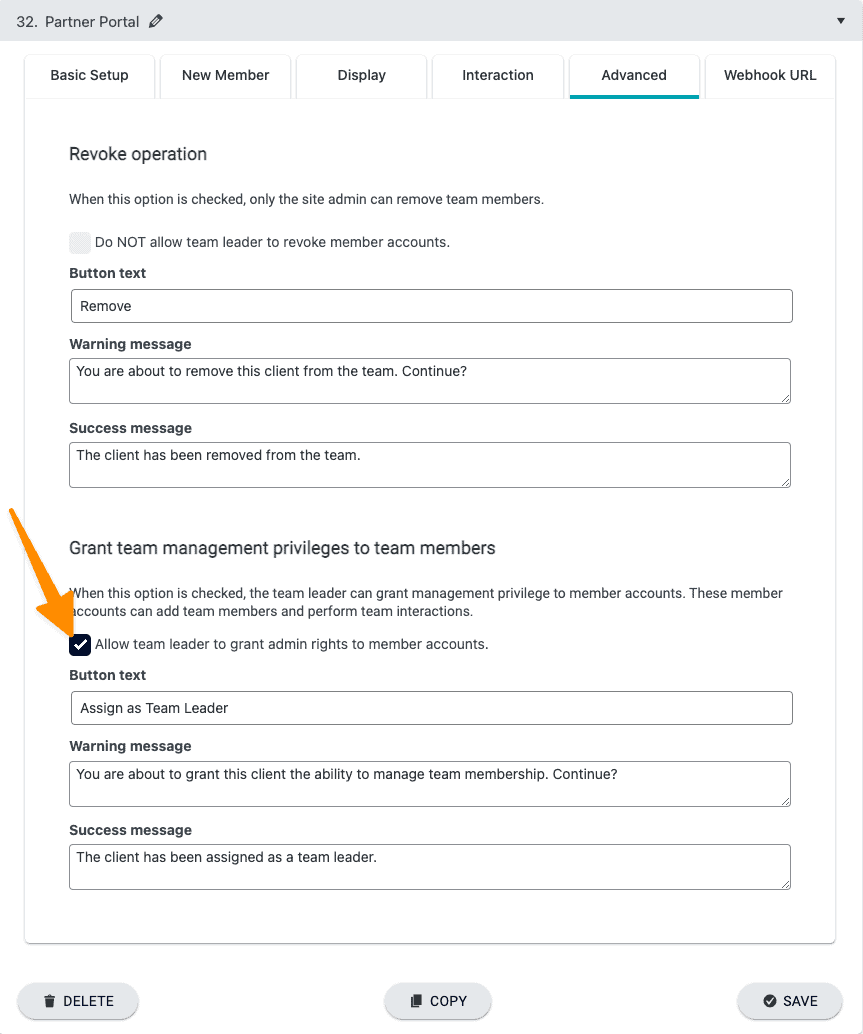
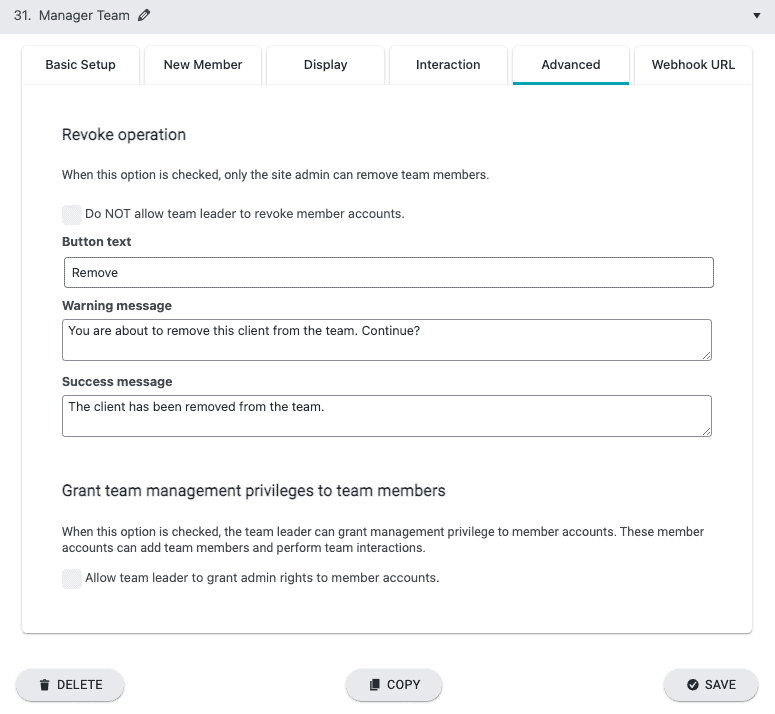
Advanced Tab
This tab allows for the “assign as team leader” and “remove” buttons to be shown on the partner portal page.
Front end view:
Behind the scenes setup:
Important – you need to enable grant team management privileges to team members. This allows a partner to “promote” a manager once added to a team.
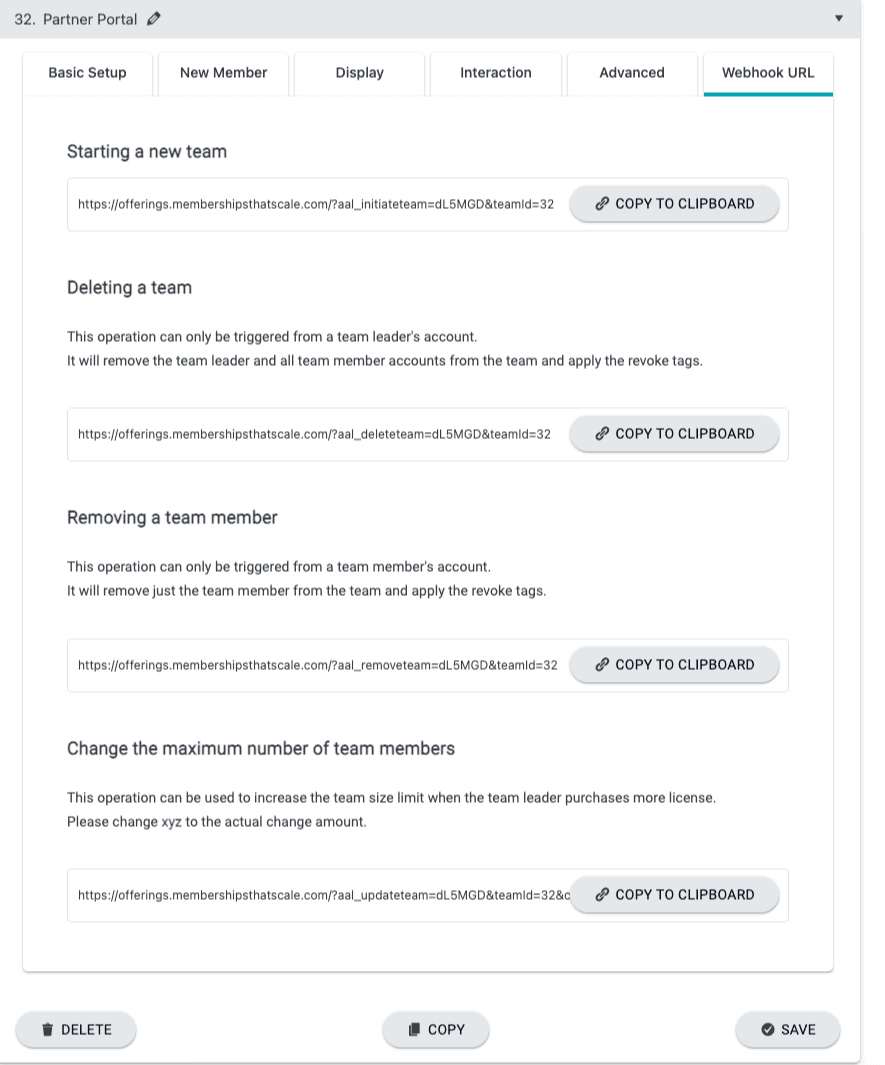
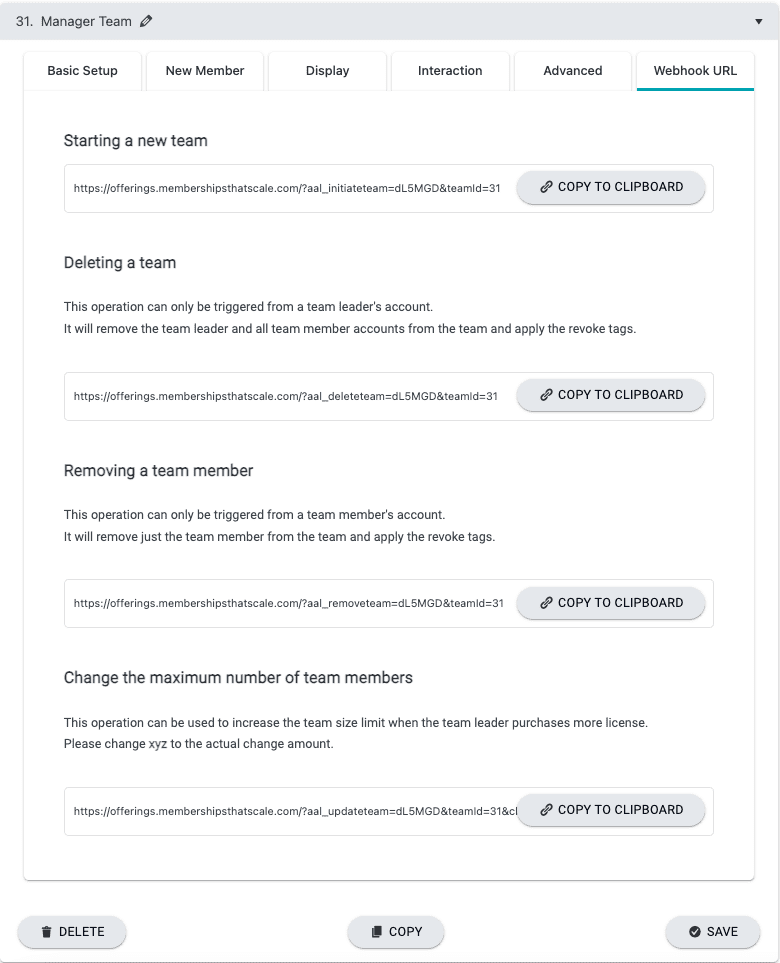
Webhook URL Tab
This tab allows you to trigger team functions via webhook from inside your CRM system as needed. You can also use interactions along with custom operations to trigger items from inside your site without needed to use webhooks if you prefer.
Team Program #2 – Offering
Go to AccessAlly > Offerings > + CREATE > Team Center > Use Template
This consists of three pages for the manager portal. Publish all pages. The first page is the base module where the manager will manage their associates. There’s also a page for associates to self-register and the welcome page associates see after self-registering.
With this setup all managers are added to the portal by a leader. Since managers are not buying access to the programs no forms (order forms or opt-in forms) are needed.
Team Program #2 – Settings
Front end example: These are examples of the items you are building to create your team display.
This is pre-filled from your choices when you created the Manager Team Offering
If you would like the Associates to have access to any programs (like courses) add those in the Welcome Operations section. Add the revoke release operation or the revoke tag for what programs are removed too.
This tab controls what is displayed when new members are added to a team. There’s an optional place to collect information (like role in the company).
Front End View
Behind the scenes setup:
This is where you build items shown in the Manage Team tab. Remember you build these to be what you would like including wording for the buttons shown.
Front End View

Behind The Scenes
This is where you add each item that is shown in the front end view.
Interactions allow for lots of options between the manager and associate. In our example for this article there are no interactions used, but if you would like to explore these in more detail, click here.
This section allows for the manager to remove, add, or grant management privileges to the associates. For this team the members are not being promoted so all settings were left at the default.
If you would like to use an integrated CRM system to perform the options below (instead of doing them from inside your site) webhooks for the available options are listed here.
Article FAQs
Yes you can. This method will not reveal companies to other companies. This is recommended when selling the exact same program to multiple companies.
