If you’re using AccessAlly Managed (as your CRM) and would like to switch to ActiveCampaign, Kit, Keap, Drip or Ontraport – follow the steps outlined in this article.
As always before a key migration such as this, we recommend that you do a thorough review, organizing and pruning of your current CRM assets prior to migration. Because these migrations involve a lot of moving pieces, it can also be helpful to consider a stair-stepped migration where new members are directed into the new CRM flow, while older members remain in the original flow and are transferred over at natural rhythm breaks or in smaller segments.
ARTICLE CONTENT:
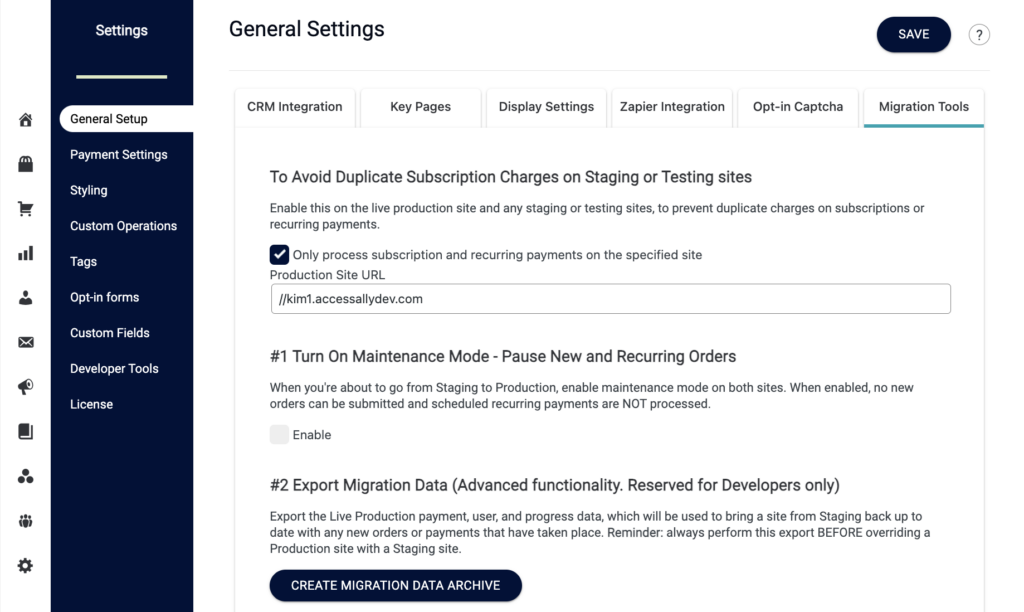
Step 1: Put Your AccessAlly Site in Maintenance Mode
Your site will need to be placed in maintenance mode so clients are not visiting the site while making this switch.
Go to AccessAlly > Settings > General Setup > Migration Tools tab
Follow each step shown in this section.
Step 2: Export All WordPress Users
You can use a plugin like Export and Import All Users and Customers by WebToffee. This will download as a CSV file to your computer.
Step 3: Edit CSV File
You’ll keep the following columns in your file. These will be mapped to custom fields in your CRM system. You can delete the remaining columns. Save this as a CSV file.
- ID
- customer_id
- user_email
- user_registered
- first_name
- last_name
If you have a new CRM system you will need a custom field in your CRM to hold each of these items.

Step 4: Import File to your CRM
Each CRM is different. You’ll want the option in your CRM to import (or add new subscribers) by CSV file. Upload your file, match each item to a custom field in your CRM, and review that the info is now stored in your CRM system.
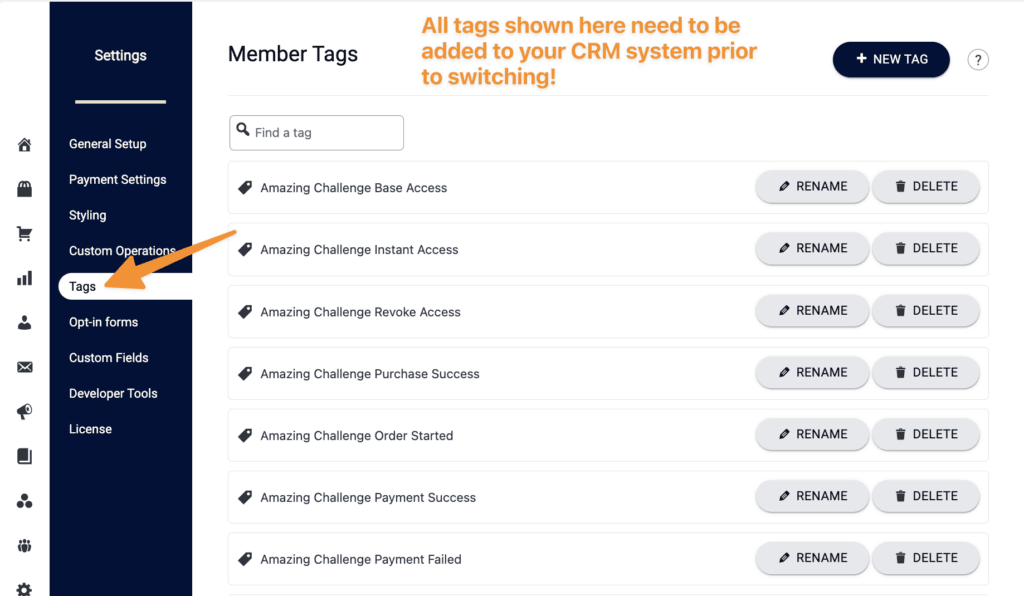
Step 5: Add All Tags to Your CRM
Go to AccessAlly > Settings > Tags tab
Step 6: Get CRM API Keys
When making the switch you will need to add your CRM API keys. Not sure how to find these?
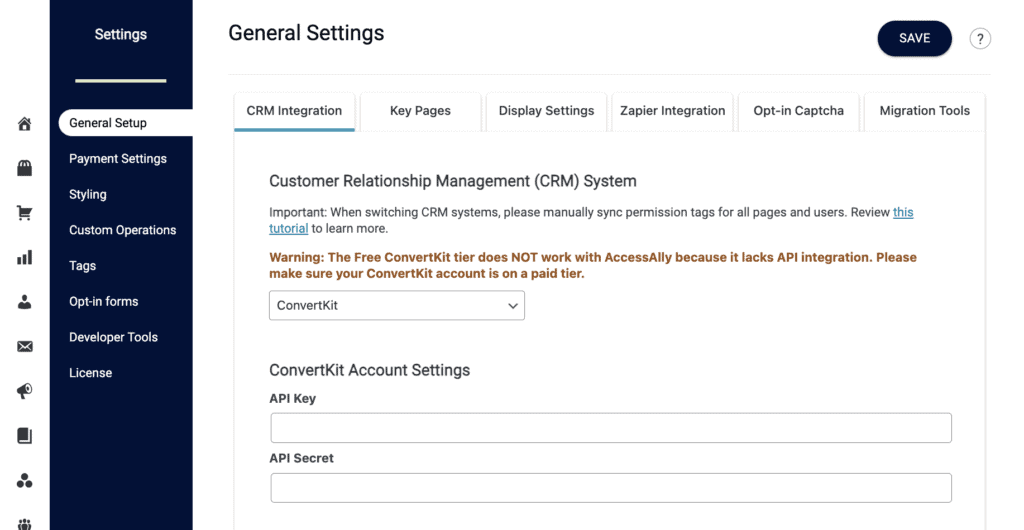
Step 7: Switch to CRM
Navigate to AccessAlly > Settings > CRM Integration tab.
Once here you will see AccessAlly Managed in the dropdown. Select the CRM system you are moving to from the dropdown.
Step 8: Review Additional CRM Setup Steps
Upon hitting “SAVE” you will need to follow the steps based on your CRM system. This ensures all settings are correct for your chosen CRM.
How to integrate AccessAlly with a CRM system
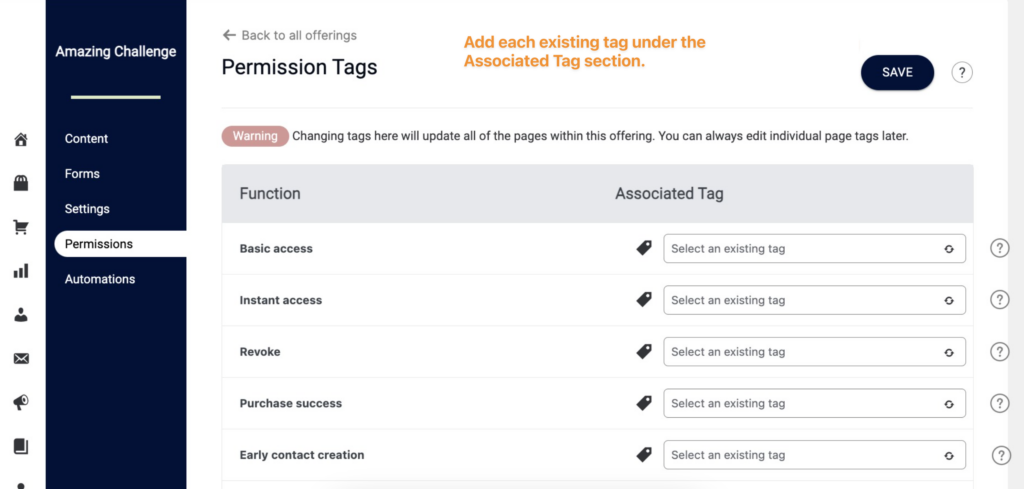
Step 9: Review Existing Tag Based Items
You’ll review all offerings, forms, custom operations, progressally events, and directories to ensure tags are matched to your CRM system.
- Permissions Tab – match each item to the tag in your CRM system (save to apply to pages in your offering)
- Forms Tab – review each order form and/or opt-in form match each tag to your CRM system (save to apply tags to all forms in your offering)
- Protected Content Files – review each file to add tags from your CRM system (save to connect tags to your protected content files)
- Custom Operations – review all custom operations to add tags from your CRM system (save to connect tags to your custom operations)
- ProgressAlly Events – review all ProgressAlly events to apply tags from your CRM system (save to connect tags to your ProgressAlly events)
- Directories – review all Directories to apply tags from your CRM system (save to connect tags to your Directories)
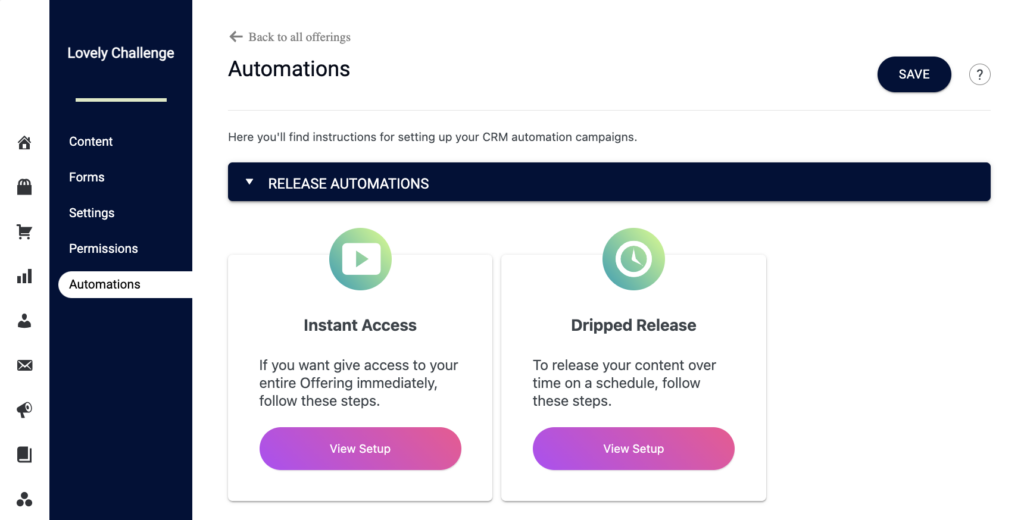
Step 10: Review and Add CRM Automations
Now you’ll review and add any tag-based CRM automations. You can continue using AccessAlly Emails (if you would like) or move to CRM automations.
You’ll find details for setting up CRM automations under:
AccessAlly > Offerings > Select an Offering > Automations tab
Step 11: Use AccessAlly User Migration Wizard Importer Tool
This tool will link existing users in AccessAlly Managed to the corresponding contact in your CRM by matching the email address. Make sure all contacts have been imported to your CRM before performing this step.
AccessAlly User Migration Wizard Importer
Step 12: Review All Subscription Payment Plans
If your site has active subscription payments being processed through Stripe and PayPal, you will need to match these to the new Contact ID number in your CRM.
To do this you’ll use the Order Contact ID updater plugin, click here to download it.
Step 13: Test
Test, test, and then test again.
Migrating is a massive endeavor. There will always be unexpected issues, and the more you test, the less “bumps” you’ll hit when you go live.
Understanding Team Settings After Migration
After migrating to AccessAlly or switching CRMs, you may notice “Team (Legacy)” settings. This section explains what they mean and whether you need to take action.
What is “Team (Legacy)”?
The orange text “Retains all tags and settings from before switch” means these settings preserve your team configuration from before any CRM or platform migrations.
You’ll see Legacy settings if:
- You had team features set up in your previous platform
- You’ve migrated CRMs in the past
- You have existing team leader and member tags in your CRM
Legacy Team vs New Team System
Team (Legacy):
- ✅ Keeps your existing team leader tag and team member tag
- ✅ Preserves team access rules from your previous setup
- ✅ No reconfiguration needed – everything stays the same
- ⚠️ Use this if your team features are working correctly
New Team System:
- ✅ Fresh configuration with current CRM integration
- ✅ Recommended for new team setups after migration
- ✅ Cleaner structure without legacy dependencies
- ⚠️ Use this if starting team features for the first time
Do You Need to Update Team Settings?
No action needed if:
- Your team features are working correctly
- Members can access team content properly
- You’re happy with current team structure
Consider updating if:
- You’re switching to a new CRM and want fresh team tags
- You want to simplify or reorganize team configurations
- You’re setting up team features for the first time post-migration
Best Practices for Working with Legacy Settings
- Document before changing – Screenshot or note your current settings before making modifications
- Test with one team first – If you do make changes, verify with a small group before rolling out widely
- Keep backups – Export team member lists and tag configurations for reference
- Contact support if unsure – We can help you understand which settings to keep vs update
💡 Pro Tip: Legacy settings are preserved to protect your existing setup. They’re a feature, not a problem – only change them if you have a specific reason to do so.
Understanding Team Operations and CRM Tags
Legacy CRM Tag Migration
When migrating from another platform to AccessAlly, you may see references to “existing tags from your prior CRM setup” when configuring team features. Here’s what you need to know.
Team Leader vs Team Member Tags
Team Leader Tags are applied to the person who manages or owns the team account. These tags typically:
- Grant access to team management features
- Allow adding/removing team members
- Provide billing and administrative capabilities
Team Member Tags are applied to individual users within a team. These tags:
- Grant access to team content and courses
- Define what content each member can access
- Link members to their team leader
Release vs Revoke Operations
When setting up team-based course access, you’ll configure when tags are added (released) or removed (revoked):
Release Operation – When to add a tag:
- When a team leader purchases or is granted access
- When a team member joins the team
- When a new course or module becomes available
Revoke Operation – When to remove a tag:
- When a team leader’s subscription ends or is cancelled
- When a team member is removed from the team
- When access to specific content expires
Migrating Your Existing Tag Structure
- Document your current tags – List all team-related tags from your previous system
- Recreate tags exactly – Tag names must match precisely (case-sensitive)
- Map team operations – Identify which tags should be released/revoked for each team event
- Test with one team – Verify the setup works correctly before migrating all teams
💡 Pro Tip: Keep tag names simple and descriptive (e.g., “Premium-Team-Leader”, “Premium-Team-Member”) to avoid confusion during configuration.
Understanding “Display Stays the Same” in Team Migration
When migrating team features or switching CRMs, you may see a message stating “Everything in Display stays the same as your current setup”. This section explains what this means and whether you need to take action.
What Does “Display Stays the Same” Mean?
This message indicates that AccessAlly will preserve your existing team display customization settings during the migration process. Display settings control how team member information appears in your member area, including:
- Team member name formatting
- Display of team leader information
- Customization of team member listings
- Visibility settings for team-related content
You’ll see this message when:
- Setting up Team (Legacy) mode after migrating from another platform
- Switching from one CRM to another while keeping AccessAlly
- Configuring team member display customization options
Do You Need to Change Display Settings?
No action needed if:
- Your current team display settings are working correctly
- Team members see the appropriate information in their member area
- You’re satisfied with how team member names and details appear
- You haven’t changed your branding or display preferences
Consider updating display settings if:
- You’ve rebranded and want to update how team information displays
- You want to show or hide different team member details
- You’re customizing the member experience after migration
- You notice display issues with team member information
💡 Pro Tip: The “Display stays the same” message is reassurance that your existing settings are preserved during migration. If your team display is already working well, you don’t need to reconfigure anything – AccessAlly has already carried over your settings automatically.
