ARTICLE CONTENT:
How Your Videos are Protected
Amazon S3 has several settings to protect your media, and if you follow the directions below then ProgressAlly will create a special “bucket” in your Amazon account that will protect your videos from being downloaded.
The bucket will contain the word “progressally” followed by unique randomized characters, like this:

If you only upload videos and content to your ProgressAlly created bucket, your videos:
- Can only be watched on your AccessAlly site
- Cannot be downloaded
Even though the bucket is set to “Public”, during the setup process below there is a script that prevents people from accessing the content outside of AccessAlly’s Media Player (other than you as the administrator).
What if you uploaded your content to another bucket?
If you have an existing bucket of content on Amazon S3, then you’ll want to set the videos to be “Read & Copy” for them to be available to the ProgressAlly Media Player.
However, people will be able to access these videos outside of your membership site if they get the link.
A better approach would be to move these files into your newly created ProgressAlly media bucket, which will protect your videos from being shared or downloaded.
Step 1: Enable Amazon S3 Integration
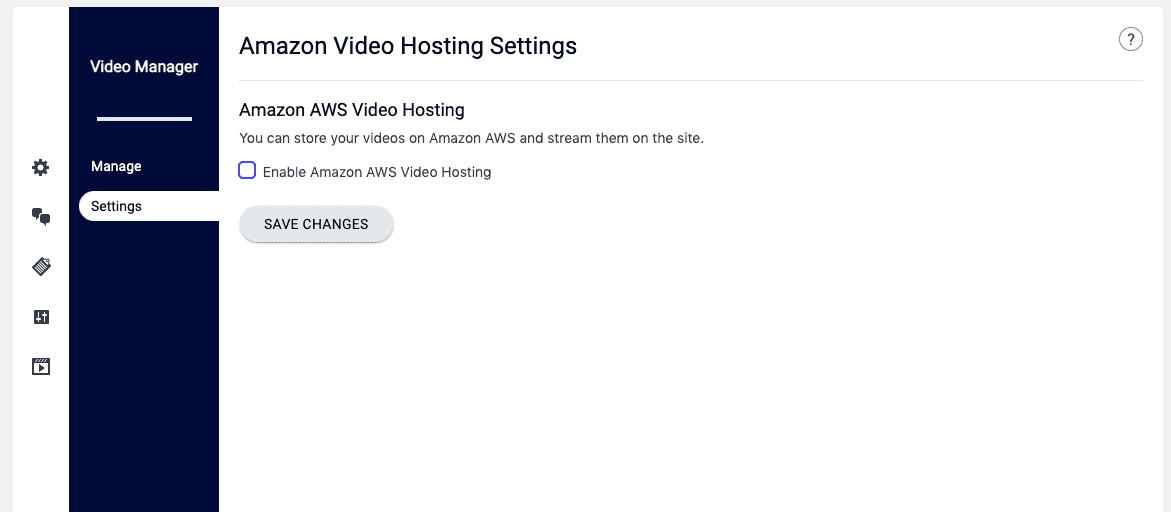
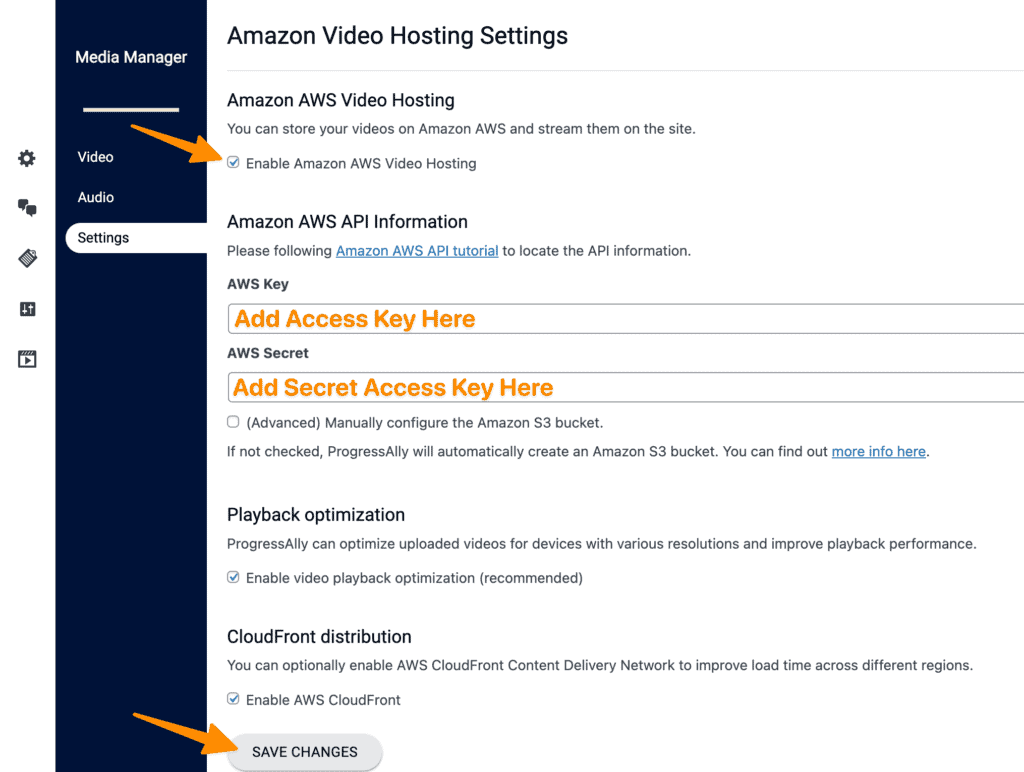
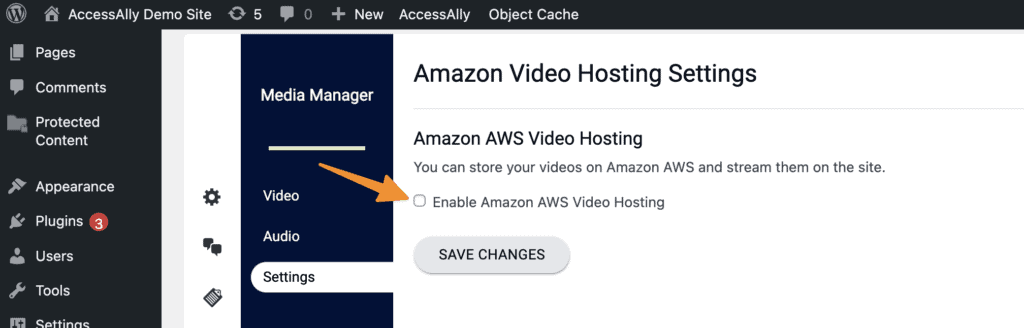
Inside your AccessAlly site, go to: ProgressAlly → Videos → Settings.
Then, check the box to enable Amazon S3 integration.
Next, you’ll need to log into your Amazon S3 account to retrieve the API integration information:
Step 2: Integrate with Amazon S3 (Two Options)
There are 2 options for setting AccessAlly Pro as a user:
- (Simple) Use the root user: this involves the least amount of work, and it is the preferred method if security is not a big concern.
- (Complex) Create a dedicated user: this is more secure, as the user will only have limited permission. It is also the ideal solution if both of the root user security keys are already in use. This is Amazon’s recommended flow!
Option 1: Root User Credentials
Here are the steps to get the root credential:
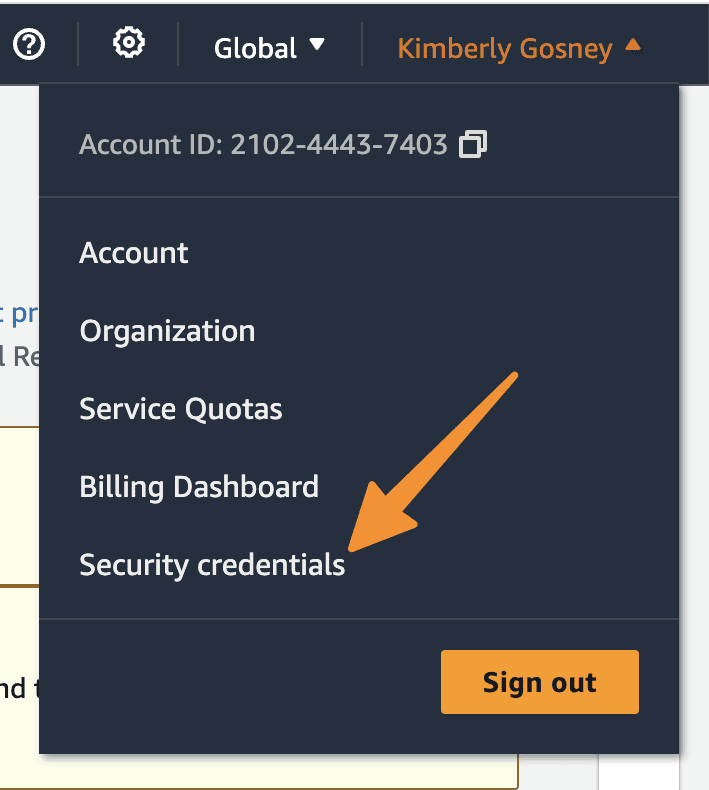
1. Login to AWS. Go to Account → My Security Credentials
2. Go to the Access Key section and click on Create New Access Key. You are limited to two of these for your account!

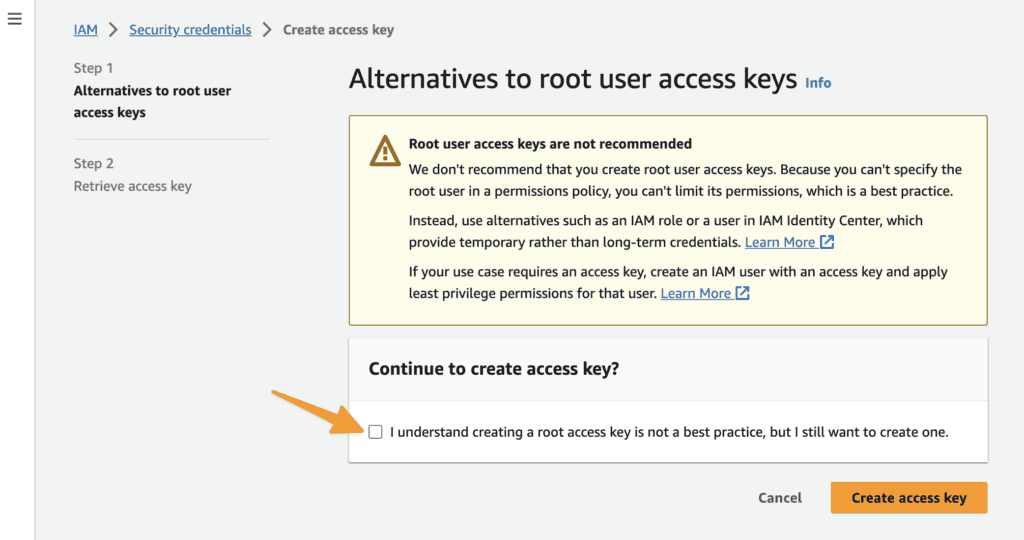
3. A box will appear noting this is not recommended. If you would like to proceed you can mark the box and continue, or stop and move to Step 2: Creating an IAM User which is Amazon’s preferred method.
4. Your access keys are created. Keep this window open so you can add them to ProgressAlly in the next step!
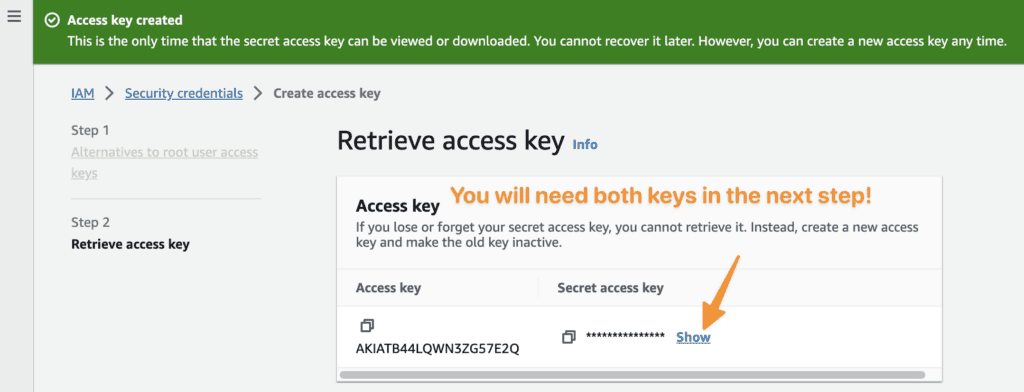
4. Enter the Access Key and Secret Access Key in ProgressAlly → Media → Settings.
Option 2: Create IAM user
Alternatively, you can create a dedicated AWS user for ProgressAlly. Here are the steps:
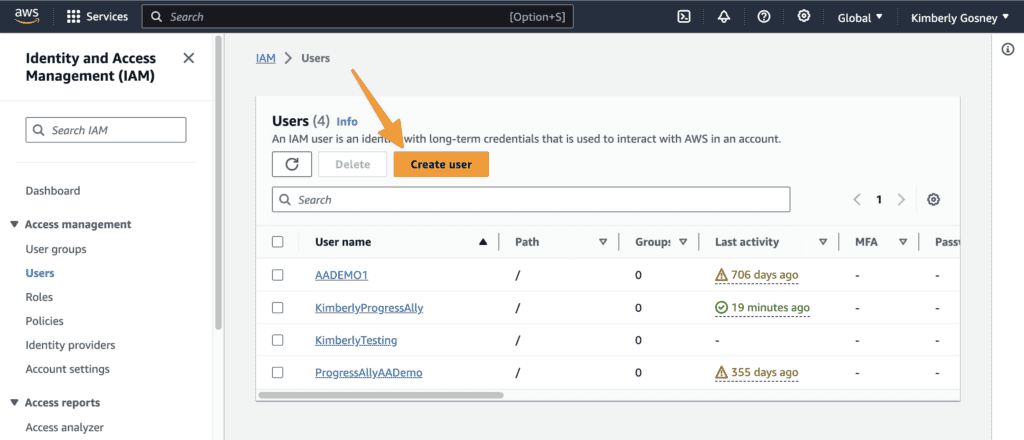
1. Go to https://console.aws.amazon.com/iam/home#/users, log in, and create user.
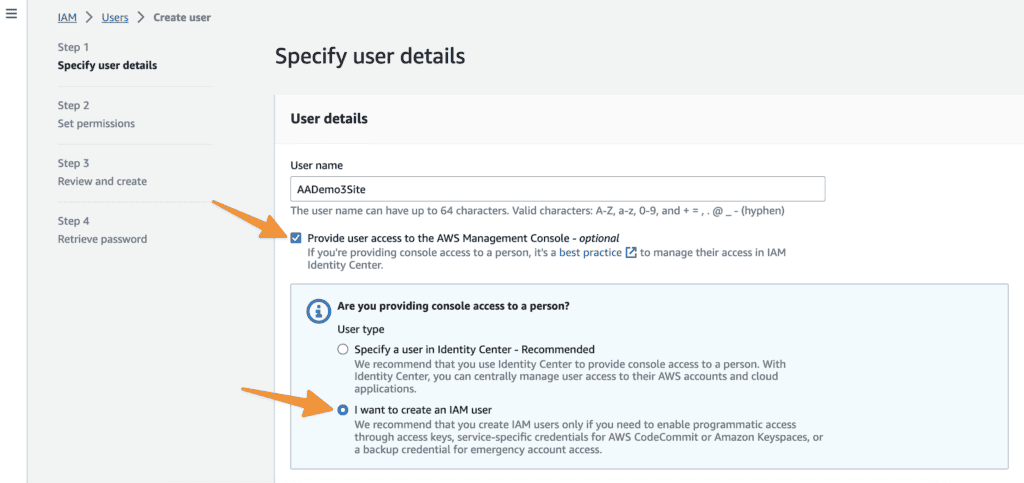
2. Add a User name, mark both items as shown in image below.
3. Select “Attach policies directly” and then click “Create policy”
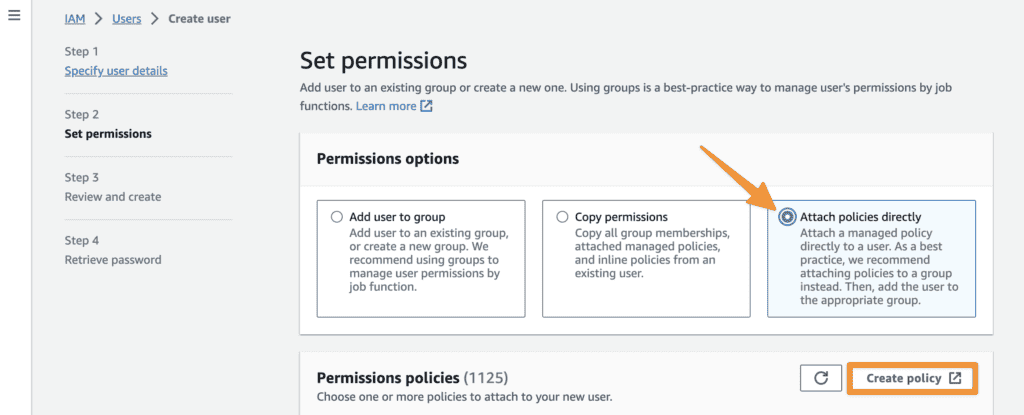
4. Click JSON and copy the code below this image into the box.

{

"Version": "2012-10-17",

"Statement": [

{

"Effect": "Allow",

"Action": [

"iam:GetRole",

"iam:CreateRole",

"iam:AttachRolePolicy"

],

"Resource": "*"

},

{

"Effect": "Allow",

"Action": "s3:*",

"Resource": "*"

},

{

"Effect": "Allow",

"Action": [

"mediaconvert:*"

],

"Resource": "*"

},

{

"Effect": "Allow",

"Action": [

"iam:PassRole"

],

"Resource": "*",

"Condition": {

"StringLike": {

"iam:PassedToService": [

"mediaconvert.amazonaws.com"

]

}

}

},

{

"Action": [

"acm:ListCertificates",

"cloudfront:*",

"iam:ListServerCertificates",

"waf:ListWebACLs",

"waf:GetWebACL"

],

"Effect": "Allow",

"Resource": "*"

}

]

}
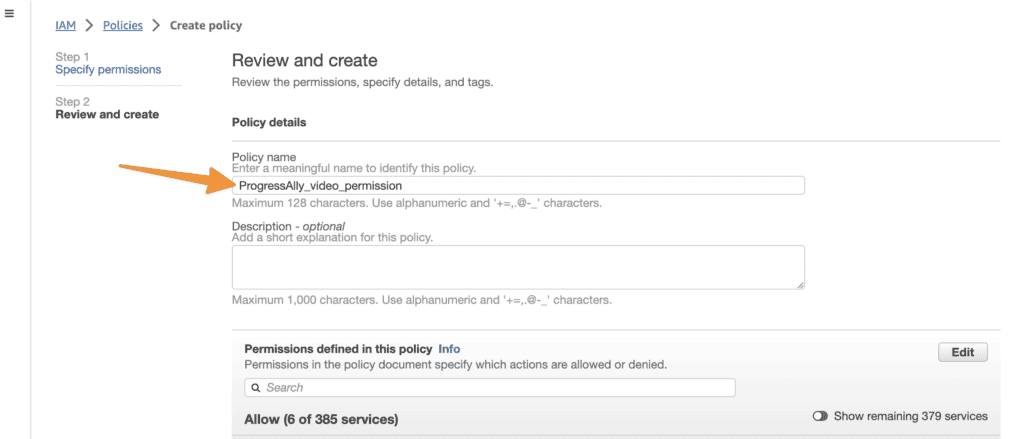
5. Under Policy details enter ProgressAlly_video_permission
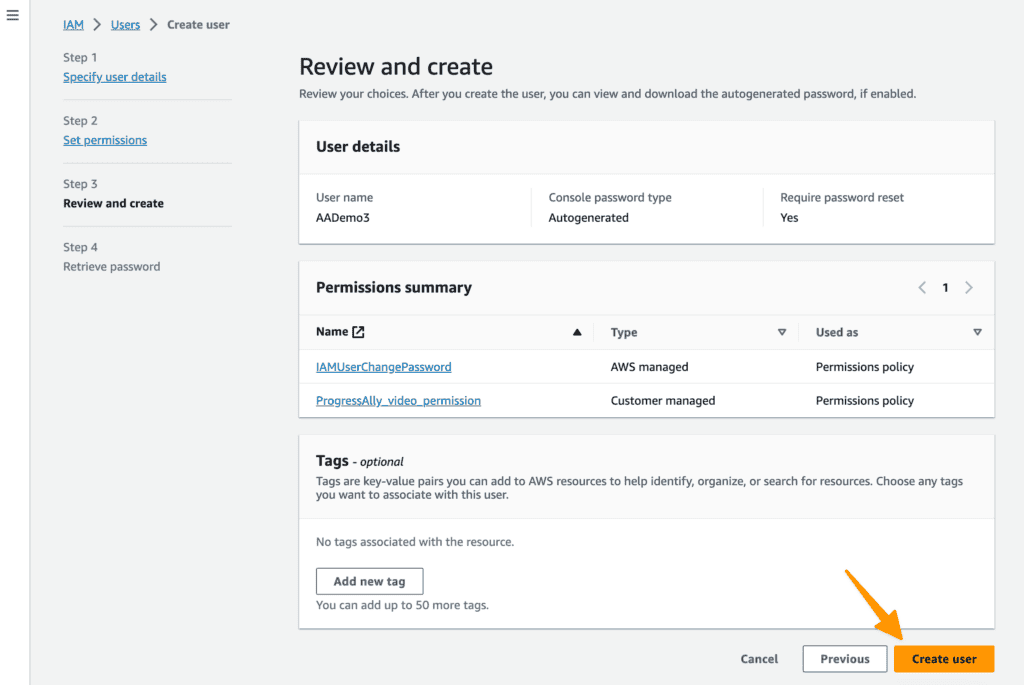
6. Click Create User.
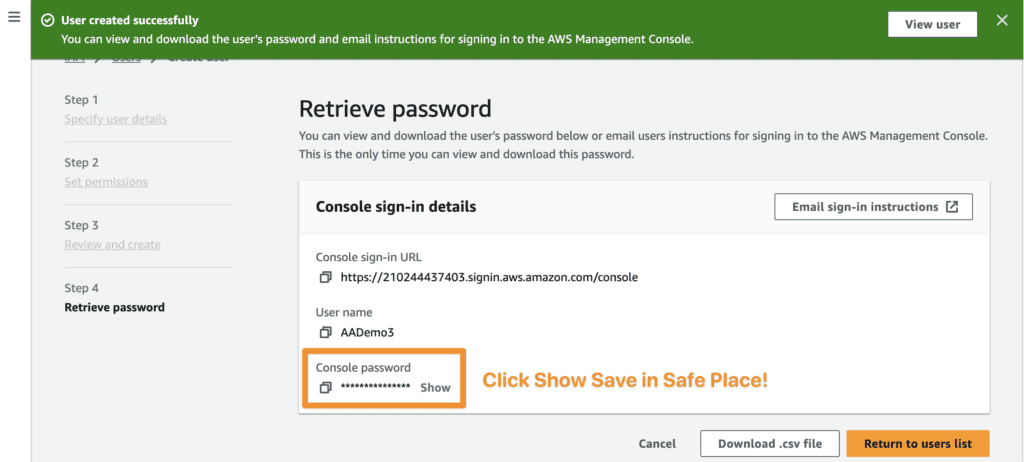
7. Retrieve your password.
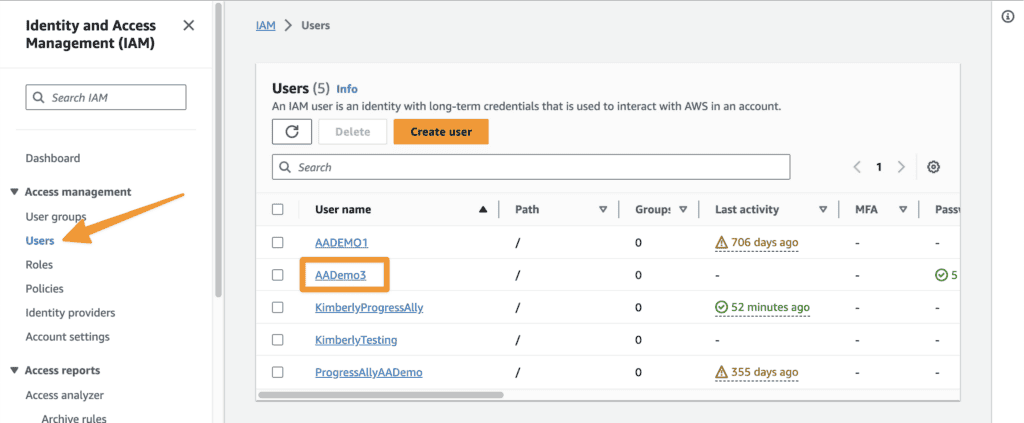
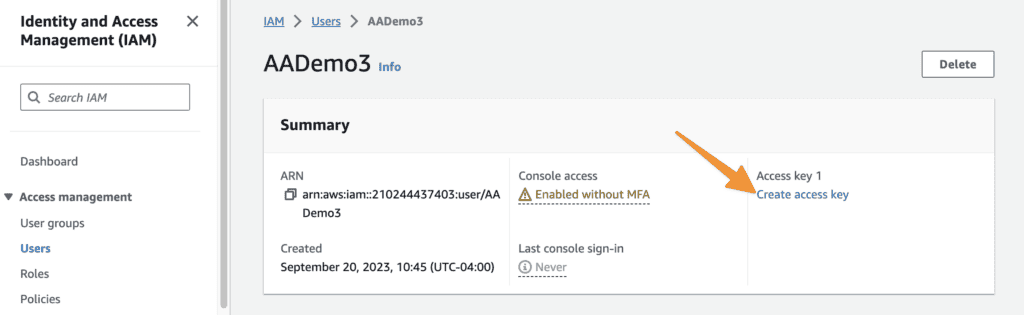
8. In the Users tab click the link for your newly created user.
9. Click “create access key”
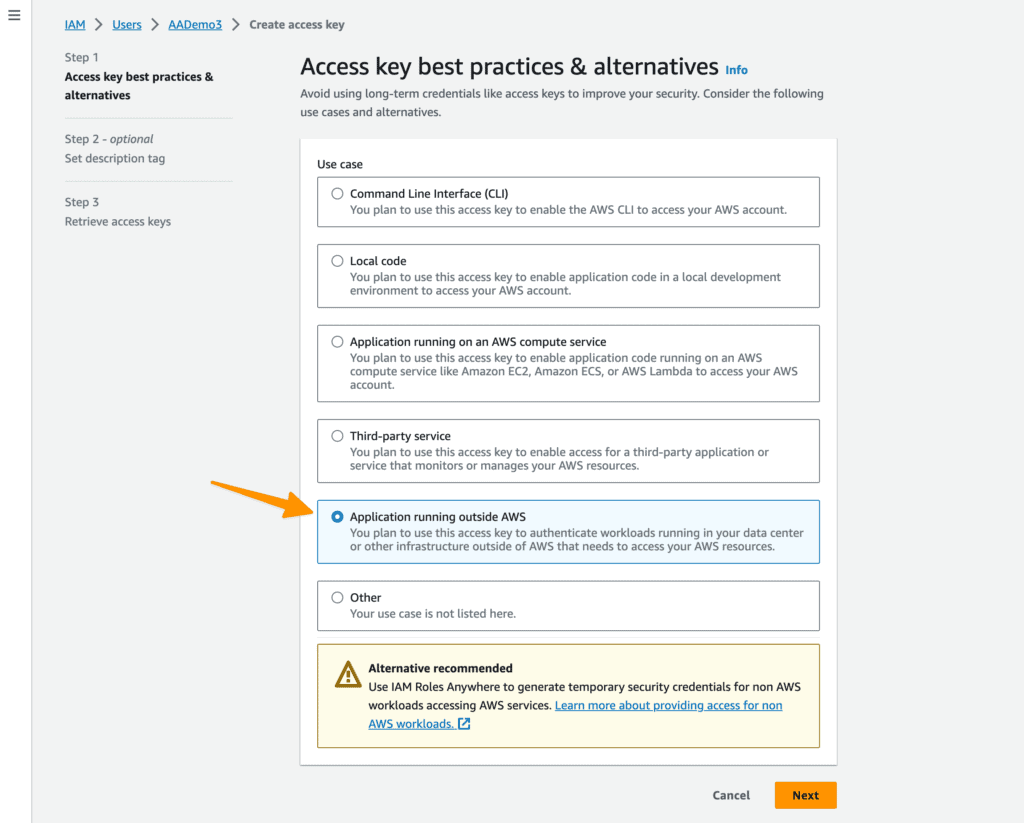
10. Select “Application running outside AWS”
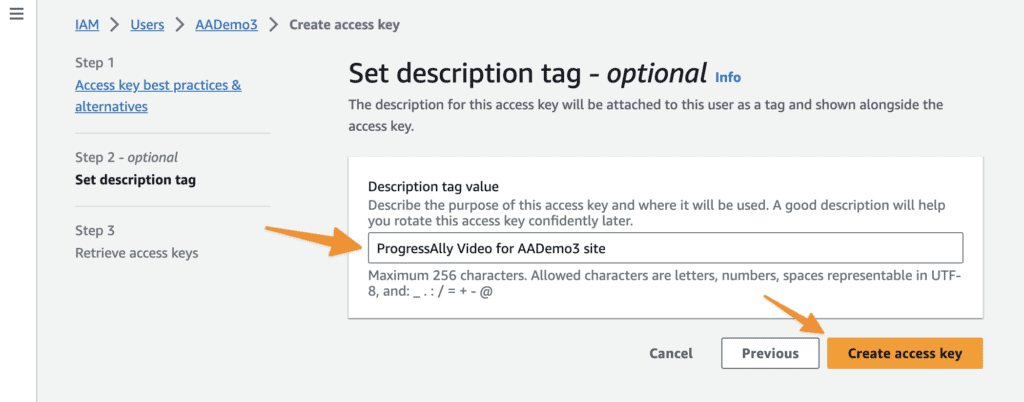
11. Set a description tag to make it easy to find this in the future! And… create access key.
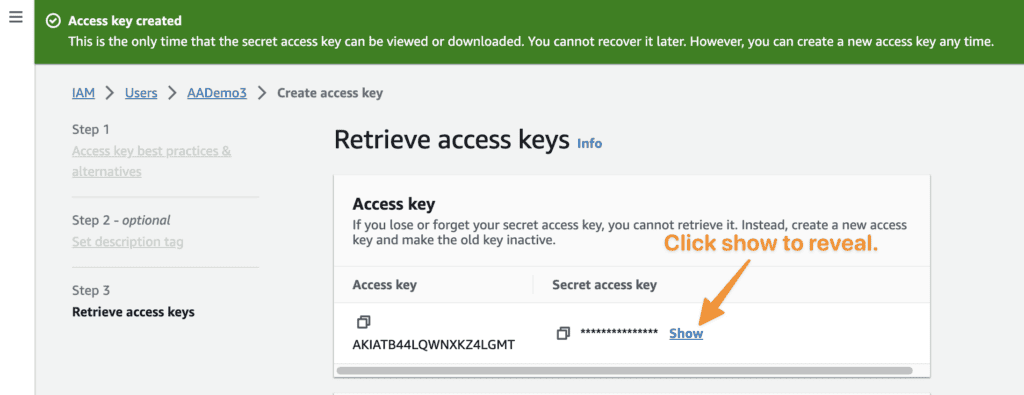
12. Click “Show” to reveal your Secret access key. Keep this tab open in your browser!
13. Go to your AccessAlly site, click on ProgressAlly > Media > Settings once here select the box by “Enable Amazon AWS Video Hosting.”
14. Add both your Access Key and Secret Access Key from Amazon S3. Review the additional recommendations (those are marked with a check below.)
Step 3: Upload Your Videos (Two Options)
Option 1: Upload Video in ProgressAlly
Once the integration information is entered and saved, you can upload videos directly to Amazon S3 by going to: ProgressAlly > Videos > Manage.
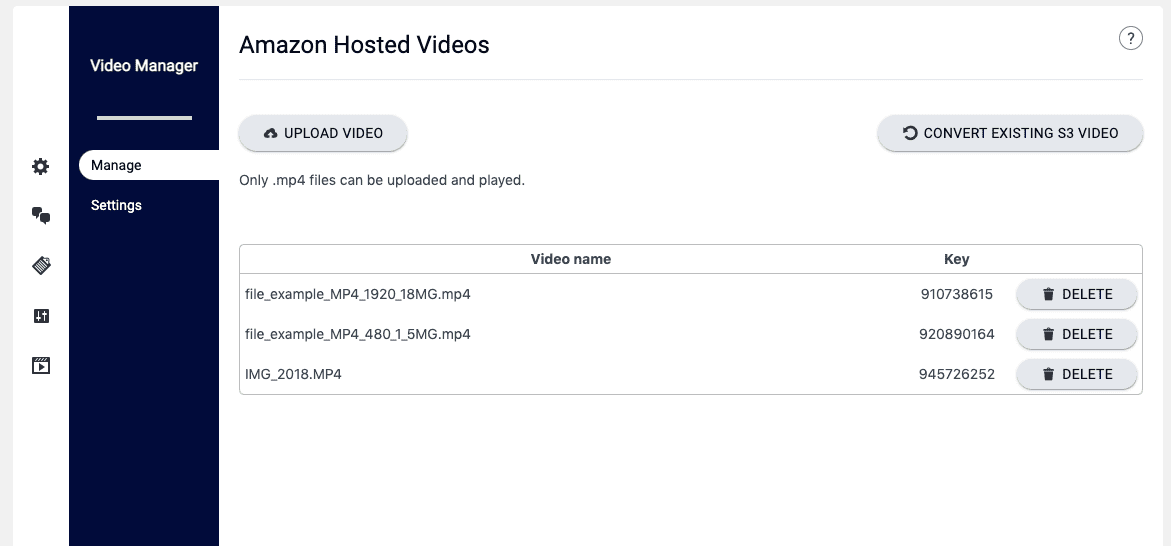
When you upload your videos through this interface, your videos:
- Can only be watched on your AccessAlly site
- Cannot be downloaded
- Are automatically converted into streaming videos
Currently, you can only upload MP4 videos for conversion to streaming through the Media Player.
Option 2. Upload Video to Amazon then Convert
For larger video files, an error message may appear. This happens if the file is larger than supported by your site hosting server.
A video can be uploaded directly to your Amazon bucket & converted to work with ProgressAlly.
The article, linked below, is from Amazon on how to upload a video (called an Object).
https://docs.aws.amazon.com/AmazonS3/latest/userguide/upload-objects.html
After uploading to Amazon, navigate to ProgressAlly → Media → Video tab → Click the button “Convert Existing S3 Video“

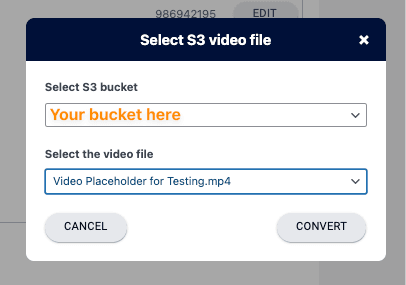
In the popup window, select your Amazon bucket, and video. Click the “Convert” button.
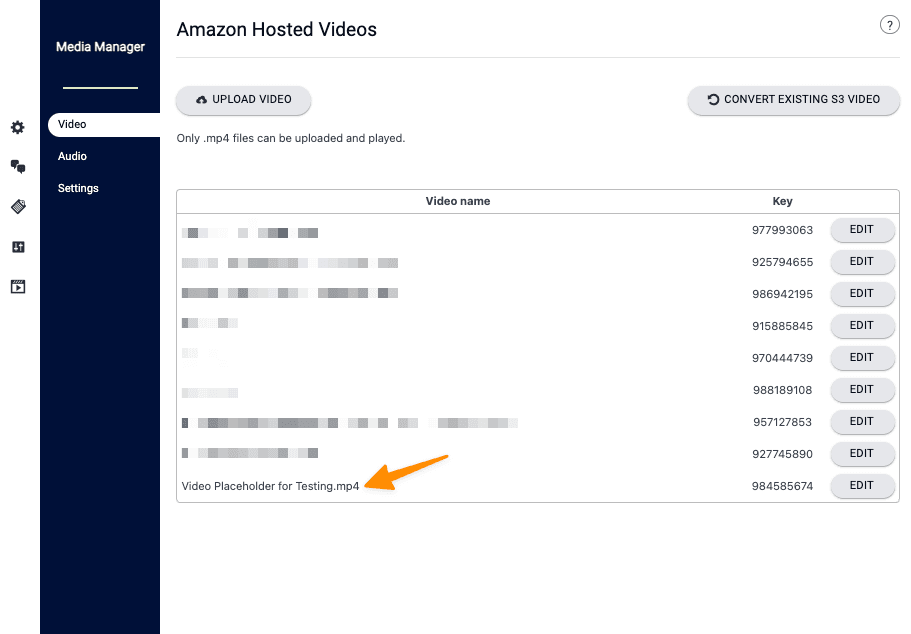
Your converted video will appear in the Amazon Hosted Videos list, in alphabetical order.
Step 4. Add Amazon Videos to Pages
Finally, when you’re ready to add your Amazon AWS videos to a WordPress page, go to the Media tab in the page’s ProgressAlly settings.
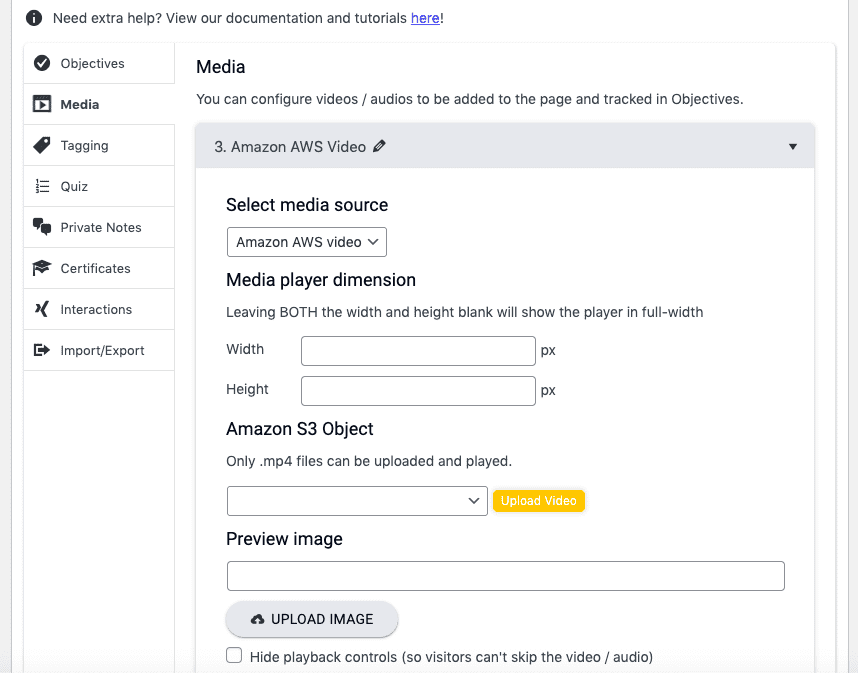
Here, change the media source to Amazon AWS Video, and you can either select a video that’s already been uploaded from the dropdown, or click on the Upload Video button to upload a new video.
If you’d like, you can also upload a custom image for your video that incentivizes people to click in and watch.
Uploading Audio files for the Media Player
If you plan to use the ProgressAlly Media player to play MP3 audio files, then you might be wondering how to best upload and manage these files.
The AccessAlly Media uploader is specifically designed to convert MP4 video files into streaming video content, so it does not accept MP3 files.
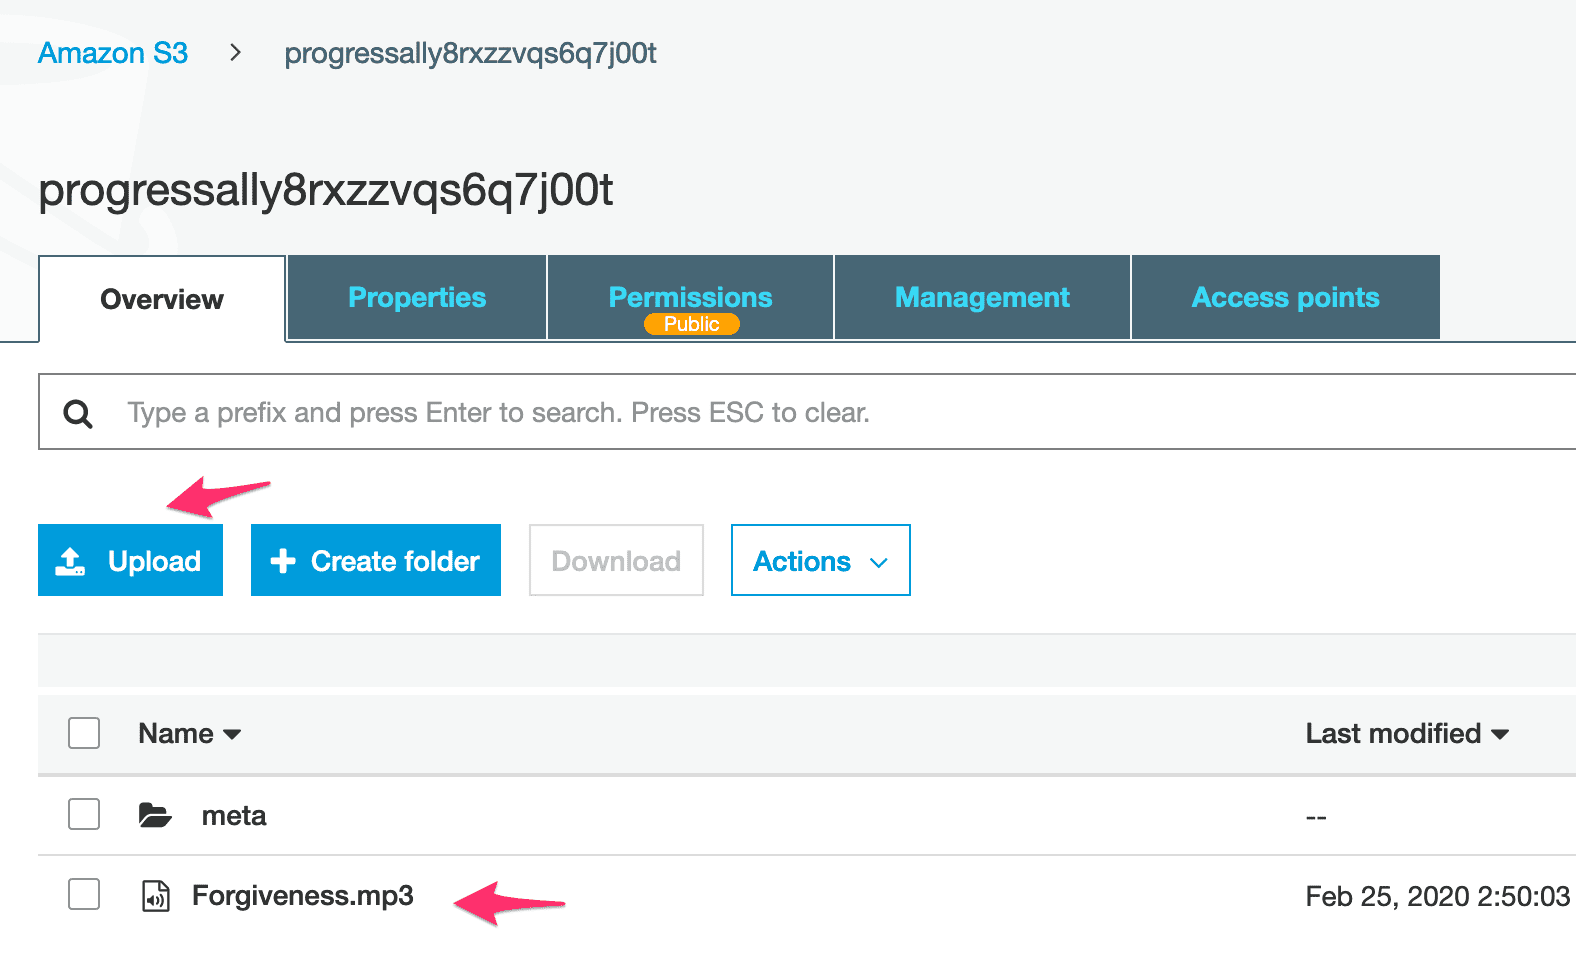
However, you can upload MP3 files directly to the new Amazon S3 bucket that AccessAlly creates (by logging into your Amazon S3 account), and that will protect these files through your site.

Upload the files you want to play through AccessAlly here.
Grab the URL of your Mp3 file:
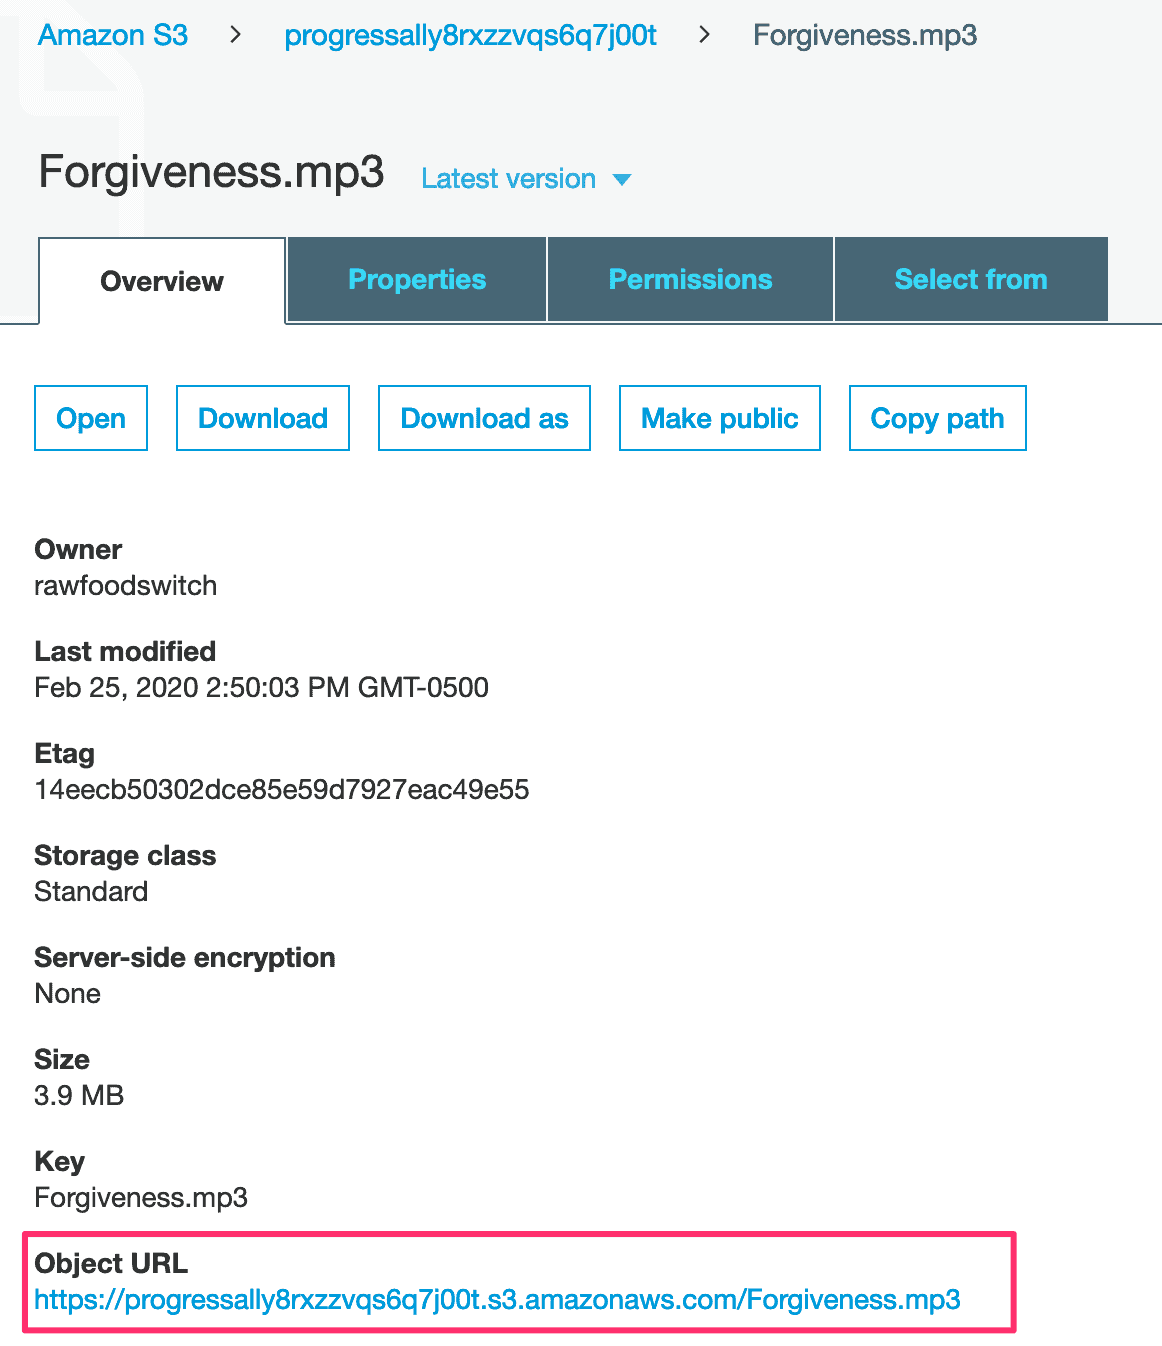
Then simply copy and paste the Amazon S3 URL into your Media player.
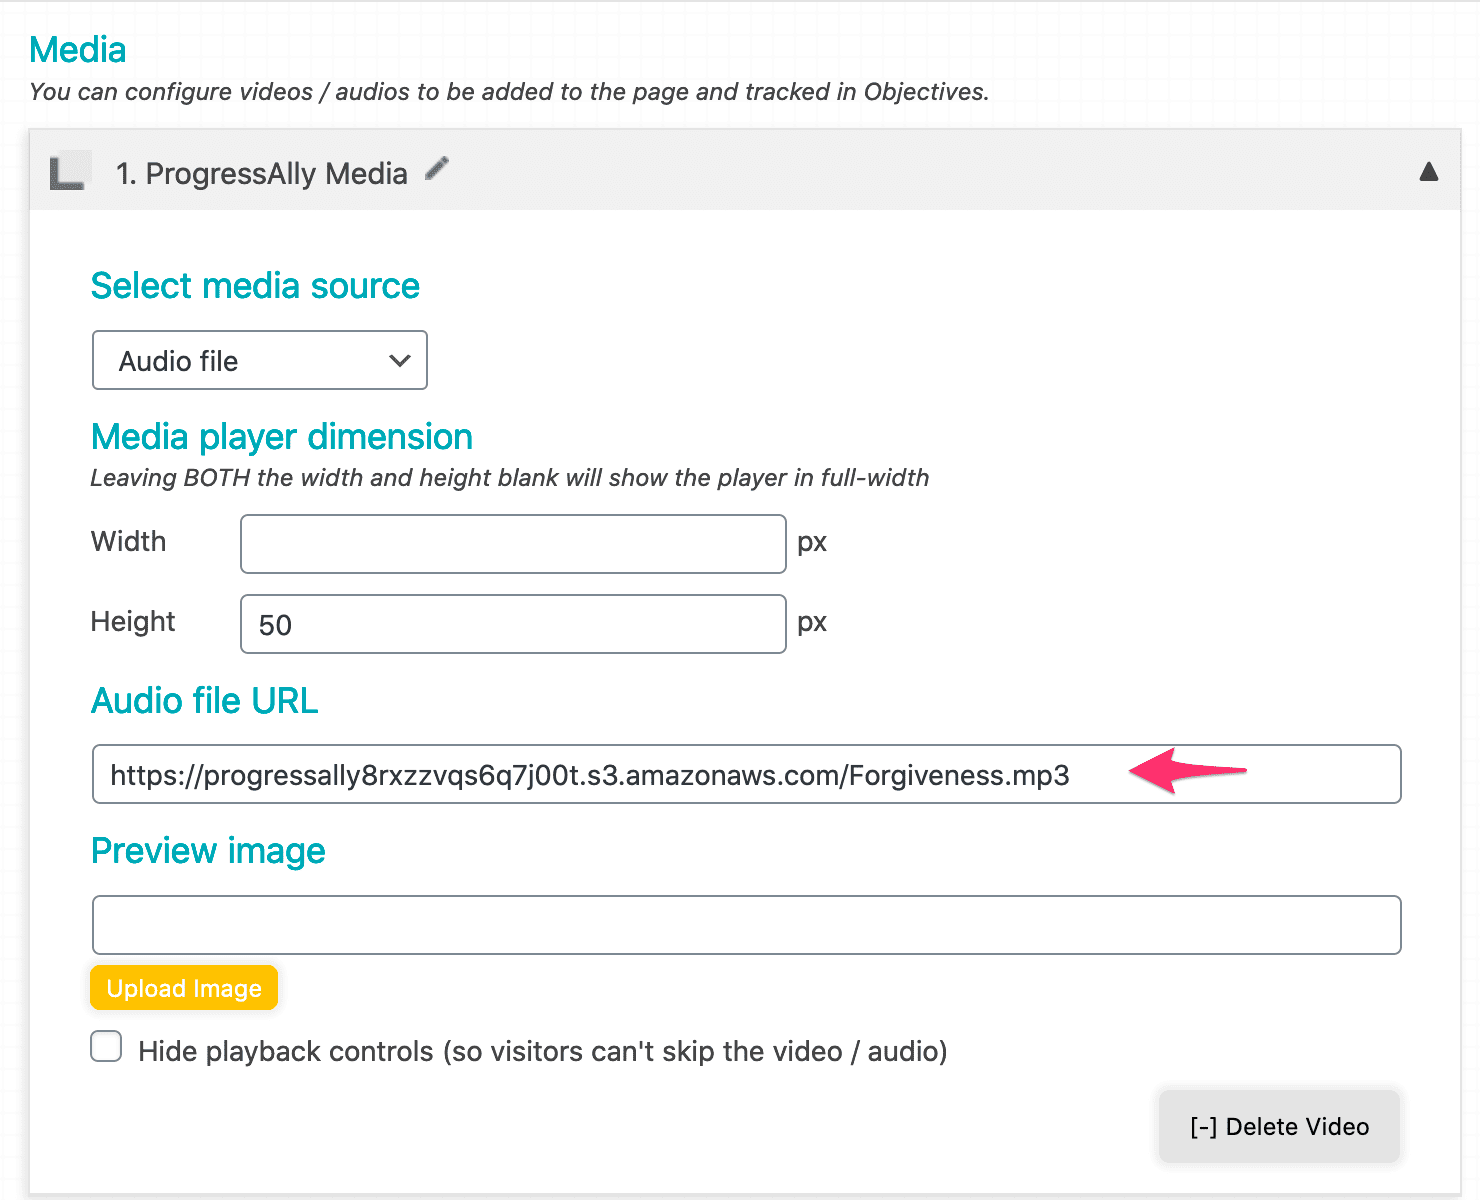
Even though the folder in your Amazon S3 account says it is “public”, the only place that this MP3 will work is through your AccessAlly site – so even if someone grabs the URL it won’t be shareable.
