In this article you’ll learn how to move existing course and membership content into AccessAlly Offerings. This article is intended for AccessAlly users with sites that were created before the offering feature was released.
Contact us if you’re not sure if following the steps in this article is right for you.
ARTICLE CONTENT:
Watch the Video on Moving to AccessAlly Offerings
This article is shown from start to finish inside the video below. Our workshops give step-by-step details. If you’re an experienced designer or developer you may prefer to skip the video and follow the written article steps.
Offering Checklist
Complete the Offering Checklist to pull together everything in your current course or membership. You can use this to review the existing content (pages and/or posts.)
Review Existing AccessAlly Offerings
Go to AccessAlly > Offerings
Before creating a new offering review all existing offerings. In some cases an offering may already be here for your course or membership (even if all pages are not currently in the offering!)
Your next step:
- If there is an offering here skip to Tab 1: Content Tab
- If there is no offering here create a new “start from scratch” offering by clicking “+ ADD” and choose “Yes, I’m ready to add my content when prompted”
Tab 1: Content Tab
While working in the content tab do not save your changes before moving to the next tab. You’ll work through content, forms, settings, and permissions before hitting “SAVE”.
Section 1: Public Pages
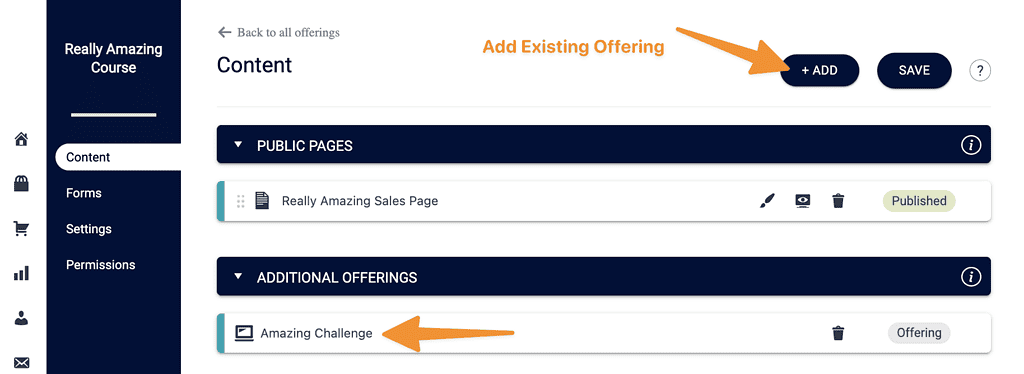
This section holds pages (like sales pages) on your AccessAlly site that go with your offering, but are not locked down by tags.
You can add your existing public pages here.

Section 2: Additional Offerings
This section holds other offerings in AccessAlly that you would like to give access to when someone purchases this offering. A great example is a bonus challenge to go with a course purchase.
Add any additional offerings here.
Section 3: Content Pages
This is where your existing pages and posts will be added to the newly created offering.
Base Welcome Page
This is the first page shown in the base module. It can not be deleted or removed and must be used! If your existing course had a welcome page you can recreate that page here, then change the permalink settings to keep the page name if desired.
Base Module Pages
Once you have added content to the base welcome page you can click “+ ADD” to move any additional base pages into this module. This option will allow existing pages to be added to appear after the base welcome page.
All pages added to the Base Module are delivered with the Base Access tag. This module is unable to hide dripped content!

Module Pages
Click “+ ADD” at the top right to add a new module. Give the module a name like “Week 1” Set the number of pages to add to the module to “0”.
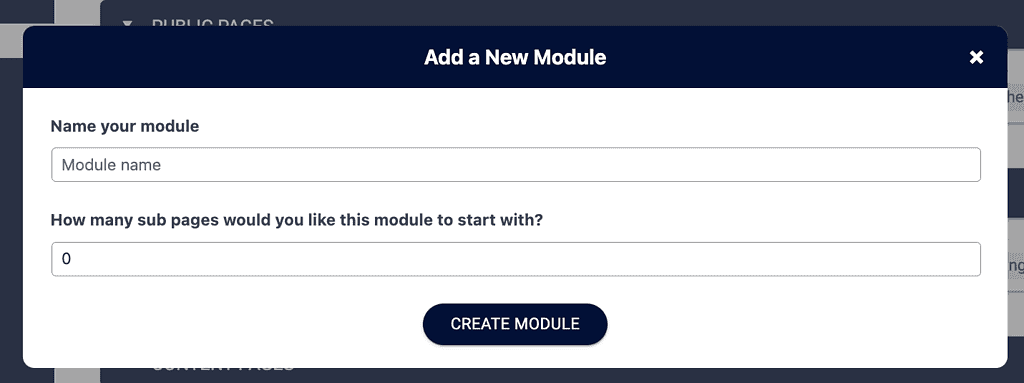
In the dropdown that was created click “+ ADD” to add all existing pages or posts for this module. Pages added here will be delivered as dripped content unlocked with the same tag.
Example: Really Amazing Course Week 1 Has Access

Repeat for each module of your course as outlined in your Offering Checklist.
Tab 2: Forms Tab
*While working in the forms tab do not save your changes before moving to the next tab. You’ll work through content, forms, settings, and permissions before hitting “SAVE”.
This is where you’ll add your existing order forms, toggles, and coupon codes to the offering.
Section 1: Free Access Forms
We have an open feature request to bring existing free opt-in forms into an AccessAlly Offering.
Section 2: Paid Access Forms
Click “+ ADD” and select Add Existing Order Form to pull your order forms into the offering.
Section 3: Toggles
Click “+ ADD” and select Add Existing Toggle to pull your order toggles into the offering.
Section 4: Coupons & Discounts
Click “+ ADD” and select Add Existing Promo to pull your coupons and discounts into the offering.
Section 5: Enrollment Limits
If you would like to add a new enrollment limit click “+ ADD”
Section 6: Waitlist
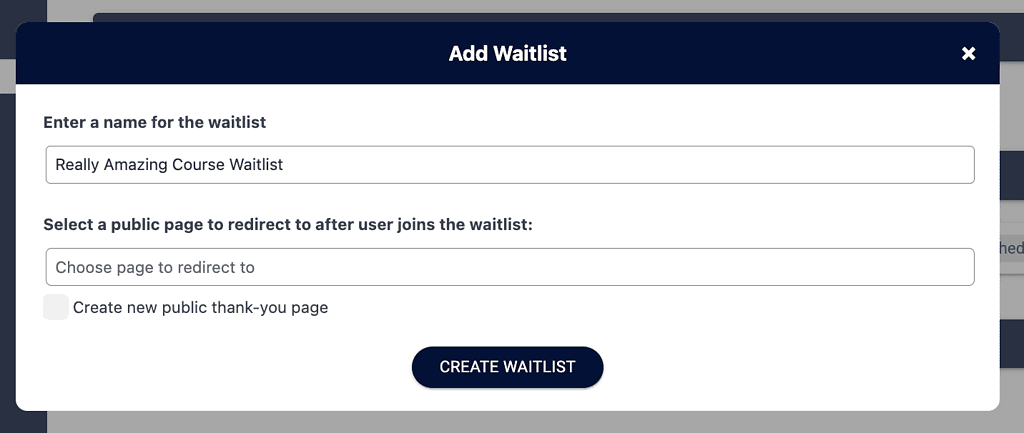
You can click “+ ADD” and select Waitlist to add waitlist to this offering.
Tab 3: Settings Tab
*While working in the settings tab do not save your changes before moving to the next tab. You’ll work through content, forms, settings, and permissions before hitting “SAVE”.
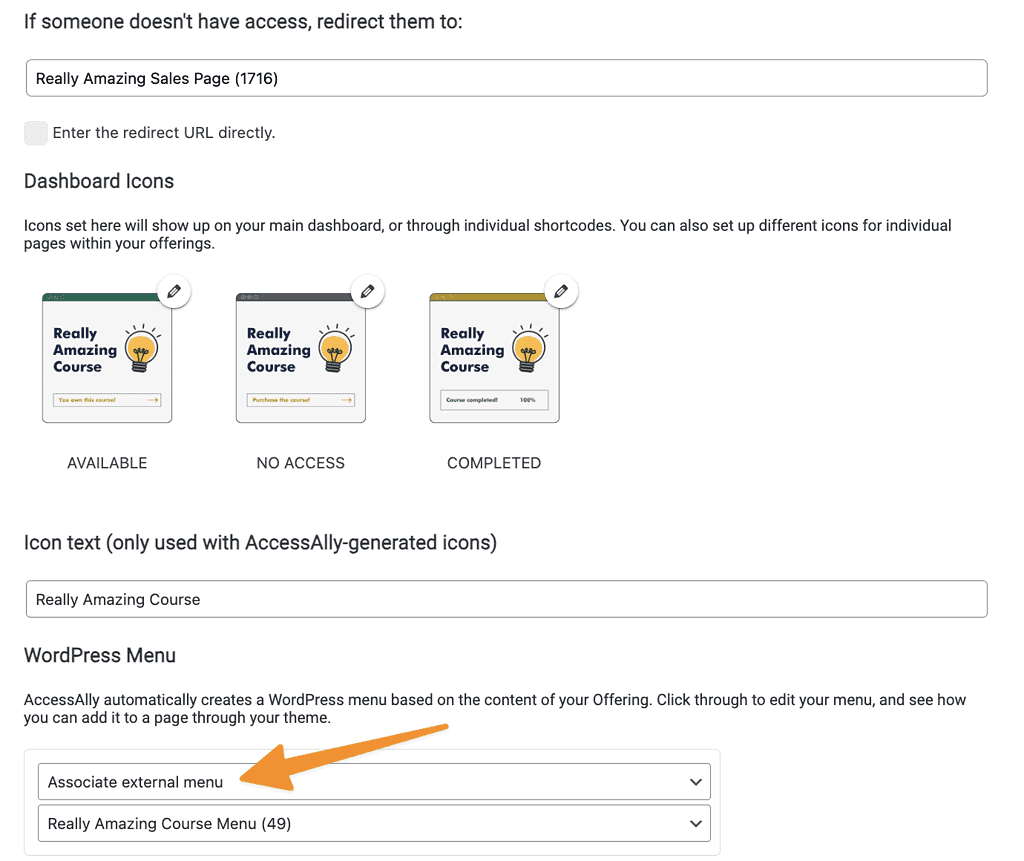
Review the settings tab. Add a redirect to your public sales page or order form and your branded offering icons. If you have a custom menu select “Associate External Menu”
Tab 4: Permissions Tab
*After completing the steps in the Permissions Tab you can “SAVE” your changes!
In the Permissions Tab check all boxes so you can use existing tags instead of creating new ones. This allows your existing CRM automations to continue working.
Then “SAVE” your changes.

After saving add existing tag to each section. If you need to add or review existing tags go to AccessAlly > Settings > Tags. Tags added in this section are automatically added to your CRM.
Add Release to Order Forms (if desired)
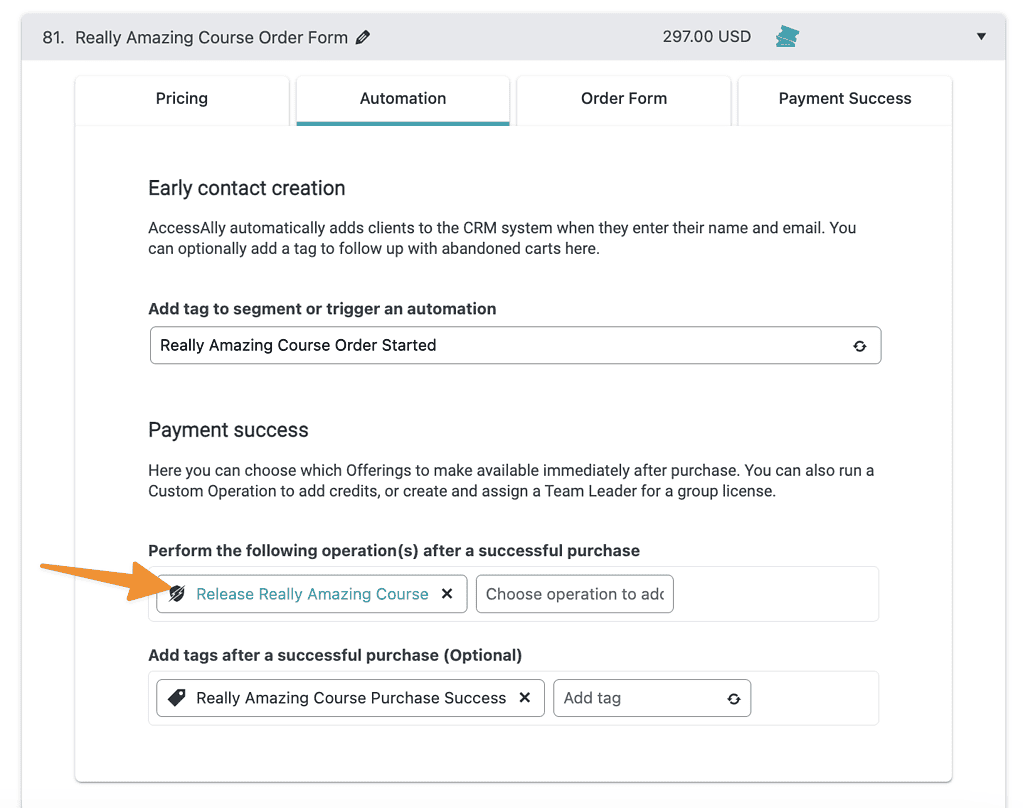
AccessAlly Offerings have a unique custom operation called a “Release” that allows a new user to be created, and base tag applied (along with immediately released content tags), and the info is synced back to the CRM system.
This can be helpful as it happens instantly and reduces your dependence on CRM based webhooks which can fail.
AccessAlly > Offerings > Select Offering > Forms Tab > click brush to edit form. Add release custom operation.
Review CRM Automations
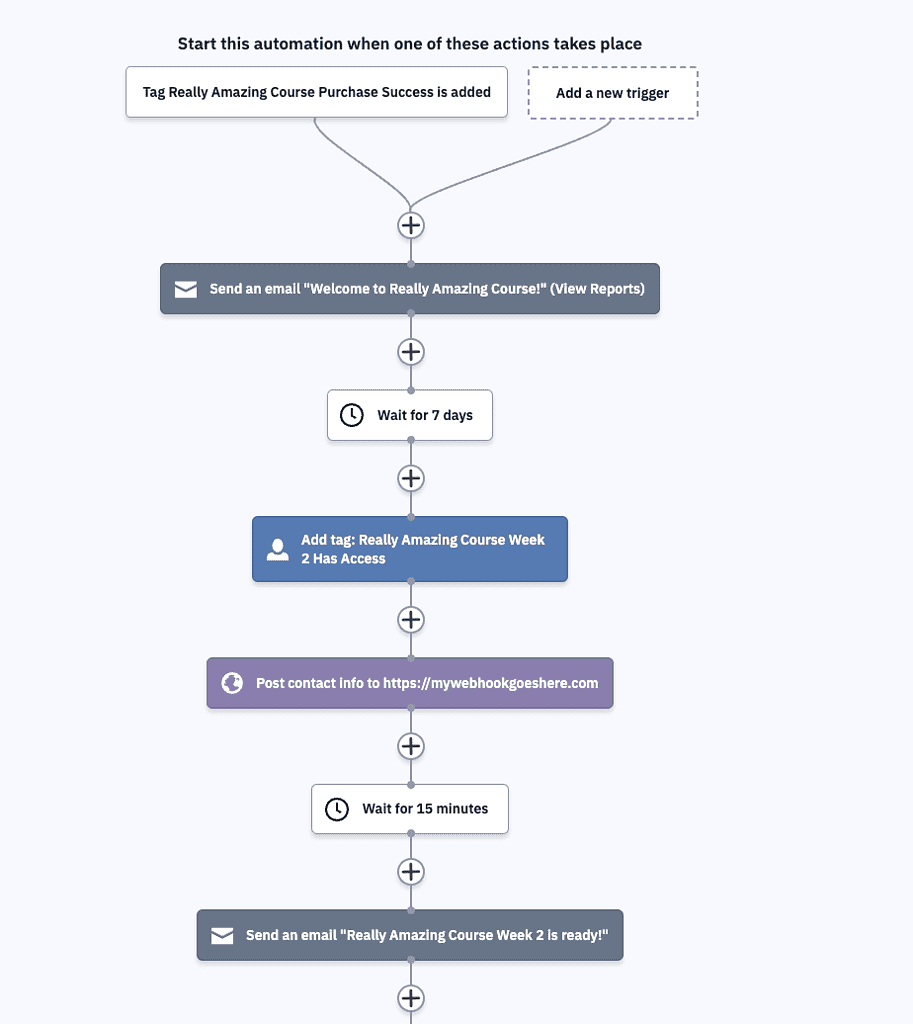
If you added the release custom operation to your order form, you can remove the initial base tag add, and create user webhook steps from your CRM automation… and move right into the Welcome email.
Example shown in ActiveCampaign.
Test Your Offering
The last step is to make a purchase (you can use a coupon code) in an incognito window in your browser with a new test email address. Review to ensure that everything works as expected before re-launching your course or membership.

