ARTICLE CONTENT:
What to expect when you request a refund for AccessAlly.
When your refund is processed your access to the plugin is immediately revoked. Before requesting a refund we recommend following the steps in this article to ensure you have everything you need before the plugin is deactivated on your site.
What to expect when you cancel AccessAlly.
When you cancel your AccessAlly subscription you’ll continue to have access to the plugin until your renewal date. After your renewal date the plugin will no longer work on your site.
The AccessAlly plugin acts like a gatekeeper preventing people from accessing your site and seeing the content there unless they purchase or opt-in to see those items.
Without the AccessAlly plugin your site in no longer locked down, it will now be open to the public, anyone can see the content on your site because AccessAlly is no longer locking it down.
About Payments in AccessAlly
Payments made by your clients on AccessAlly order forms will no longer process without an active AccessAlly subscription.
Invoices and past payments will no longer be able to be downloaded by your clients or viewed on the My Orders and Subscriptions page.
View of the My Orders page without an active AccessAlly subscription.

Recommended Timeline
We recommend not waiting until the last minute to cancel your AccessAlly subscription. You’ll need time with the plugin active on your site to follow the steps below. This can take 1-2 weeks or longer, depending on your site.
Steps to Migrate Off of AccessAlly
1. Export Active AccessAlly Subscriptions
Once you cancel your AccessAlly subscription and the plugin becomes disabled, your customers’ payments will no longer be charged through AccessAlly’s Stripe payments.
There is no automated way to migrate a subscription payment out of AccessAlly into another system.
You can export payment details.
Go to: AccessAlly > Sales > Subscriptions > Change the Status filter to Active > Download All Subscriptions.
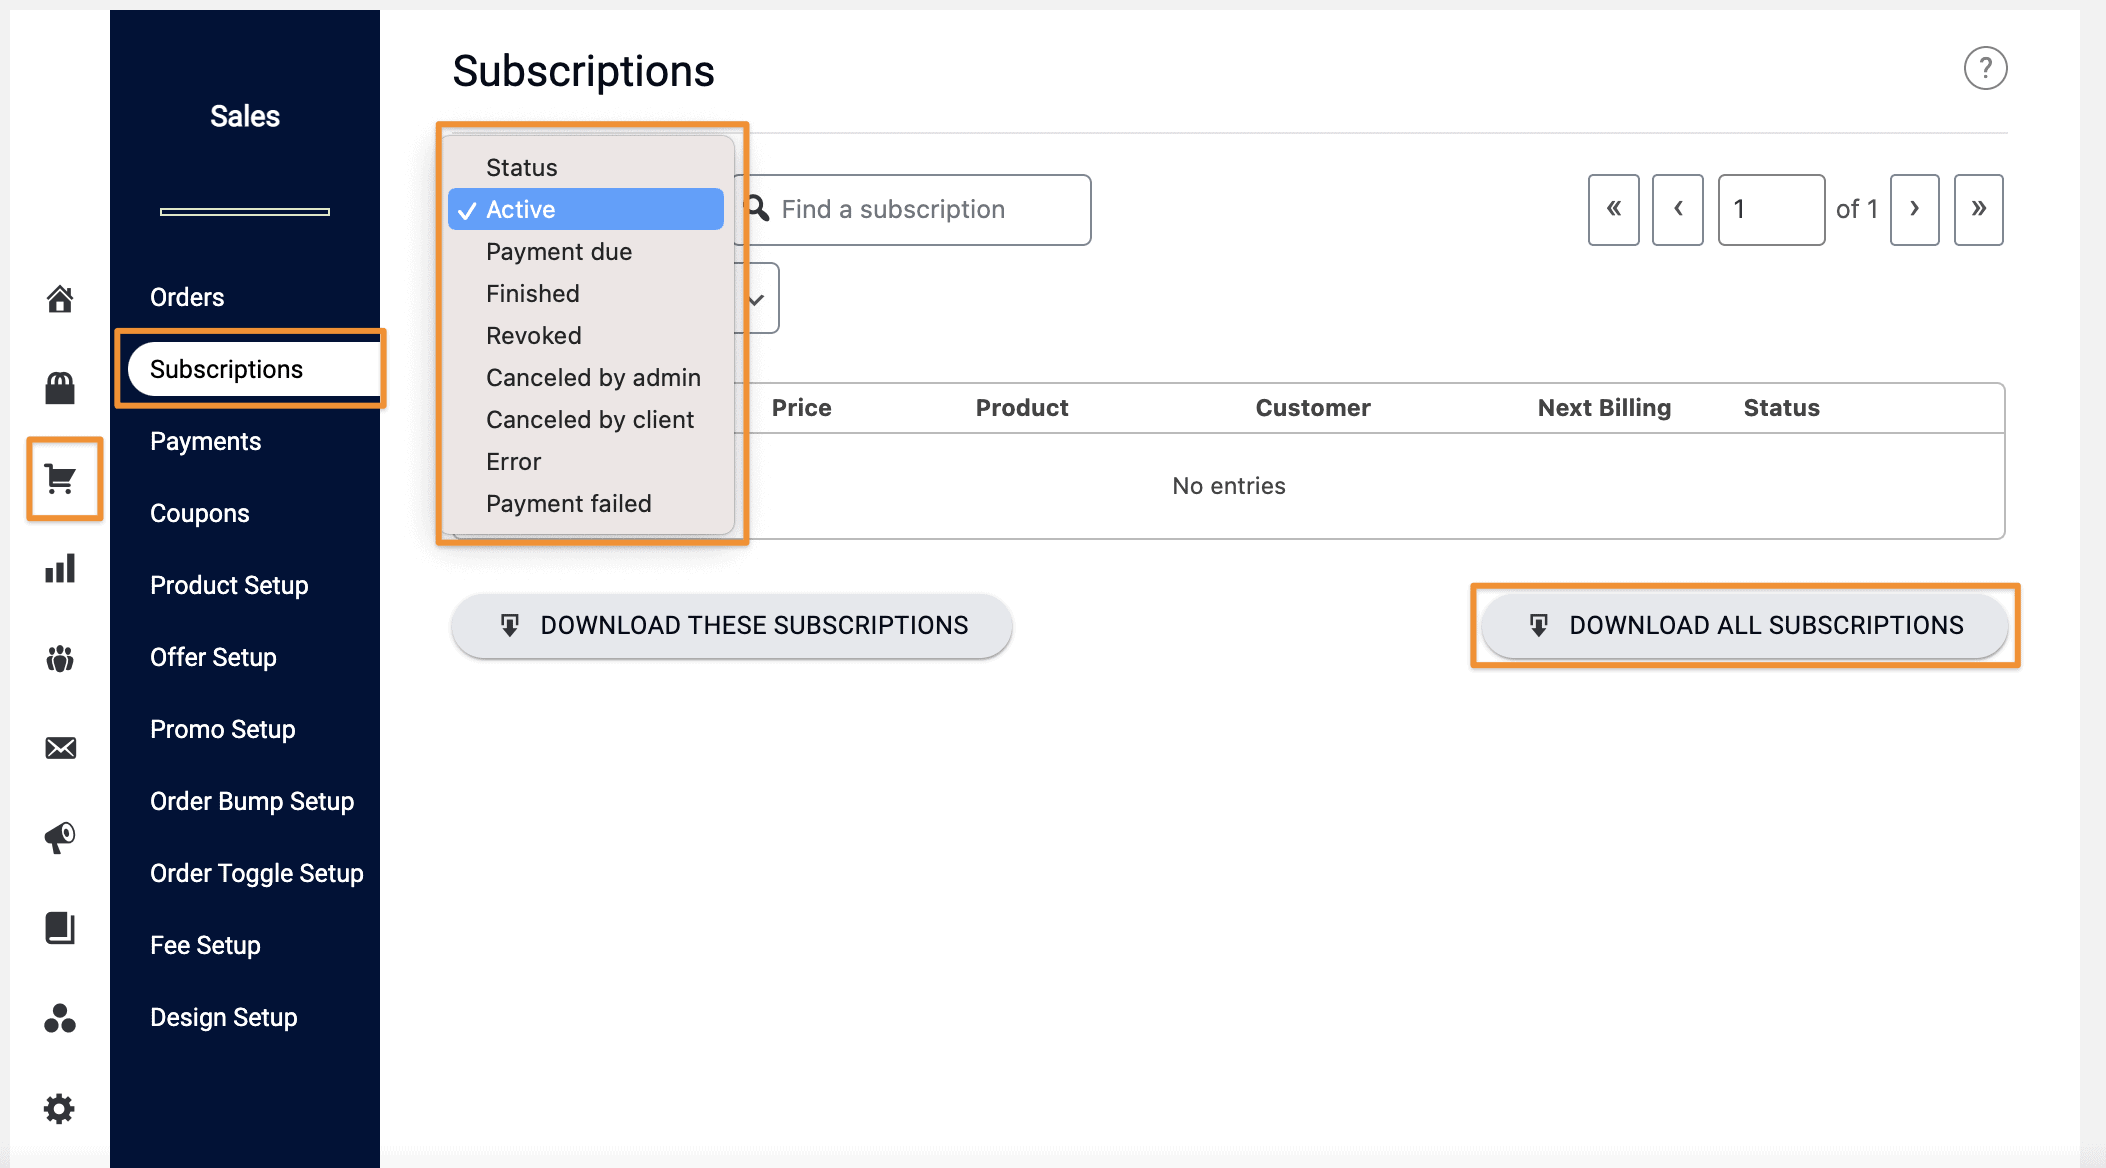
This will allow you to email these paid subscribers to have them register for a subscription in another system.
Alternatively, if you have too many subscribers and you worry that they won’t sign up again on a new system – you can keep AccessAlly running in “run off mode” until they cancel or move onto the next platform.
2. Create Users in the New System
The exact process here depends on where you’re migrating your users. You will likely need to regenerate the username and password for each member.
If the new system you’re moving to has webhooks, then install that plugin and run a webhook on the members you want to regenerate.
To test that everything is working, run through the migration and login process yourself before migrating all of the other members.
3. Migrate Course Content & Permissions
AccessAlly’s courses are created using regular WordPress pages, so you don’t have to worry that another course or membership plugin won’t be able to use the same content.
You’ll want to set permissions for each of your existing pages using the interface of your new plugin. These may be via tags, in which case you can use the same tags that AccessAlly created for you.
If you’re moving off WordPress entirely, then you’ll need to copy and paste your content over to the new tool.
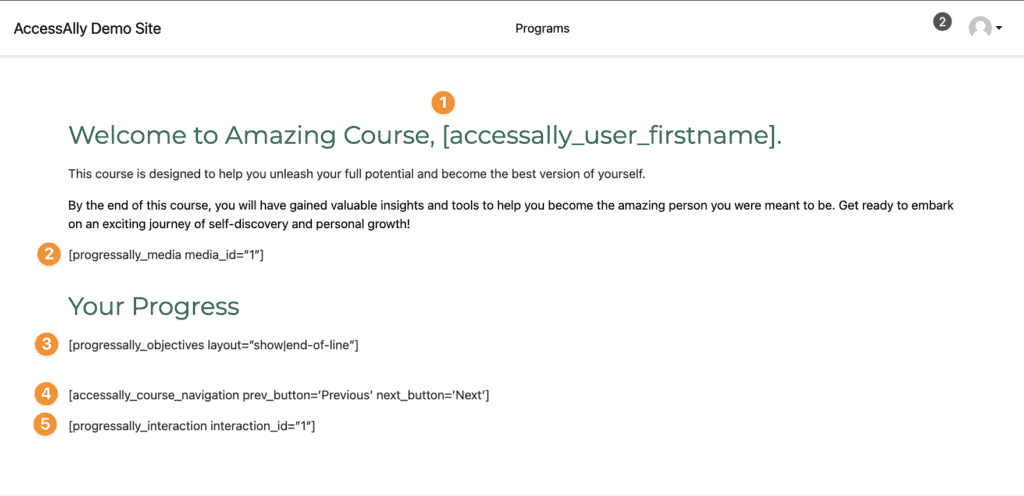
4. Remove AccessAlly (and ProgressAlly) Shortcodes
Once you disable AccessAlly and ProgressAlly, you’ll see that all of the shortcodes turn into “code”. So you’ll want to look through the site and delete any AccessAlly shortcodes you’ve used.
The common ones include the ones on your Dashboard page, update card details, and progress tracking.
Simply delete these and replace them with the new options (or if you’re migrating entire off WordPress, you can skip this step).
5. Update CRM Automations
You’ll need to update your “welcome email” to send people the new password (this might be a different custom field, for example) or to have the password/welcome sent directly by the other platform you’re moving to.
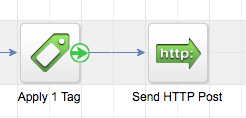
You’ll also want to change or remove all of your webhooks (HTTP Posts) in your campaigns and automation sequences since AccessAlly won’t be there to receive them anymore.
Check to make sure that you don’t have any “Auto login links” that use AccessAlly’s functionality since these will no longer work.
6. Make the Final Switch and Remove AccessAlly
If you’re staying on WordPress, you’ll want to switch out the AccessAlly Login widget to the login widget from your new plugin. This will ensure that when people login, they will be doing it through the new system.
AccessAlly has a Development Mode that allows you to have two WordPress plugins on the same site, so you can essentially turn off AccessAlly while you test.
To enable the Development Mode, go to: AccessAlly > Settings > Migration Tool > Development mode > check the box to enable.
![]()
By doing this, you’ll also be able to spot-check that everything is working with the new plugin.
Once you’ve tested and everything is working, you’ll want to send a “We’ve moved – here’s how to login” email to all of your existing members. This will usually include a new password, and possibly a different login link.
Frequently Asked Questions About This Article
Your dashboard page will show shortcodes in place of the content because AccessAlly is no longer active to display your icons.
Example with AccessAlly.
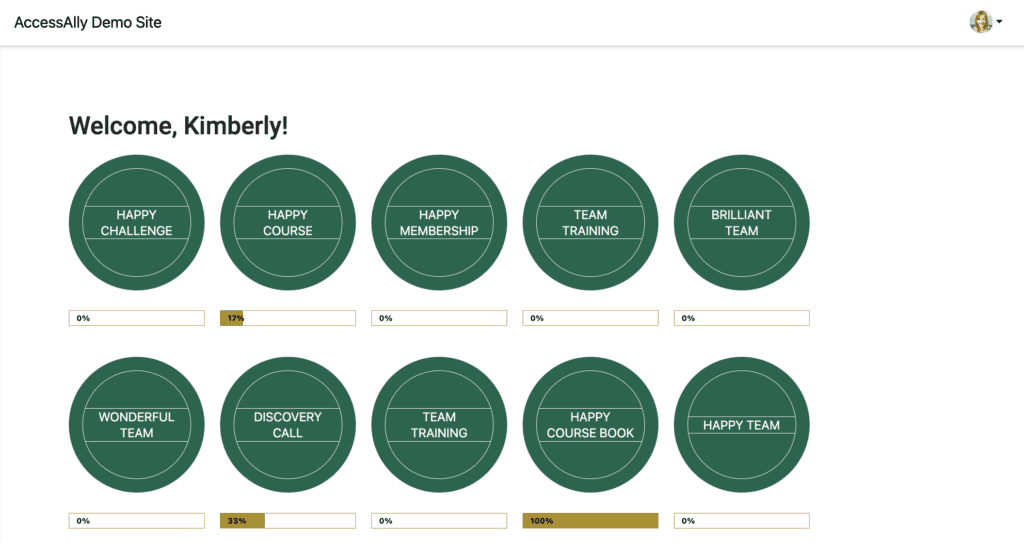
Example without AccessAlly.

Your content is always your content. Any videos you’ve created will remain safe in your video hosting account. And files in Protected Content will be either on your computer (if you haven’t deleted those) or in your Amazon S3 account.
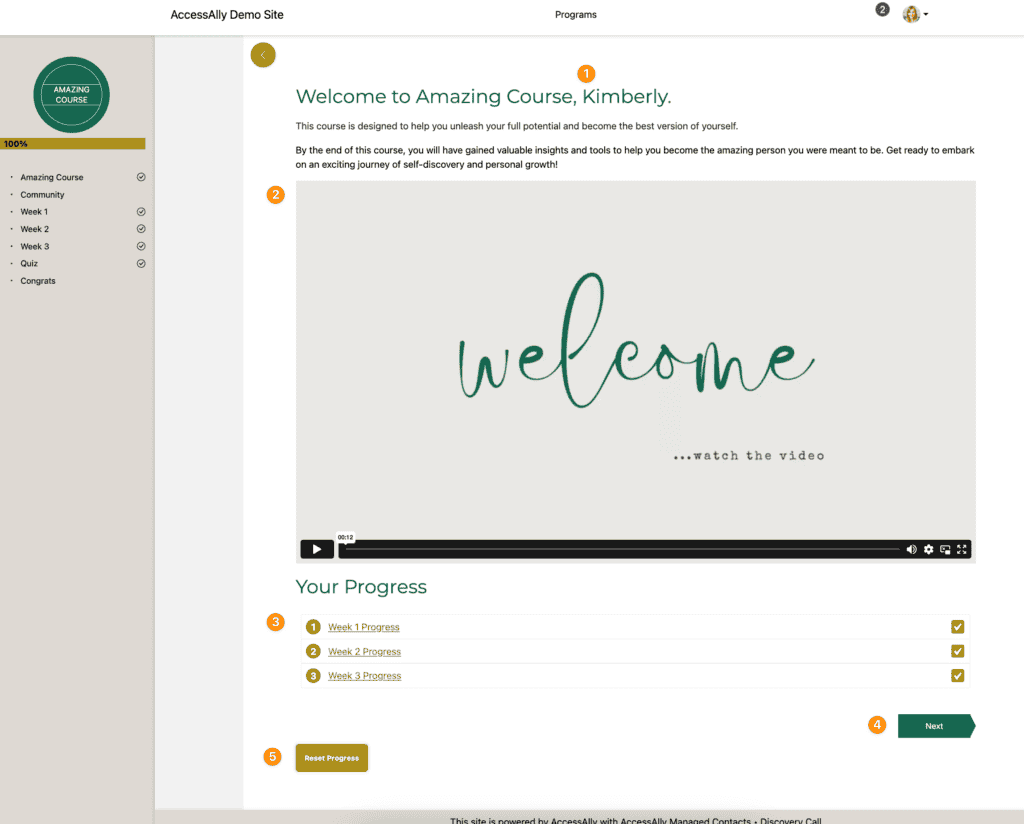
Here’s an example of a course page with AccessAlly and ProgressAlly in use.
- First name shortcode
- Media shortcode
- Objective list shortcode
- Offering navigation
- Interactions (like reset progress, certificate downloads, and mark all objectives complete)
Here’s an example of the same page with AccessAlly and ProgressAlly deactivated. This site is using the AccessAlly Theme so the sidebar is no longer visible.
- First name shortcode
- Media shortcode
- Objective list shortcode
- Offering navigation
- Interactions (like reset progress, certificate downloads, and mark all objectives complete)
