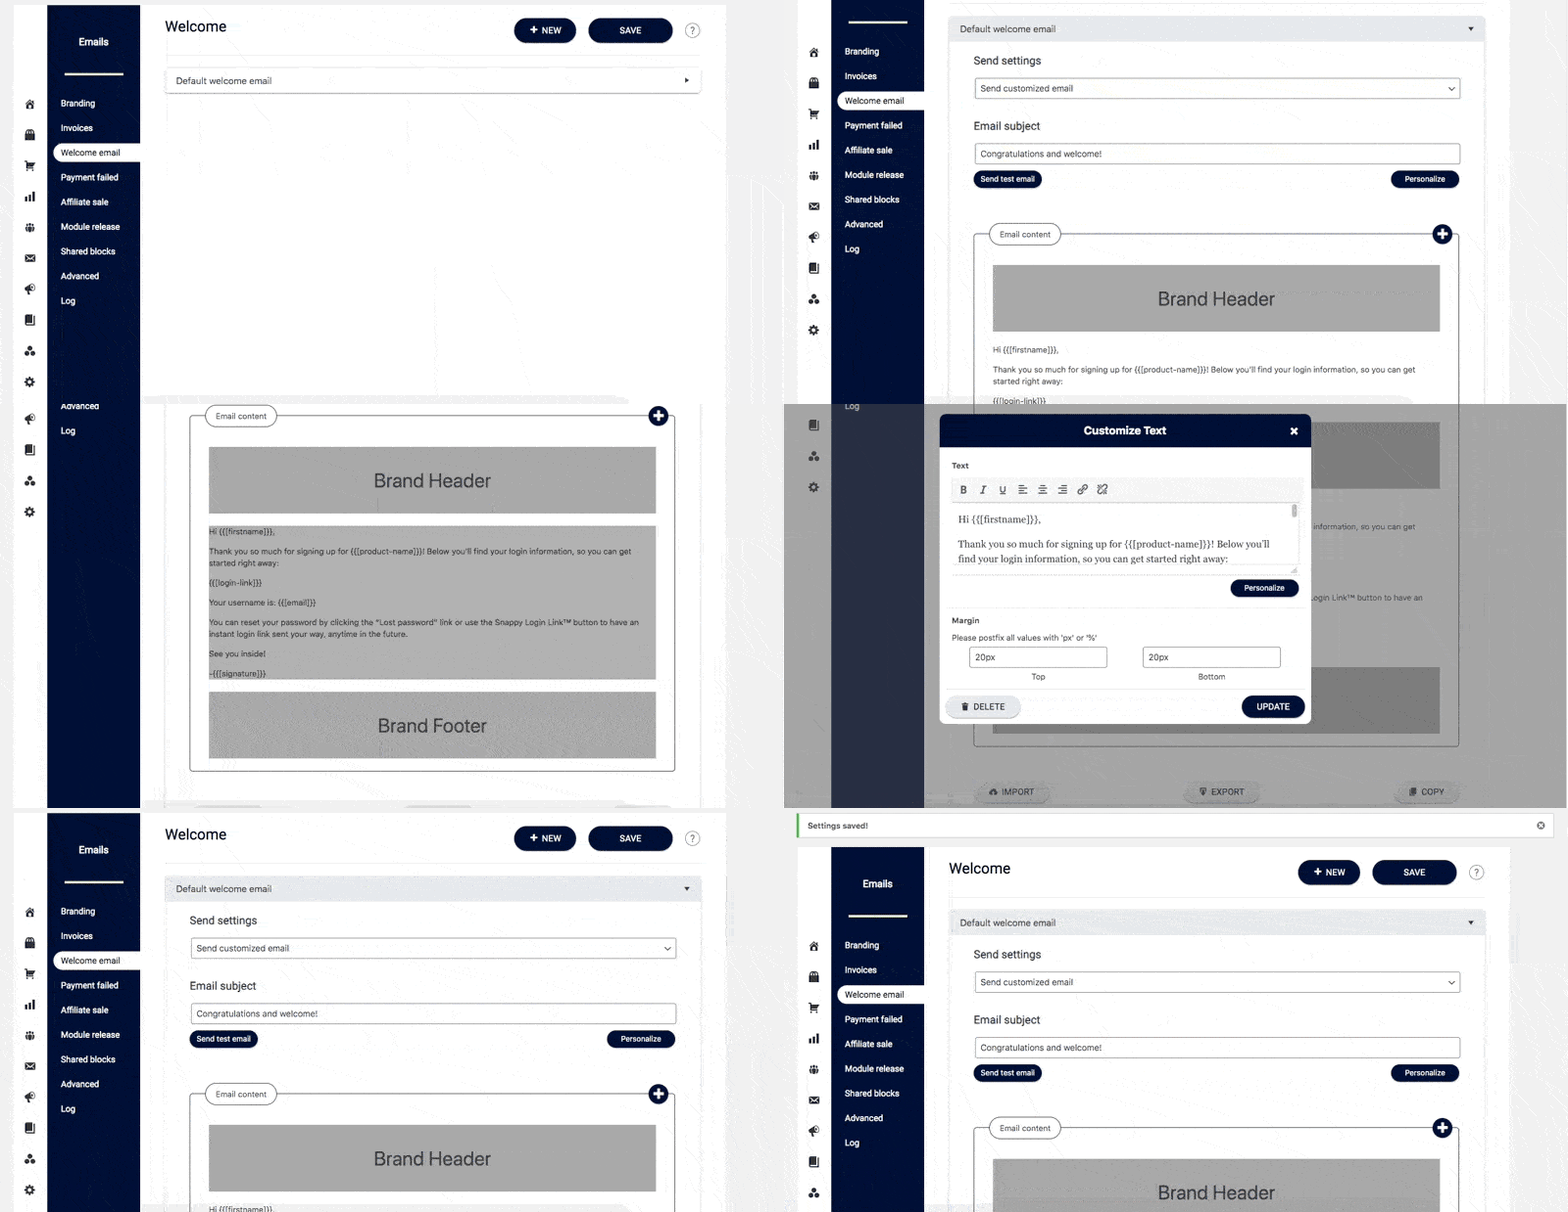
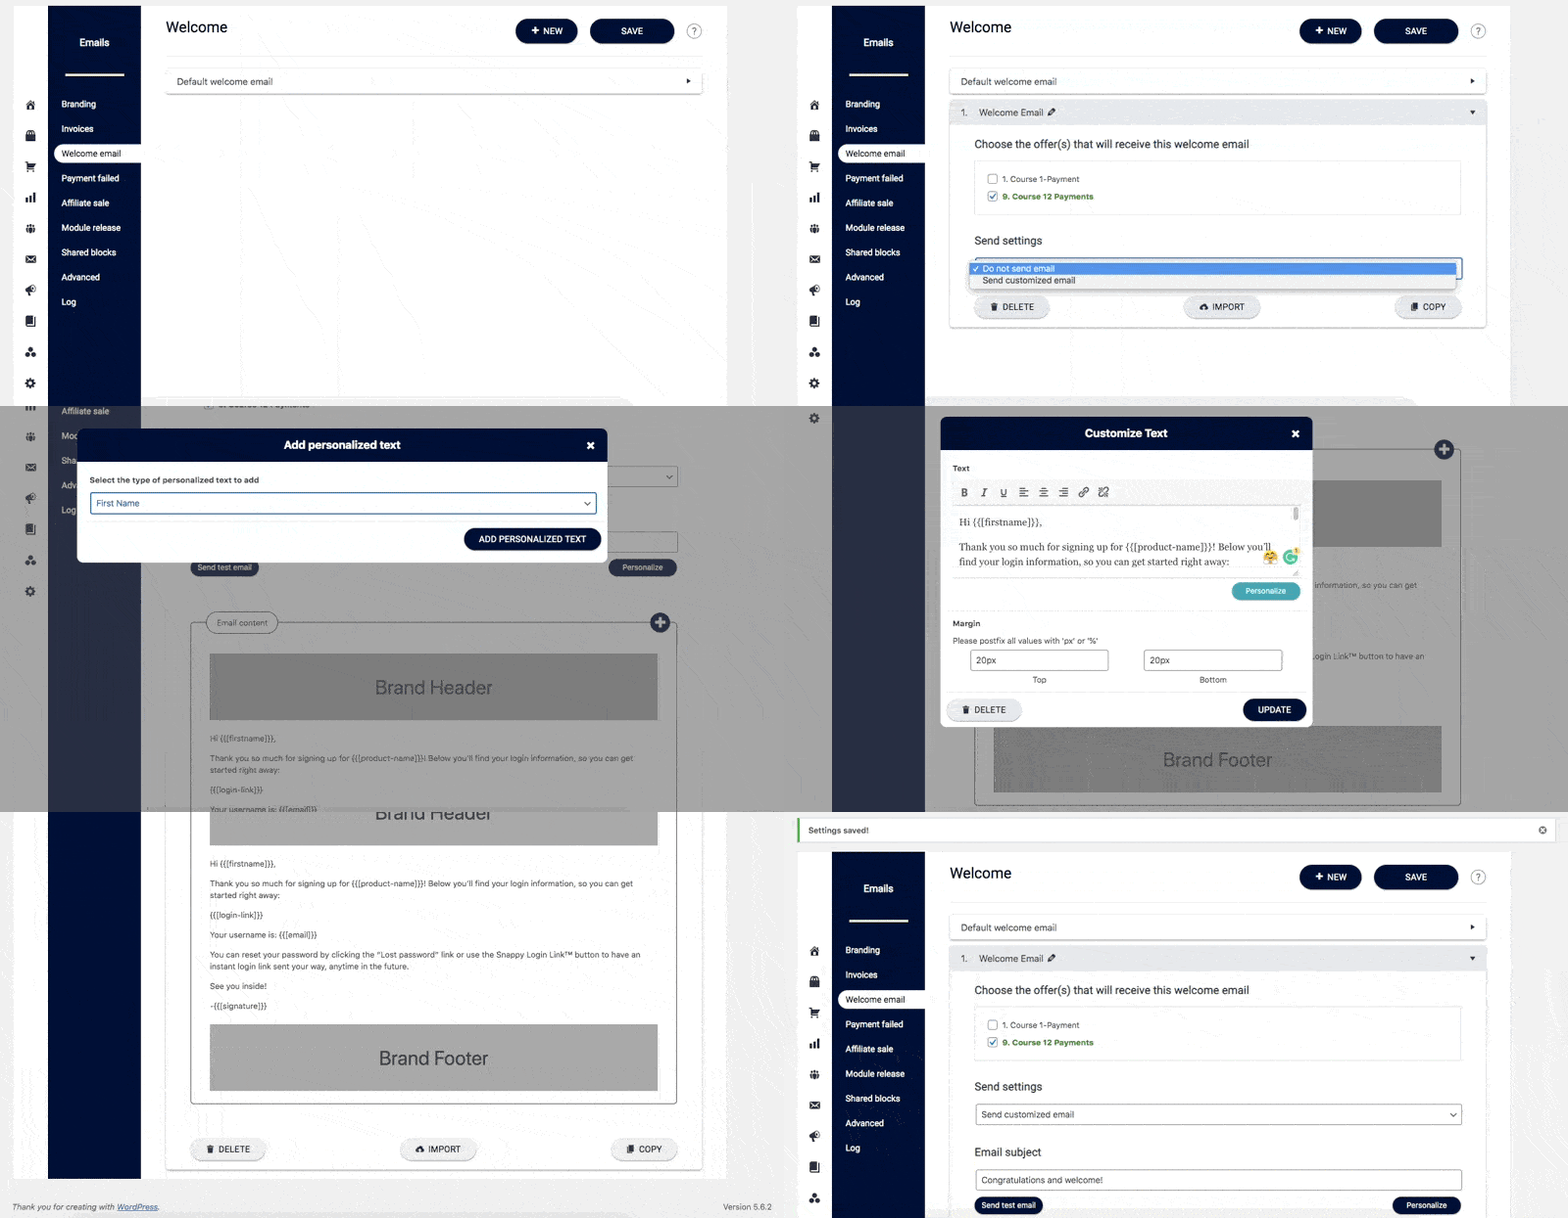
Welcome emails are an important way to greet new members, customers, or subscribers after they complete a purchase or sign up through an opt-in form. AccessAlly makes it easy to send a default welcome email that applies to all offerings, or to create customized welcome emails for specific offerings.
ARTICLE CONTENT:
1. Before You Begin
Make sure your site is set up to send emails reliably. WordPress on its own does not guarantee delivery of password resets, notifications, or reminders.
You’ll need:
- An SMTP plugin such as WPMail SMTP
- An email sending service such as SendLayer
👉 Learn more about WPMail SMTP and SendLayer
2. Options for Sending Welcome Emails
The table below will share more details about your options.
| Option | When to Use | Benefits |
|---|---|---|
| Default Welcome Email | When you want one emails for all offerings | Quick setup, consistent messaging |
| Customized Welcome Emails | When each offering needs unique emails | Tailored content, branded experience |
3. Step-by-Step Instructions
Option 1: Send a Default Welcome Email
This is the fastest way to get started, and it applies to all offerings.
- Navigate to AccessAlly → Emails → Welcome Email in your WordPress dashboard.
- In the Default Welcome Email section, choose when the email should send:
- Do not send email – If you prefer using an integrated CRM system.
- All initial purchases – Sends when someone completes a purchase through an AccessAlly order form.
- All purchases and opt-ins – Sends for both purchases and opt-in signups.
- Write your welcome message in the editor.
- Click Send Test Email to preview the message.
- Save your changes.

Option 2: Send Customized Welcome Emails
Use this option when each offering needs its own unique welcome message.
- Go to AccessAlly → Emails → Welcome Email.
- Click + NEW to add a new welcome email.
- Select the trigger for when the email should send.
- Choose the specific offering this email applies to.
- Add and format your welcome message.
- Save your changes.

4. Troubleshooting Welcome Emails
Use the table below to quickly identify and fix common welcome email issues.
| Problem | What to Check | Fix |
|---|---|---|
| Welcome email didn’t send | Trigger not set up correctly; email not saved; user missing required step | Confirm trigger settings, ensure template is saved, verify user completed purchase or opt-in |
| Wrong email sent | Default email is overriding custom setup | Check the offering settings and make sure custom template is active |
| Email looks off | Styling or formatting issues in email editor | Simplify formatting, send test email, review AccessAlly Emails Branding (for email header and footer design) |
| Customers not receiving emails | Check the AccessAlly Emails log to confirm messages are being sent | If emails appear in the log but aren’t reaching inboxes, set up an email deliverability service |

