With AccessAlly’s credit system, users can earn and spend points inside your membership site. These points or credits don’t have to be tied to “real money”, but are totally independent. One fun way to utilize the credit system is by offering a certain number of “free points” every time someone renews their subscription to your site.
For example, if you’re running a monthly membership subscription, you could offer 50 points each month to active subscribers. Each time their credit card is successfully charged for a monthly payment, AccessAlly will automatically add the 50 points to their account.
This tutorial shows you how to set up the automation inside your CRM to make it happen:
Step 0: Set up your credit system Custom Field in Kit
The credit system is a part of AccessAlly’s custom operations feature and has a corresponding custom field inside Kit. If you haven’t set up that custom field yet, log into your Kit account, go to Subscribers.
Open any subscriber and add the custom field at the bottom of the left sidebar:

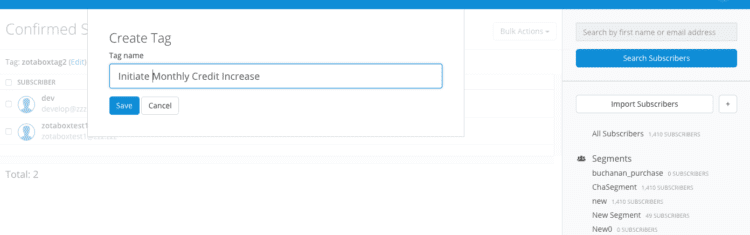
Step 1: Create a Unique Tag in Kit
Now, create a new tag inside your Kit account. This will be a unique tag that is only used in this particular automation.
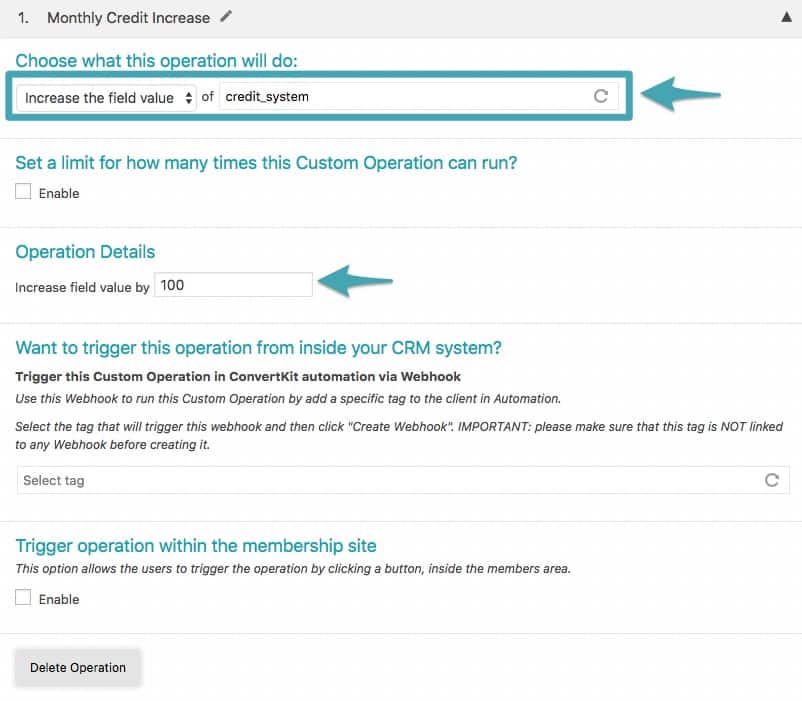
Step 3: Set Up Custom Operation
Inside your membership site, go to: AccessAlly > Custom Operations > Add New.
Set it up as follows:
- Choose what this operation will do: Increase the field value of [the field you set up in Step 0 of this tutorial]
- Set a limit for how many times this operation can be run – (leave unchecked)
- Operation Details: Increase field by [the number of credits you want to give them each month]
- Want to trigger this automation from inside your CRM – Select the tag you created in step 1 of this tutorial.
Then, click Save.
Step 4: Create Automation Inside Kit
Now, the pieces are ready to set up your automation. Back inside Kit, go to Automations, and create an automation that looks like this:
A. Trigger: When a tag is added
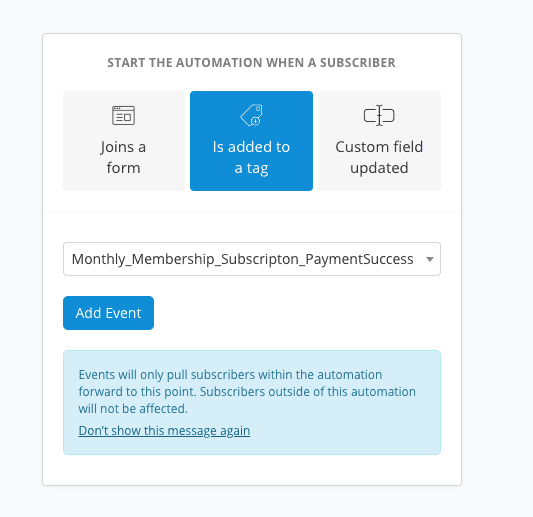
Here, you’ll select the tag that’s added to a user every time their payment goes through successfully. (Configured when you set up the subscription as an AccessAlly Product).
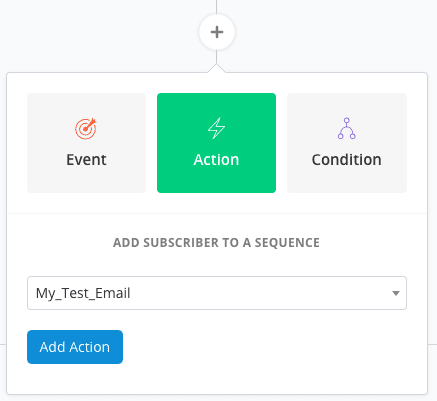
B. Add a tag
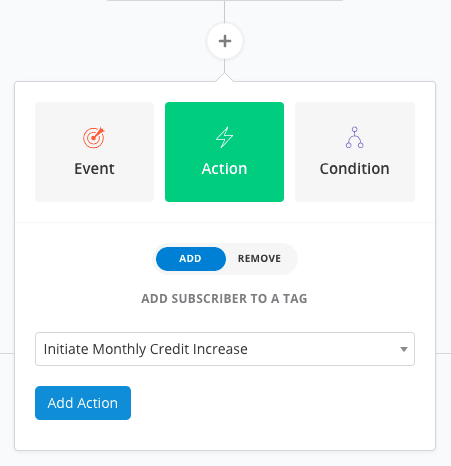
Add the tag that you set up in Step 1 of this tutorial. (When added to the user, AccessAlly will automatically add X credits to their account.)
C. Send Email (Optional)
If you want to send an email to your membership subscribers to let them know the payment was charged successfully, you can add that step here.
D. Remove a tag
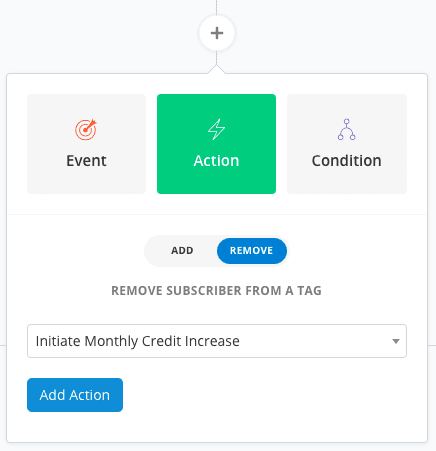
Now, you’ll want to remove the monthly credit increase tag from the user. This allows the tag to be re-added every month.
E. Remove a tag
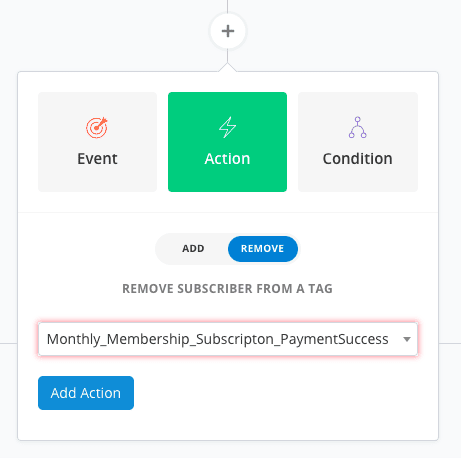
The last step is to remove the “payment success” tag that triggered this automation. This allows the tag to be re-added every month.
Step 5: Test The Automation
Finally, take time to run a test user through this automation before making it live.
