With AccessAlly Custom Operations, you can automate adding (or removing) a tag for any user. You’ll do this with the Add / Remove a Tag(s) option.
The custom operation add/remove tag feature gives you the flexibility to create user or admin-initiated tag changes inside your AccessAlly site or via your CRM system.
ARTICLE CONTENT:
Ways To Add/Remove Tags
- Admin Initiated CRM Tag Changes
Add the custom operation webhook to initiate the tag change inside a CRM automation. - User-Initiated Tag Changes
The custom operation appears inside the AccessAlly site as a button. Once clicked, the chosen tags are added (or removed), and AccessAlly syncs this information with the CRM.
Use Cases for this feature:
- Add an Interest button for a user to indicate interest in an upcoming course or topic. Once clicked this user receives your marketing and launch materials.
- Add a Cancel button to allow a paying member to easily cancel an ongoing subscription.
- Add a Preferences button that removes a newsletter tag so a user can stay on your list, but get fewer emails.
Setup the Add/Remove Tag Custom Operation
- Go to AccessAlly > Settings > Custom Operations. Then, click + NEW OPERATION
- Name this operation something operation something descriptive (like “Add Course Tags”)
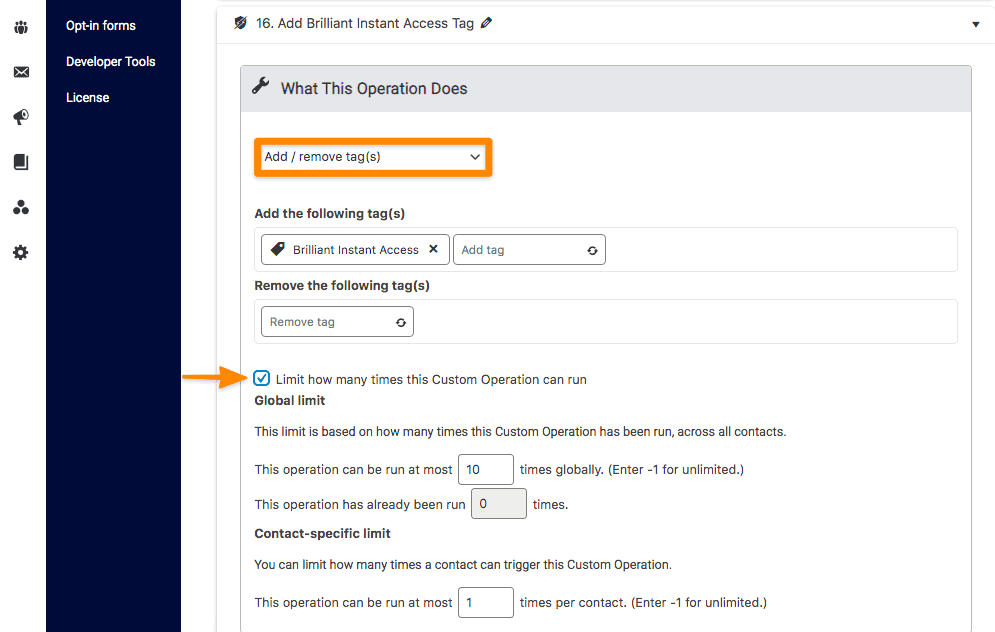
- In What This Operation Does choose add/remove tag(s)
- Now add and/or remove the desired tag(s)
- Add a checkmark and follow the steps to limit the number of times this operation can run if desired

Trigger This Operation Inside the CRM
The admin initiates the tag change via the CRM.
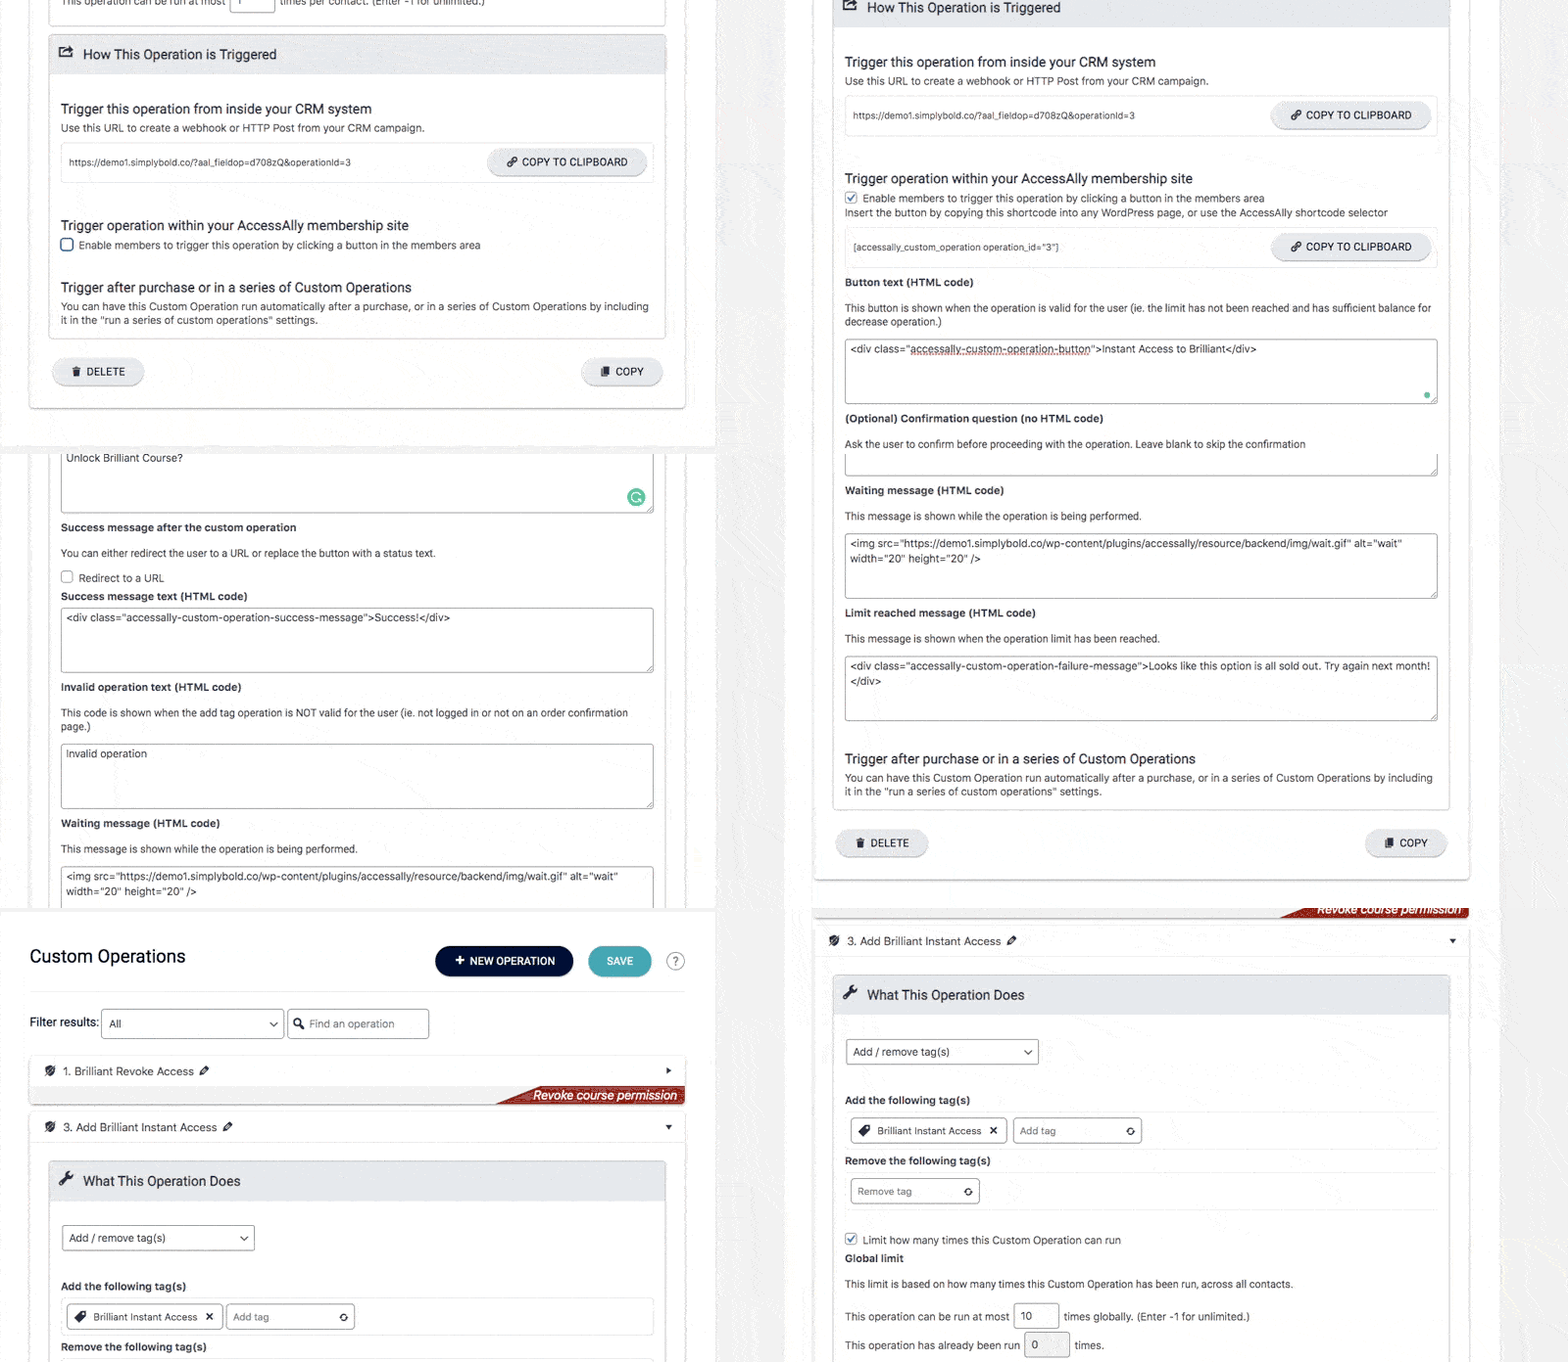
- Click the COPY TO CLIPBOARD button and paste this webhook (HTTP Post) into your CRM automation.
- Click the SAVE button to save your changes.

Important! Make a unique tag to trigger this operation in Kit, After creating the tag click the refresh icon on the right, type the tag and select it from the dropdown. Next, click the CREATE WEBHOOK button.
Click the SAVE button to save your changes.

Trigger This Operation Inside the AccessAlly Site
The user initiates the tag change!
- Checkmark the box by Trigger Operation Within the Membership Site.
- Click the COPY TO CLIPBOARD button to grab the button shortcode
- Button text (HTML code) – It’s a good idea to change the button text so that the user will clearly understand what click the button will accomplish.
- (Optional) Confirmation question (no HTML code)
- Success message after the custom operation – Check the box if you wish to redirect to a URL (thank you or confirmation page), otherwise the confirmation message will show.
- Invalid operation text (HTML code) – This code is shown when the add tag operation is NOT valid for the user (ie. not logged in or not on an order confirmation page.)
- Waiting message (HTML code) – This message is shown while the operation is being performed.
- Limit reached message (HTML code) – If you’ve set a limit in the section above, this message is shown when the operation limit has been reached.
- Click the SAVE button to save your changes
- Paste the shortcode from step 2 above on the page of your site that you’d like the user to see the button.

Test Your Setup
Please test this new custom operation to make sure that it works properly before making it “live” for your membership site users.

