ARTICLE CONTENT:
Why AccessAlly Has Two Separate reCAPTCHA Settings
Technical reason: AccessAlly separates reCAPTCHA configuration for order forms and opt-in forms because they use different processing systems internally.
What this means for you:
- The settings don’t automatically sync between sections
- Entering keys in one location does NOT copy them to the other
- You must manually enter the same keys in both places
- Both sections need to be configured, even if you use the same reCAPTCHA project
Common mistake pattern:
- User sets up reCAPTCHA for order forms first
- Order forms work perfectly
- User creates opt-in form later
- Opt-in form fails with error [02014] or ERROR 422
- User checks order form reCAPTCHA settings – everything looks correct
- User doesn’t realize opt-in forms have a separate reCAPTCHA section
- User opens support ticket confused why “reCAPTCHA is configured but forms are failing”
Step-by-Step: Entering Keys in Both Locations
Follow these exact steps to avoid errors:
Part 1: Configure Order Forms reCAPTCHA
- Go to WordPress Admin
- Navigate to AccessAlly → Settings
- Click on Order Forms tab
- Scroll to reCAPTCHA Section
- Look for “Google reCAPTCHA” or “reCAPTCHA Settings”
- This is usually near the bottom of the Order Forms settings page
- Enter Your Keys
- Site Key: Paste your reCAPTCHA Site Key (starts with “6L”, 40 characters)
- Secret Key: Paste your reCAPTCHA Secret Key (starts with “6L”, 40 characters)
- Double-check for extra spaces before or after the keys
- Ensure you copied the complete key (all 40 characters)
- Save Order Forms Settings
- Scroll to bottom and click “Save Changes” or “Update Settings”
- Wait for confirmation message
Part 2: Configure Opt-in Forms reCAPTCHA (CRITICAL – DON’T SKIP)
- Stay in AccessAlly Settings
- Click on Opt-in Forms tab (different tab than Order Forms)
- This is a completely separate settings page
- Scroll to reCAPTCHA Section
- Look for “Google reCAPTCHA” or “reCAPTCHA Settings”
- It will look identical to the Order Forms reCAPTCHA section
- But it’s empty! Even though you just entered keys in Order Forms
- Enter the SAME Keys Again
- Site Key: Paste the SAME reCAPTCHA Site Key you used for Order Forms
- Secret Key: Paste the SAME reCAPTCHA Secret Key you used for Order Forms
- Use the exact same keys – they should match
- Save Opt-in Forms Settings
- Scroll to bottom and click “Save Changes”
- Wait for confirmation
Part 3: Verify Both Locations Are Configured
- Check Order Forms Tab
- Go back to AccessAlly → Settings → Order Forms
- Scroll to reCAPTCHA section
- Verify keys are present (will show as masked/hidden dots)
- Check Opt-in Forms Tab
- Go to AccessAlly → Settings → Opt-in Forms
- Scroll to reCAPTCHA section
- Verify keys are present (will show as masked/hidden dots)
- Both Should Show Keys
- If either location is empty, reCAPTCHA will fail for that form type
- Go back and enter the keys where they’re missing
Testing After Configuration
Test BOTH form types to ensure reCAPTCHA is working:
Test Order Forms
- Open one of your order forms in an incognito browser
- Fill out the form
- Complete the reCAPTCHA challenge (check the “I’m not a robot” box)
- Submit the form
- Verify it processes without error [02014], [02015], [02011], or ERROR 422
Test Opt-in Forms
- Open one of your opt-in forms in an incognito browser
- Fill out the form
- Complete the reCAPTCHA challenge
- Submit the form
- Verify it processes without errors
If either test fails:
- Double-check you entered keys in the correct location for that form type
- Verify keys don’t have extra spaces
- Verify keys are the full 40 characters
- Try clearing the keys and re-entering them
- Check the Error Code Reference if you see specific error codes
Troubleshooting “I Entered Keys But Still Getting Errors”
Problem: Getting error [02014] on opt-in forms
Most likely cause: Keys are in Order Forms section but NOT in Opt-in Forms section.
Fix:
- Go to AccessAlly → Settings → Opt-in Forms (not Order Forms)
- Scroll to reCAPTCHA section
- If fields are empty, enter your keys
- Save settings
- Test opt-in form again
Problem: Getting error [02014] on order forms
Most likely cause: Keys are in Opt-in Forms section but NOT in Order Forms section.
Fix:
- Go to AccessAlly → Settings → Order Forms (not Opt-in Forms)
- Scroll to reCAPTCHA section
- If fields are empty, enter your keys
- Save settings
- Test order form again
Problem: Getting ERROR 422 after entering keys in both locations
Most likely cause: You fixed the reCAPTCHA issue, but now there’s a different validation error.
Fix:
- This is actually progress – reCAPTCHA is now working
- ERROR 422 without an error code means different issue (missing fields, API connection, etc.)
- See our HTTP 422 Troubleshooting Guide
- Or Login Widget Captcha Conflicts if using auto-login forms
Quick Reference: reCAPTCHA Configuration Checklist
Use this checklist every time you set up reCAPTCHA:
- ☐ Obtained Site Key and Secret Key from Google reCAPTCHA
- ☐ Entered keys in AccessAlly → Settings → Order Forms → reCAPTCHA section
- ☐ Saved Order Forms settings
- ☐ Entered the SAME keys in AccessAlly → Settings → Opt-in Forms → reCAPTCHA section
- ☐ Saved Opt-in Forms settings
- ☐ Verified keys appear (as masked dots) in both locations
- ☐ Tested an order form – reCAPTCHA appears and submission works
- ☐ Tested an opt-in form – reCAPTCHA appears and submission works
- ☐ No error codes [02014], [02015], [02011] appear
- ☐ No ERROR 422 related to reCAPTCHA appears
Related Error Codes and Articles
If you’re seeing these errors, you likely need to configure keys in both locations:
- Error [02014]: reCAPTCHA configuration issue – See Error Code Reference
- Error [02015]: reCAPTCHA configuration issue – See Error Code Reference
- Error [02011]: Google reCAPTCHA key issue – See Error Code Reference
- ERROR 422 on forms: May be reCAPTCHA-related or other validation issue – See HTTP 422 Guide
- ERROR 422 with auto-login: Login widget captcha conflict – See Captcha Conflicts Guide
💡 Remember: AccessAlly won’t automatically sync reCAPTCHA keys between Order Forms and Opt-in Forms settings. You must enter them in both places manually. This is by design, not a bug. Once you understand this, reCAPTCHA configuration becomes straightforward.
Step 1: Google reCAPTCHA
First, go to this page on Google to create your captcha system for your domain (or subdomain as the case may be):
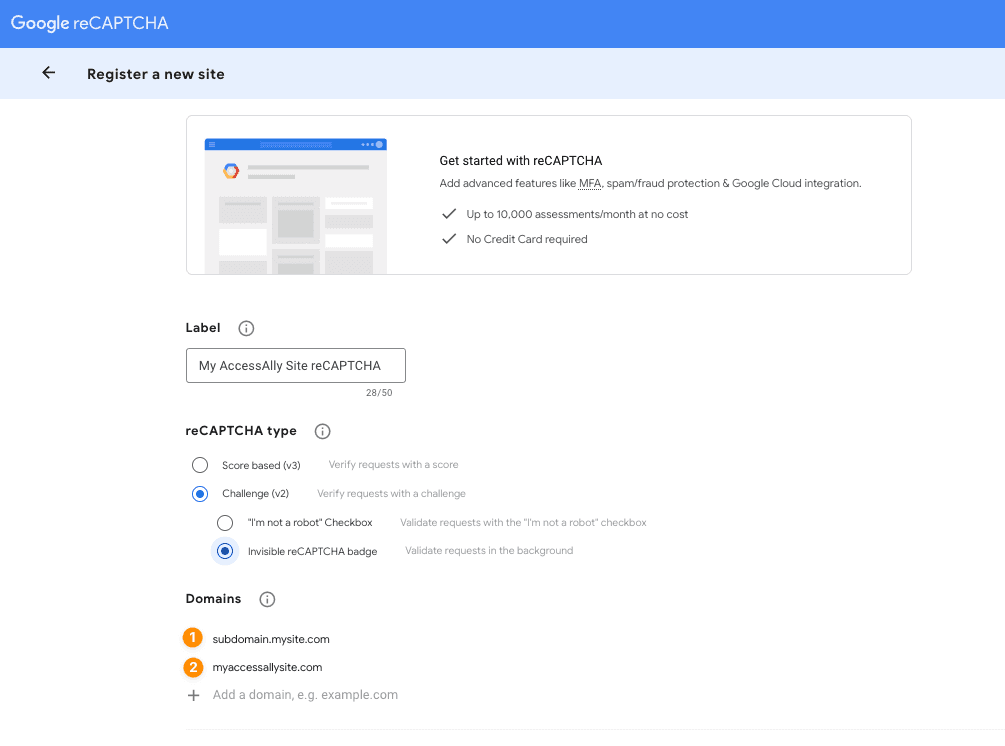
Fill in the details as shown in the image below:
- Label – name the reCaptcha for your membership site
- Select “Version 2” and “Invisible” reCaptcha badge
In Domains select option 1 or 2 based on how your site is setup as shown in the image below.
- Add your subdomain without the https://
- Add your domain without the https://
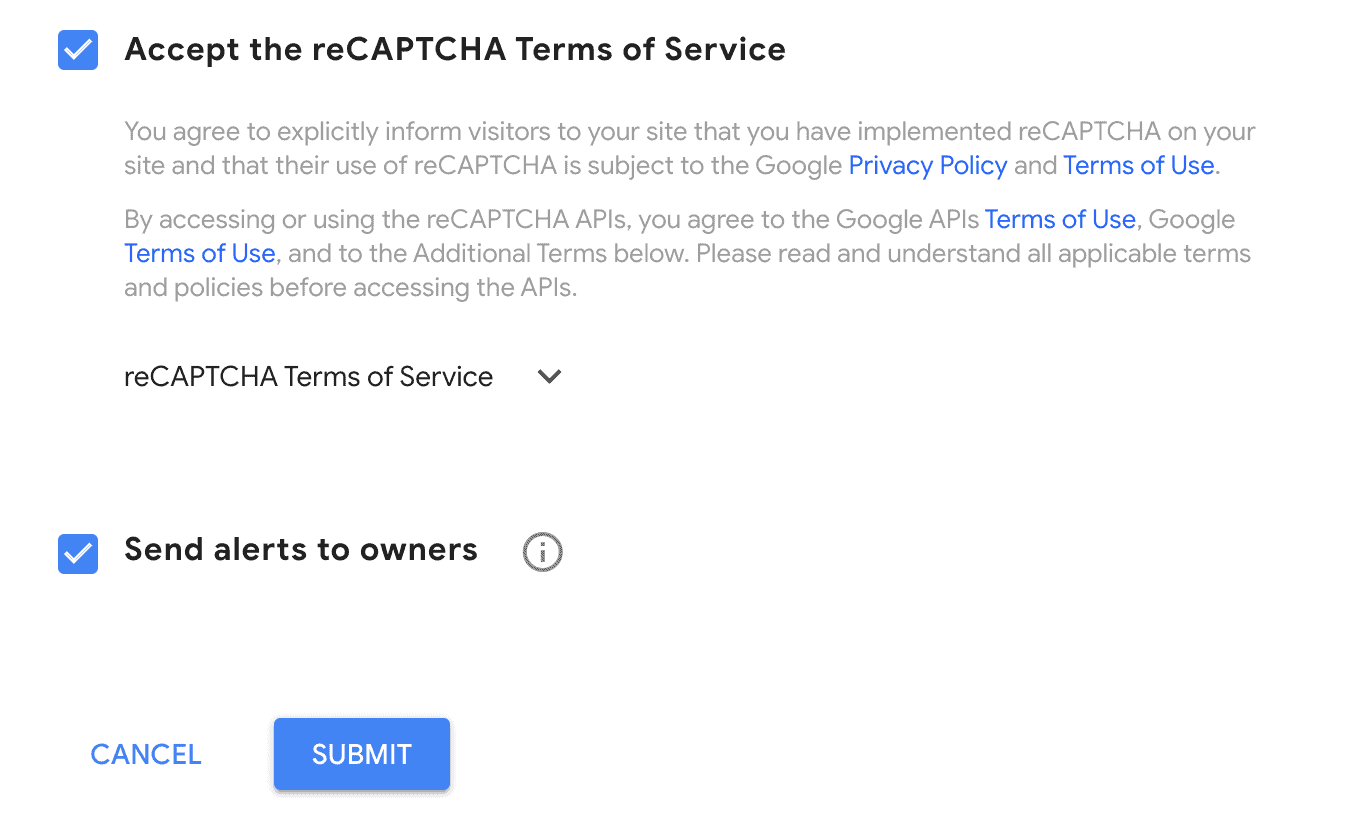
Then agree to the Google terms of service and decide if you’d like to be notified of suspicious activities.
Hit the submit button.
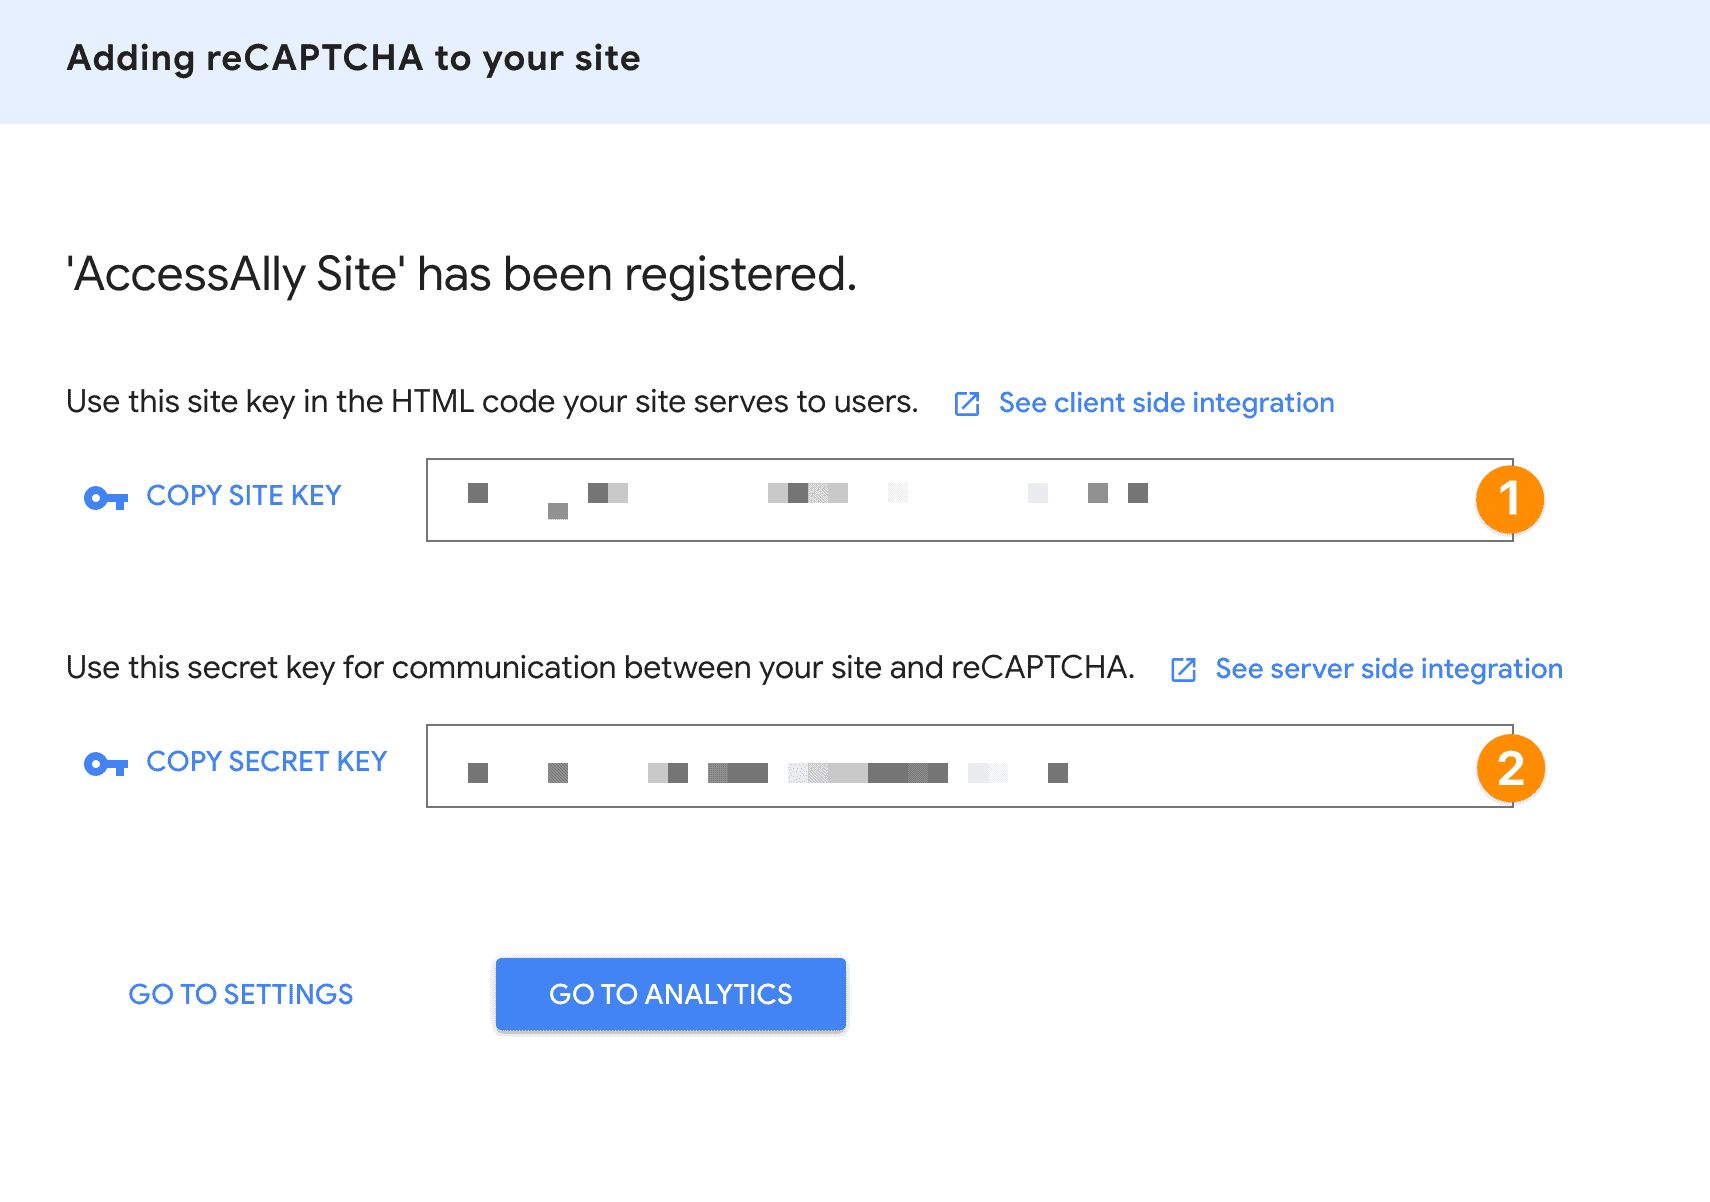
Now you’ll have your ReCaptcha keys, and you can insert them into the AccessAlly settings.
Step 2: AccessAlly Opt-In Forms & Order Forms
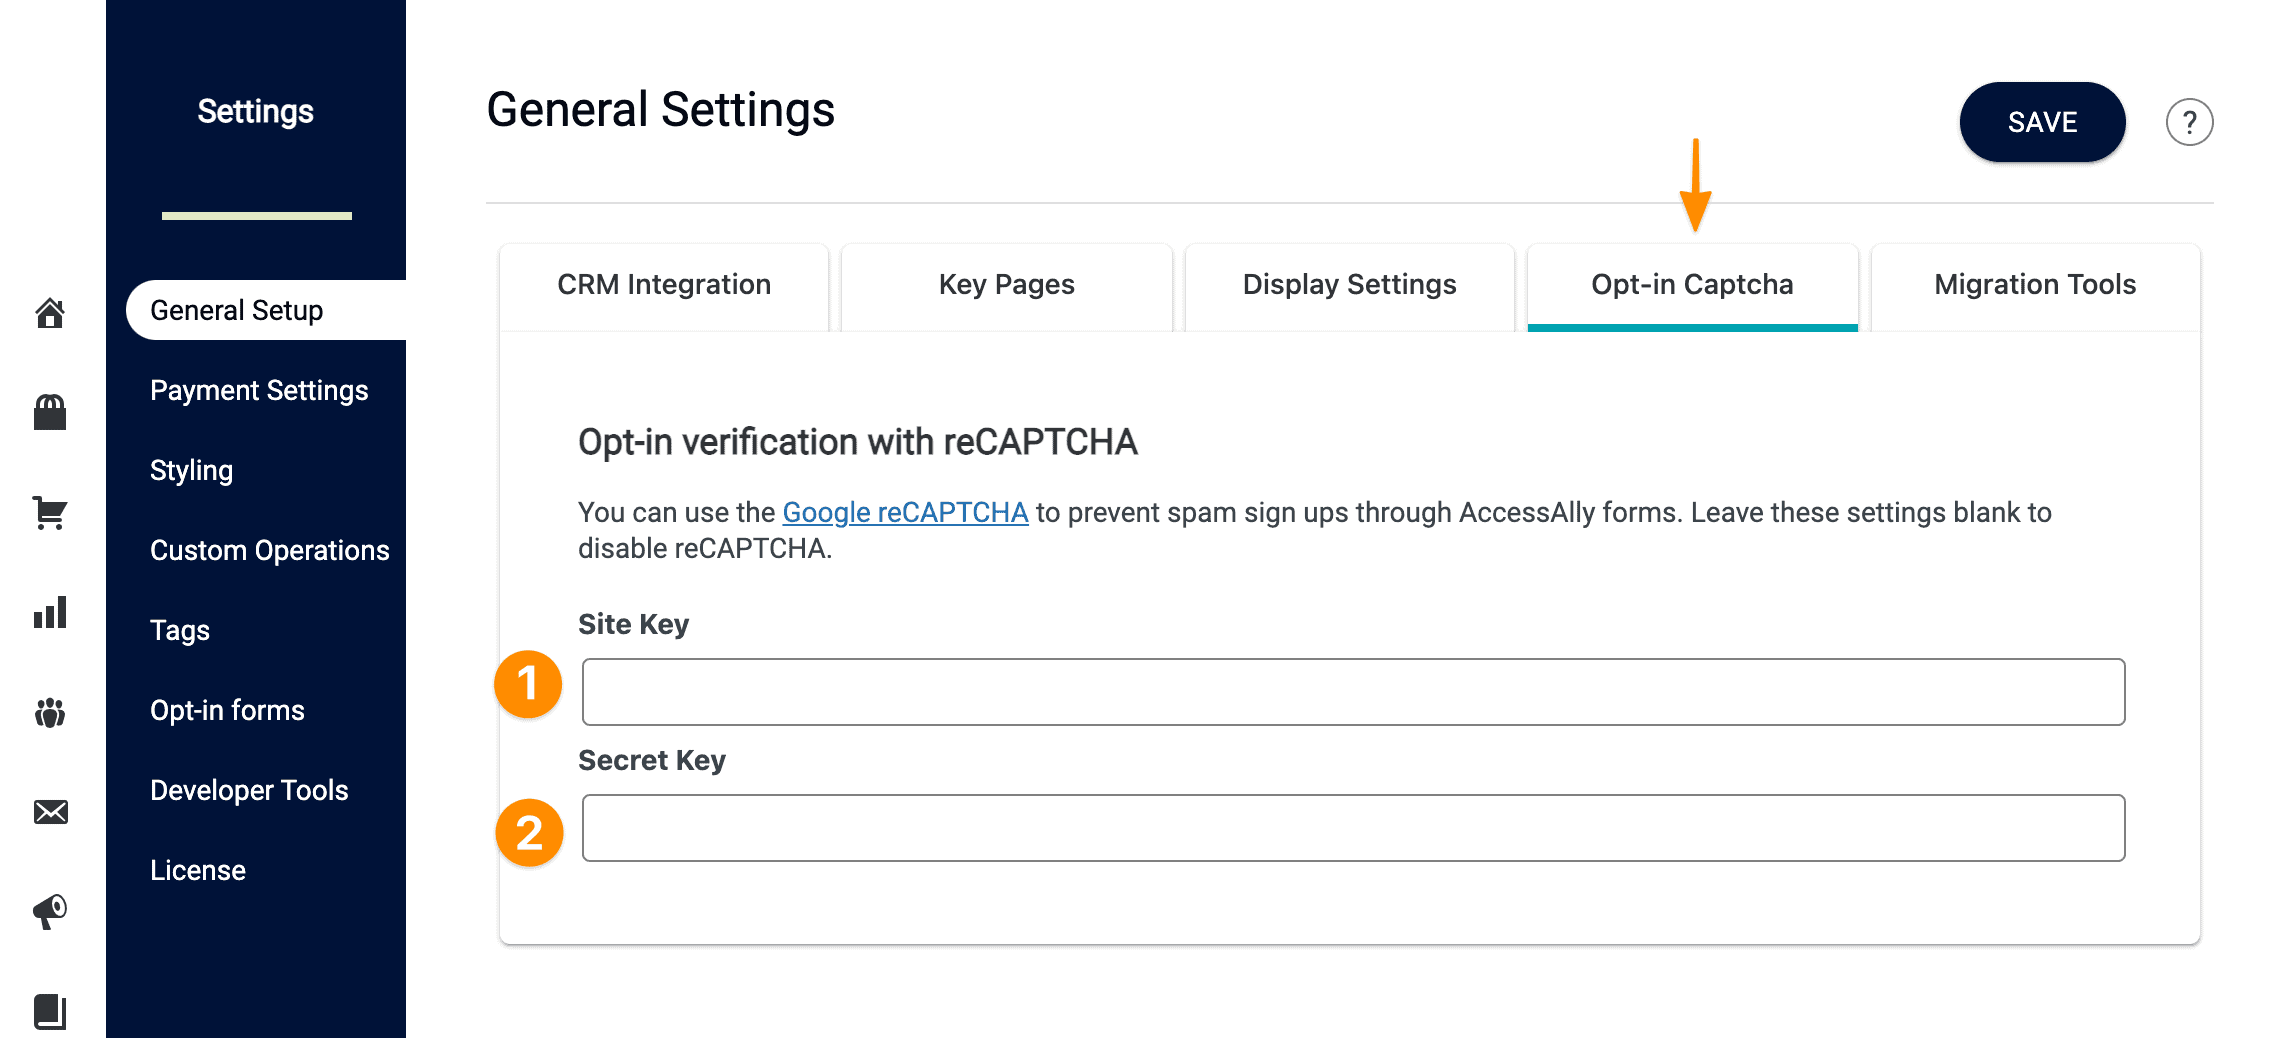
In your WordPress site, navigate to Settings -> General Setup -> Opt-in Captcha
Adding your keys here will prevent SPAM signups on AccessAlly opt-in forms and in Step 1 of your AccessAlly order forms.
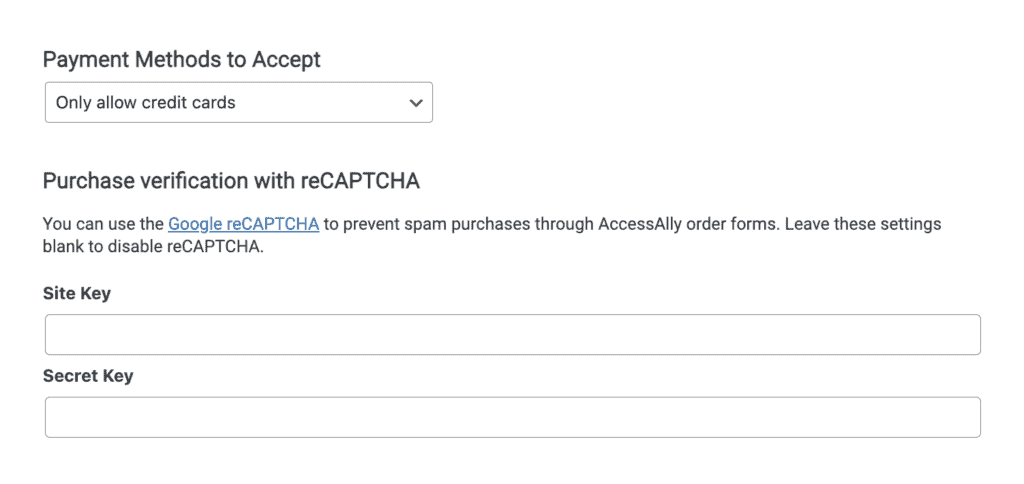
Step 3: AccessAlly Order Forms
When using AccessAlly Order Forms there’s an additional spot to add your keys. You’ll find this under AccessAlly -> Payment Settings -> Credit Card -> Purchase verification with reCAPTCHA
In this spot you’ll add the same keys as you did in Step 2.
Step 4: Review Automation Logs
AccessAlly opt-in forms
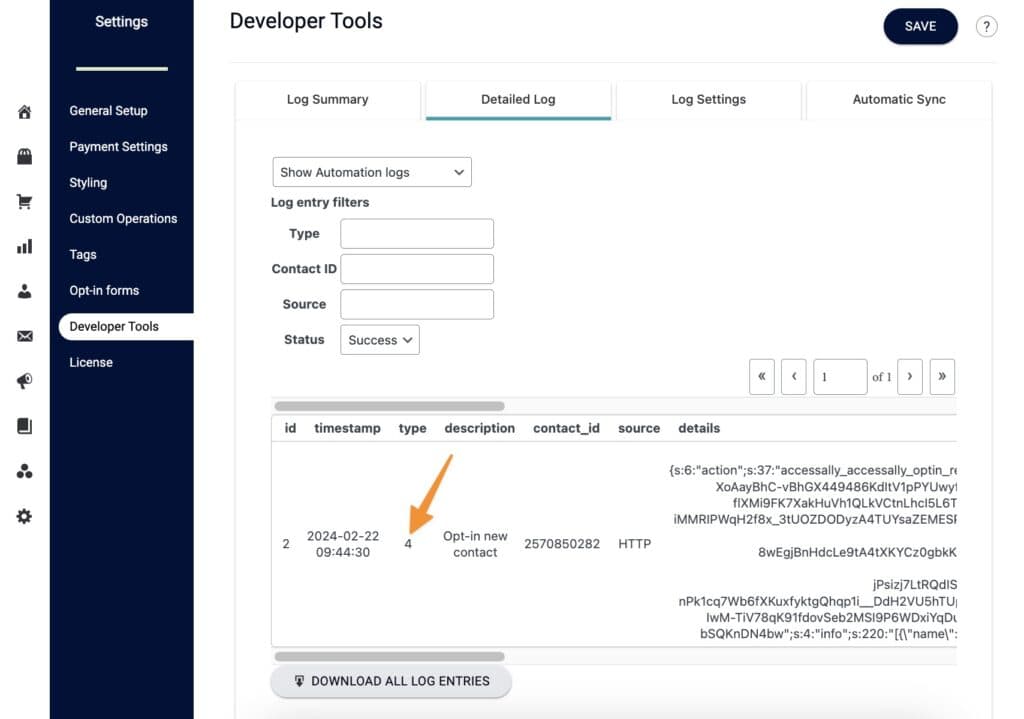
After you’ve completed setting up captcha on your site you’ll be able to see your successful opt-ins with captcha. This shows you that your setup is correct and working as new users complete your opt-in forms.
Go to AccessAlly → Settings → Developer Tools → Detailed Log tab → Show Automation Logs dropdown → Status dropdown → Success
All opt-in forms with captcha will show as a type “4” on your log. All opt-in forms without captcha will show as a type “1” on your log.
AccessAlly Order Forms
AccessAlly order with Google’s “invisible” reCAPCHA, will validate requesters in the background rather than needing a challenge.
It is invoked when the submit button is pressed to go to the next step in the order form. Google identifies which traffic is most suspicious and only shows a challenge to those users. For everyone else, it doesn’t display anything and works seamlessly in the background.
If you’d really like to see it (while it’s invisible) the best option is opening your AccessAlly order form in an incognito window in your browser. The challenge may appear after completing step 1 of an AccessAlly order form.
