The protected content feature can be used in a variety of ways. In this article we’ll cover how to display protected content.
ARTICLE CONTENT:
Resources for Displaying Protected Content
If you are new to this feature and want to learn how to use it see articles on this feature here.
Display Protected Content in Menu
When protected content is displayed in a WordPress menu a client can click a menu link to go directly to your protected content. This is great if your protected content is in an offering, but you do not need a page of content to go with it.
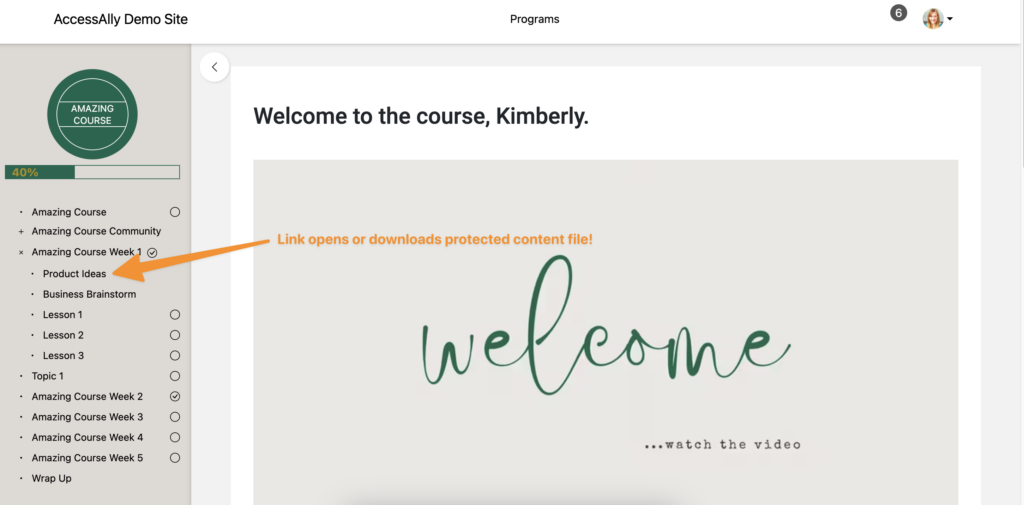
Client view
Upon click the file will either download or open in a new tab in browser (this is different for every client based on their browser and chosen settings.)
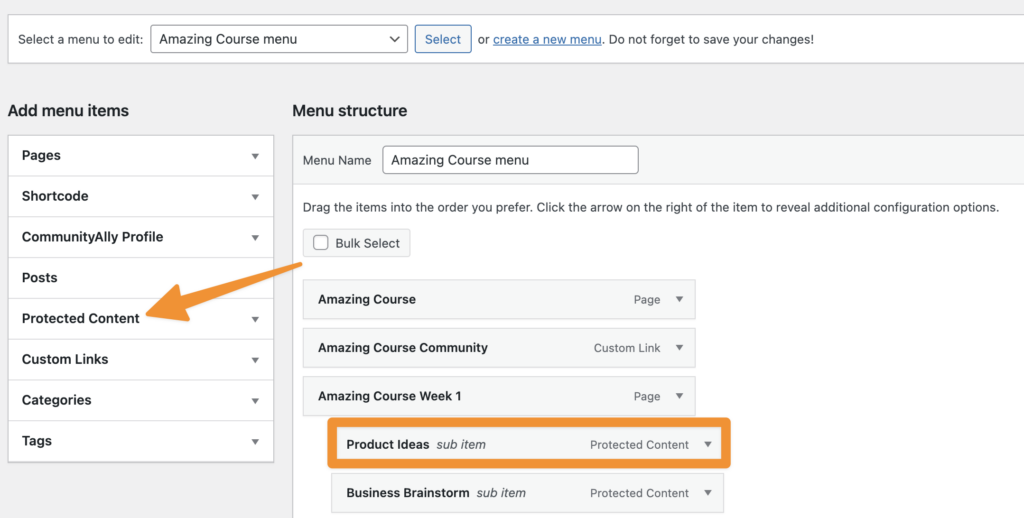
Developer View
Appearance → Menus → Screen Options
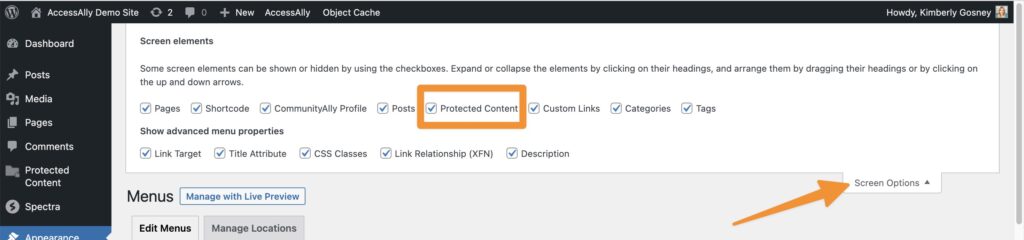
Add protected content to the menu of your choice.
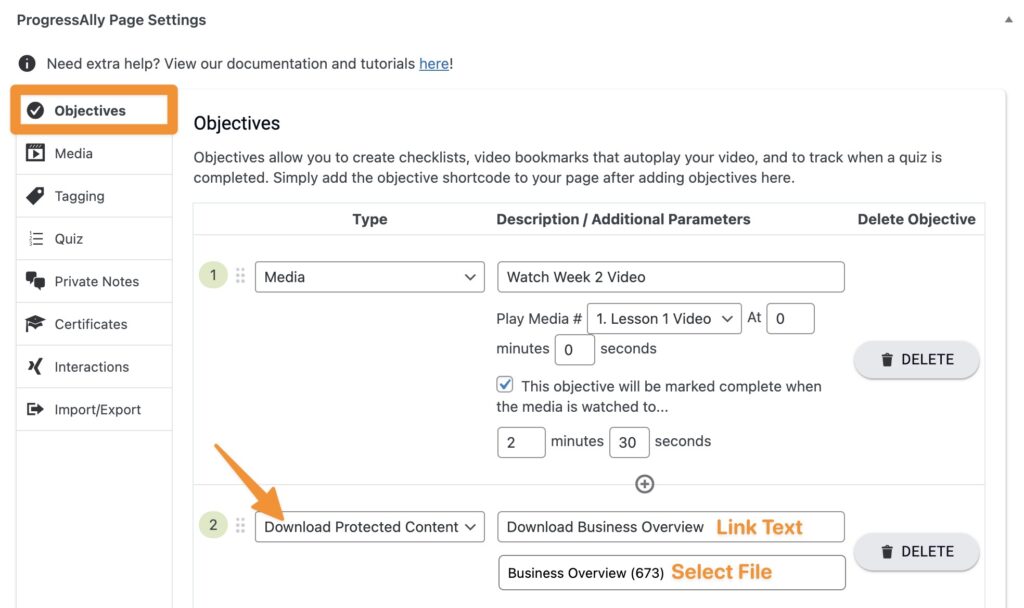
Display Protected Content in an Objective Checklist
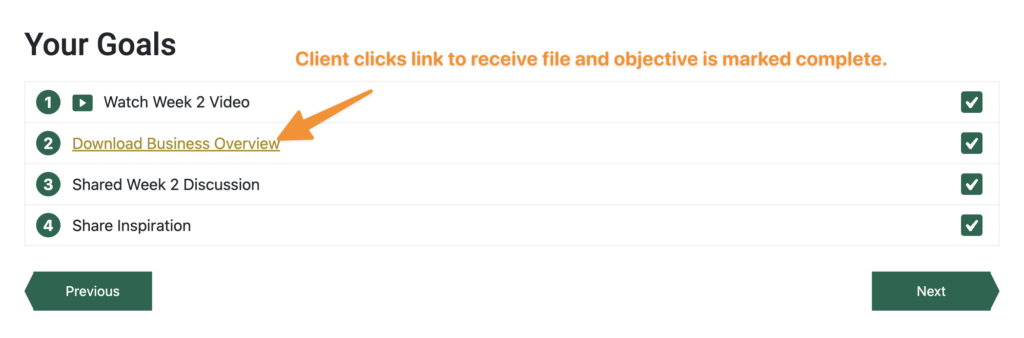
You can display protected content in objective checklists. Once the client clicks on the file it will either download or open in a new tab in browser (based on the client’s browser settings) and mark this item complete on the checklist.
Client View
Developer View
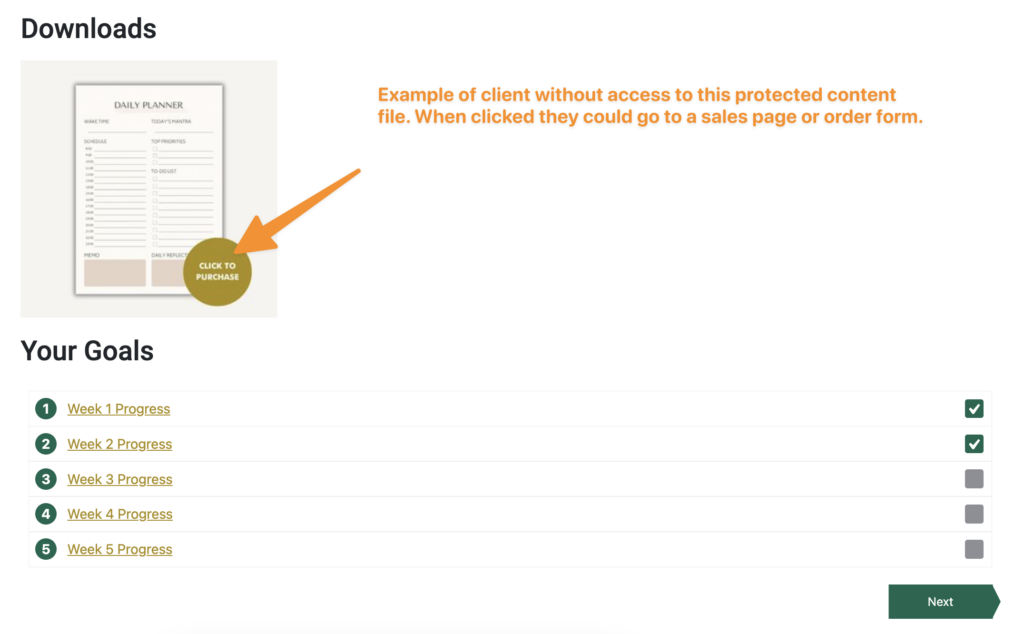
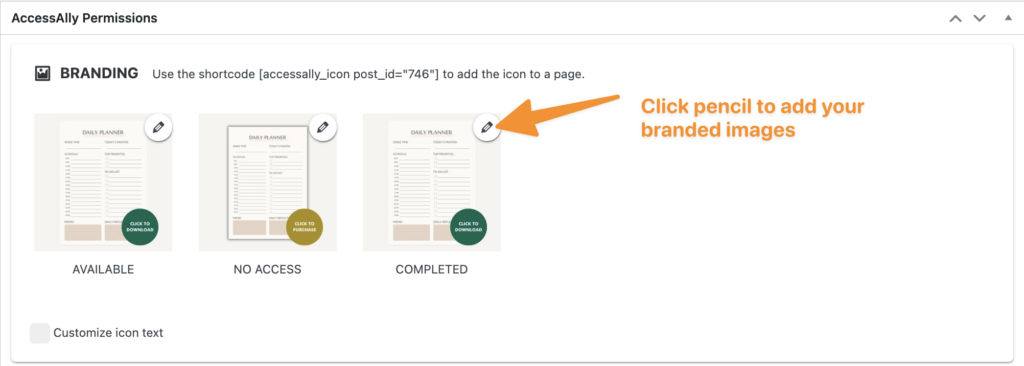
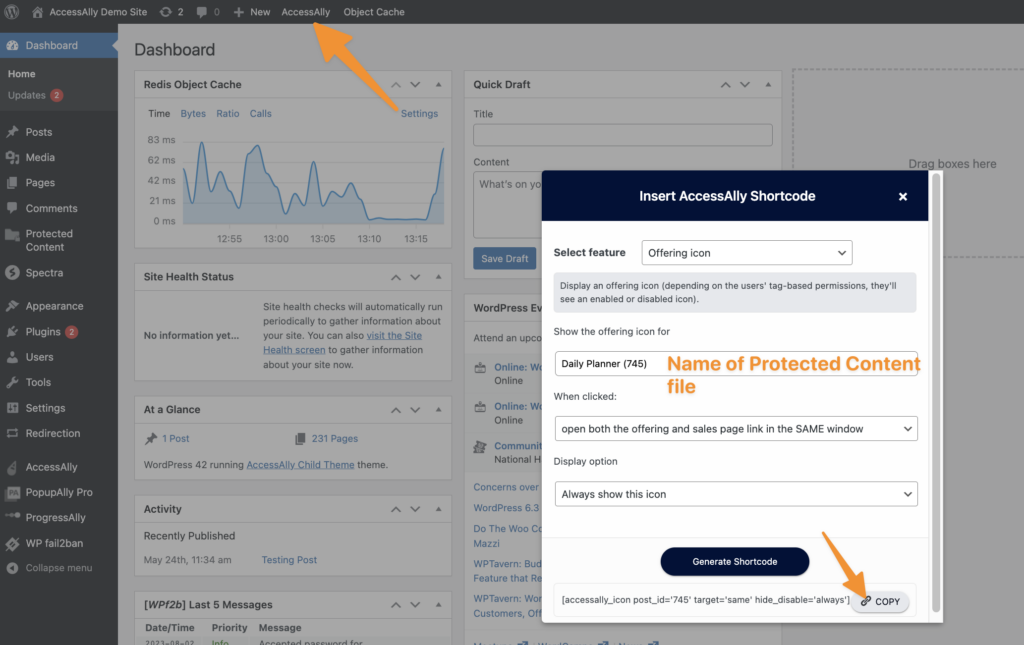
Display as Offering Icon
With this option you can create branded images to represent your protected content files and display those similar to offerings in AccessAlly. Simply place the offering icon on pages in your site.
Client View With Access
Client View No Access
Developer View
Go to Protected Content → All Protected Content to add your offering icon images.
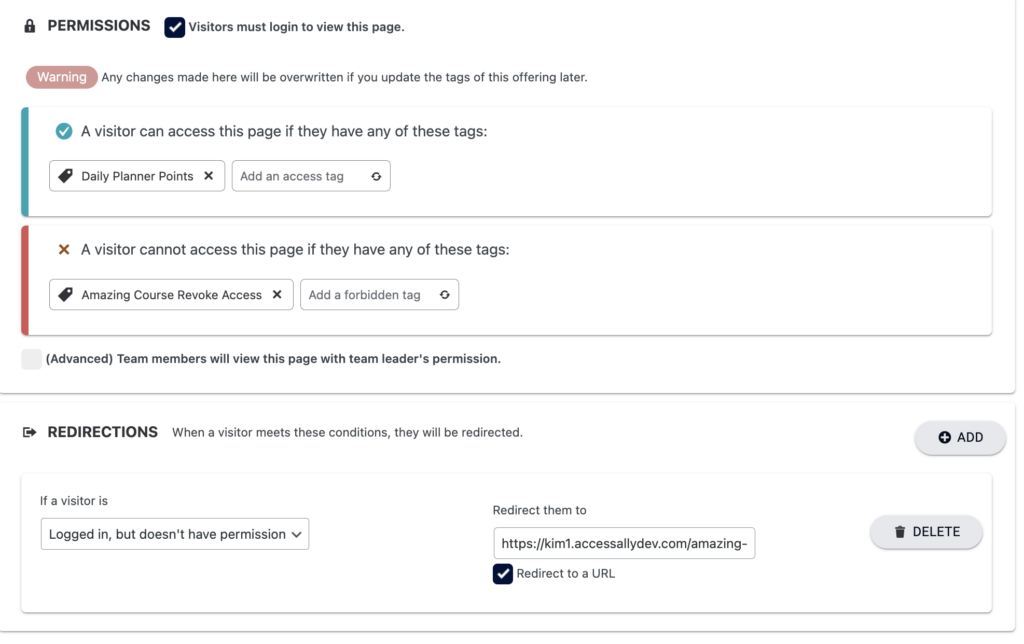
You may also add offering access tags and sales page or order form redirects!
Use the AccessAlly Shortcode Generator to get the code for your protected content offering icon. Then add it to your desired WordPress page.
Display Protected Content in WordPress Search
If you would like your Protected Content files to be displayed in the WordPress search widget follow the steps below.
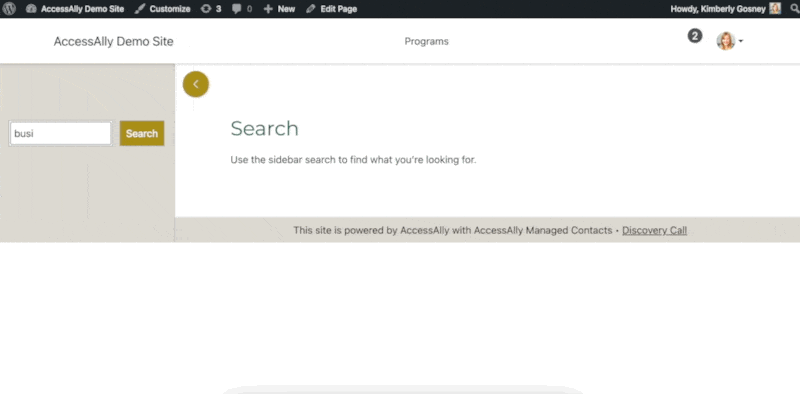
Client View
Client enters info in the search box and relevant pages, posts, and Protected Content files will appear.
Developer Steps
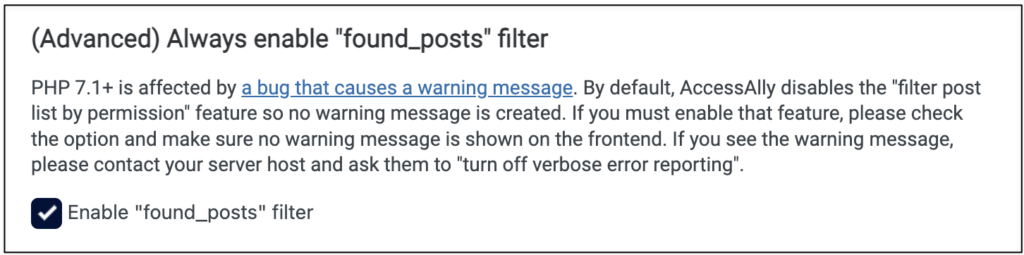
Step 1: Enable “found_posts” filter in AccessAlly
This filter will hide protected content files that a user does not have permission to see. AccessAlly → Settings → General Setup → Display Settings
Add a checkmark by Enable “found_posts” filter as shown in the image below.
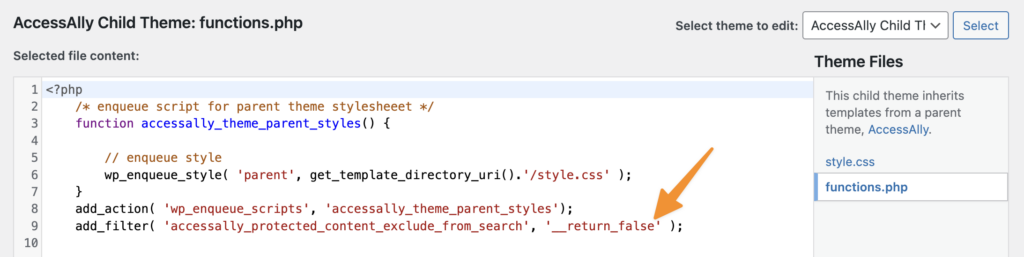
Step 2: Add the following code to your theme file editor functions.php file. If using the AccessAlly Theme you can add this by going to WordPress → Appearance → Theme File Editor
Code to add
add_filter( 'accessally_protected_content_exclude_from_search', '__return_false' );
AccessAlly Theme users: You can add this by going to WordPress > Appearance > Theme File Editor. If using a 3rd party WordPress Theme review your theme documentation.
Step 3: Add a WordPress search widget on the page of your choice. This will vary by theme. Steps below are shown in the AccessAlly Theme.
Recommendation: Create a new page on your site set to “visitors must log in to view this page” so all visitors can search. When viewing search results – all pages, posts, or protected content files will appear. If a visitor clicks on something they do not have access to they are redirected.
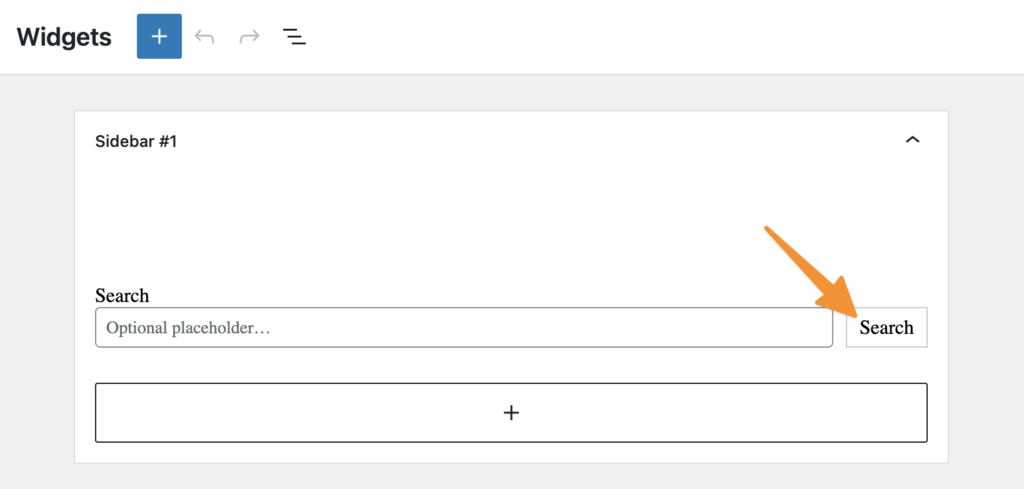
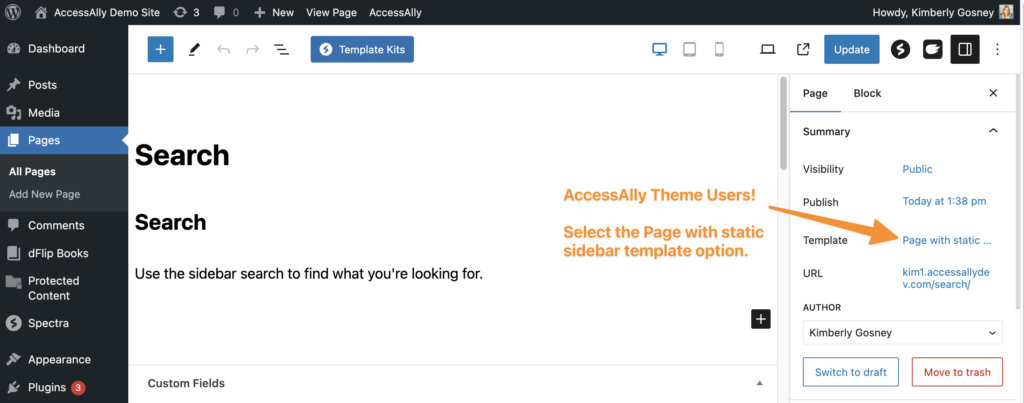
Step 4: Make sure the widget is displayed on the page. This step will vary based on your WordPress theme. Shown in the AccessAlly Theme in the image below.
Step 5: Test the search option.
Search the name of a Protected Content file to ensure it appears in search.
