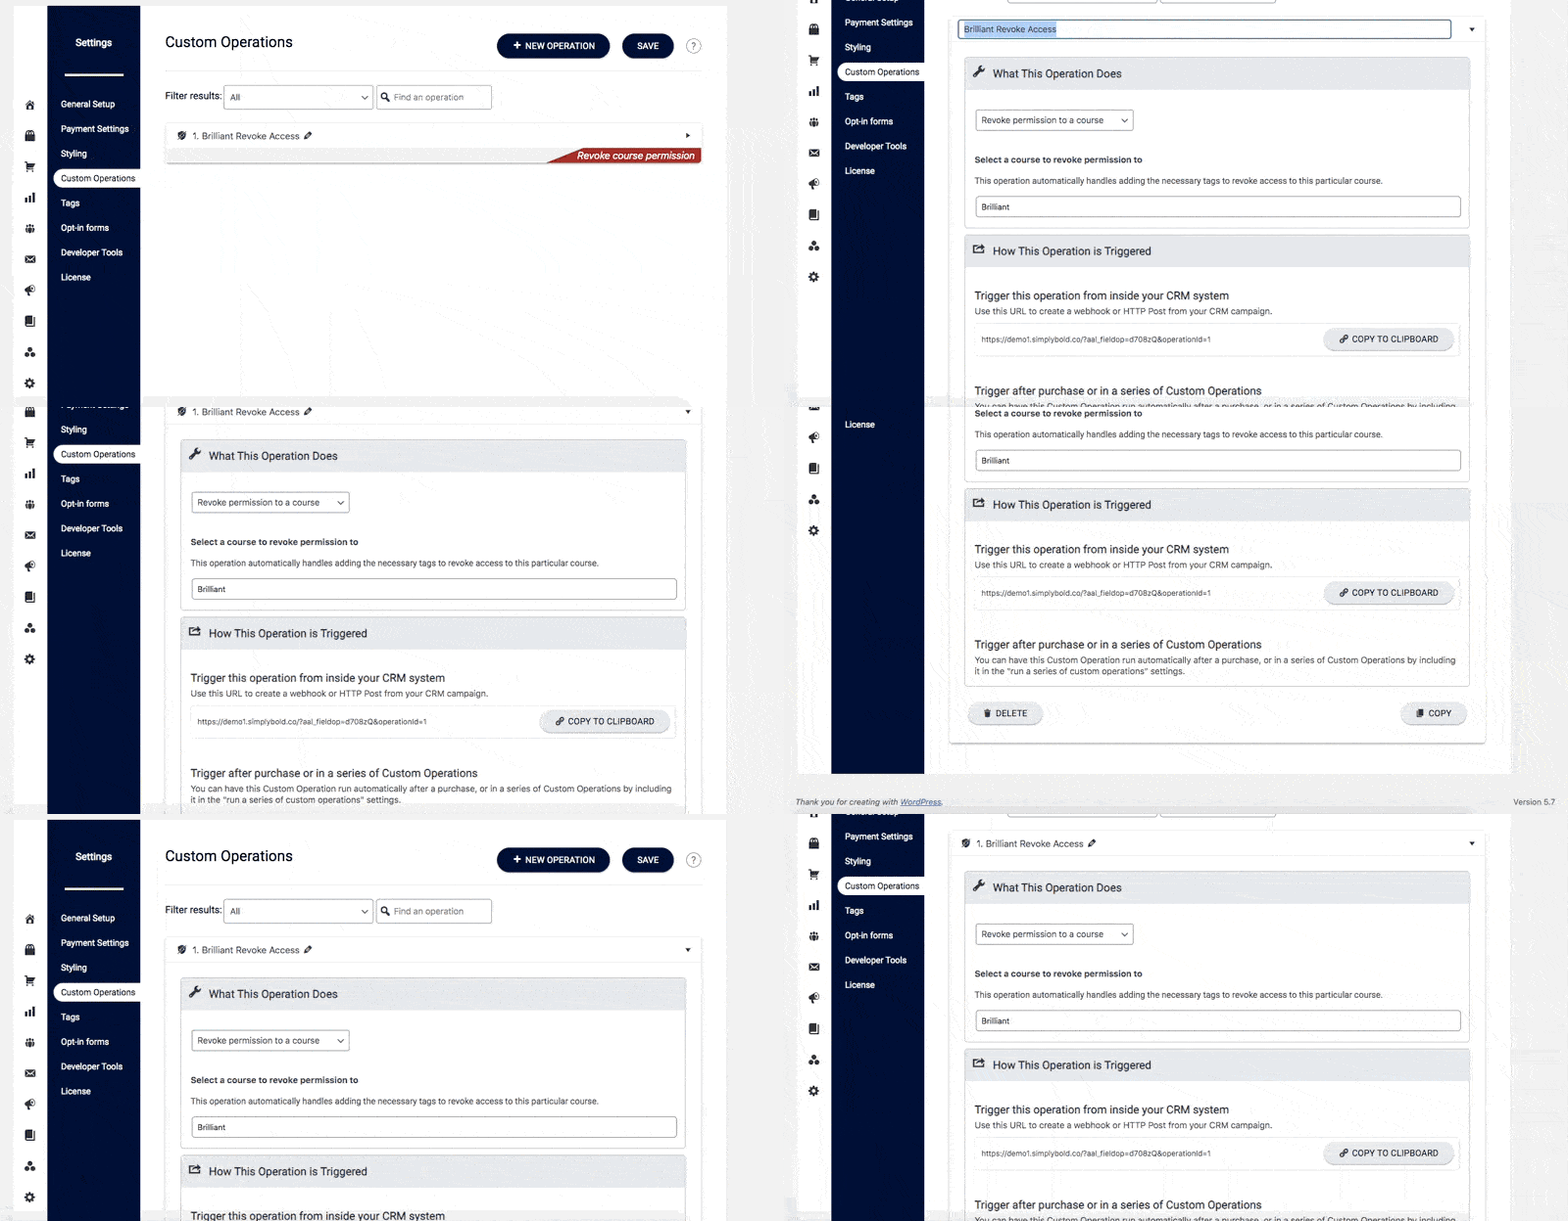
The Revoke Course Permission custom operation allows you to revoke course permission on AccessAlly for an entire course with a single action.
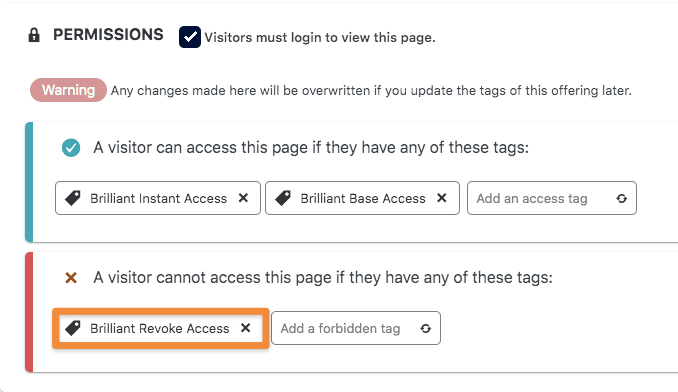
All offerings have a Revoke tag that is created in the Offering Wizard as a forbidden tag. Users with both access tags and the forbidden tag are not able to see the content. This tag allows for access to be removed and granted again based on tags.

ARTICLE CONTENT:
How to Create The Course Revoke Operation
- Go to AccessAlly > Dashboard > Settings > Custom Operations
- Click the + NEW OPERATION button at the top
- Name your operation something easy to remember like Course Revoke Access
- Under What This Operation Does select Revoke Permission to a course
- For Select a course to revoke permission to type in the name of the course
- Click the blue SAVE button to save your changes

How to Use This Custom Operation
Option 1: Using the Webhook Via the CRM as part of an automation
If you’d like to revoke access to a course after a payment failure automation or refund request you’ll use your CRM. Click the COPY TO CLIPBOARD button to copy the webhook for use in your CRM automations.
Option 2: Manually Adding the Revoke Tag to a User
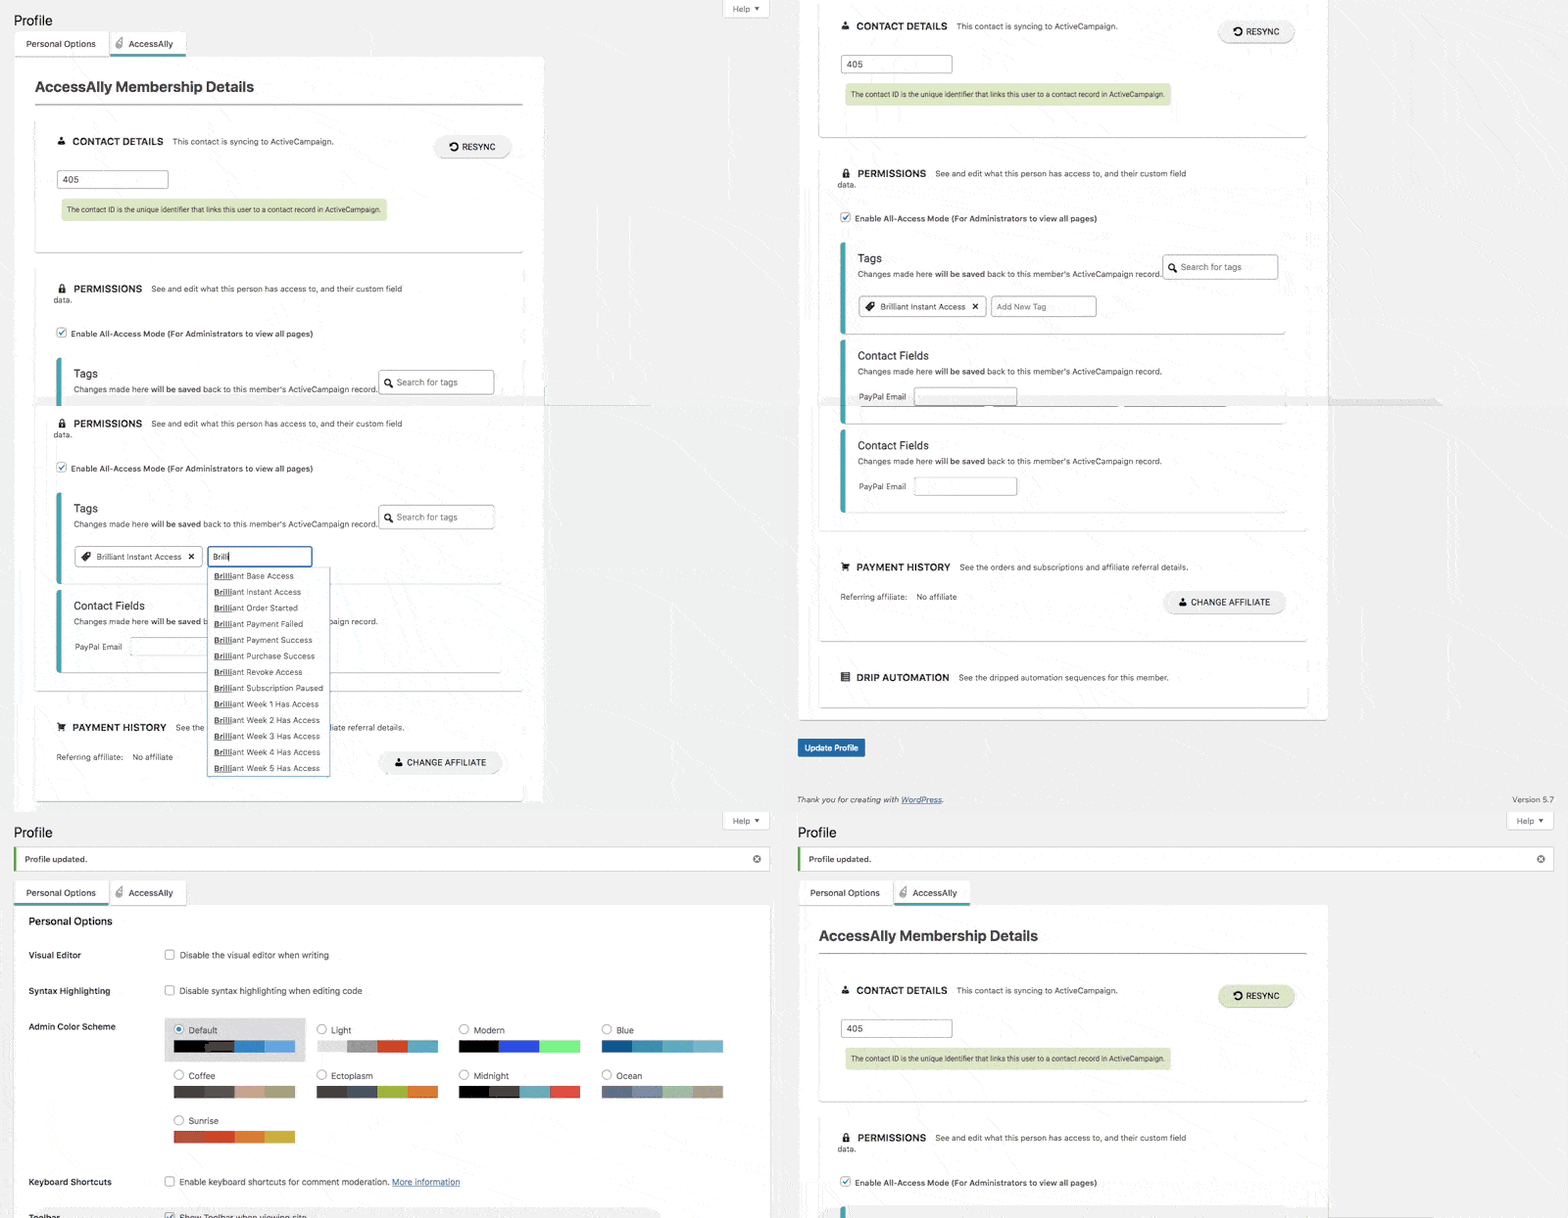
- If you would like to remove access from inside your site without using your CRM system simply navigate to WordPress > Users and enter the email address of the user. Click edit.
- Click the AccessAlly tab
- Verify the user has a number in the Contact Details section
- Under Permissions > Tags add the Revoke tag
- Scroll to the bottom and click the blue Update Profile button
- Click the AccessAlly tab and click the RESYNC button to update this user


