ARTICLE CONTENT:
Video Walkthrough of Creating a Member Roadmap
Watch the video and follow along to create your member roadmap.
Scenario
Scenario: You would like to create a visual roadmap of the steps on a member journey. This article narrows the steps to a single member moving through your AccessAlly site to the result you would like that member to achieve.
Version: The steps outlined in this article are available for AccessAlly Pro or CommunityAlly users.
Shoutouts: Special thanks to Scott on Team AccessAlly for sharing steps to support this scenario.
Roadmap Example
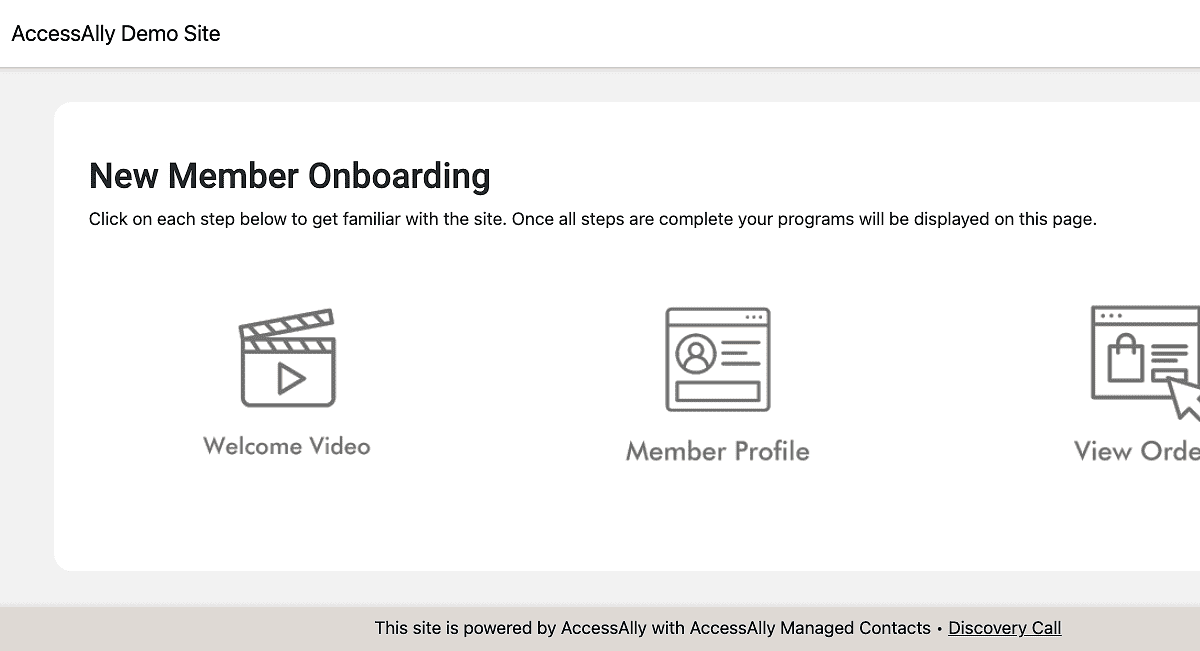
Here’s an example of creating a member roadmap to support new member onboarding.
View new member sees when logging in.
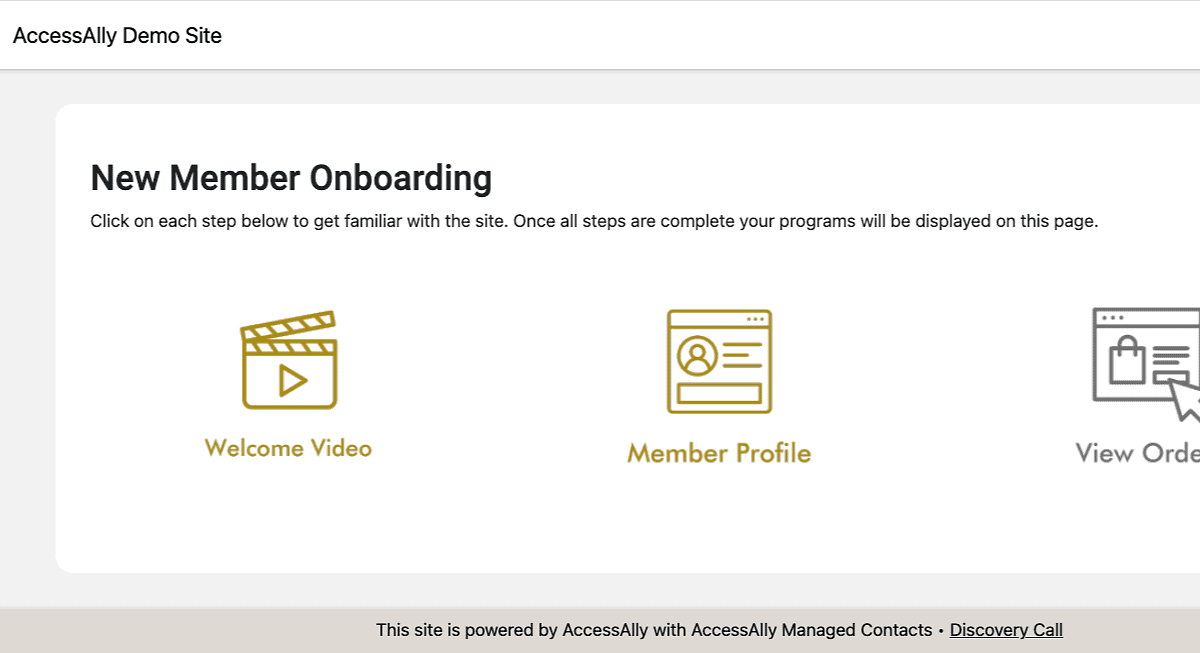
View new member sees while completing items on the roadmap.
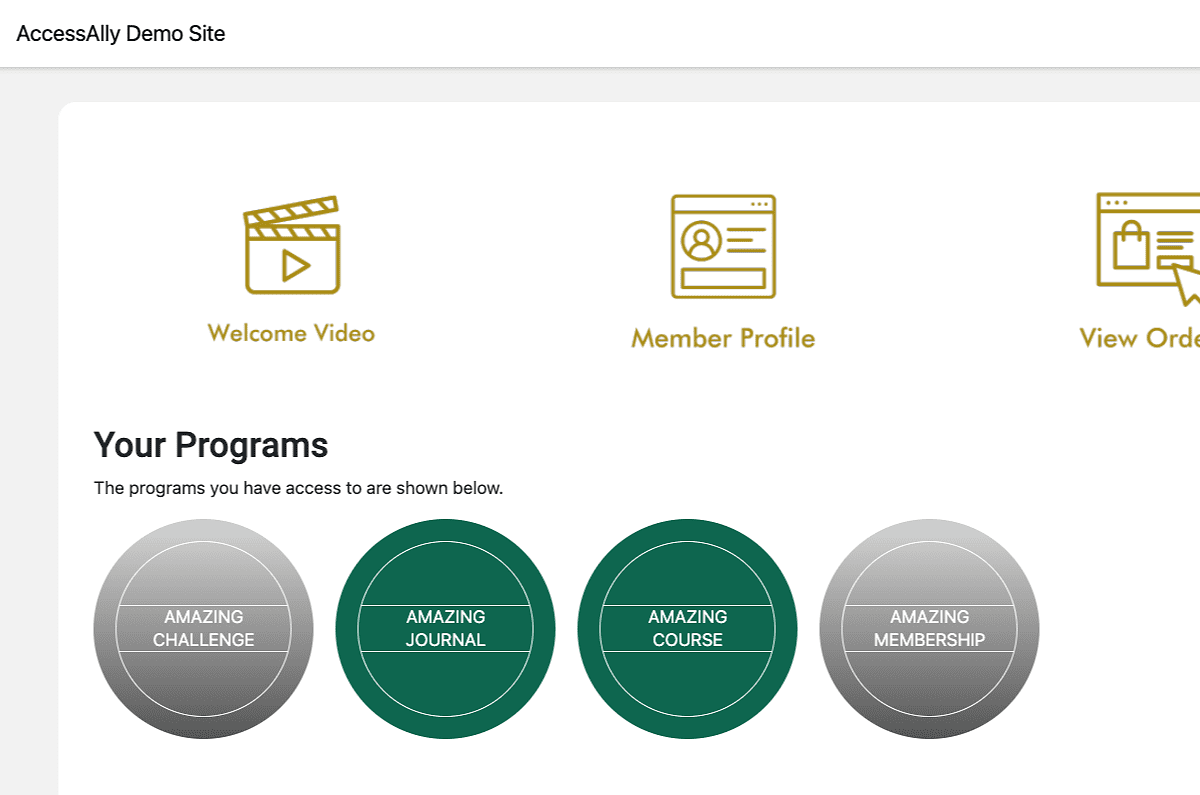
View new member sees once roadmap is complete.
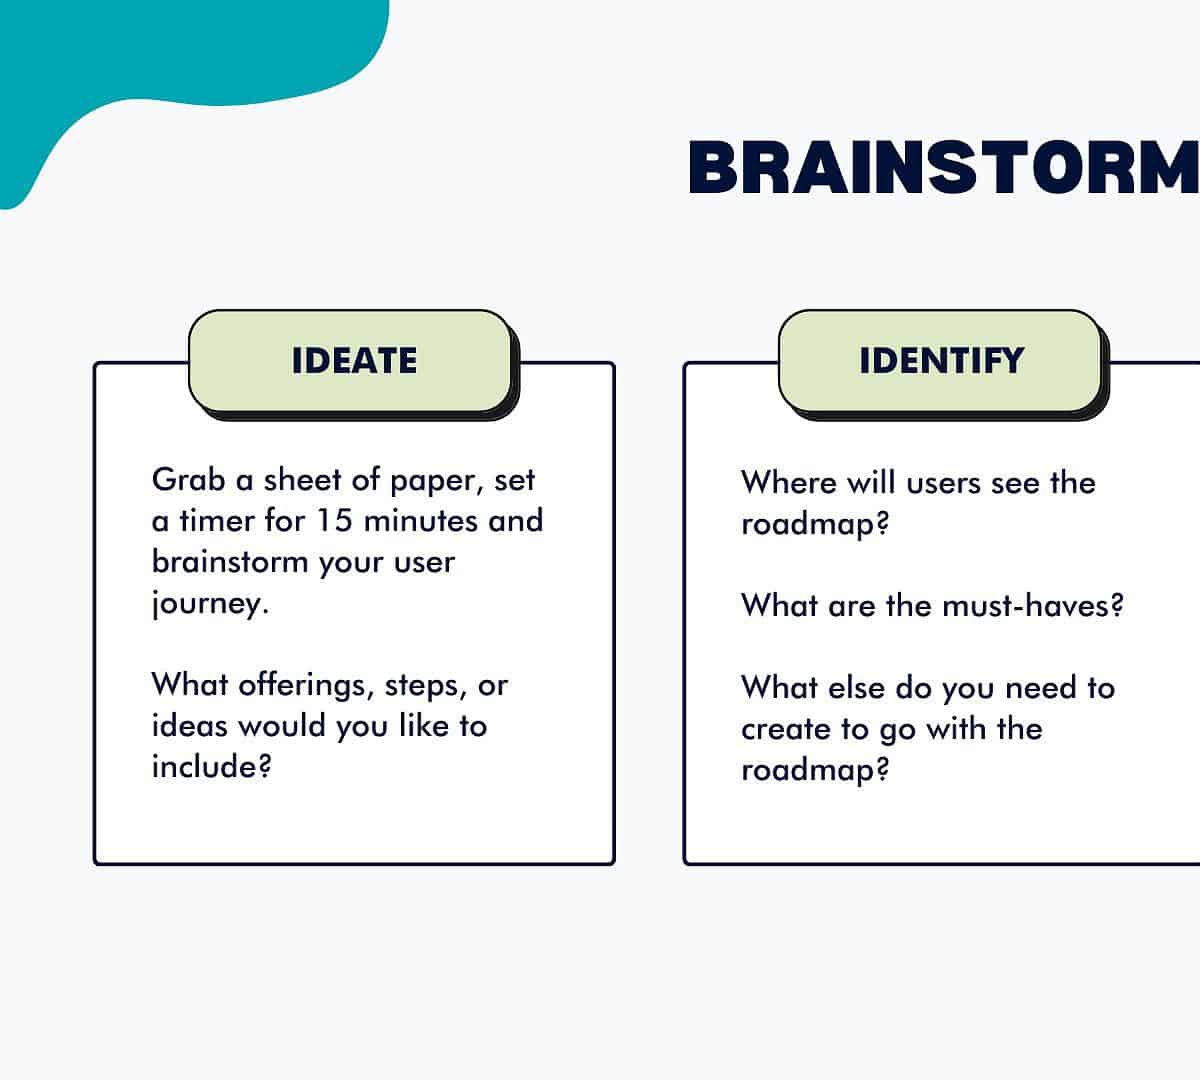
Brainstorm Your Roadmap
An important part of your journey is defining what your member roadmap needs before you build it.
- Ideate – grab a sheet of paper, think about a member, and jot down everything that is important this member needs to know, see, or experience as part of your AccessAlly site or as part of one unique offering.
- Identify – narrow down the items in ideate to create a list of must-haves for this member’s journey. Is there anything you need to create for this member like a video, PDF guide, or images?
- Implement – this article is designed to help you implement your member roadmap. These are the tech steps that make up this member’s journey.
Features Used
We’ll use the following AccessAlly and ProgressAlly features in this article.
- Tagging – Creating identification tags inside your site to match the steps on the member’s journey.
- ProgressAlly Events – allow for tags to be applied when a member visits a specific page on the site or completes items in a checklist.
- Shortcode Generator – creating conditionals to display items on a page based on tags a member has or or does not have.
Images Used
For each step in the member roadmap you will need two images. This works similar to AccessAlly Offering icons.
- User completed the step (displayed using Access icon)
- User has not completed the step (displayed using no Access icon)


Build Your Member Roadmap
Review and create any needed pages for your member roadmap.
In our example one new page is created to hold the Welcome Video. The content you place on the page can be anything you would like.
It’s important that the member has a way to get back to the member roadmap to complete all steps adding a link back to the page your member roadmap is displayed on makes this process easy.
Here there’s a new member section at the top with a link to the dashboard page of this site.
Front end view of this page as a new member sees it.

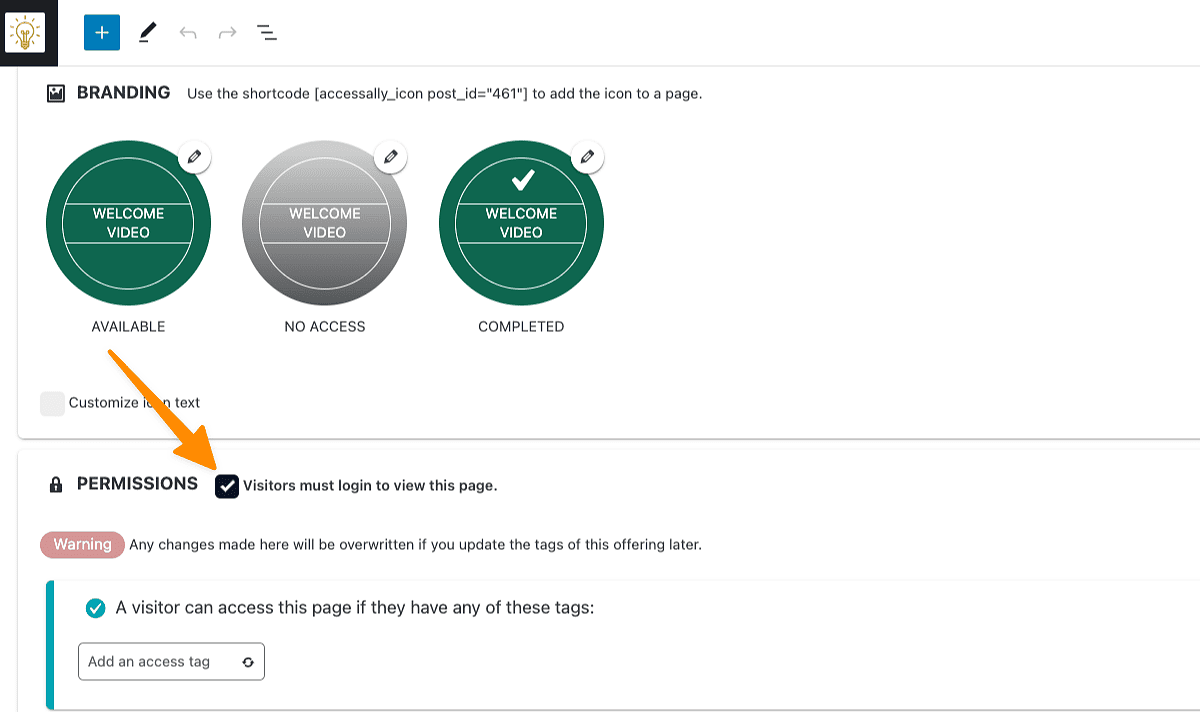
Admin view of this page showing the settings.
Permissions – must be logged in to view this page.
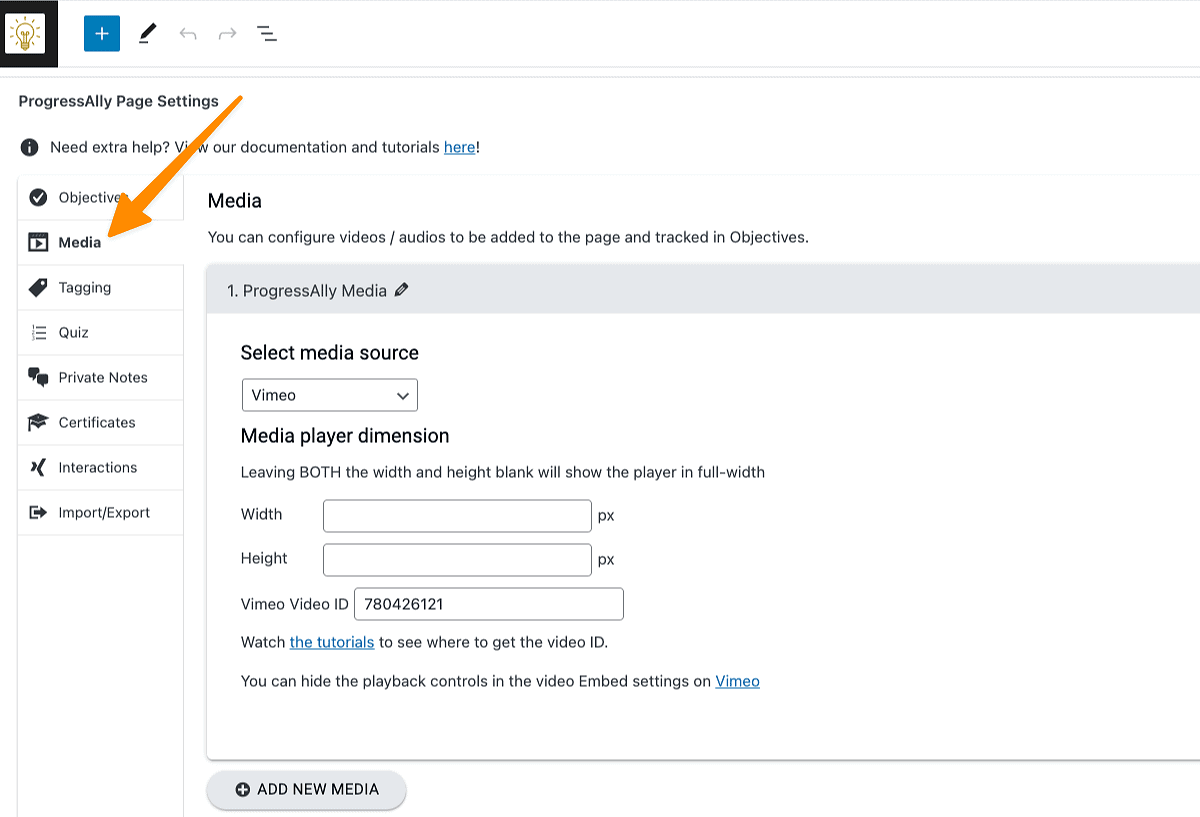
ProgressAlly Media – view of video added to media section.
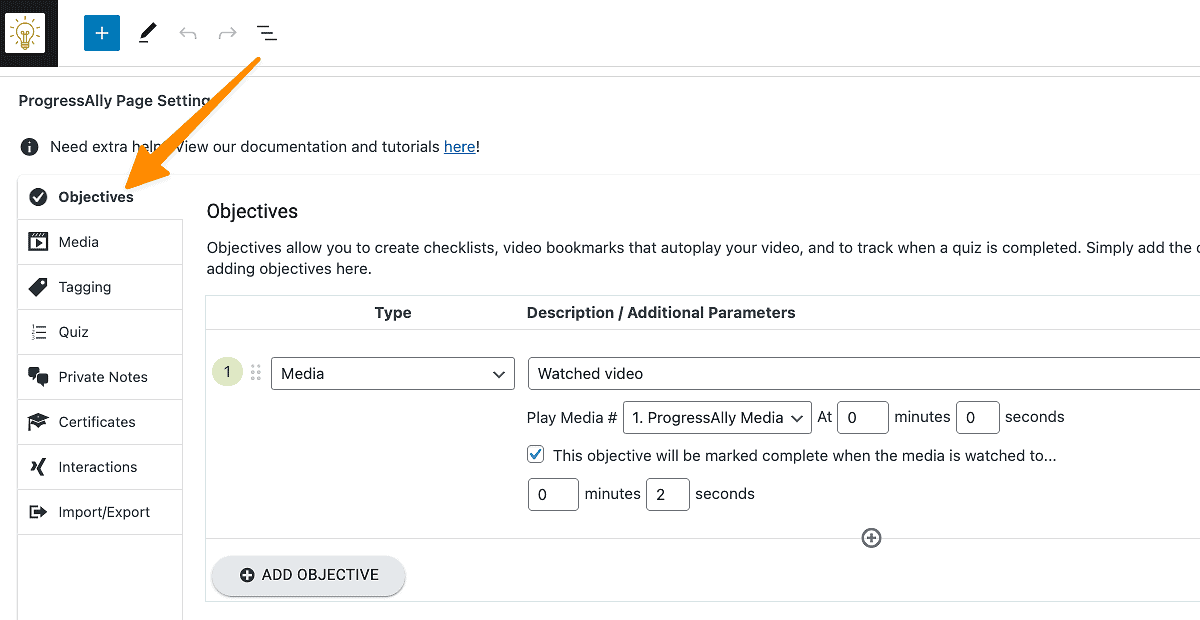
ProgressAlly Objective – view of the video added as a media objective set to be marked completed when a specific watched time in the video has been reached.
Repeat these steps for any remaining new pages needed.
You need a unique tag to note when each roadmap item is complete. Identification tags are perfect for this part of the process. This type of tag does not have to be connected to an offering in order to work within your site.
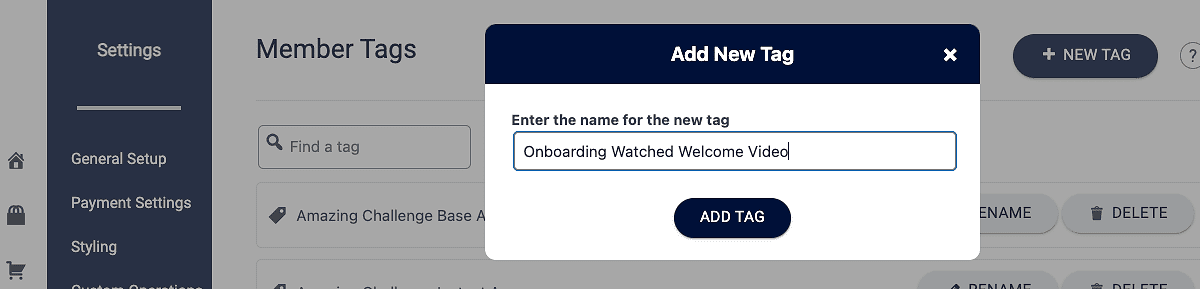
Go to AccessAlly > Settings > Tags > + NEW TAG
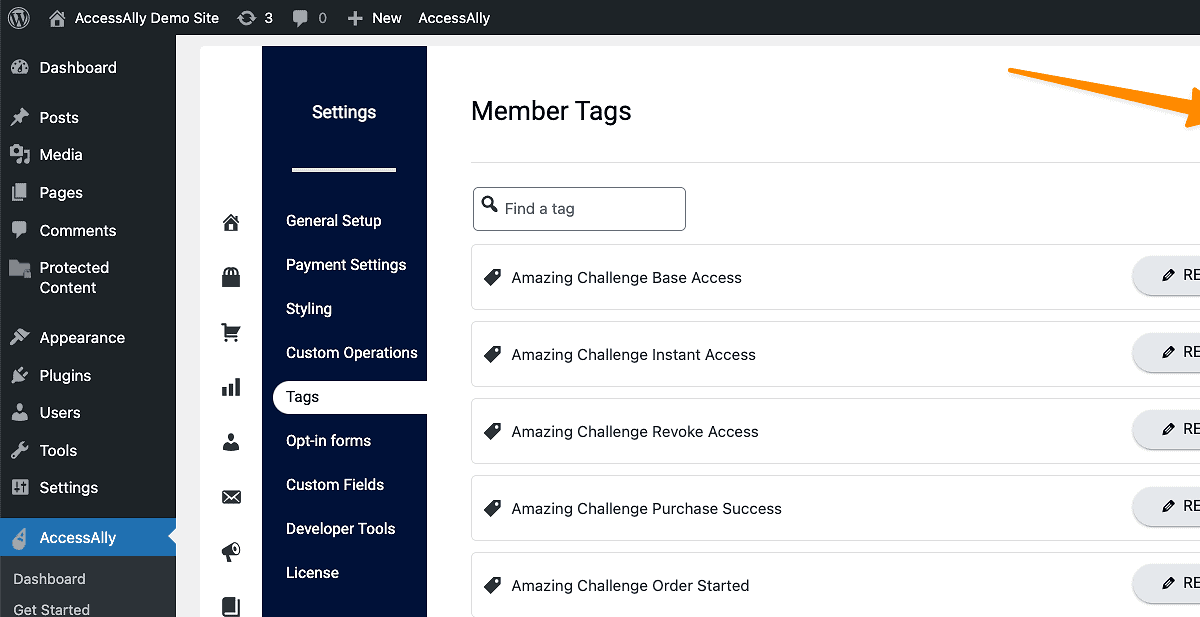
Create a new tag for each item in your member roadmap. Use a unique and memorable name for each tag.
ProgressAlly Events are extremely flexible and great for tracking when a member visits a page or completes a checklist item. This will apply your identification tag automatically which then shows the correct image on your member roadmap.
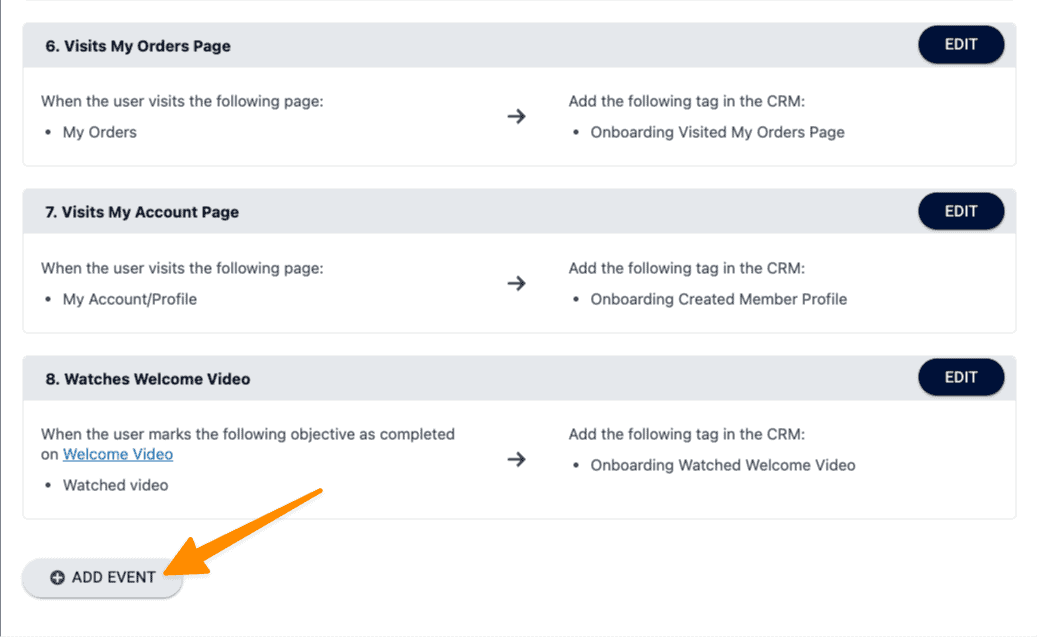
Two types of ProgressAlly Events are used in this example. One when a member has watched the welcome video. And… the remaining two are when a member visits specific pages on the site.
Go to ProgressAlly > Events > +ADD EVENT
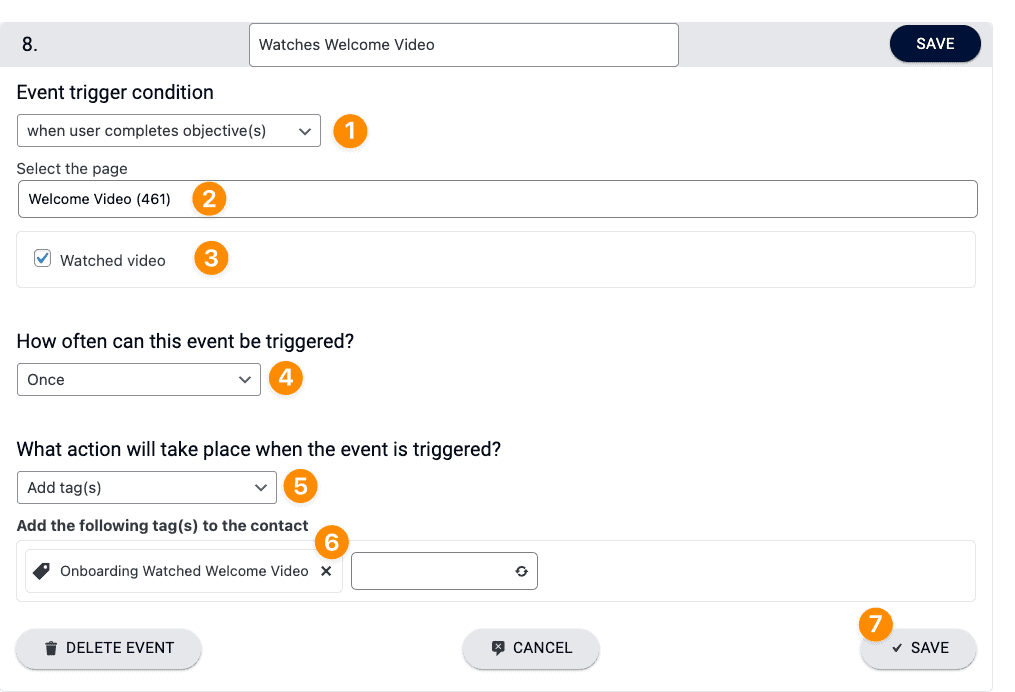
Event 1: When a user watches a video.
Review the settings in each section and match to your workflow. The tag in #6 is the identification tag that goes with that step on your roadmap.
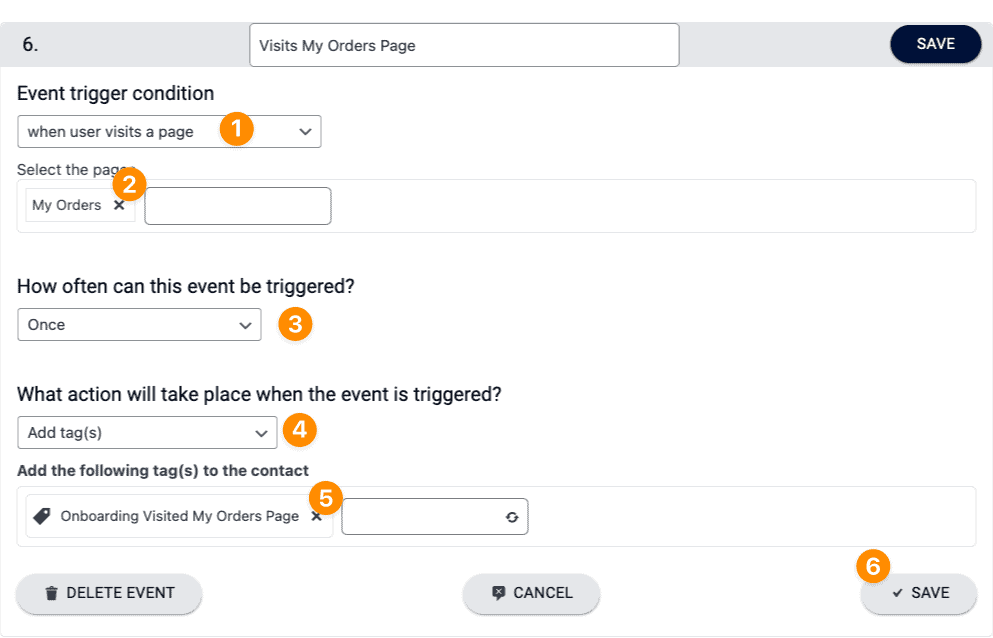
Event 2: When a user visits a page on your website.
Review the settings in each section and match to your workflow. The tag in #6 is the identification tag that goes with that step on your roadmap.
Rinse and repeat using ProgressAlly Events for each item on your member roadmap.
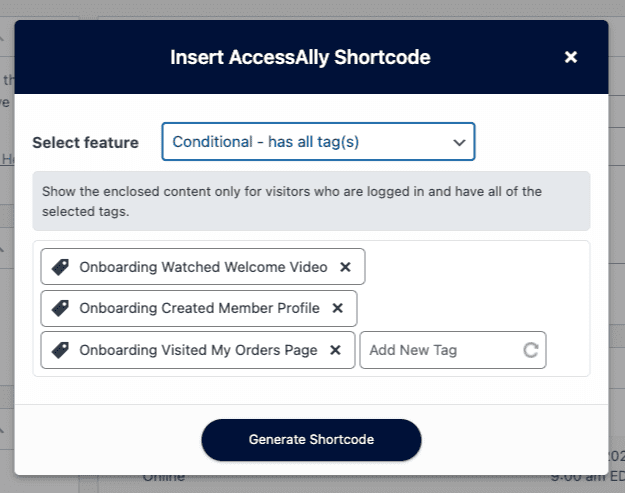
When displaying your member roadmap you will use the AccessAlly Shortcode Generator with conditions that display images based on a member having one or more of your identification tags.
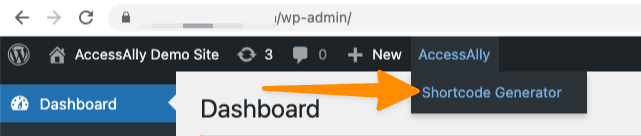
The AccessAlly Shortcode Generator is visible on any WordPress admin level pages the easiest way to find it is to add /wp-admin to the end of the URL of your AccessAlly site in your browser.
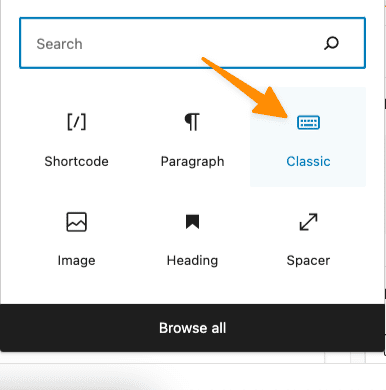
It is also located in the WordPress “classic” block.
Go to the page on your site that you would like to display the member roadmap. This example is added to the /dashboard or home page of this AccessAlly site. The member roadmap can be added to any page as long as:
- It requires a member to be logged in to view the page
- If the page requires the member to have a tag to view the page the member has that tag.
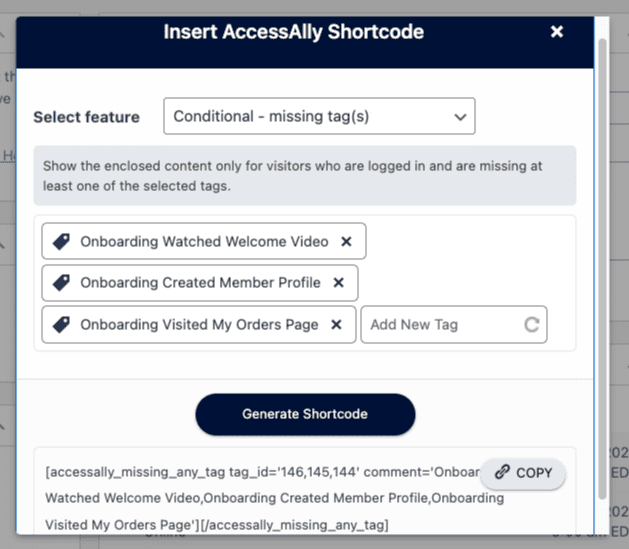
Add a conditional missing tag(s) shortcode to the page and add each tag in your member roadmap. Generate the shortcode. Copy the shortcode.
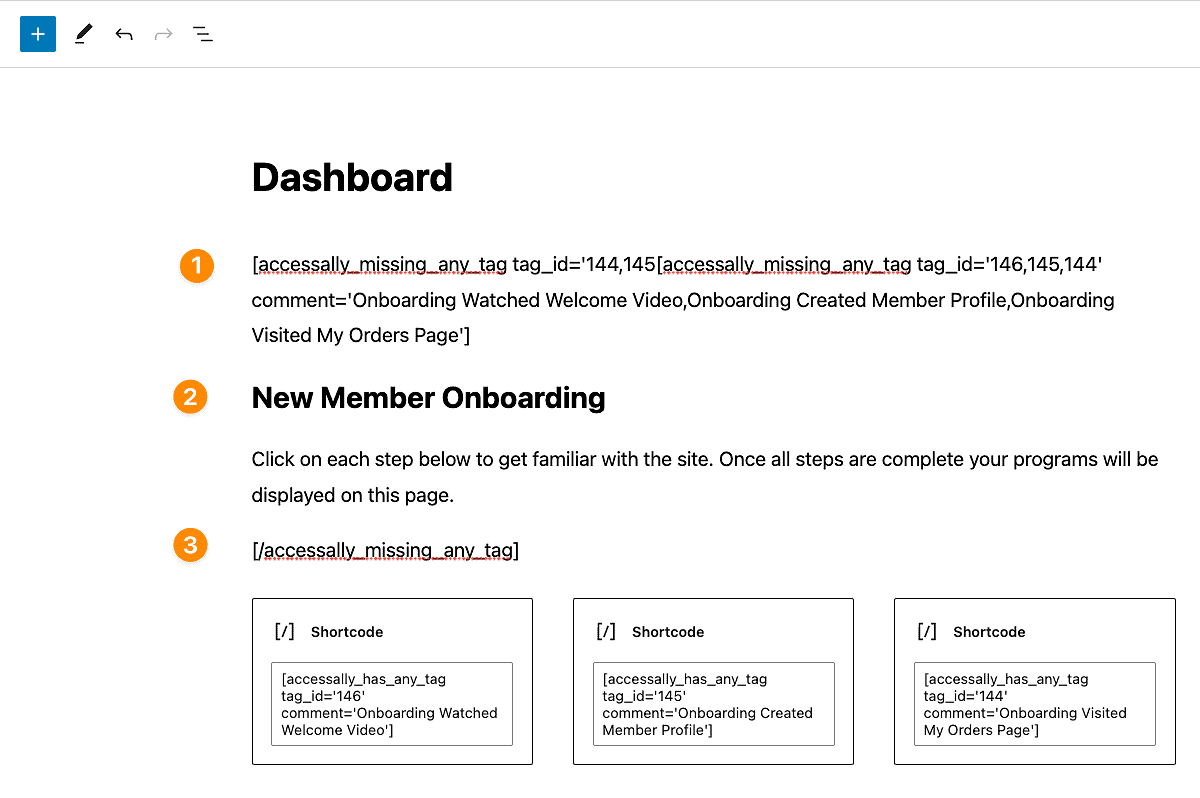
Add the shortcode to the page with your member roadmap.
- Add the shortcode the the page you want your member roadmap on. Copy this part of the shortcode after pasting in [/accessally_missing_any_tag] then delete it from this section. You will need it in part 3.
- Add a heading and any text you want a member to see when they need to complete these steps. Once the steps are complete this will disappear from view.
- Paste the ending of the shortcode [/accessally_missing_any_tag]
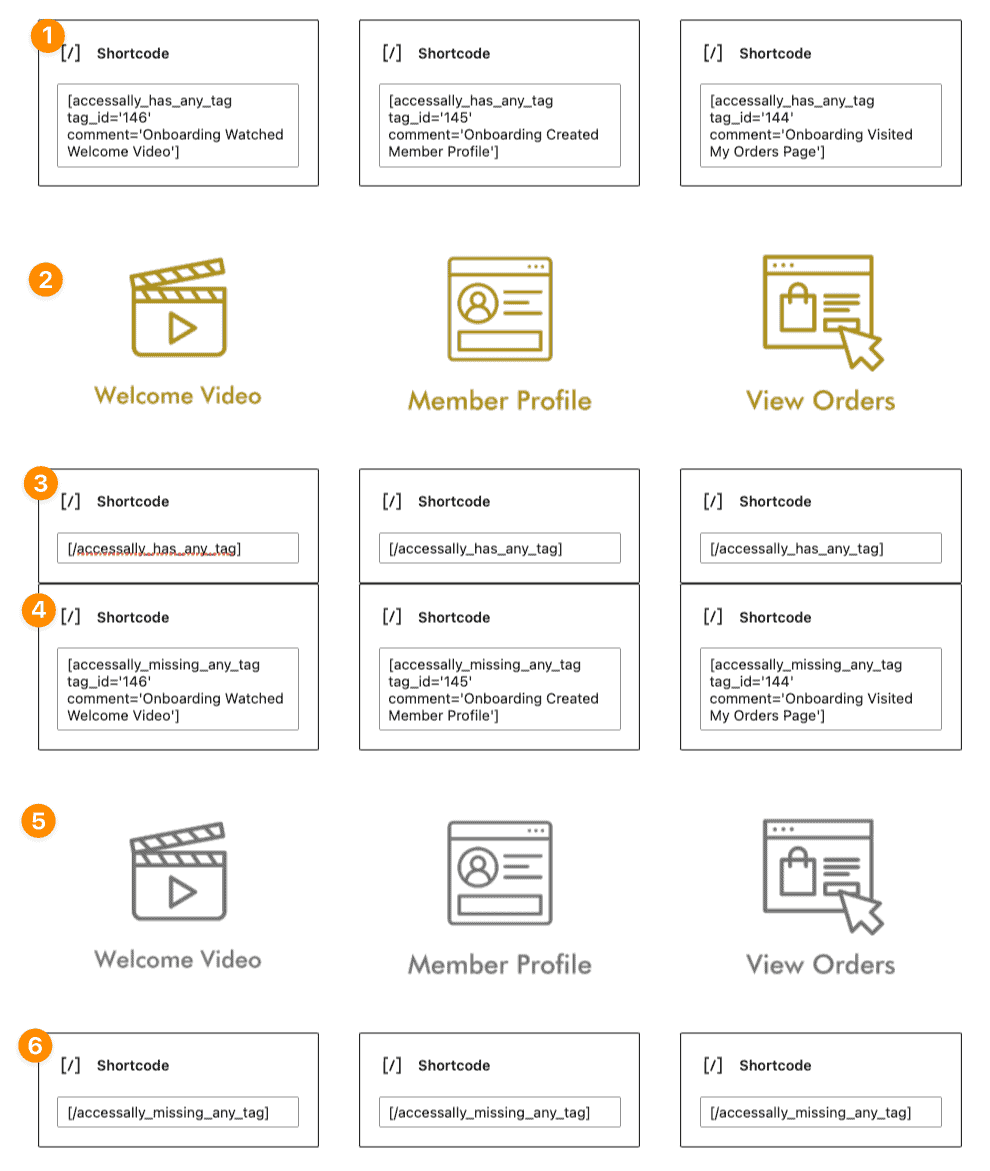
Add member roadmap images and conditional shortcodes.
Now it’s time to add the member roadmap images. Depending on your WordPress theme and page builder you may prefer columns for this setup.
This is a three column example. The steps in the first column are shown in the image in orange. You’ll rinse and repeat for each column until you’ve created all roadmap images.
- Conditional Shortcode: Has Tag(s) – add the identification tag for this step
- Media add image (example is gold in this article) – can be linked to the page this step is on. This image is in your media library.
- End of conditional shortcode – [/accessally_has_any_tag]
- Conditional Shortcode: Missing tag(s) – add the identification tag for this step
- Media add image (example is gray in this article) – can be linked to the page this step is on. This image is in your media library.
- End of conditional shortcode – [/accessally_missing_any_tag]
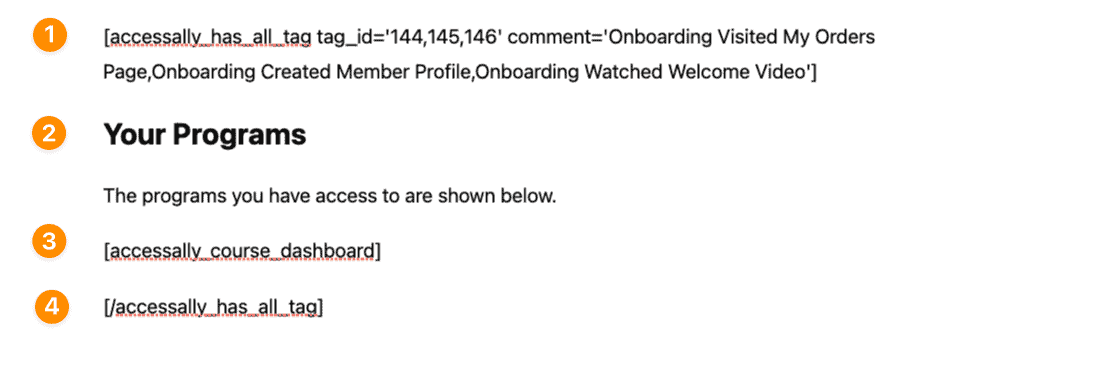
In this example the dashboard page hides available programs until a new member completes onboarding. Upon completion of all steps in the member roadmap the offerings are revealed.
This is achieved through conditional shortcodes. When user has all tag(s).
Add the shortcode to the page with your member roadmap.
- Copy this part of the shortcode after pasting in [/accessally_has_all_tag] then delete it from this section. You will need it in part 4.
- Add a heading like Your Programs
- Add the [accessally_course_dashboard] icon from the shortcode added this will display all offerings on your site.
- Paste the ending of the shortcode [/accessally_has_all_tag]
FAQs
We recommend testing the view as both an admin and a user moving through the roadmap. This ensures that you’ve got the steps just right.
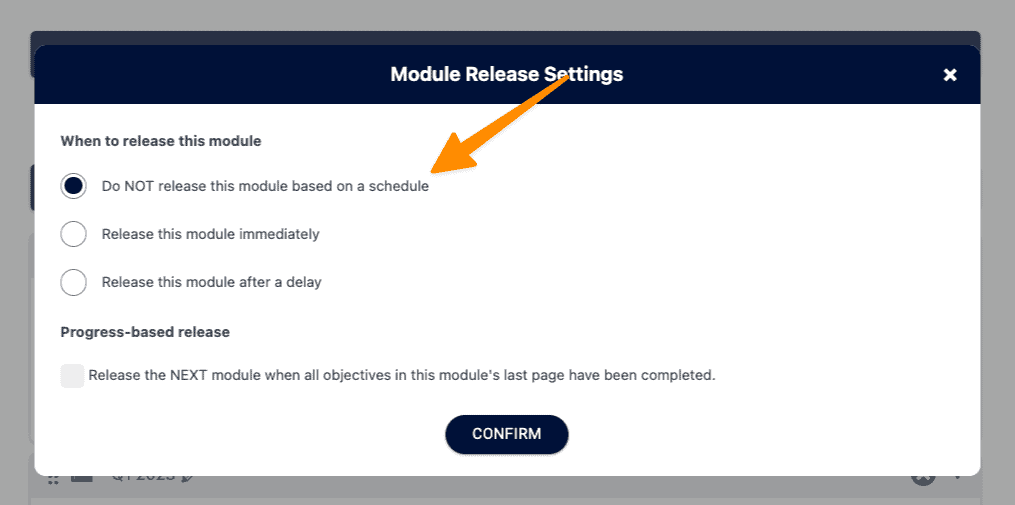
Yes, you can. This method keeps all steps inside a single offering. We recommend using the Drip Release Course Offering Template as this will allow for “modules” to control the “images” for each module page. The remaining steps are the same.
Note – you will need to add the “release offering” custom operation to items purchased so new members have access to the onboarding offering and set the release timers to do not release this module based on a schedule.
Following the outline in this article allows use of any pages in any offerings to become part of the roadmap. It’s so flexible that you can create pages that are not part of any offering… and still have them appear in your roadmap.
