Give a warm welcome to new members with a special message that introduces them to your membership site and points them in the right direction so they can get started.
With AccessAlly Pro, you can use unique tags and conditional content shortcodes to limit the viewing of this video to new members.
ARTICLE CONTENT:
Part 1: How To Reveal The Welcome Message
Step 1: Create a “Welcome Message” Tag In Your CRM
First, you need to create a new tag in your CRM. This tag will be applied to new users when they first log into the site.
We recommend choosing a very obvious name for this tag, like: Logged_into_site
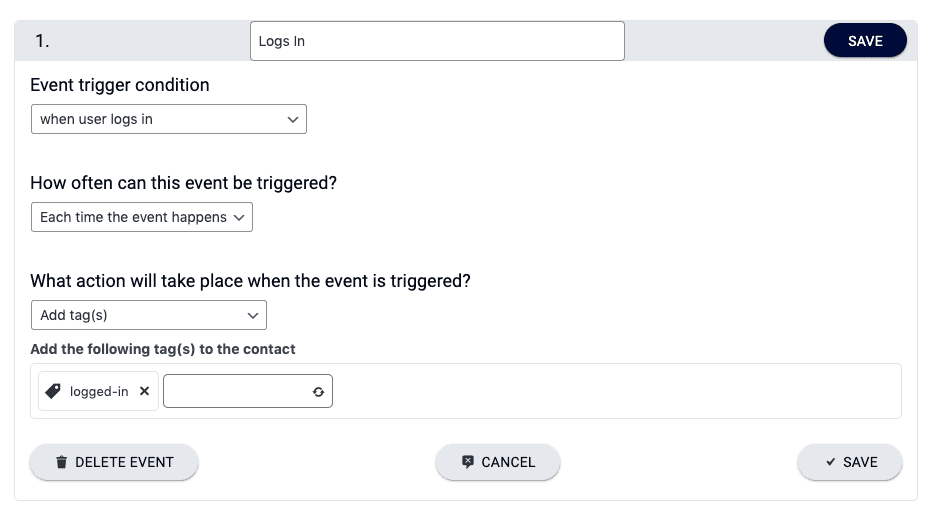
Step 2: Create a ProgressAlly Event
Go to ProgressAlly > Events.
Create a new event with the trigger condition: when user logs in.
Make sure it only runs once, and that the tag you created in step 1 is added in the designated area (indicated with the blue arrow in the screenshot below).
Step 3: Add Welcome Message to Dashboard Page
Now, add your welcome message to the main page (a great place to put it is at the top of your Dashboard page, but you can put it wherever you want!).
This could mean a written message, an embedded video, etc.
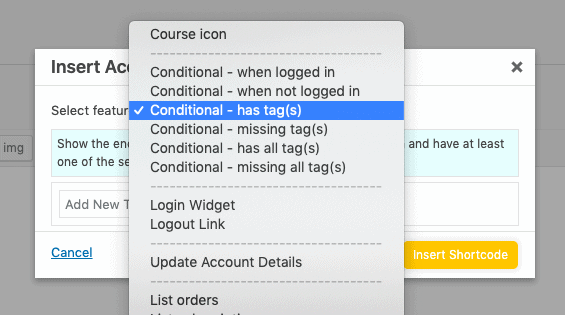
Step 4: Wrap welcome message with “Conditional Shortcodes”
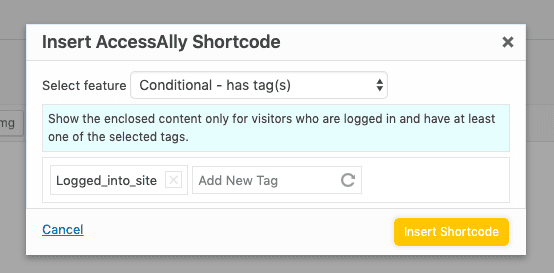
With your welcome message added to the page, you’ll use AccessAlly’s shortcode adder to select the Conditional – has tag(s) option.
Then, add the same tag you created in step 1 of this tutorial, and click “insert shortcode.”
When the shortcode is added, make sure the two parts “wrap” around the welcome message, as in this screenshot: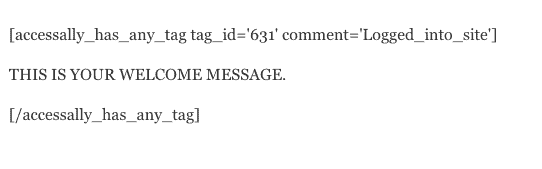
Part 2: Hiding/Retiring the Welcome Message
With the setup in Part 1, the welcome message will appear as soon as the user logs into the site for the first time. Since there’s a specific “start” trigger, you can also configure an automation that “retires” the content.
The tutorial below will show you how to retire the welcome message after 30 days using a CRM automation. However, you can get as creative as you want. For example, you might choose to use a video bookmark/objective combination instead, so that the video disappears when the user finishes watching it.
NOTE: This part is totally optional. If you want, you can simply leave the welcome message as-is, so that the user can continue viewing it whenever they wish.
Create A Timed Automation In Your CRM To Retire The Content
The timed automation setup is extremely simple, and uses only three elements:
- Trigger: When the “logged_into_site” tag is added
- Wait/Delay: 30 days
- Action: Remove the “logged_into_site” tag
