In this article, we’ll explore how a participant can continue to have access to an offering after they’ve canceled a recurring subscription plan.
There are many ways that you can use tags to control access to your online offerings. This is one example. If you have questions about anything in this article join our next Tune Up call or Contact Support.
ARTICLE CONTENT:
Create Separate Offerings
Beginner Friendly!
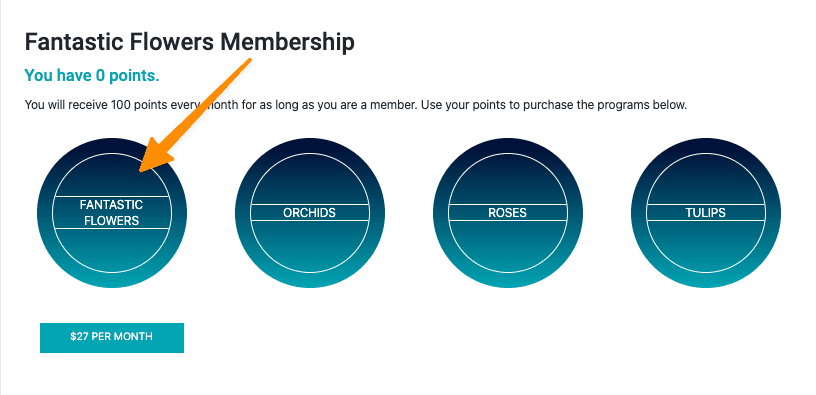
In the example below there are four separate offerings. This allows each Offering a member receives to have its own unique Revoke Access tag. If the member cancels the membership and the Membership Revoke Access tag is applied, the content they had while a member is not affected!
Why Separate Offerings?
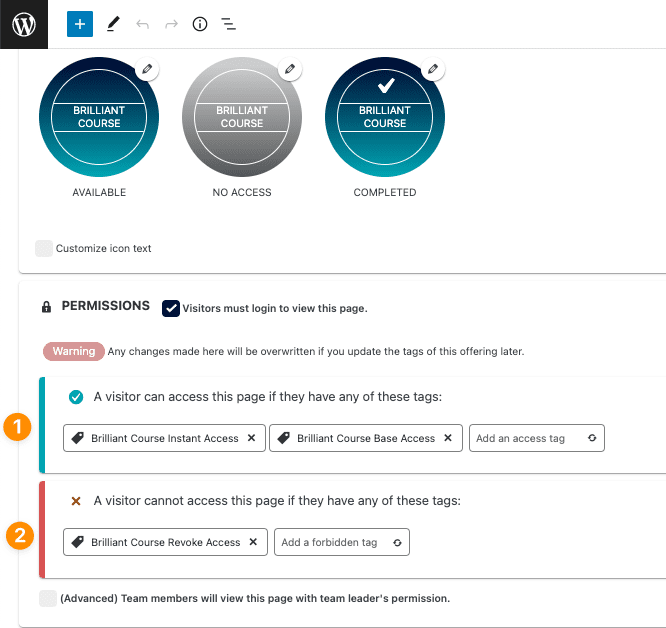
Every Offering has both access tags that allow a user to see the content on the pages and revoke tags that can hide the pages from a user’s view.
- A visitor can access this page if they have ANY of these tags – tags a user needs to see this page of content.
- A visitor cannot access this page if they have ANY of these tags – tags a user has that will hide or prevent the user from seeing this content.
About the Revoke Access Tag
Revoke access tags are frequently added to a user on your site when they have failed payment plan payments or have canceled a recurring payment plan.
These tags are designed to keep users from seeing the content.
This can cause friction for you as the site owner if they retain access after canceling within a single offering as the revoke tag is used on all pages. This is why it is highly recommended to use separate offerings as the content is not sharing a single revoke tag.
When are Revoke Access Tags Applied?
In the dropdown below you’ll see popular examples of how and when Revoke Access tags are applied. It’s important to see the flow of each type so you’ll know how these actions impact offerings a user is able to keep upon canceling your membership.
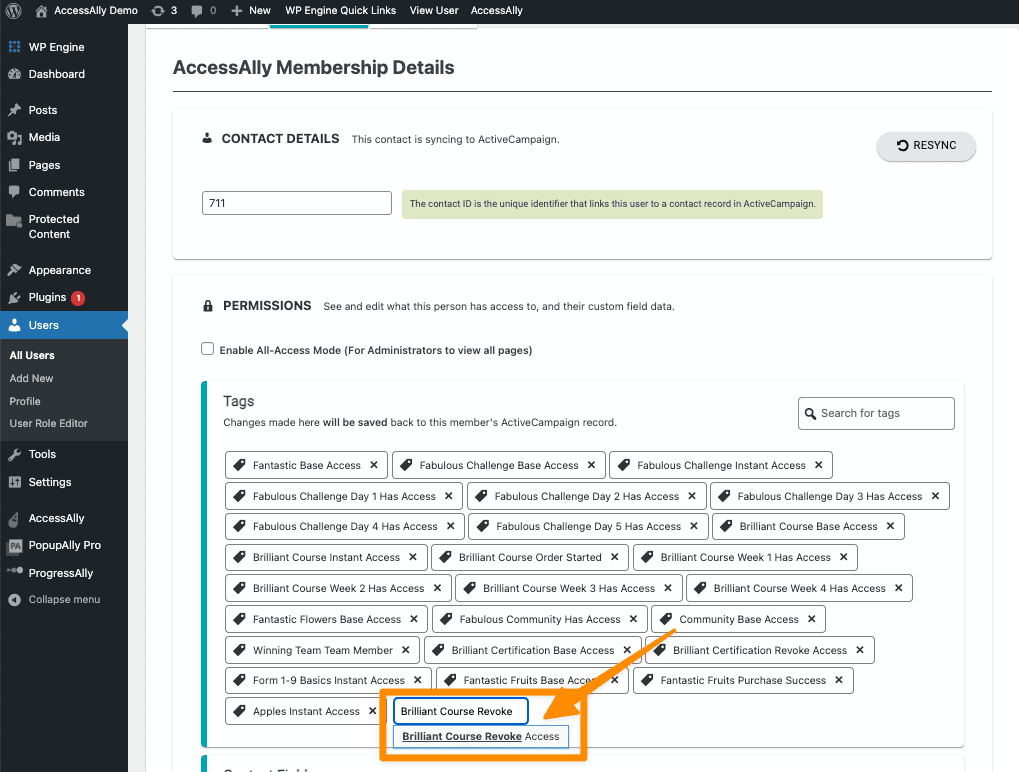
1. Revoke Access Tag is Manually Applied to a WordPress User
An admin user has added the tag to a single user. This user is now unable to see everything in this Offering.
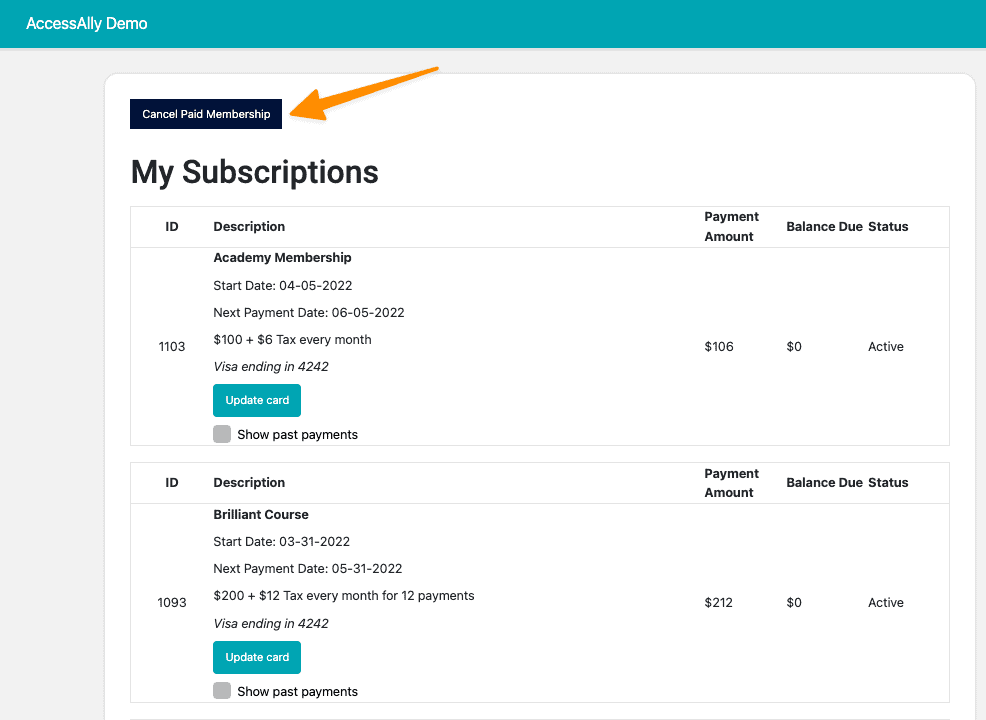
2. The Member Clicks a Self-Cancelation Button
If you have added a Self-Cancelation button custom operation the Revoke Access tag is added after the existing paid time has ended.
3. The Member Emails in and Requests to Cancel
An admin is canceling the recurring payment plan by adding the Subscription Paused tag until the end of the paid period and the Revoke Access tag is then automatically applied.
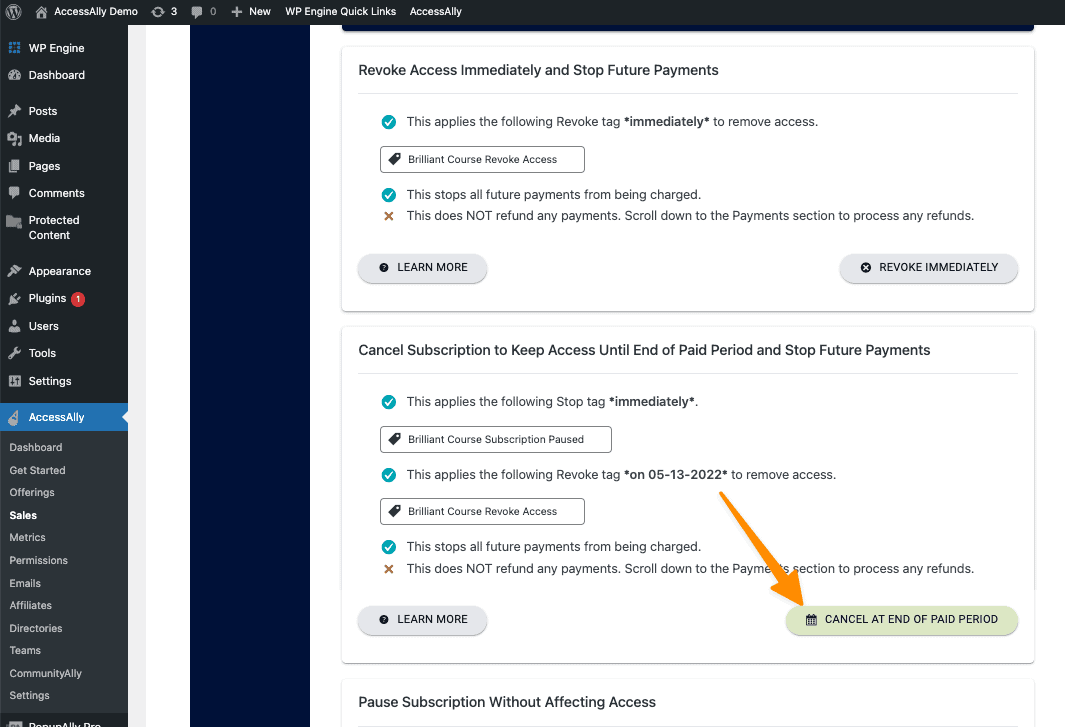
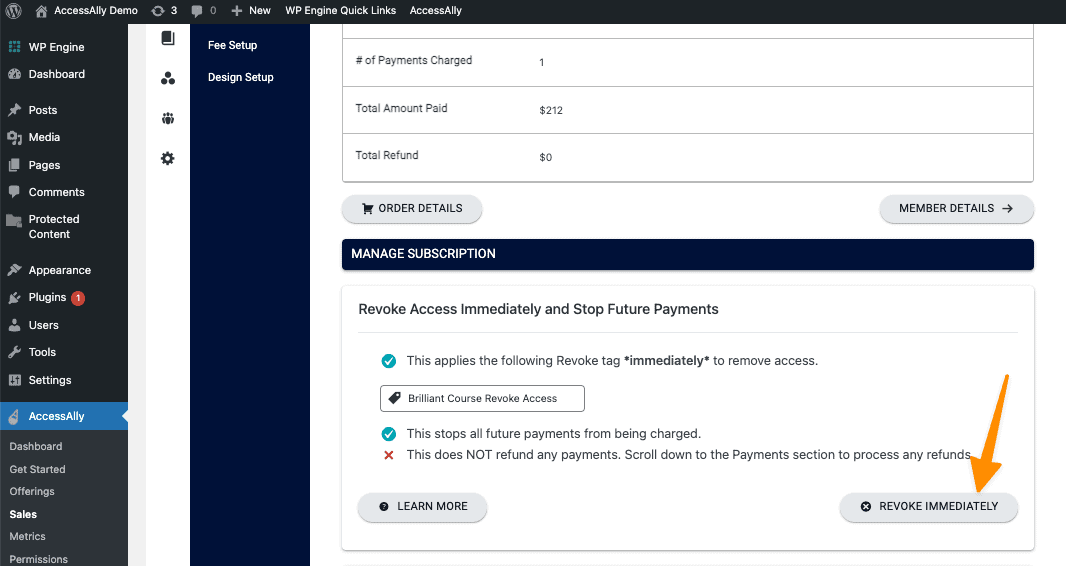
4. The Member Requests or is Issued a Refund
When the refund has been processed a site admin is applying the Revoke Access tag.
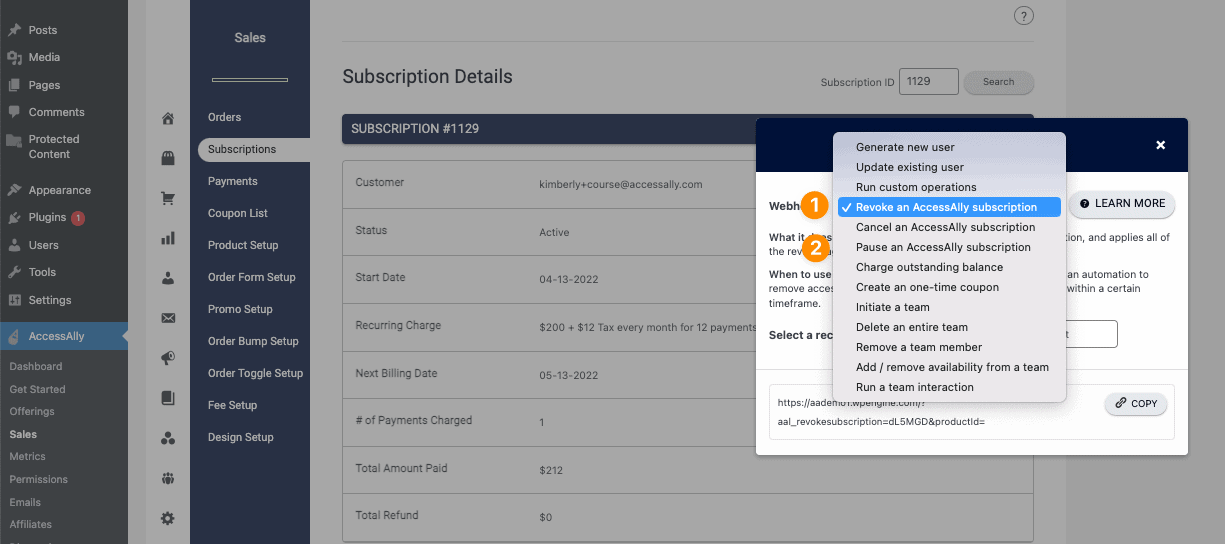
5. The Revoke or Pause Subscription Webhook is Used
These are typically seen at the end of a failed payment automation or cancel automation that happens inside your CRM.
Testing Your Setup
It’s important to test what happens when a user purchases your membership and has access to the content and what happens when they cancel, get revoked, or are no longer receiving new content in the future.
See how to test your offerings using the AccessAlly Testing Guide.

