Do you currently use Groove HQ as your helpdesk and Infusionsoft as your CRM system? Great! With GrooveAlly, you have the ability to pull valuable information from Infusionsoft right into Groove’s contact profile.
GrooveAlly was created to increase the efficiency for support teams. What it does is pulls the tag data from Infusionsoft right into Groove, so you can see what tags the client has, and it also creates a link to their user profile in the CRM system and with one click, you are in their profile in Infusionsoft. This eliminates the need to search time after time for the contact by name, email, or phone and can help your clients get the answers they need quickly.
Want to get started with GrooveAlly? It’s a free plugin and can be downloaded here:
ARTICLE CONTENT:
How To Set Up GrooveAlly
Ready to get started with GrooveAlly? Please view the link below for a step by step tutorial on getting GrooveAlly installed.
https://wordpress.org/plugins/grooveally/
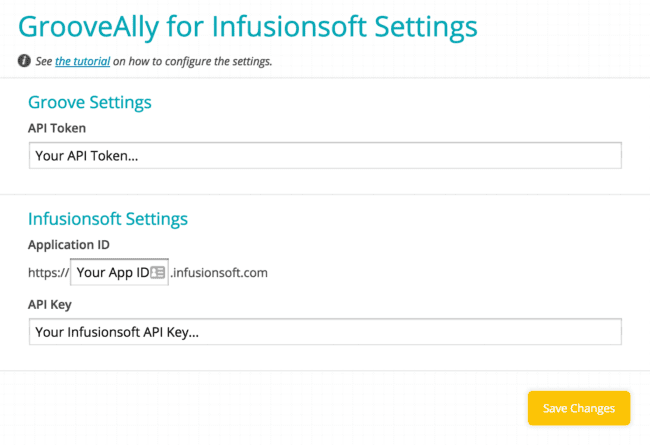
Installation – Groove API Access Token and Infusionsoft API Key
In order to install GrooveAlly, you will need to gain access to the Groove API token and Infusionsoft’s API key. In order to get to these, you will need to the the admin of your accounts.
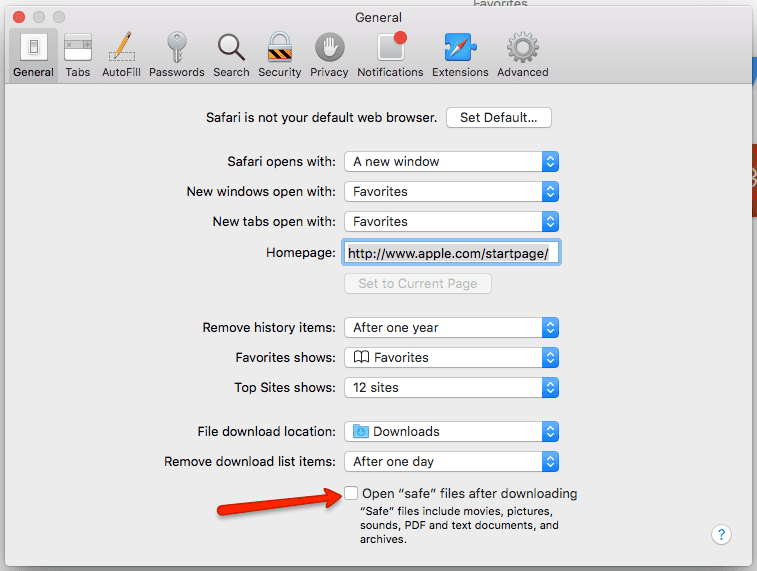
When using Safari on a Mac, the browser may automatically extract that zip file that i needed for installation of the plugin. You’ll know this happened because you’ll see a regular folder in place of a zip file.
If possible, try downloading the file with a different browser, such as Firefox or Chrome.
Alternatively, you can disable the auto-unzip in the Safari preferences:
Safari -> Preferences -> General, then uncheck the “Open safe files” option.

Now, please re-download the file and once the download is complete, you will then have the proper format to add into WordPress (‘.zip’ extension).
Step 1: Log Into Your Website
First, log into your WordPress site.
Step 2: Install Plugin on Your WordPress Site
Then, go to Plugins > Add New.
Search for “GrooveAlly” and then click Install Now.

Then, activate the plugin.
Step 3: Open The Plugin
Once the GrooveAlly plugin is installed and activated in your website, you can find it on the left sidebar of your website dashboard.
Click on it to reveal additional plugin settings.
Step 4: Add The API for Groove And Infusionsoft

At this point, you’ll add in the API token for both Groove and Infusionsoft. If you’re uncertain how to find these, here are the links to each platform’s tutorial:
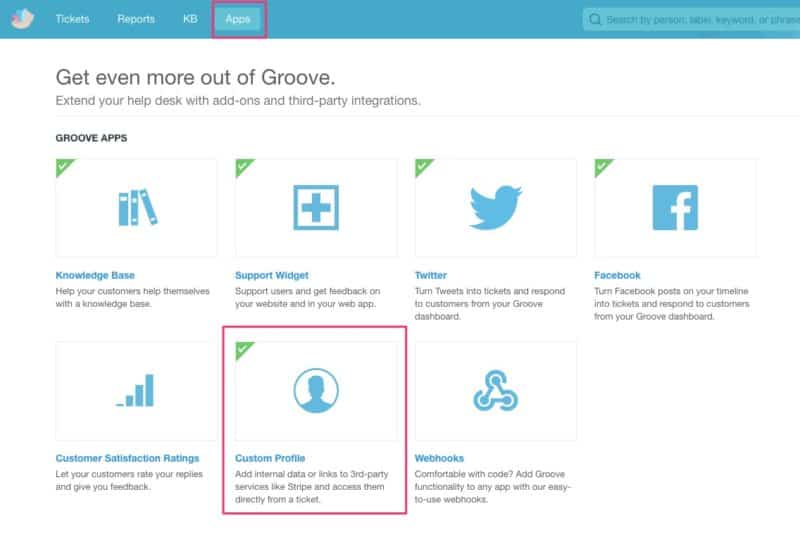
Step 5: Log Into Groove & Install The Custom Profile App

To install the app, log into Groove and go to: Apps > Custom Profile App.
Step 6: Complete The Custom Profile Settings In Groove

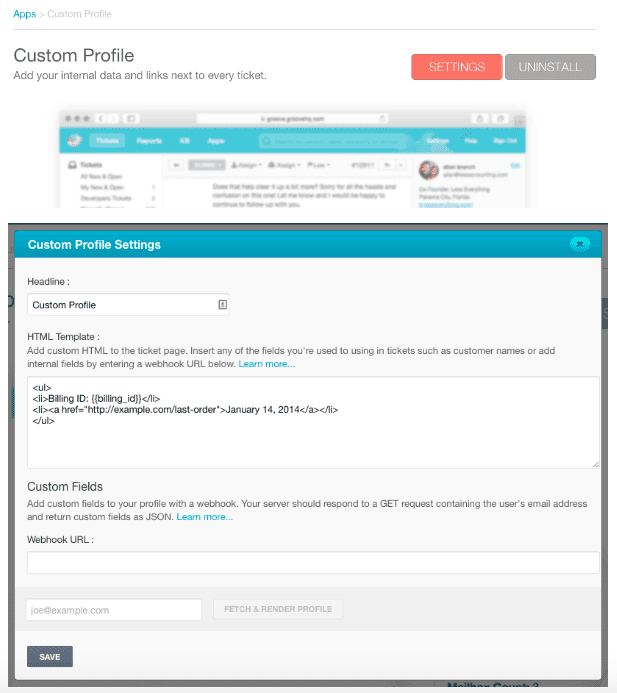
Once the Custom Profile App is installed, go into the App settings, and fill in the following fields:
- Headline
- HTML Template
- Webhook URL
Headline
This is just the name of the custom profile section. Suggested name: “Infusionsoft Profile”.
HTML Template
Copy + past the following code into the HTML template:
{% if {{status}} == 'success' %}
-
- {% assign tags = {{tags}} | split:”,” %} {% for item in tags %}
- {{item}}
{% endfor %}
{% elsif {{status}} == ‘new’ %}
{% elsif {{status}} == ‘error’ %}
{% else %}
{% endif %}
Webhook URL
https://YOURWEBSITE/grooveally-profile-request
The “YOUR WEBSITE” section should be replaced by your own website URL where the plugin is installed.
Step 6: Test & Save Settings
To make sure everything is added properly, you can type in an email address of one of your Infusionsoft clients, and click the Test & Render Profile button.
This will allow you to preview the results of your newly-created custom profile.
If everything pulls properly, you can hit Save and close out of the Custom App Settings.
You’re now ready to go!
NOTE: We Do Not Offer Tech Support For This Plugin
If the profile is not rendering properly in Groove, double check:
- The API settings in the plugin itself (step 4)
- The HTML code & webhook in the Groove Custom Profile settings (step 5)
