This is for CommunityAlly – a new AccessAlly add-on, that has everything you need to connect your members to each other.
Note: After installing both AccessAlly 3.9.0 and CommunityAlly, please go to AccessAlly Settings > Styling. Then hit the “Save” button. This will ensure you have all of your color choices reflected in CommunityAlly!
ARTICLE CONTENT:
Icon Display
There are two ways icons are presented inside CommunityAlly.
- Offering Icon – takes a member to the first page in an Offering.
- Group Icon – when clicked takes a member to the CommunityAlly Group Feed
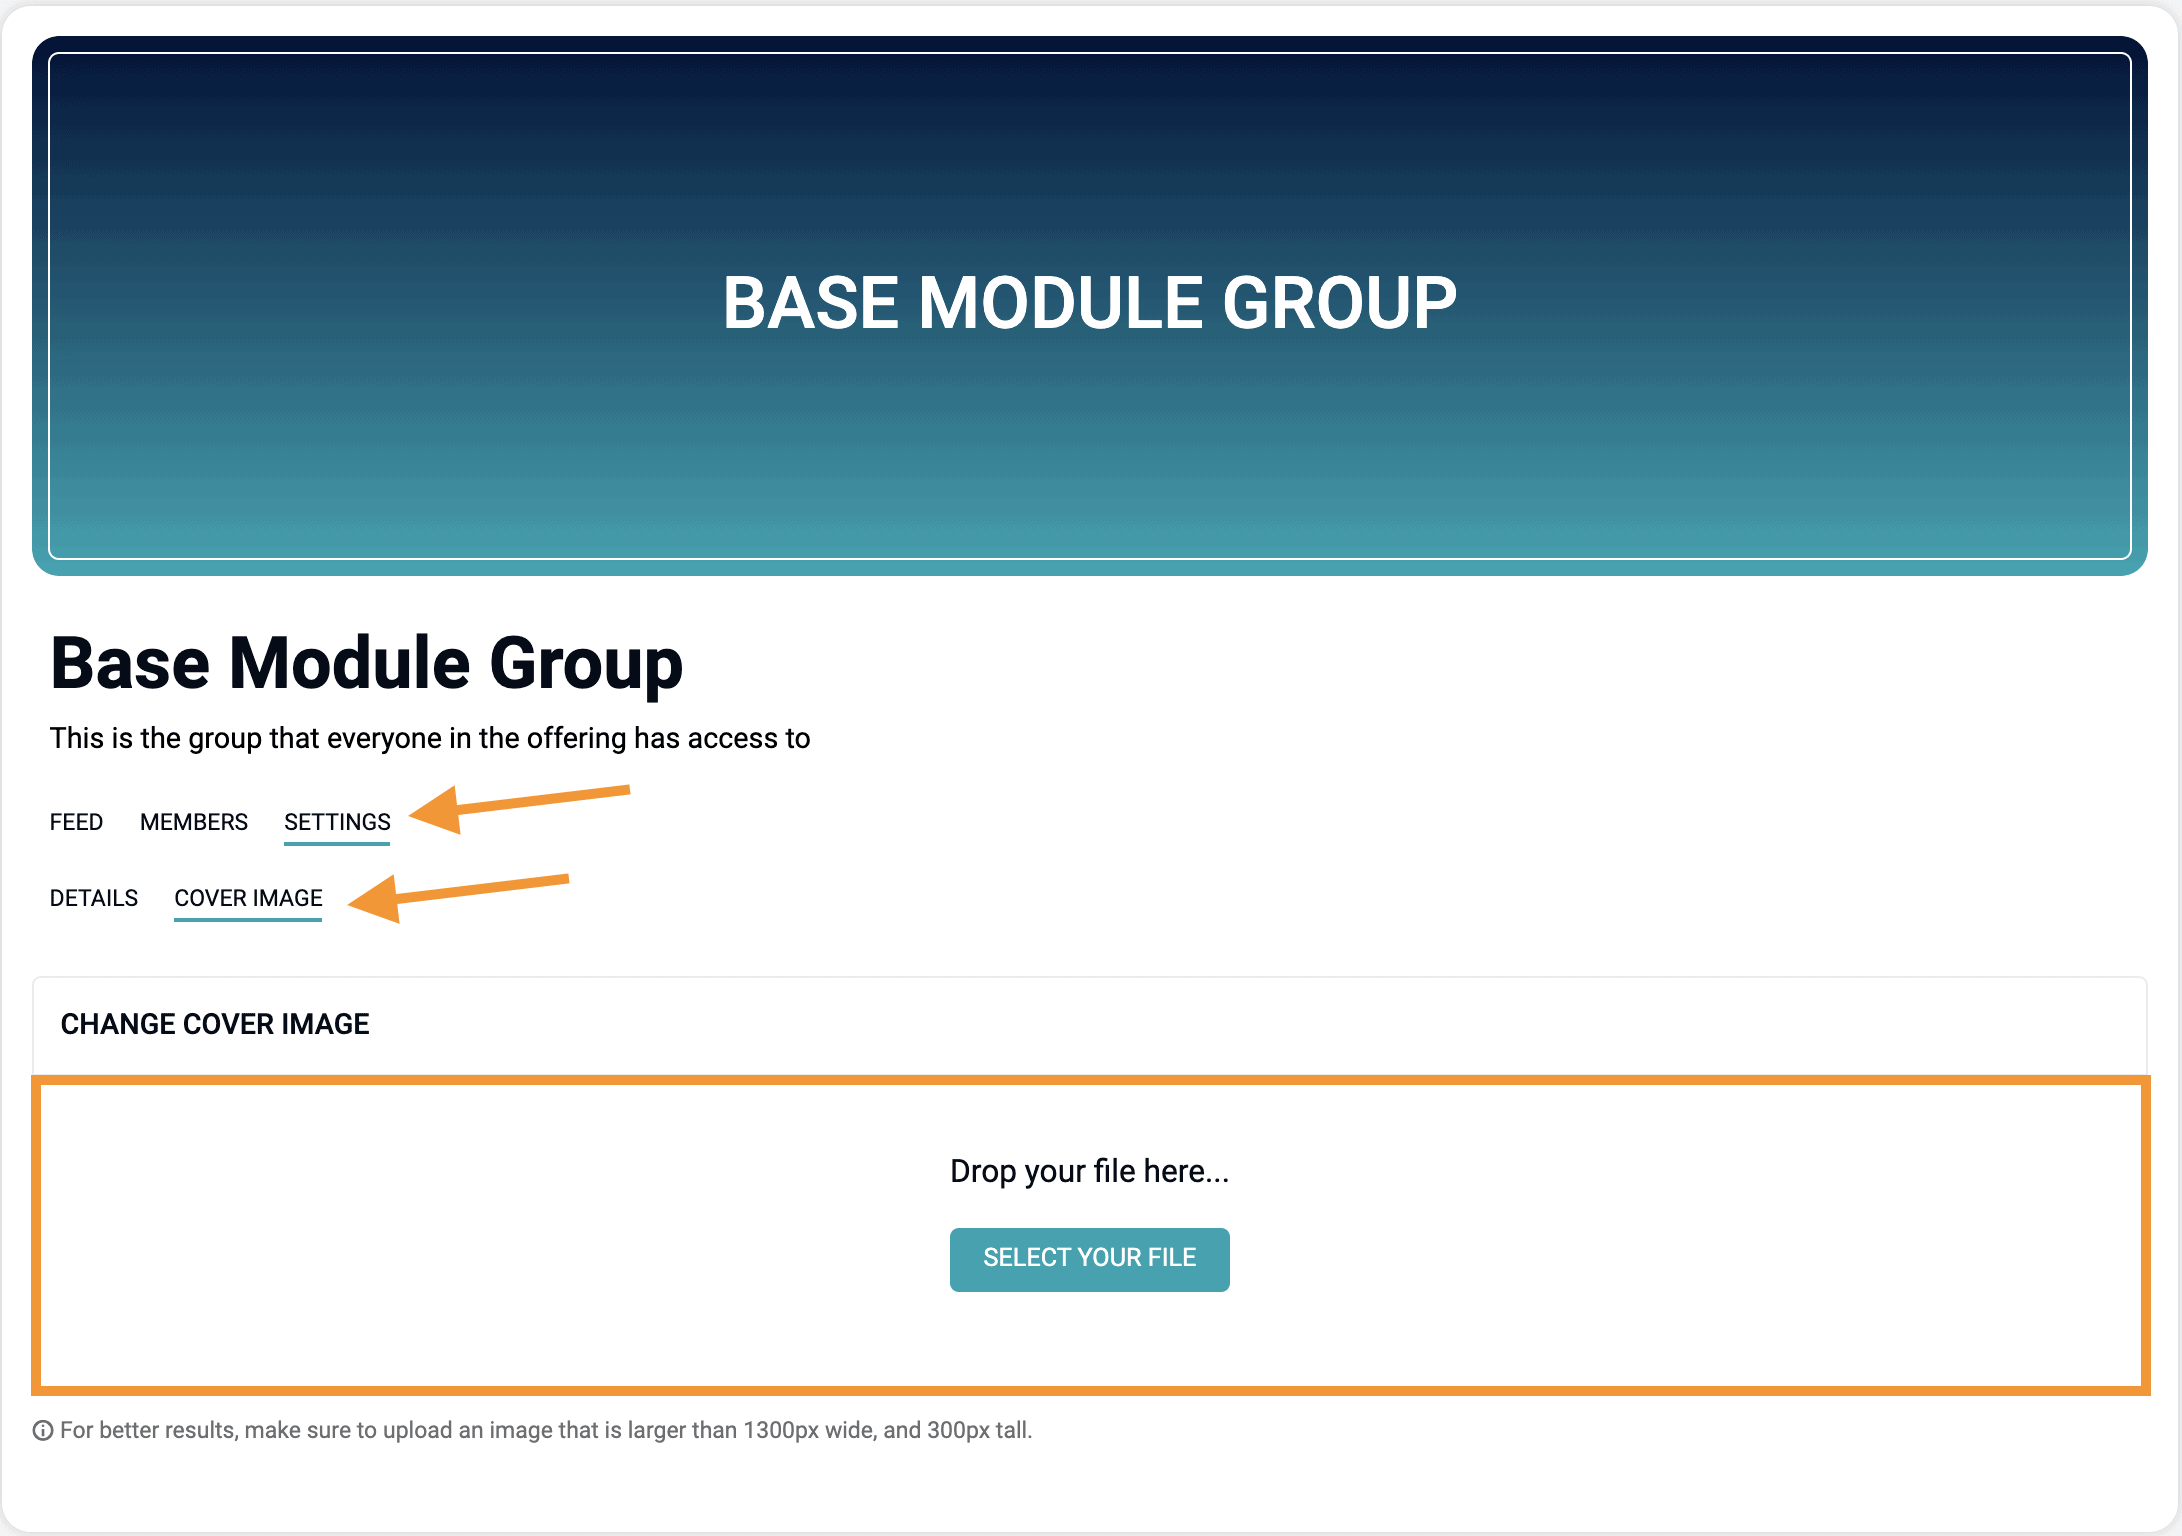
Cover Images
There are two types of Cover Images in CommunityAlly.
- Group Cover Images – added by a site admin for each group to personalize the group design.
- Profile Cover Images – added by a group member to customize the banner shown when someone visits their profile in a group.
Group Cover Image
If you would like to add a cover image for a group in CommunityAlly… you will navigate to your group of choice, and select Settings > Cover Image.
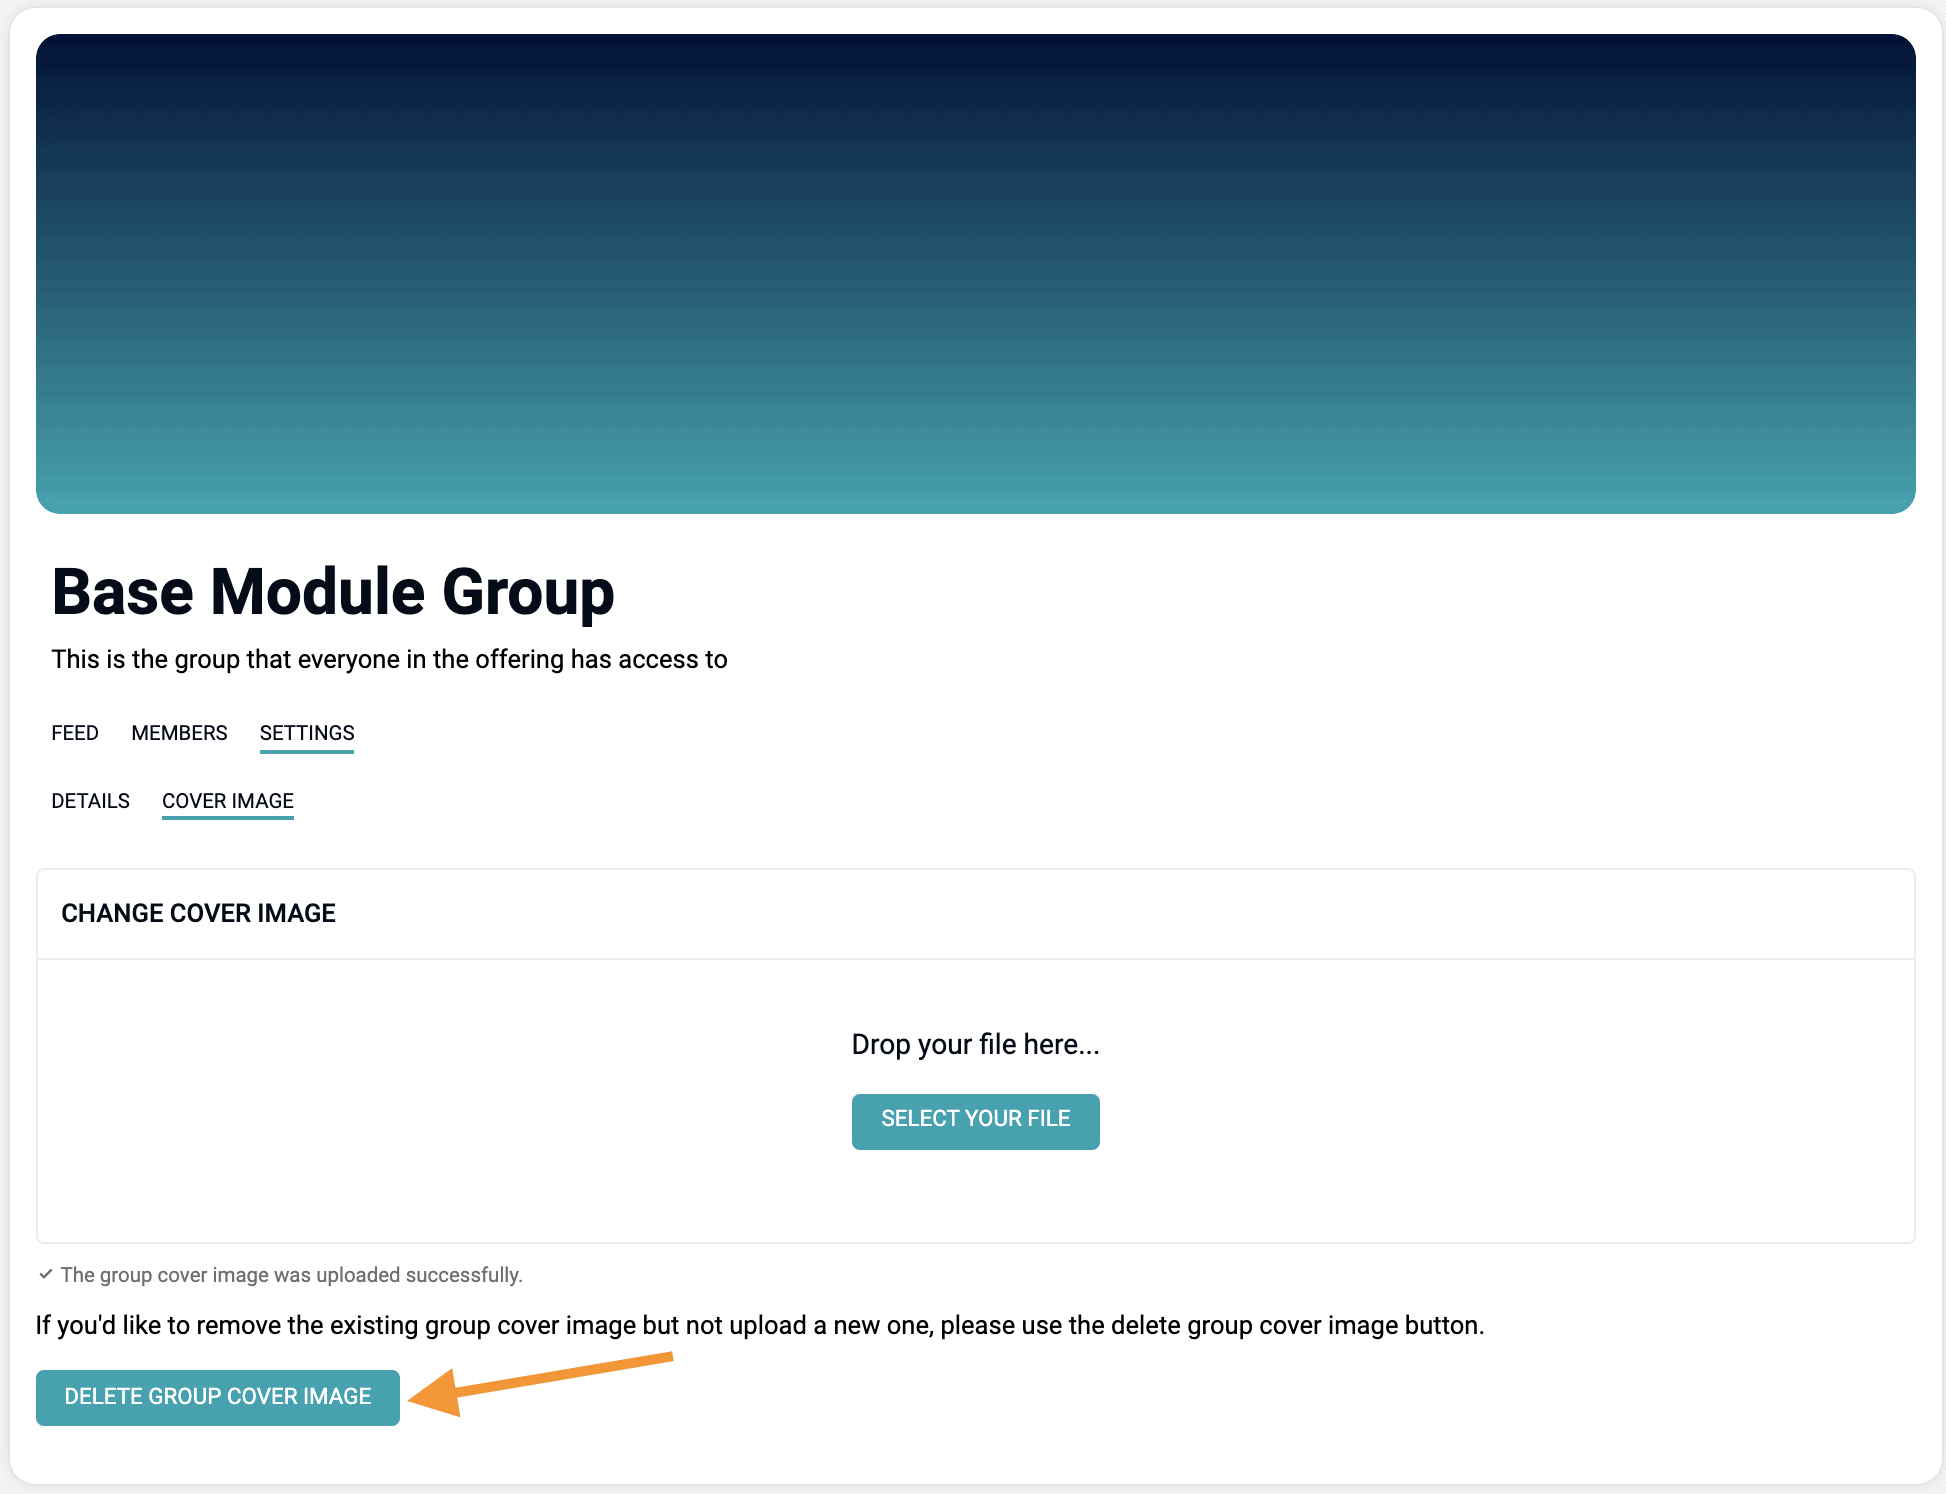
If you’ve already uploaded a group cover image and would like to revert back to the default gradient. A new Delete Cover Image button will appear for you to do so.
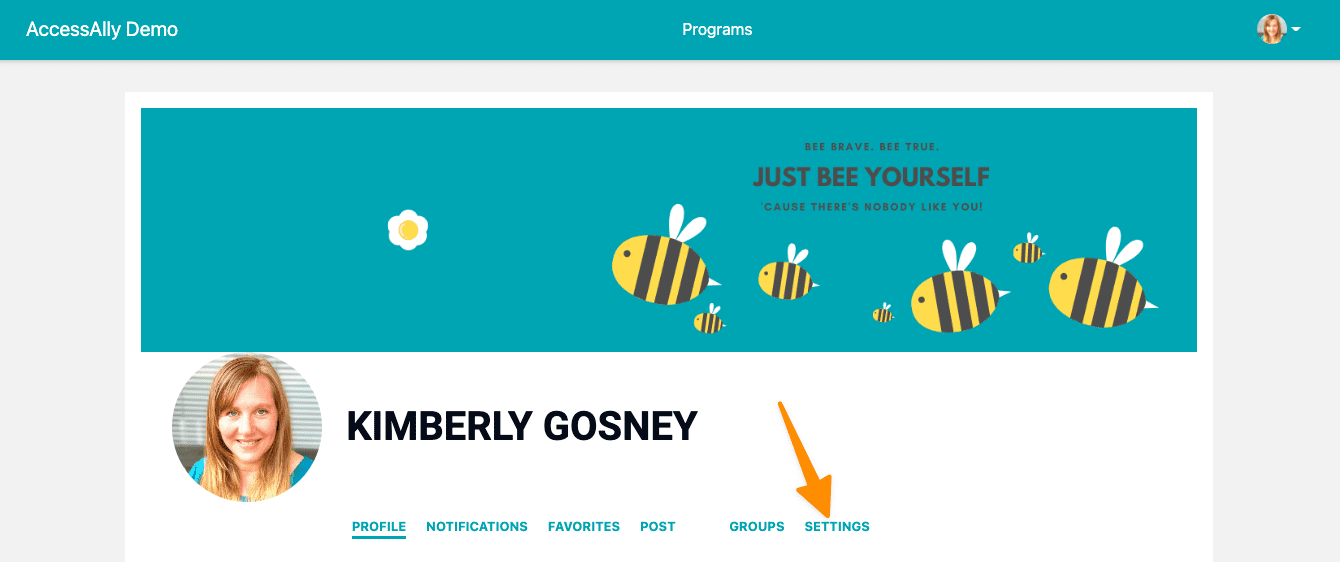
Member Profile Cover Image
This option is changed by the member so they can have their own image displayed when someone visits their profile. This option is available under Profile > Settings > Cover Image.
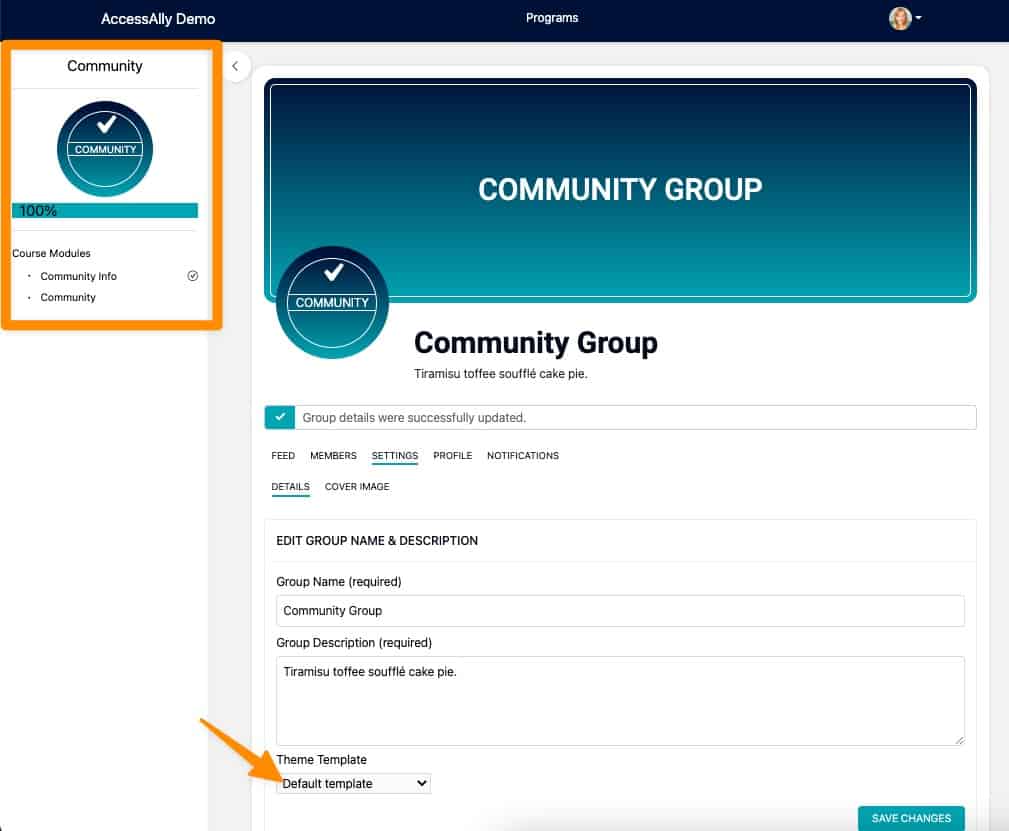
How to Add a Group Template
Site admins can add templates from your WordPress theme to a group quickly and easily from the Settings > Details tab.
Option 1: AccessAlly Theme Users
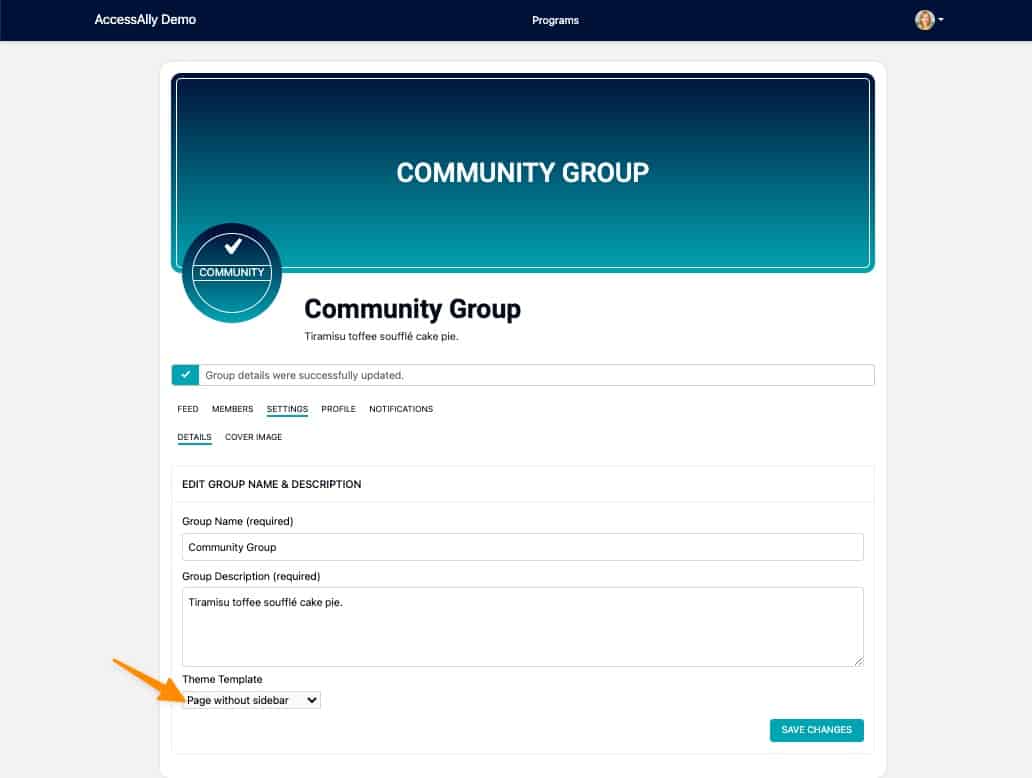
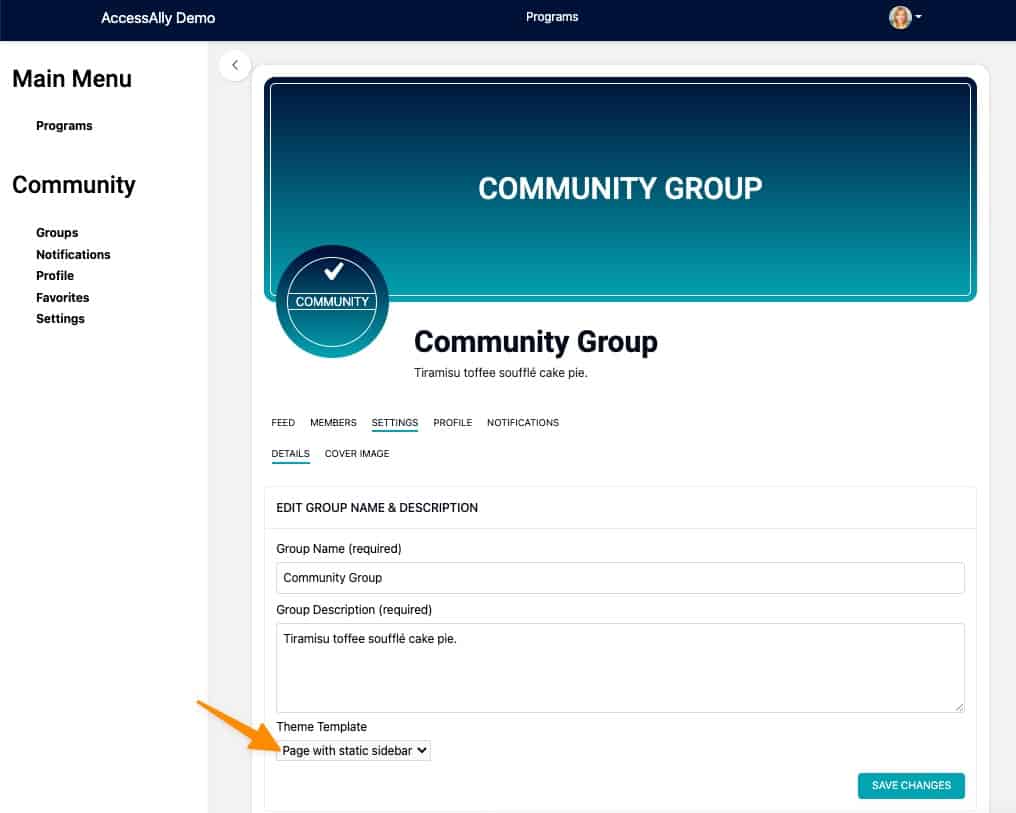
Under your group in the details tab, choose the template you would like to use from the dropdown.
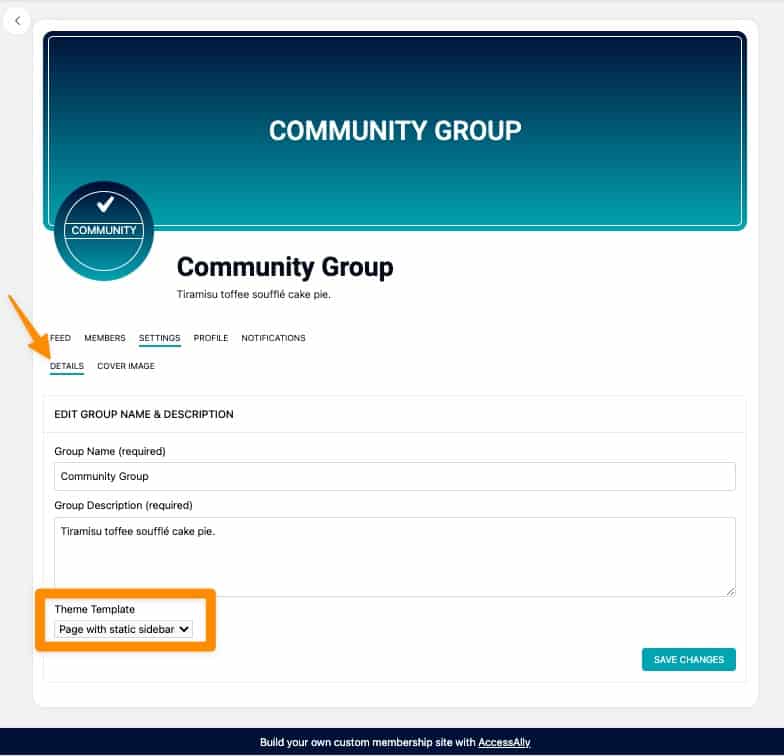
For AccessAlly Theme users there are three built-in template styles available.
Default – your groups will use the default template which shows the Offering Sidebar Menu.
Page without sidebar: This template will show your group without a sidebar.
Page with static sidebar: This template allows you to create your own sidebar using WordPress widgets.
Option 2: All Other WordPress Themes
You can select templates that you have created in your theme or page builder from the dropdown under Settings > Details to apply a template to your groups.
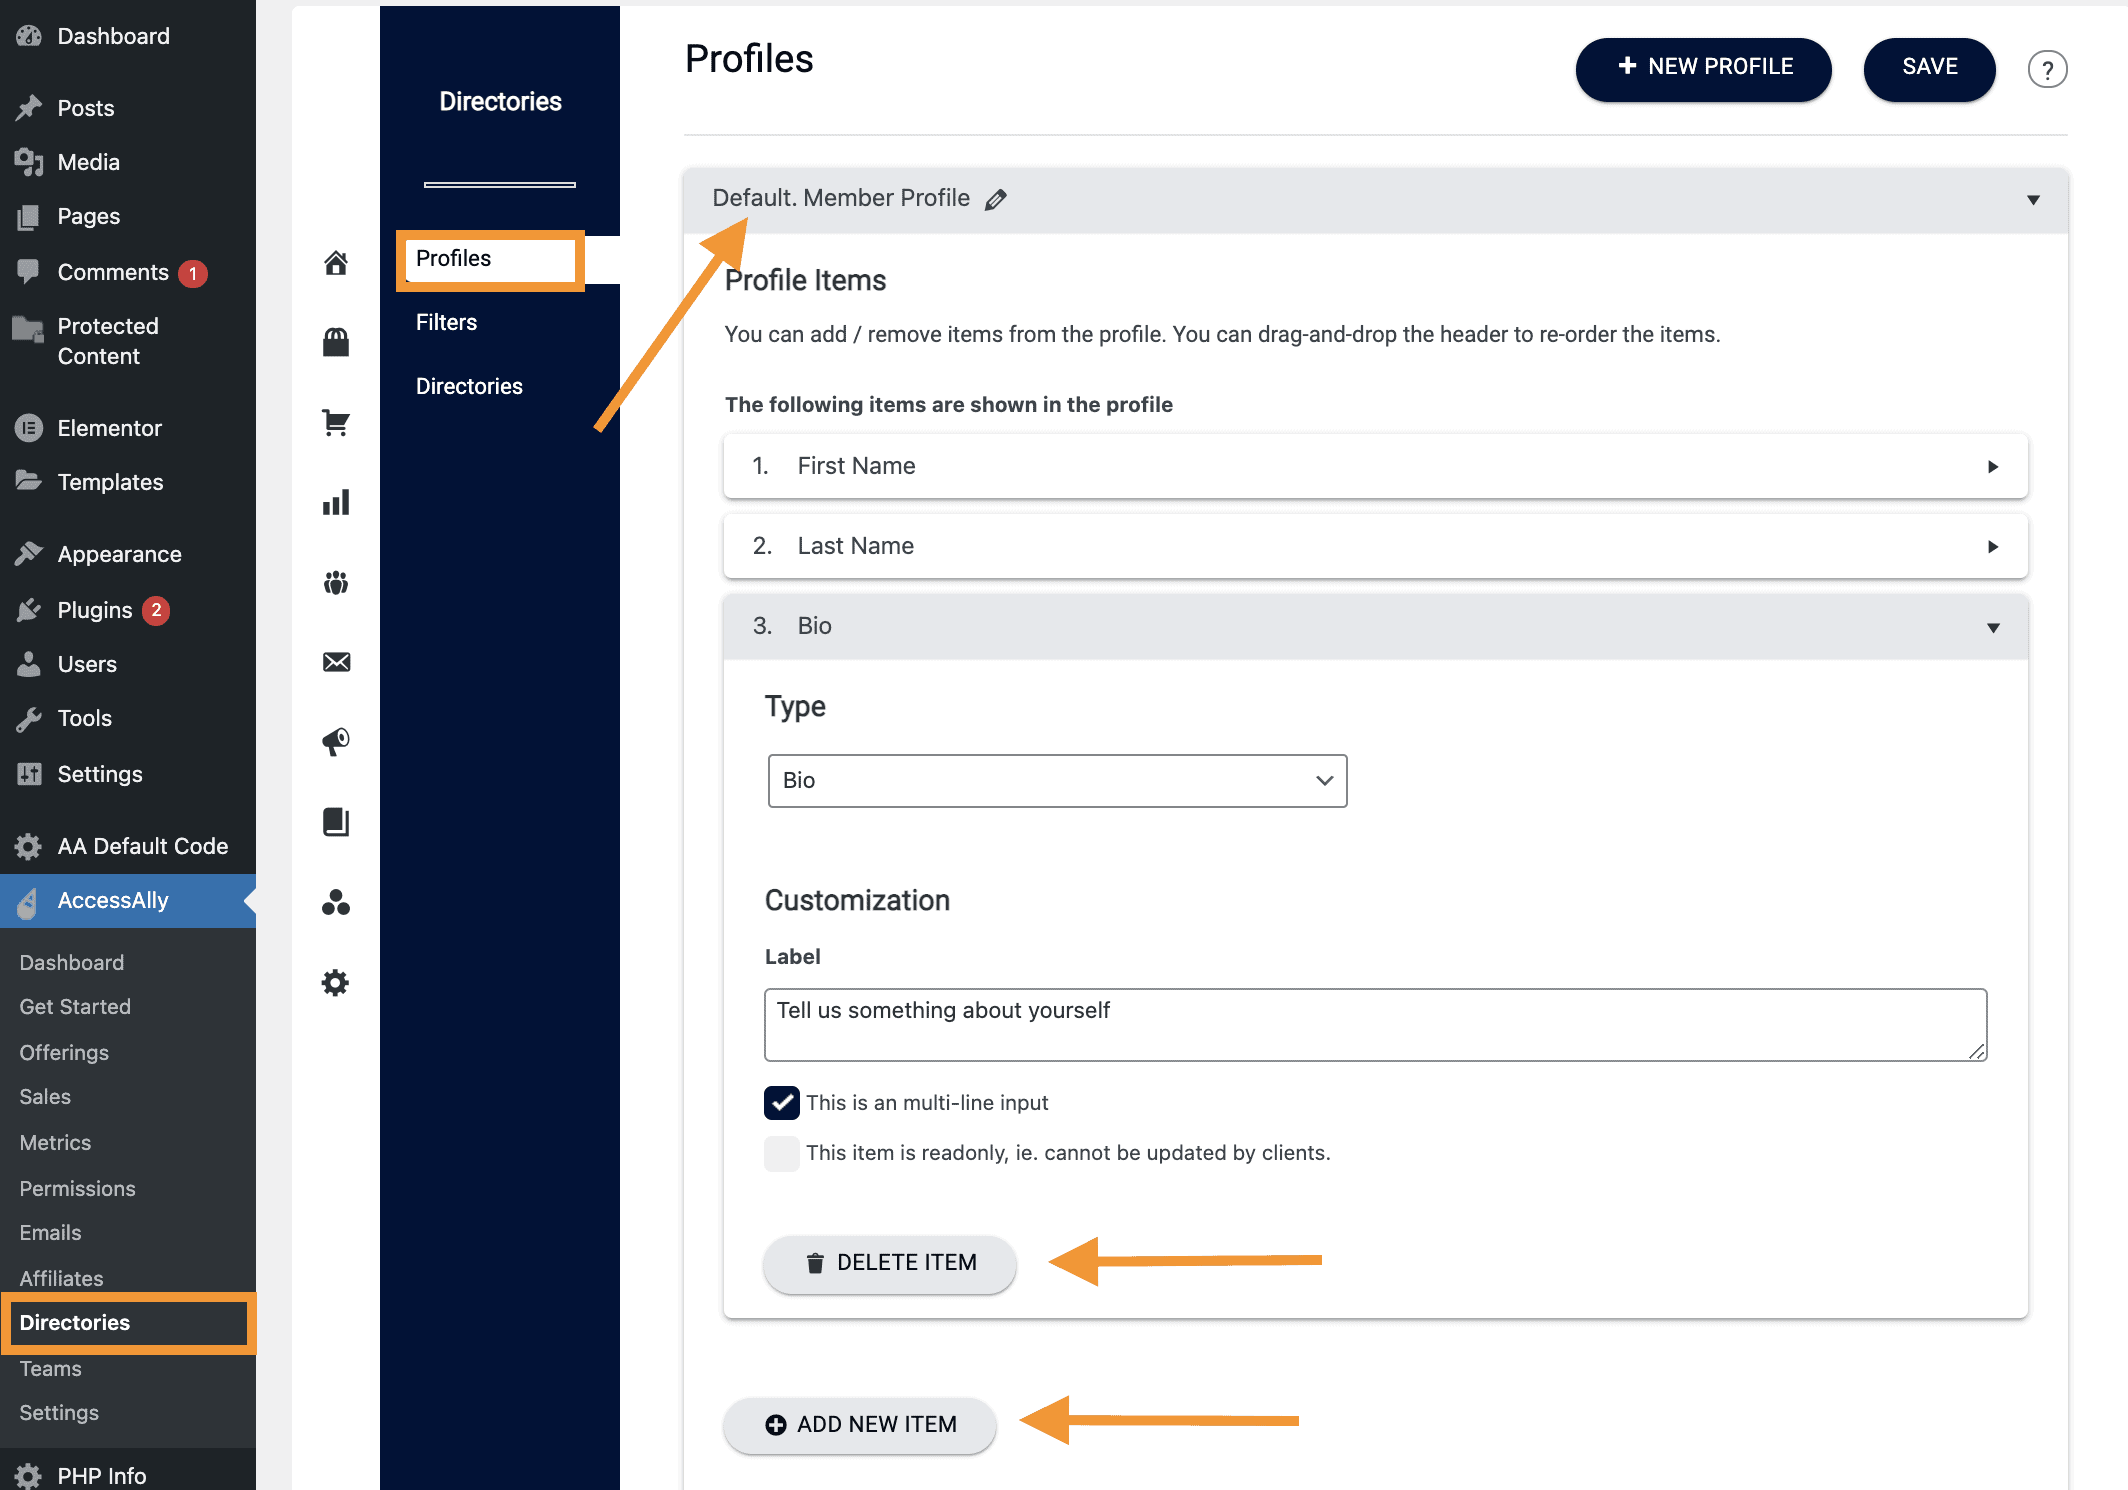
Select an AccessAlly Profile to Use For Community Groups
The CommunityAlly profiles has three entries by default: first name, last name, and the user bio.
You can customize the CommunityAlly profile in the same way you would customize a profile for a user directory. In the admin dashboard, navigate to AccessAlly > Directories > Profiles.
You will see a new default entry that controls the CommunityAlly profile. Use the ADD NEW ITEM button or the DELETE ITEM button to customize the fields that show up on this profile. You can also add this profile to any page using the shortcode: [accessally_user_profile profile_id="primary"]
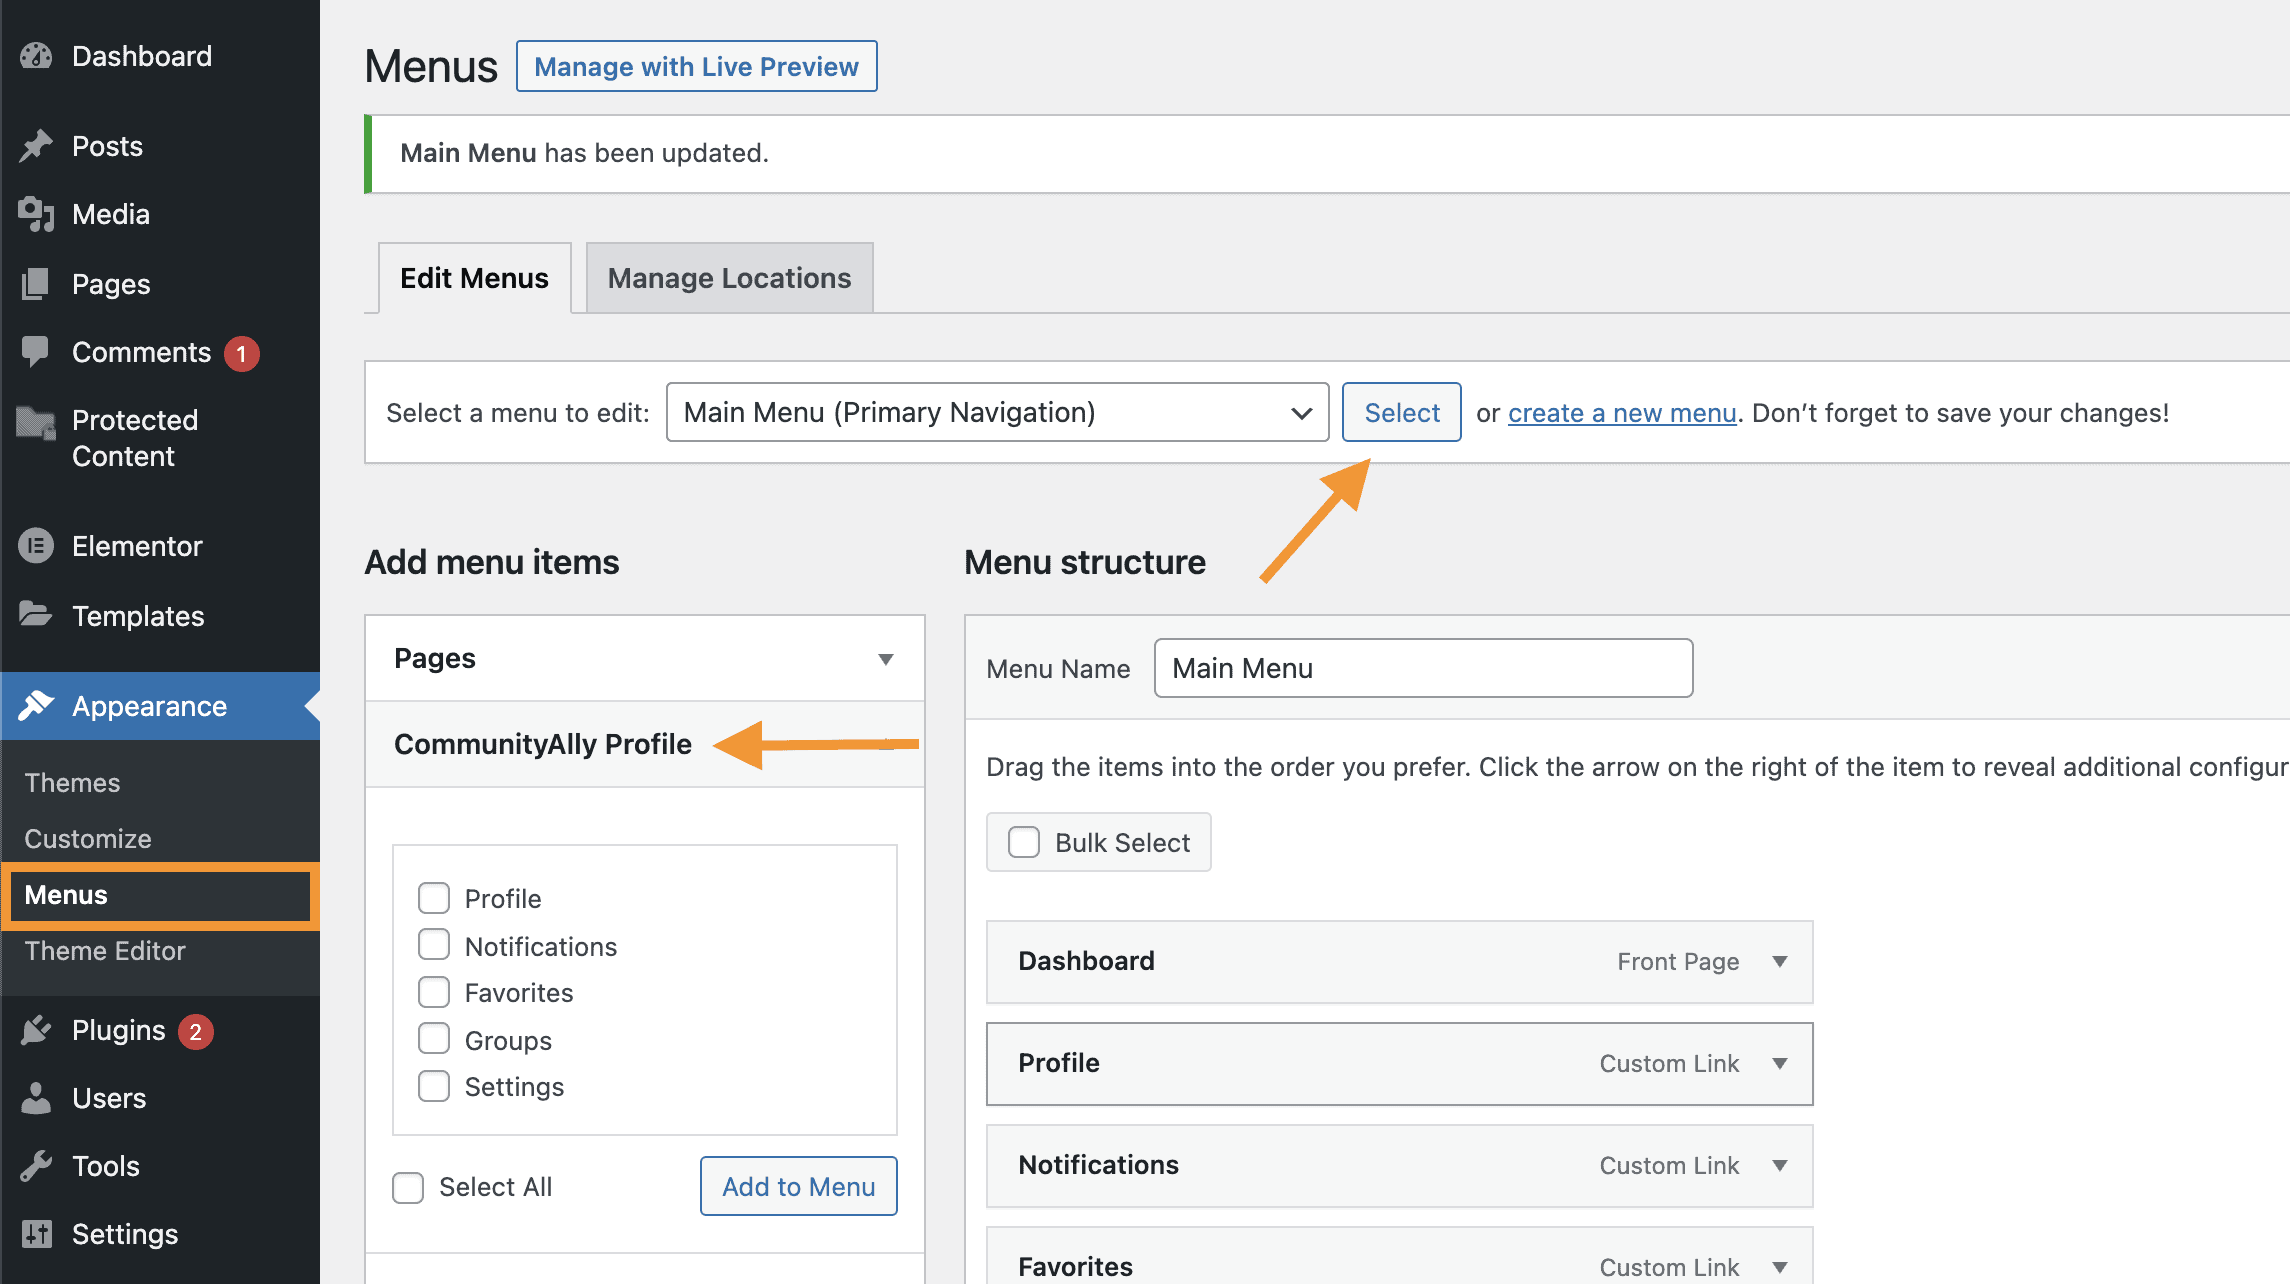
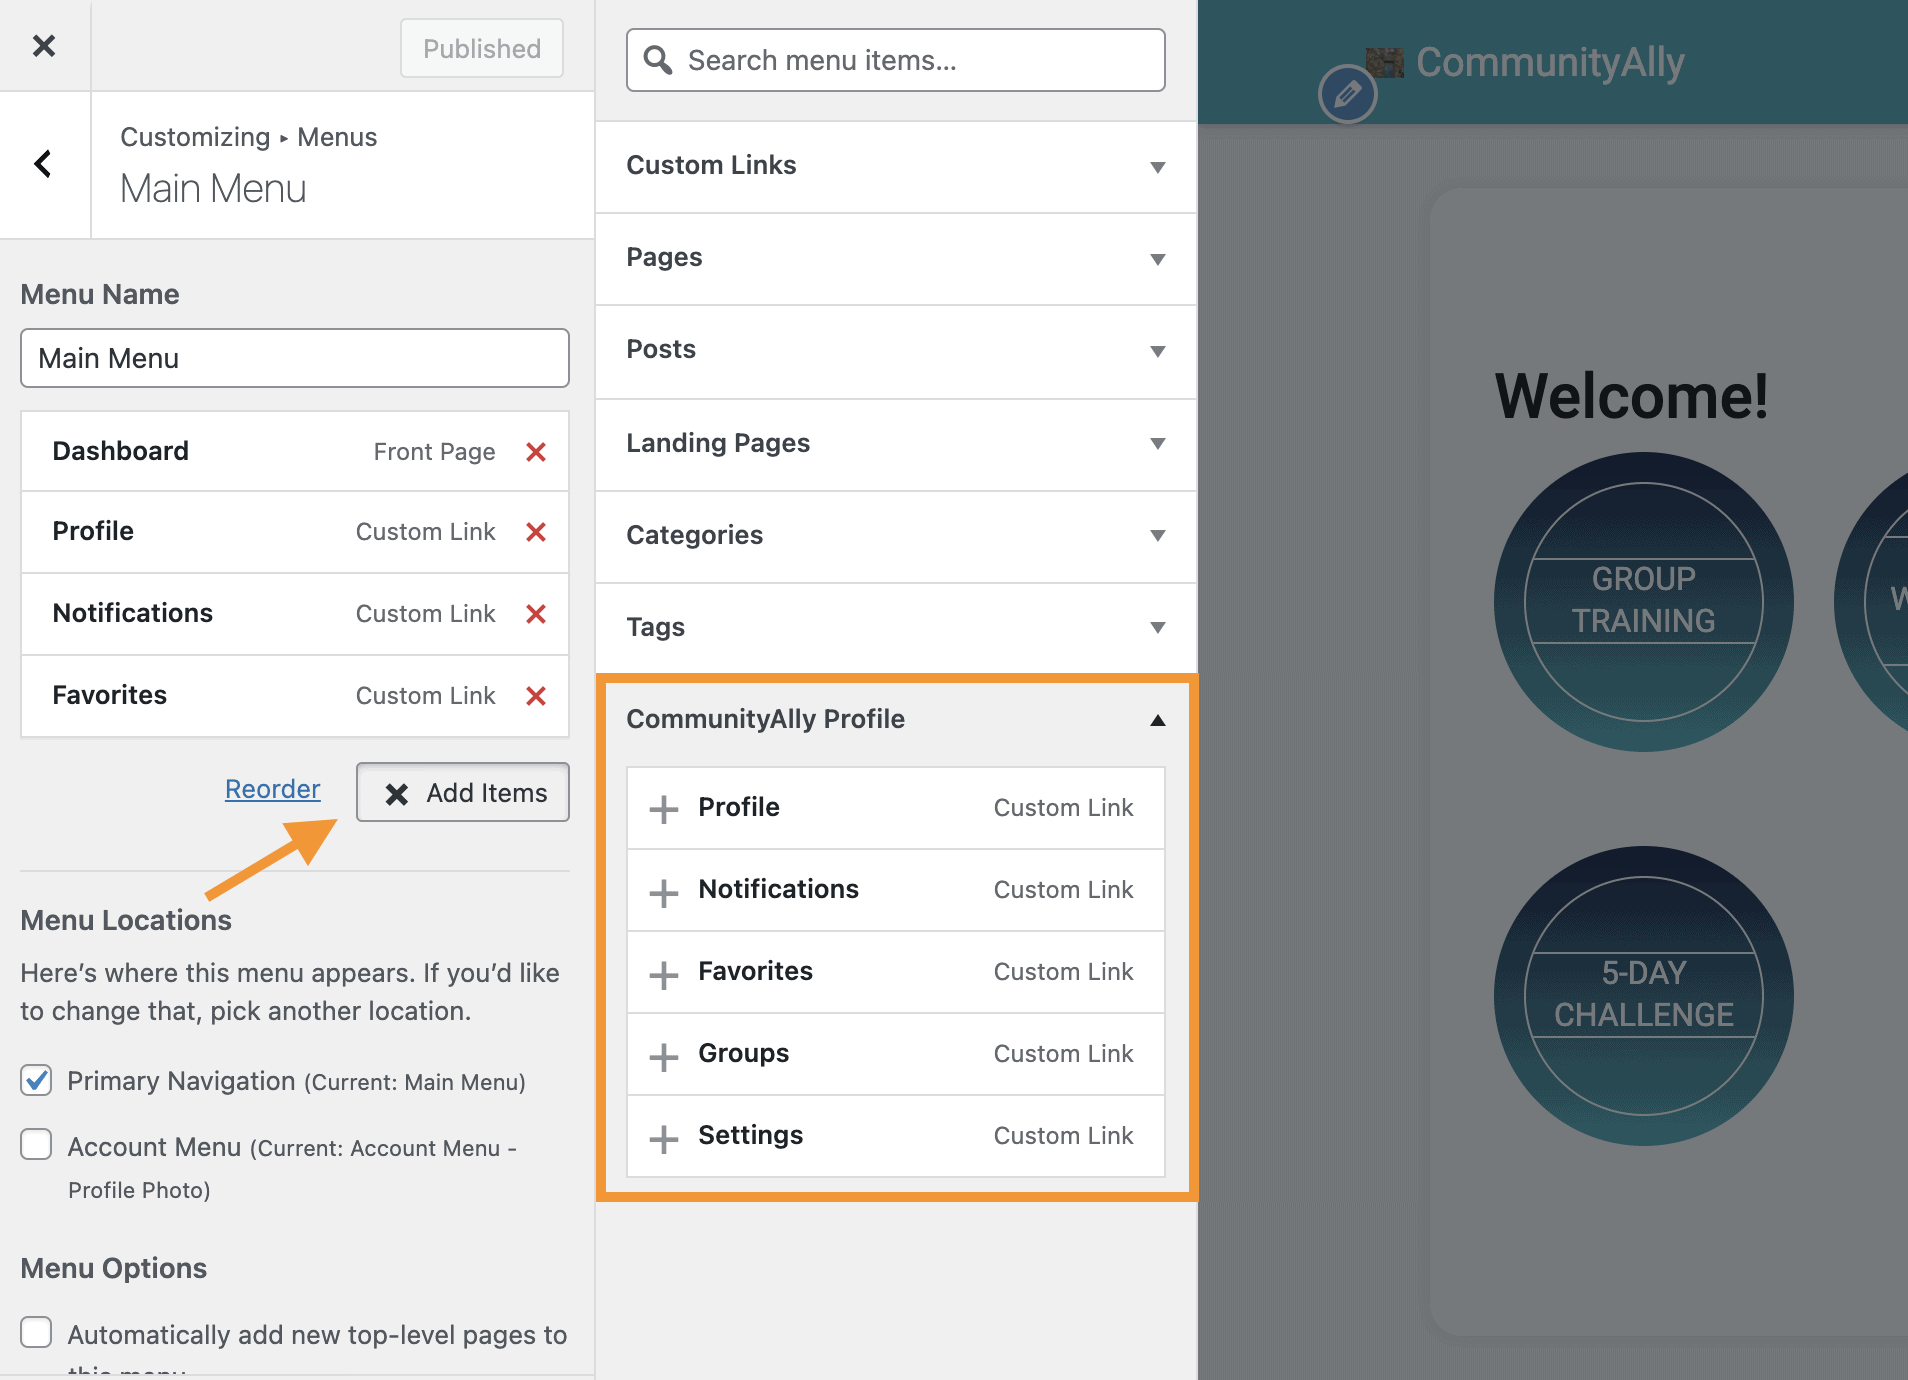
Add CommunityAlly Items to WordPress Menus
You may want to give users quick access to certain profile items for easier navigation. For example, you want to give users the ability to quickly navigate to their notifications (the notifications tab), or allow them to see a list of the groups that they’re in (the groups tab). There are two ways for you to do this:
-
Using the built-in menu editor
-
In the admin dashboard, navigate to Appearance > Menus and select the menu that you’d like to edit. In the menu items accordion, you will see an entry ‘CommunityAlly Profile’.
-
Each option in the CommunityAlly Profile corresponds with a tab in the user profile. Select the ones you’d like to include and add them to your menu.
-
Using the customizer’s menu editor
-
In the admin dashboard, navigate to Appearance > Customize or select Customize on the admin bar. In the customizer, select the Menus and the menu that you’d like to customize.
-
Select Add Items, and in the menu items accordion, you will see an entry ‘CommunityAlly Profile’. Select the one that you’d like to include and add them to your menu.
Note: These menu entries will only be displayed if the user is logged in.
Set Limits on Threads in Groups with the Activity Per Page Filter
Also called limit number of posts in a group, limit threads in a forum.
In your WordPress Theme functions.php file paste the code below. If you’re new to editing files in your WordPress Theme, reach out to your Developer for assistance.
function communityally_activity_perpage( $per_page ) {
	return 3;
}
add_filter( 'communityally_default_activity_per_page', 'communityally_activity_perpage', 20, 1 );
When pasting the code into your functions.php file, switch the 3 to the number of items you would like displayed before the “Load More” button appears.
