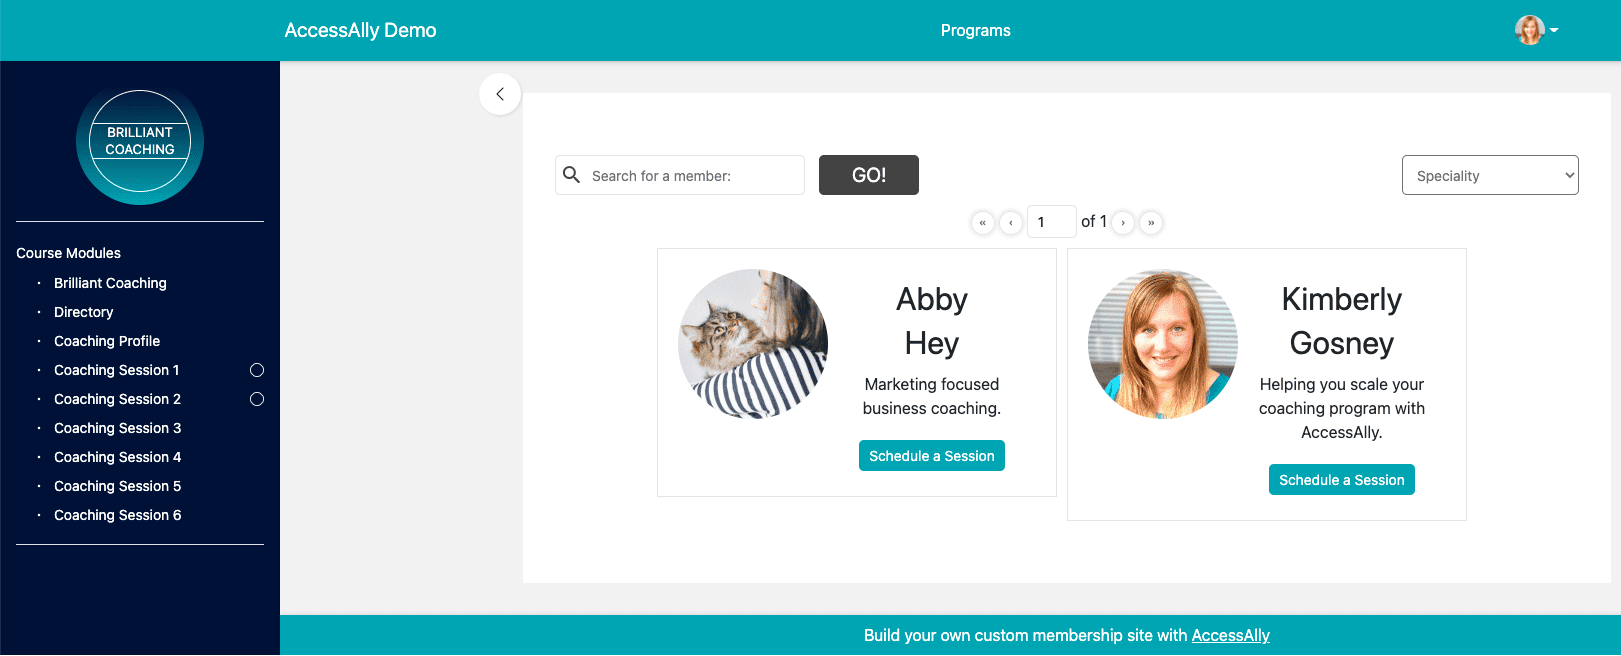
In this article we’ll cover creating a directory of coaches that your members can book 1-on-1 sessions with.
Skill level: Intermediate
Heads up. There are many ways that you can incorporate work with coaches into your AccessAlly site. This is one example. If you have questions join our next Tune Up call or contact us for support.
ARTICLE CONTENT:
Step 1: Create a Directory Profile
The profile allows a coach to add this information for others to view (so you as the site owner or admin don’t have to!)
Create the member profile.
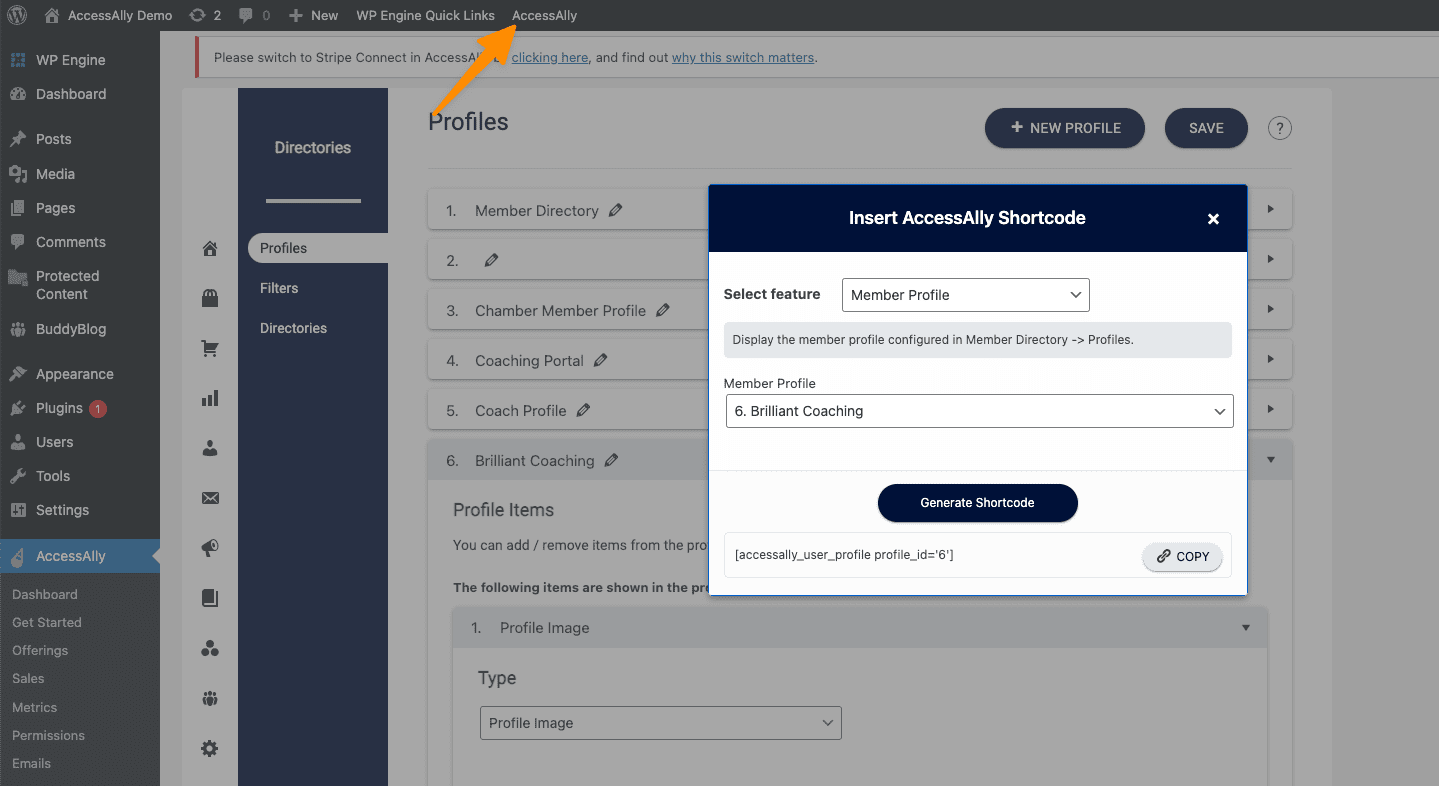
Go to AccessAlly >Directories > Profiles and add a new member profile.
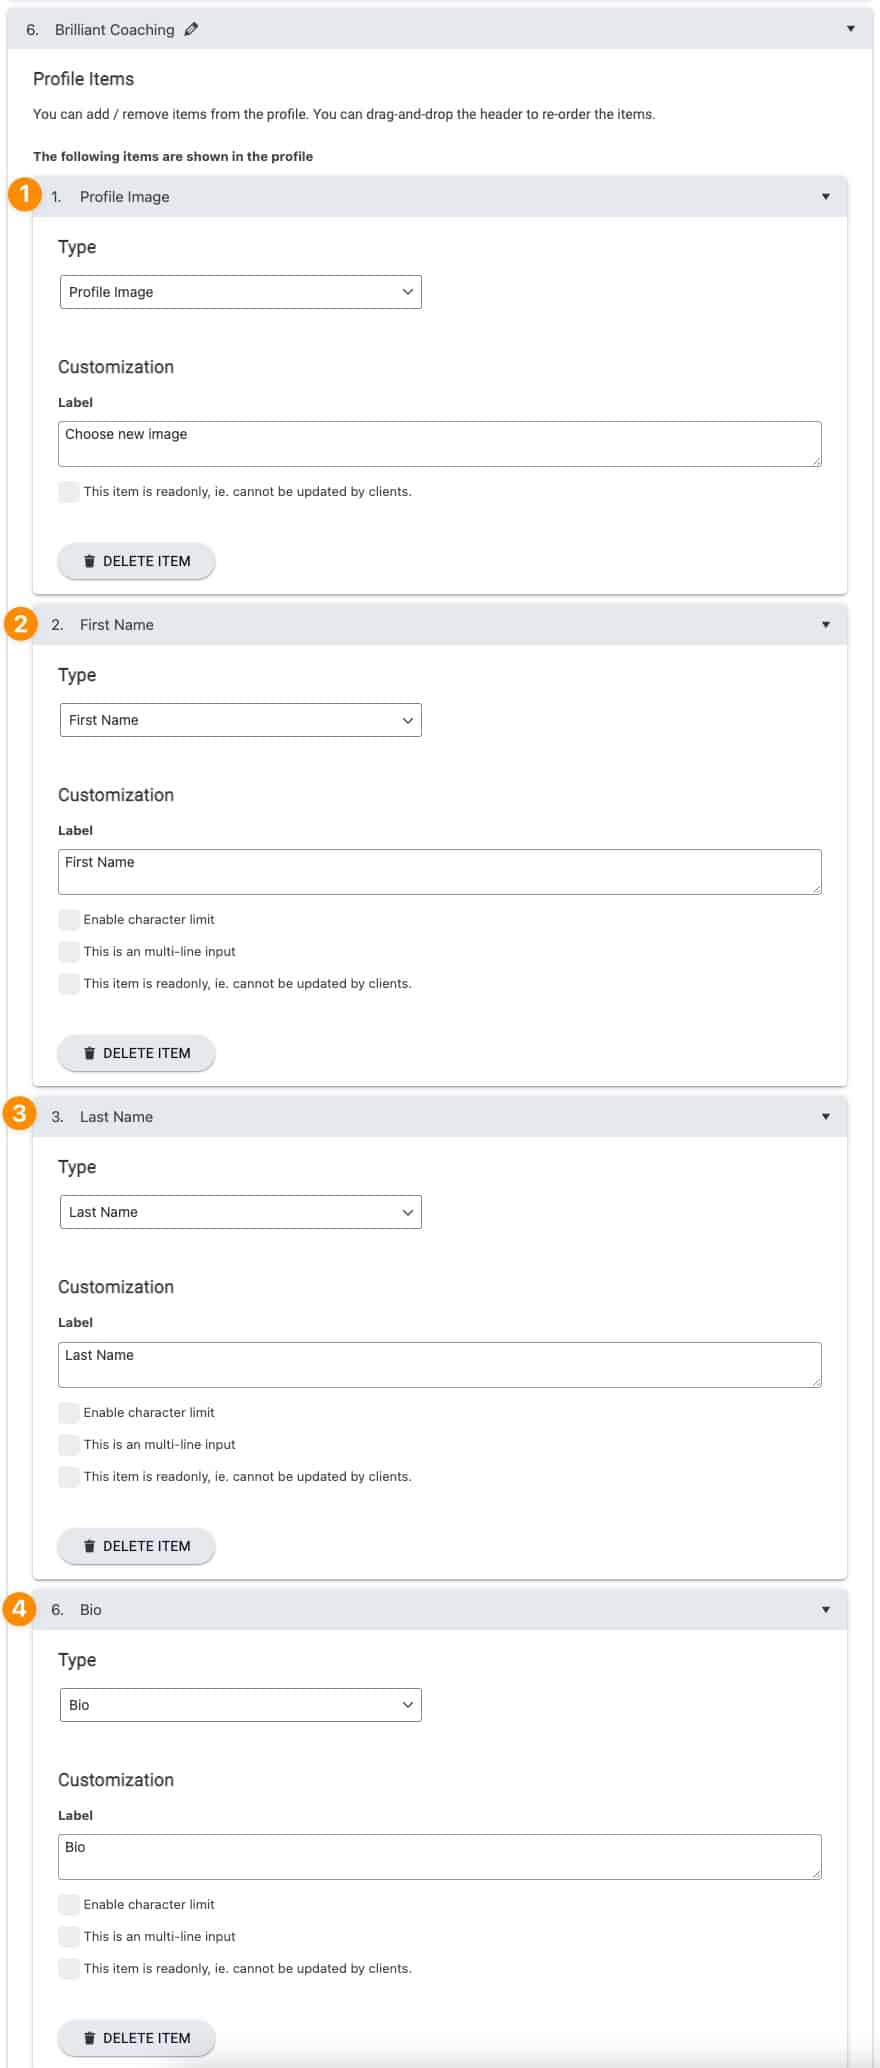
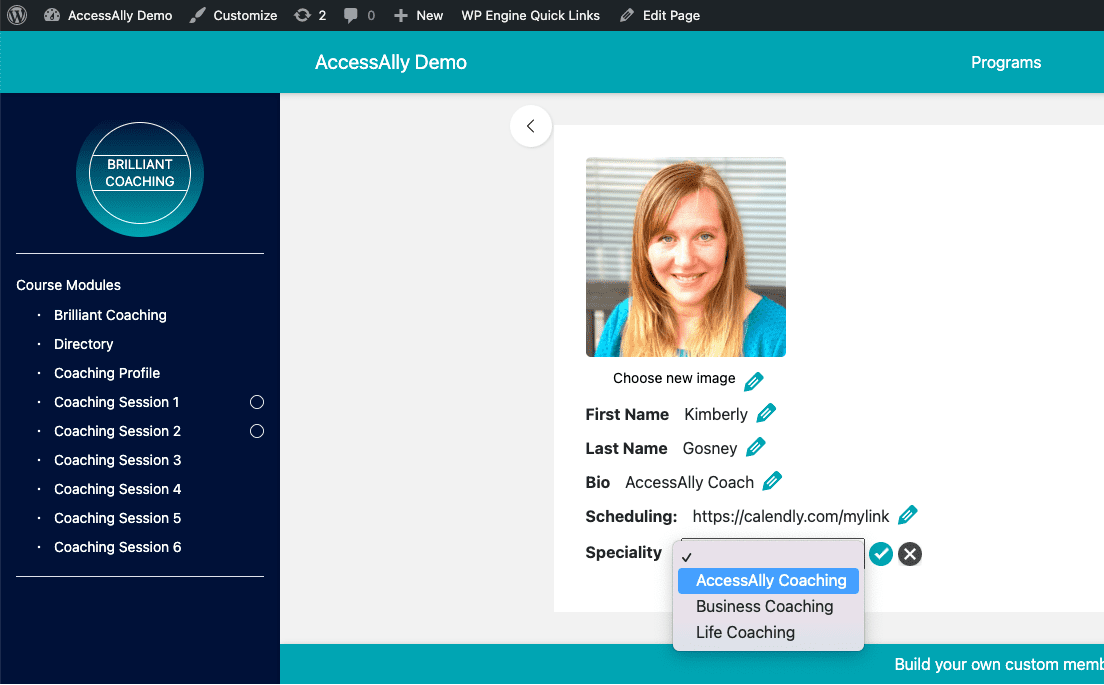
In this newly created profile you’ll add the items that you would like shown to people visiting your directory. Here are some popular examples:
- Profile Photo
- First Name
- Last Name
- Bio
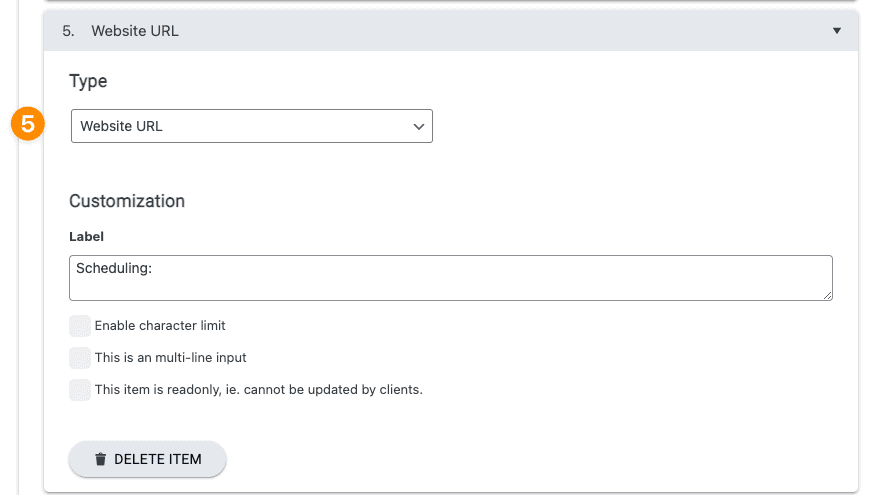
- Website – great for appointment booking links in 3rd party tools like Calendly!
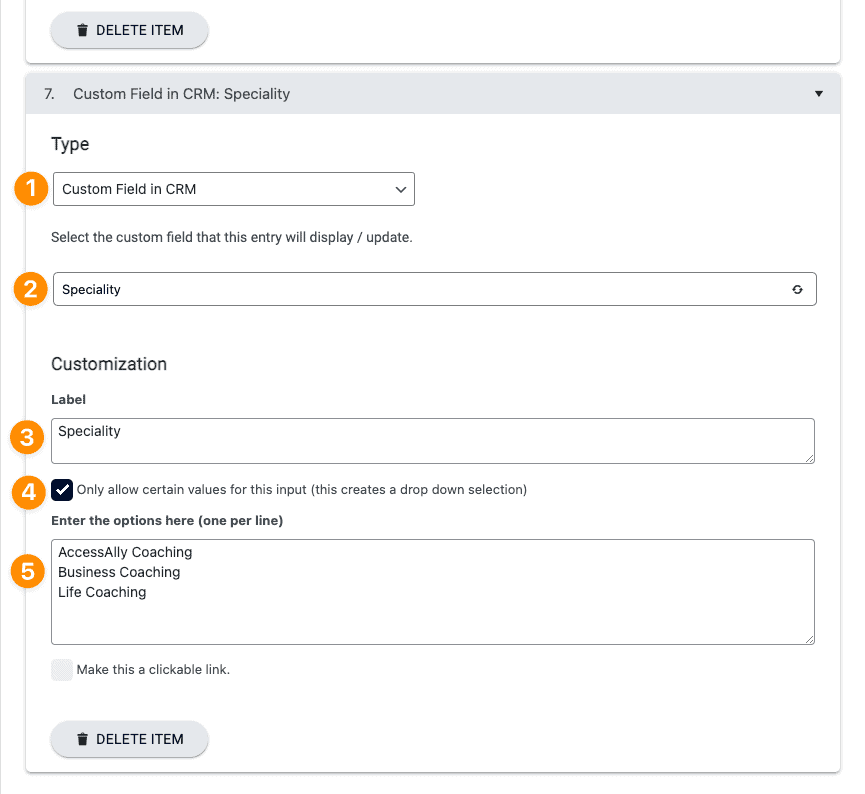
And… if you’d like to have your coaches sorted into categories you can create a custom field in your CRM to store this information and use it in your directory.
- Type: Custom Field in the CRM
- Custom Field: What field does this go with in your CRM
- Label: What would you like people to see this called in your directory?
- Checkbox: Allow certain values for this input – this option gives a coach only certain choices they can use to prevent typos, spelling issues, or from having large number of highly niched items from being added.
- Options: The exact options you would like the coaches your coaches to choose from.
Add the member profile shortcode to a page on your site.
You can use the AccessAlly shortcode generator to grab the code and add the member profile you created for the directory to any page of your site.
This is what the completed profile looks like.
Step 2: Create a Directory Filter
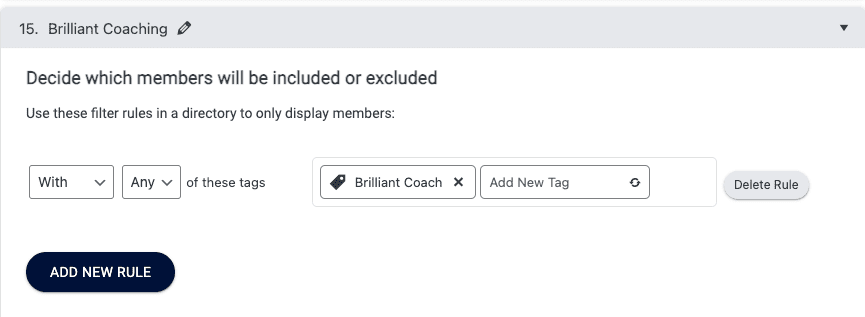
Now it’s time to create a directory filter. This allows you to select who will be shown on your directory.
Go to AccessAlly > Directories > Filters > and add a new filter. Use a tag that your coaches have to pull them into your directory.
Optional: Sort the coaches with a filter.
This option is great if you have different levels of coaches like master coaches and coaches. Your master coaches could have priority and appear first in the directory.

Optional: Search Criteria
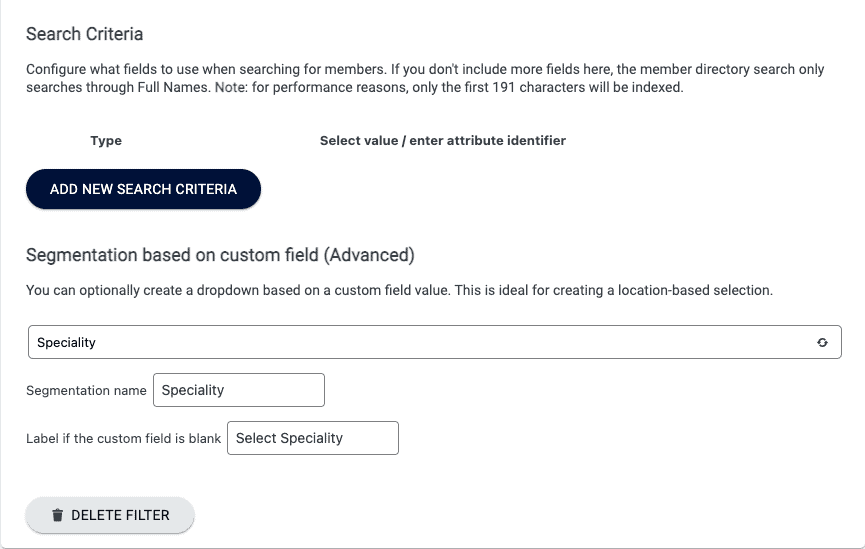
If you created a dropdown for your profile (like speciality) use this option to filter the directory by this option.
Step 3: Create a Directory
Now it’s time to pull your profile and filter together into a directory! We have a few steps left to get the directory view ready!
Go to AccessAlly > Directories > Directories add a new directory.
Member filters tab
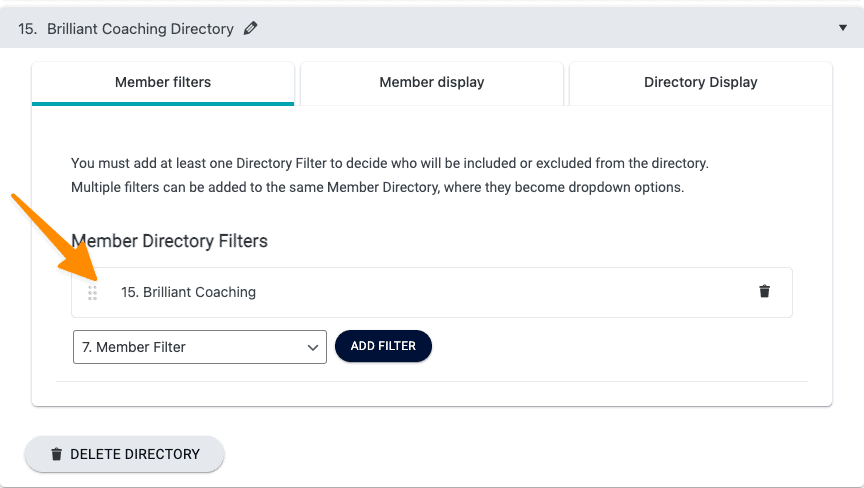
We’ll start in the Member filters tab. Use the dropdown to select the filter you created for your directory.
Member display tab
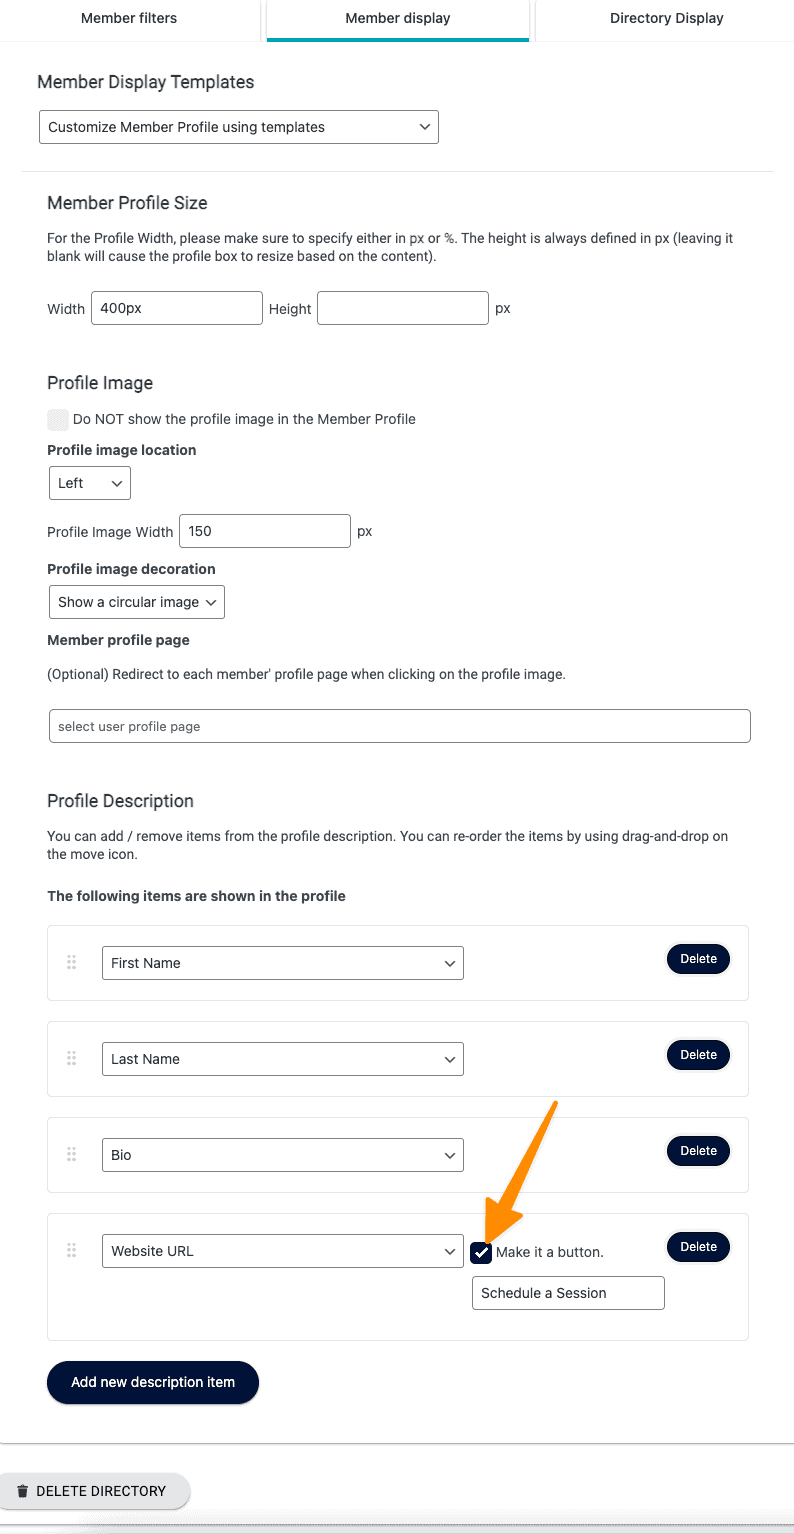
This is where you’ll select the options for displaying the member profile items. For the website URL link you can set this to appear as a button with your choice of wording. Here are the exact options that I used when creating the directory.
Add the directory shortcode to a page on your site.
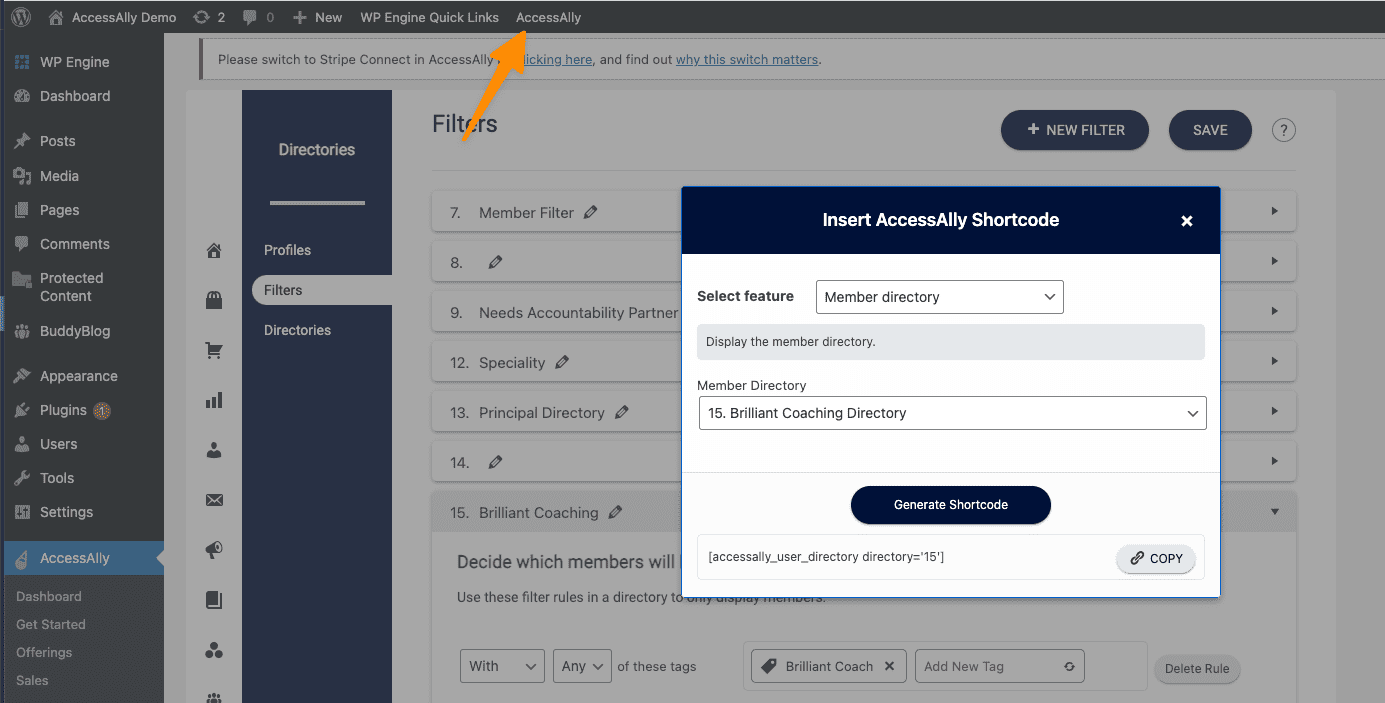
You can use the AccessAlly shortcode generator to grab the code to add the directory to your site. This page is not the same page that you added the profile shortcode to!
Paste the shortcode into the page using your WordPress theme or page builder.
All coaches tagged with the tag used in your directory filter will now be visible on the directory.
