ARTICLE CONTENT:
About
In this article, you will find out how to add subtitles to your Amazon videos. Adding subtitles allows your video content to reach a broader audience that speaks different languages and/or has difficulty hearing.
Recommended Tools
You’ll need a way to create WebVTT files. These files contain the time stamps and subtitles that you would like displayed in your video.
- VTT Creator – upload a video and easily create video subtitles.
- Rev – service that creates .vtt files for you
Location
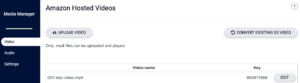
To add subtitles to AWS videos, open the edit modal by clicking on the “edit” button.
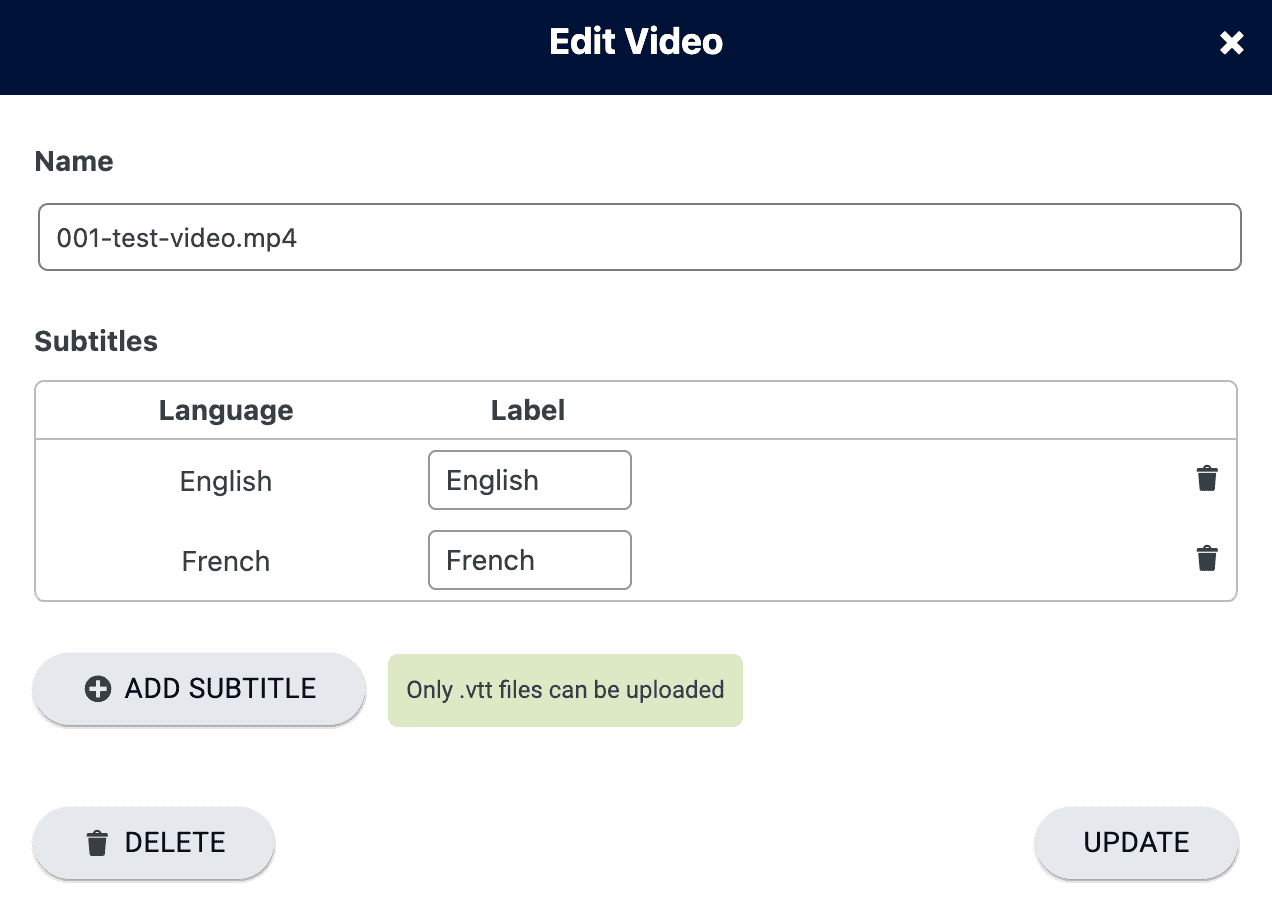
Overview
There is a single table in the edit modal. All subtitles will appear in this table, and they will be displayed with their language and custom label. The modal is designed such that any subtitle displayed in the table will be saved, regardless if they are new subtitles you are uploading or existing subtitles that were previously uploaded. Subtitles can be uploaded and deleted together in one process.
To save any of the changes made in the modal, you must press the “update” button. Additional to the “update” button, the “delete” button will delete the current video you are editing.
Uploading
Clicking on the “+ Add Subtitle” button will add a new row to the bottom of subtitle table. To upload, you must complete and fill out all three of the following sections of the row.
- Select the language of the subtitle from a dropdown menu. The current language options are English, French, German, Italian, Spanish, Portuguese, Hebrew, and Bulgarian.
- Type the custom label to be displayed in the video’s captions settings.
- Add the subtitle file. Only
.vttfiles can be uploaded.
You are able to upload multiple subtitle files at a time. However, only one file per language can be uploaded. For example, if you already have an uploaded English subtitle but you want to add a new English subtitle, you must remove the existing English subtitle first. This rule only applies to the language column and not the label column.
It’s important to note that your uploads will not save unless if you press the “update” button.
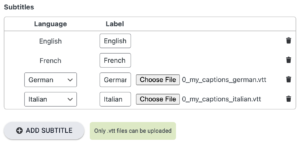
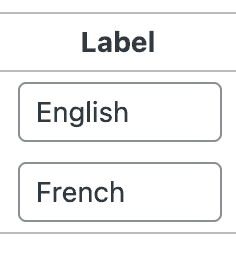
To differentiate new and existing subtitle rows, new subtitles will have a file selector. Existing subtitles will not have a file selector. In the picture above, the top two are existing subtitles that have already been uploaded prior. The bottom two are new subtitles we are planning to upload.
Deleting
To remove subtitles, press the “x” button corresponding to the subtitle you wish to remove. You will be prompted to confirm the removal of the subtitle. After confirming, the subtitle will be taken off the table. Similarly to uploads, multiple subtitles files can be deleted simultaneously, and to save your deletions, press the “update” button.
The “delete” button in the bottom left corner of the modal will delete the video. If you decide to delete the video, all corresponding subtitles will also be deleted.
Viewing the Captions
The custom labels are displayed in the captions settings menu in the video player. It is not the selected language that is being shown in the menu.

Other Updates
The edit modal consists of two more updating features.
- You can rename the video.
- You can change the custom label of a subtitle after you uploaded it.
Neither of these fields can be empty when you are saving. To save your changes, press the “update” button.
