Find out how to use AccessAlly Emails to send welcome emails and module release emails based on being in a team.
Works for: CRM managed contacts and AccessAlly Managed Contacts
ARTICLE CONTENT:
Team Leader & Member Welcome Email
Go to AccessAlly → Emails → Welcome email → New to add a new Welcome Email template.

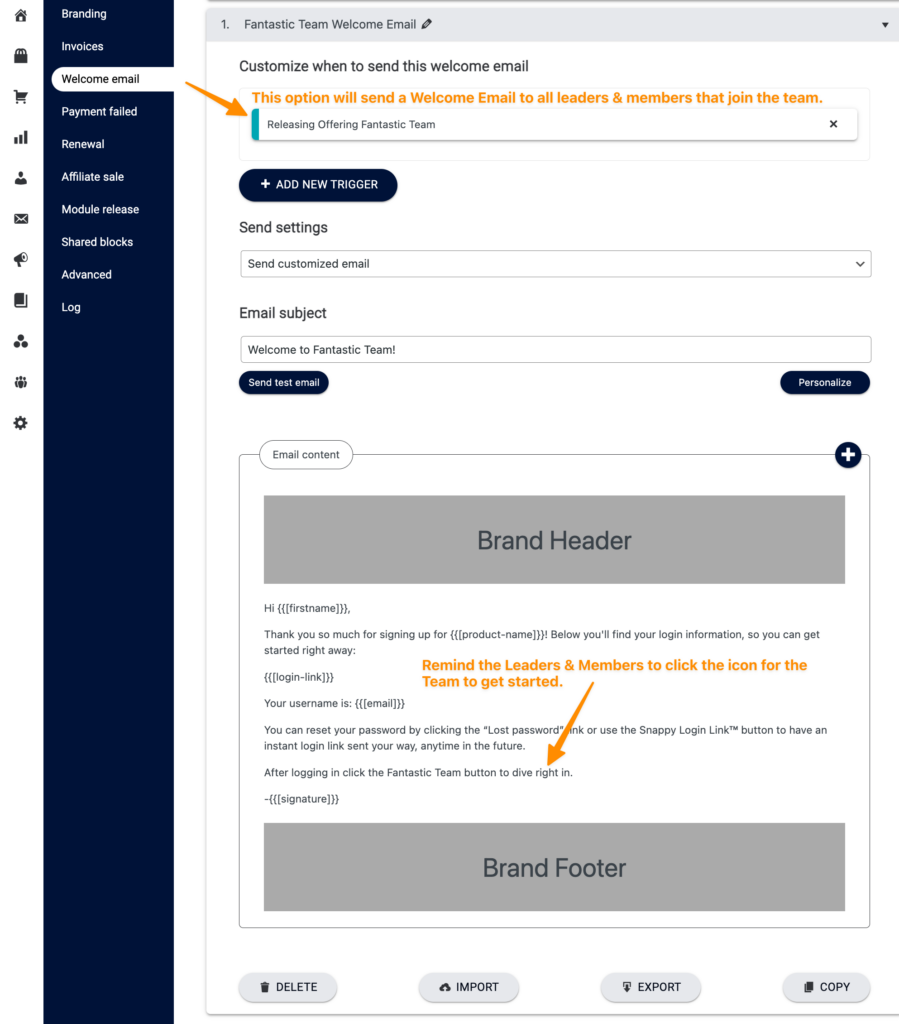
For the easiest setup, create a New Welcome Email for both Leaders and Members in one step by using the Releasing Offering option for your team. Keep the copy in this email so that it works for everyone.
Team Leader & Member Module Release Emails
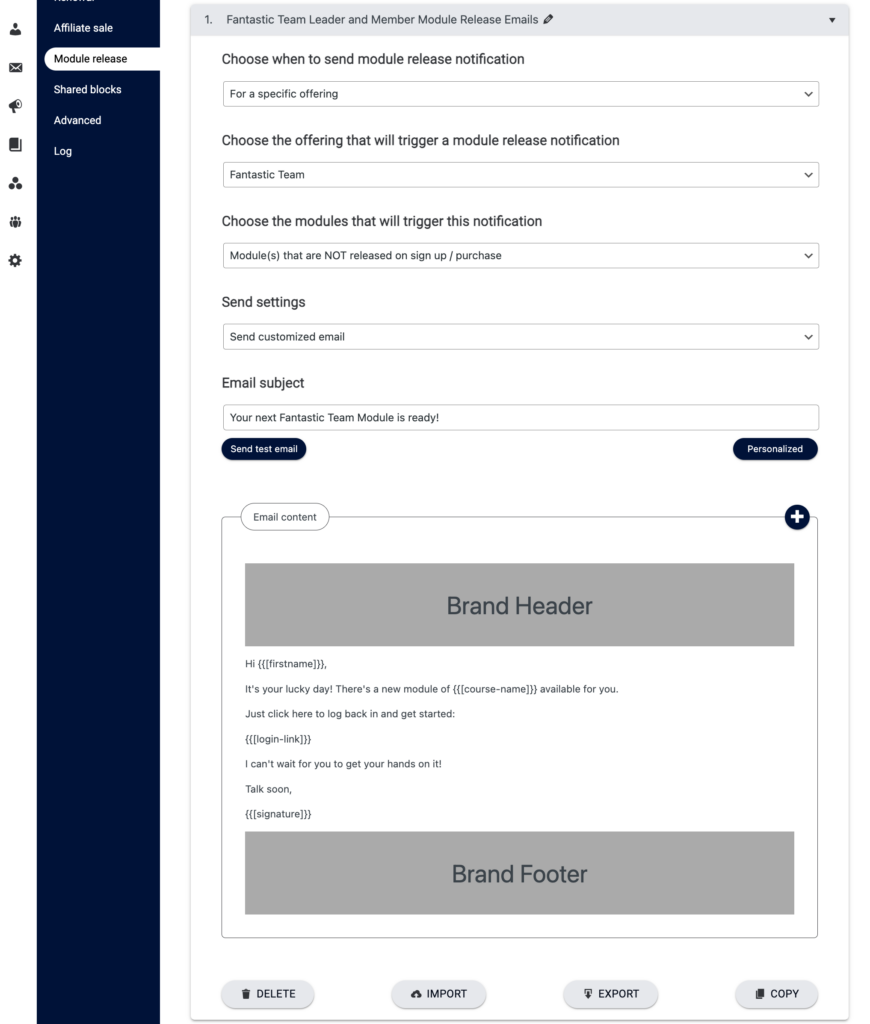
If your Leader and Member content also includes module releases you’ll add a new module release email.
Go to AccessAlly → Emails → Module release → New to add a new Module Release email template.
This template will release the remaining drip modules based on your module release timers in the Leader and Member content tabs. Remember to keep the copy in the emails so it will work for leaders and members!
Advanced AccessAlly Team Email Options
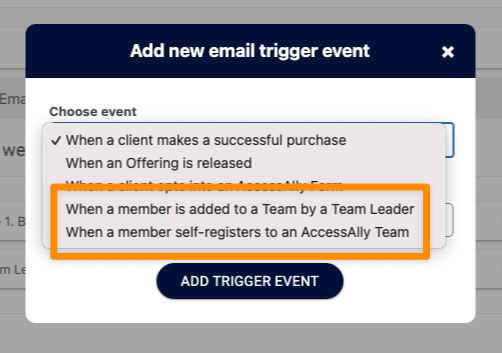
If you would like to send Member specific emails you can create them based on the options below.
- When a member is added to a Team by a Team Leader
- When a member self-registers to an AccessAlly Team
When choosing your trigger option(s) review your Team Administration Dashboard to account for all available options your team leaders have.
This determines which trigger(s) you need to use for your welcome email.
- Self-registration – use member self-registers to an AccessAlly Team
- Batch upload members – use member is added to a Team by a Team Leader
- Add individual member – use member is added to a Team by a Team Leader
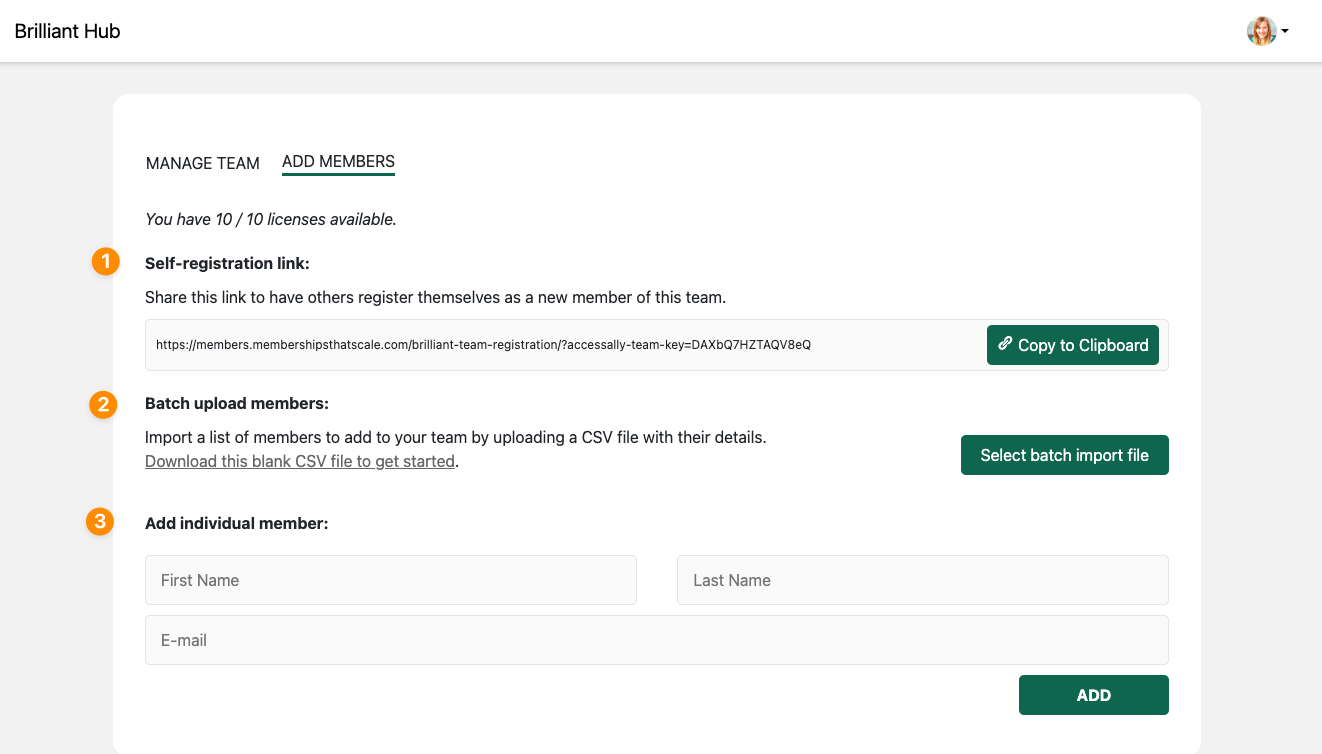
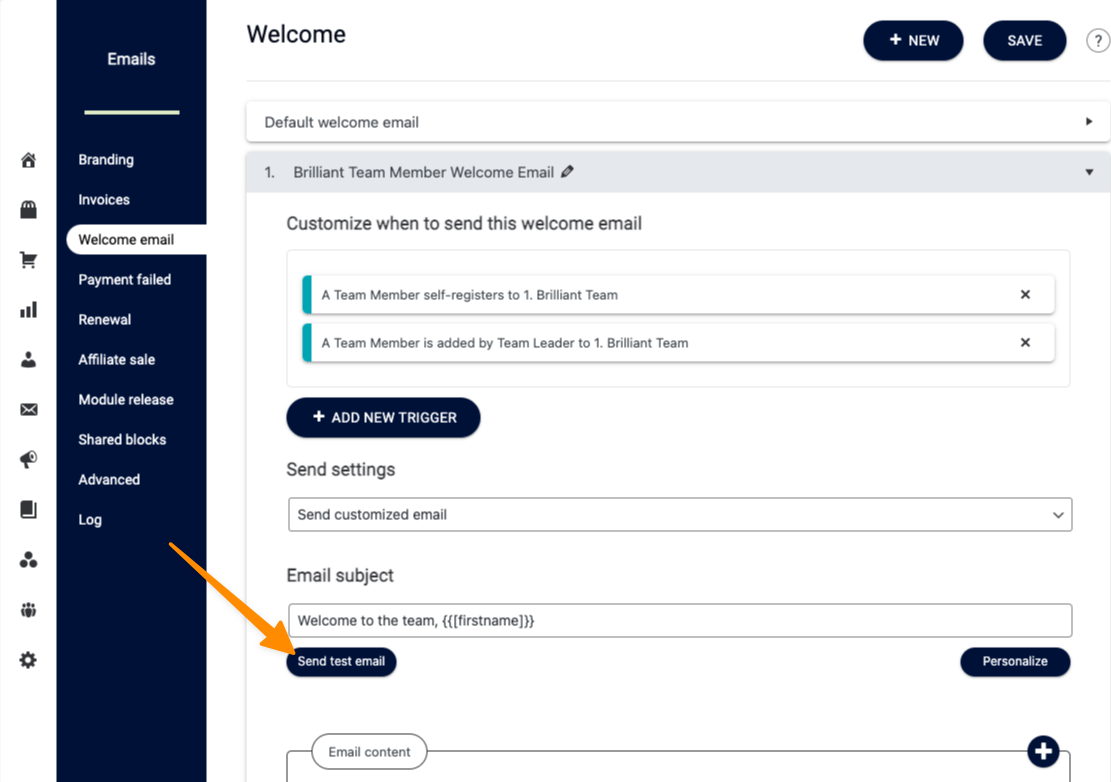
In the above image the Team Leader Administration page shows all three options so the Welcome Email needs two triggers to account for these options.
Here’s the Welcome Email setup for this workflow:
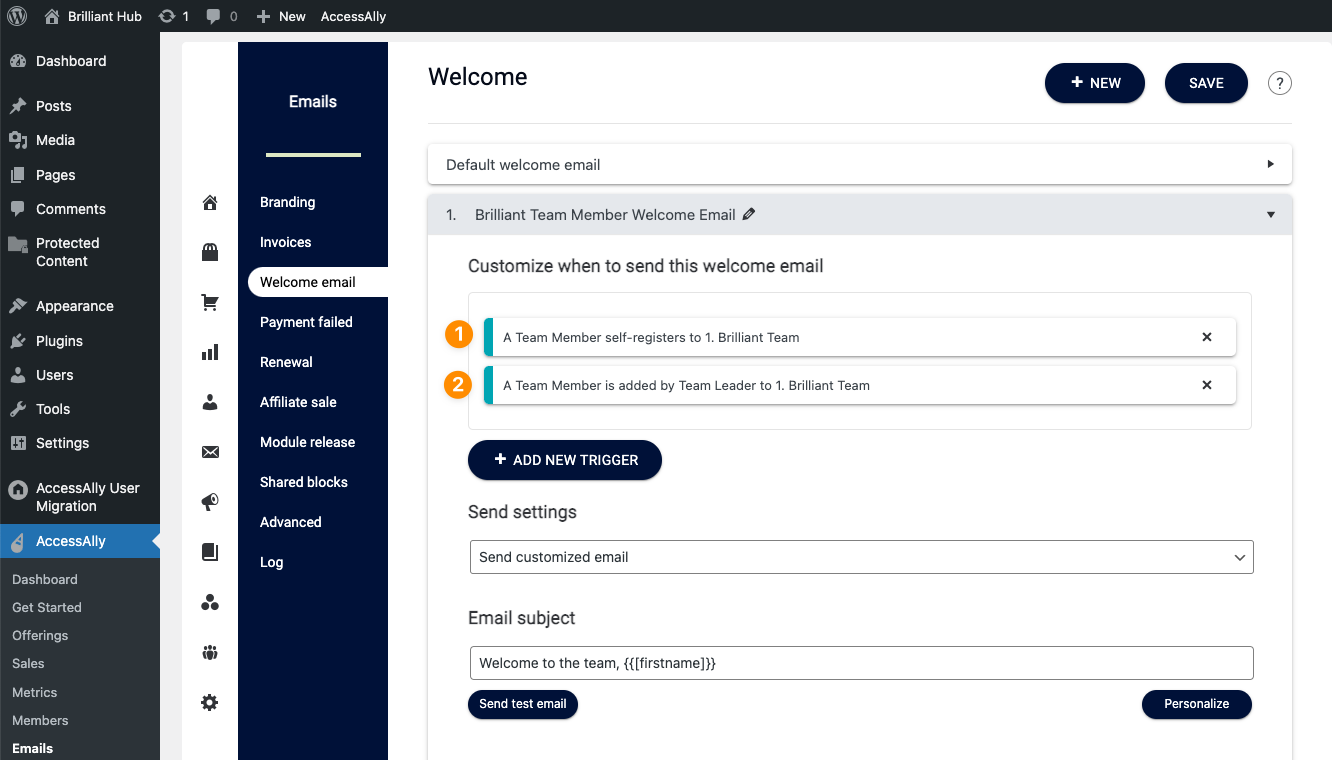
Send Settings
Set this to Send customized email.
Email Subject
Add your desired email subject which can be personalized using the “Personalize” button. The options available to personalize your subject line will appear. No image of this is shown as it varies based on your unique site setup.
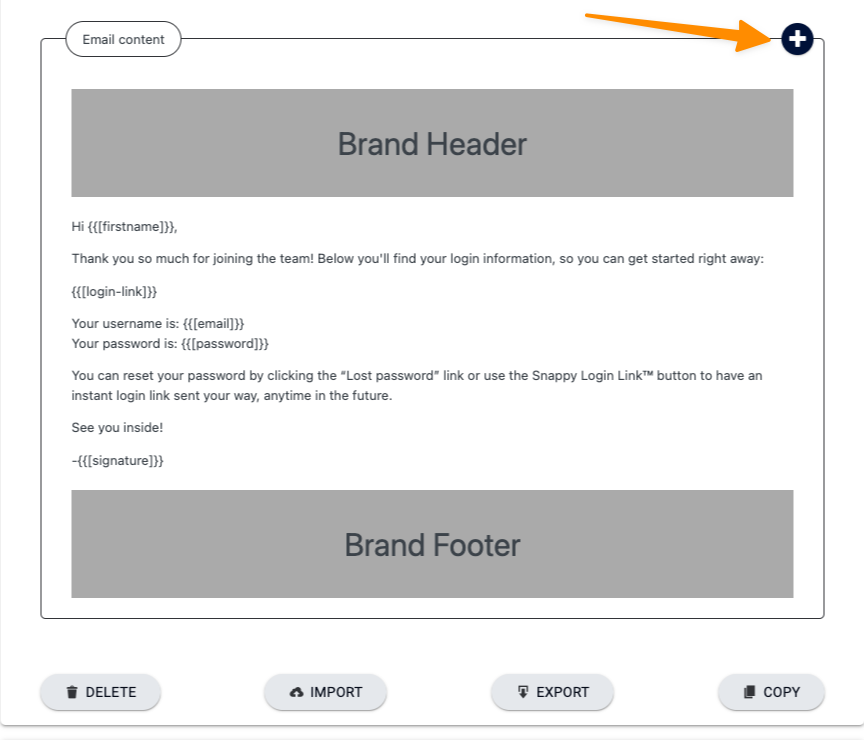
Email Content
Using the email content editor you can add any custom text you would like to the email. Clicking the “+” button in the top right corner offers additional options available to you to get the welcome email copy… just right.
Save Your Email
Click the Save button in the top right corner.

Test Your Welcome Email
Click the “test” button to test your new Team Member Welcome Email.