ARTICLE CONTENT:
How to get the HTML Code from Ontraport
Step 1: Create a new Smart Form
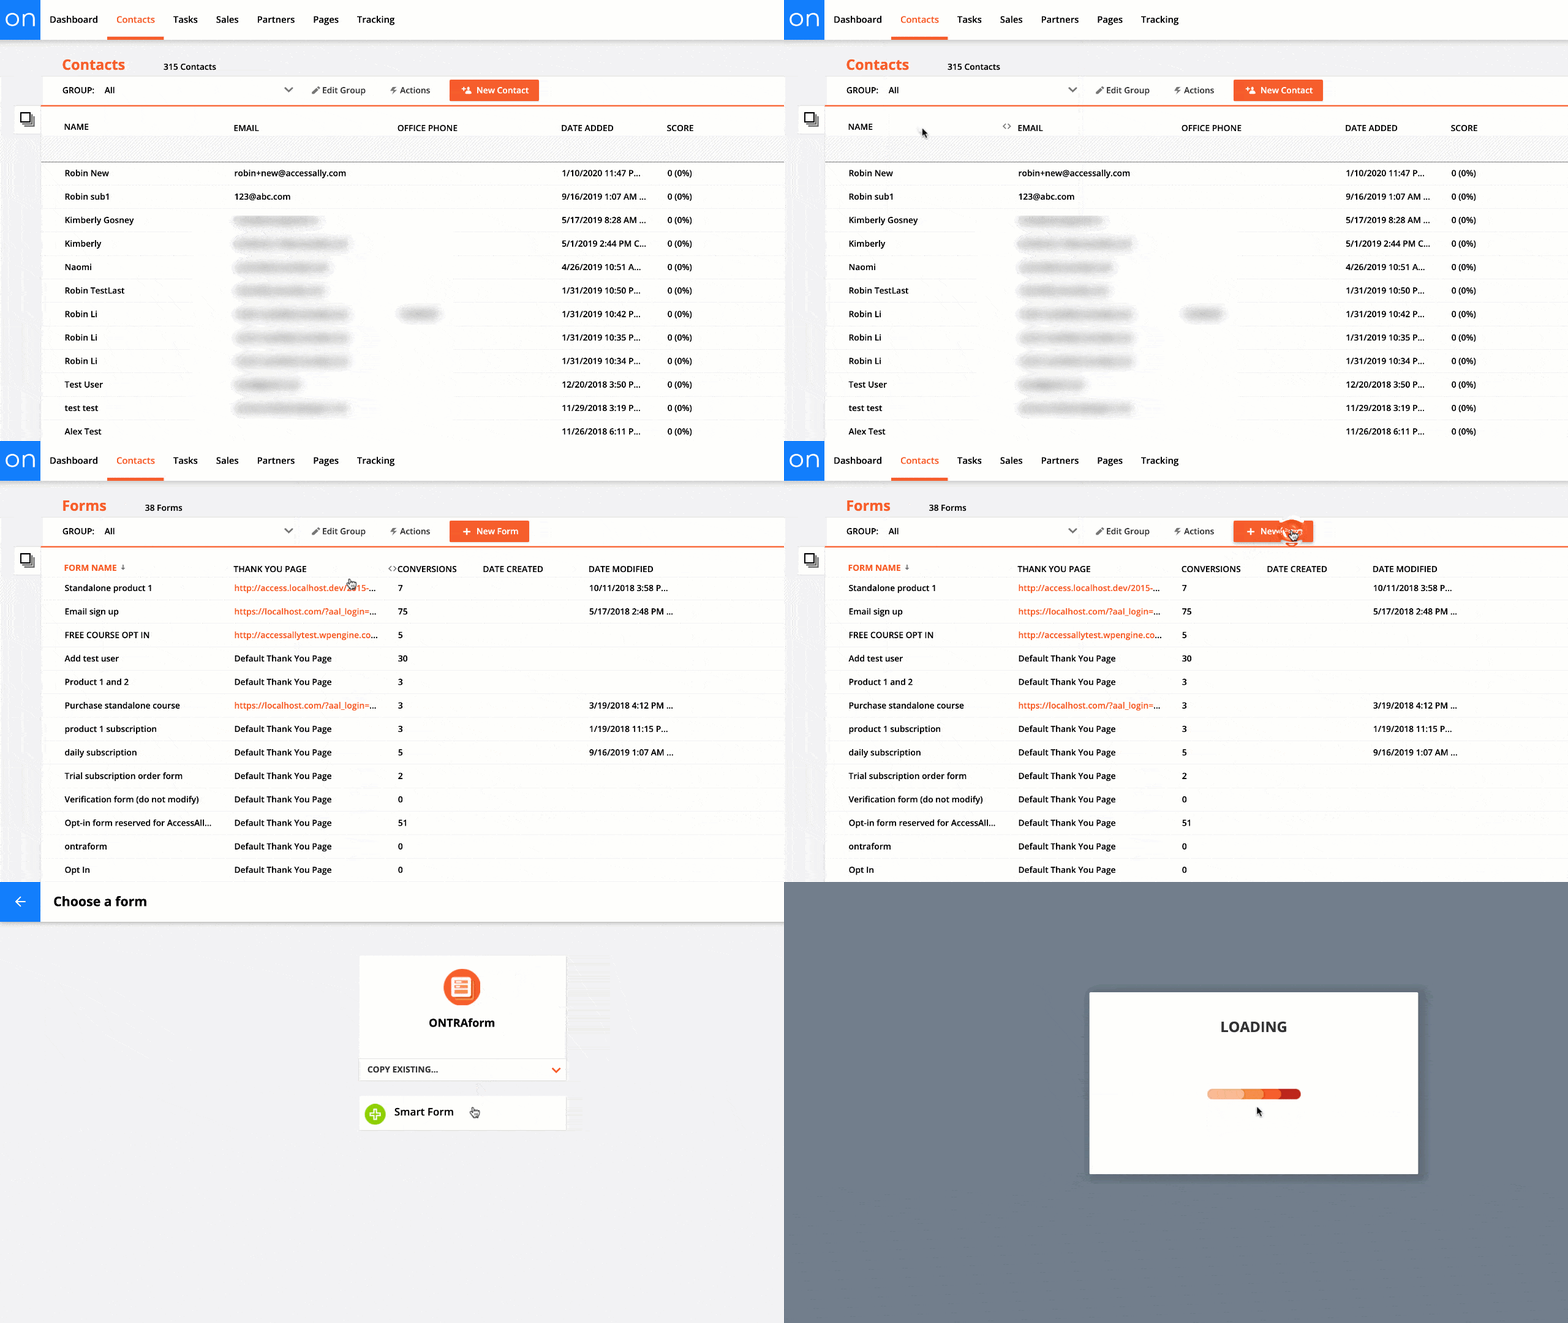
Under the Contacts menu item, go to: Forms > Add New Form.
Important: Make sure to choose the “Smart Form” option, as Ontraforms will NOT integrate with PopupAlly.

Step 2: Configure the form
Give the form a name and edit what fields to include. Use a name that will easily help you distinguish what this particular sign up form is being used for.

Step 3: Set up your thank you page settings
Select the Settings tab to set up a thank you page. We highly recommend selecting your own thank you page, and here’s how to set it up in PopupAlly Pro too: How To Setup the Thank You page.

Step 4: Publish the form
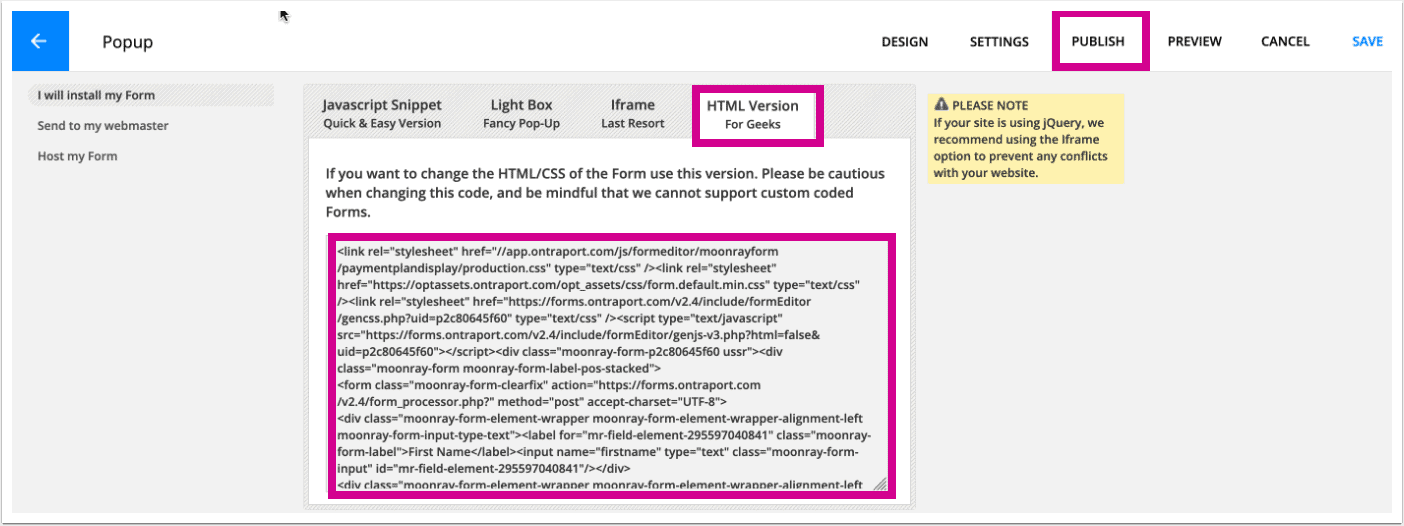
When you’re ready, publish the Ontraport form. This will give you access to the code you’ll need.
Step 5: Copy the HTML code
Go to the HTML Version tab, and the signup form HTML code is in the text box. Go to: I will install my form > HTML Version for Geeks.
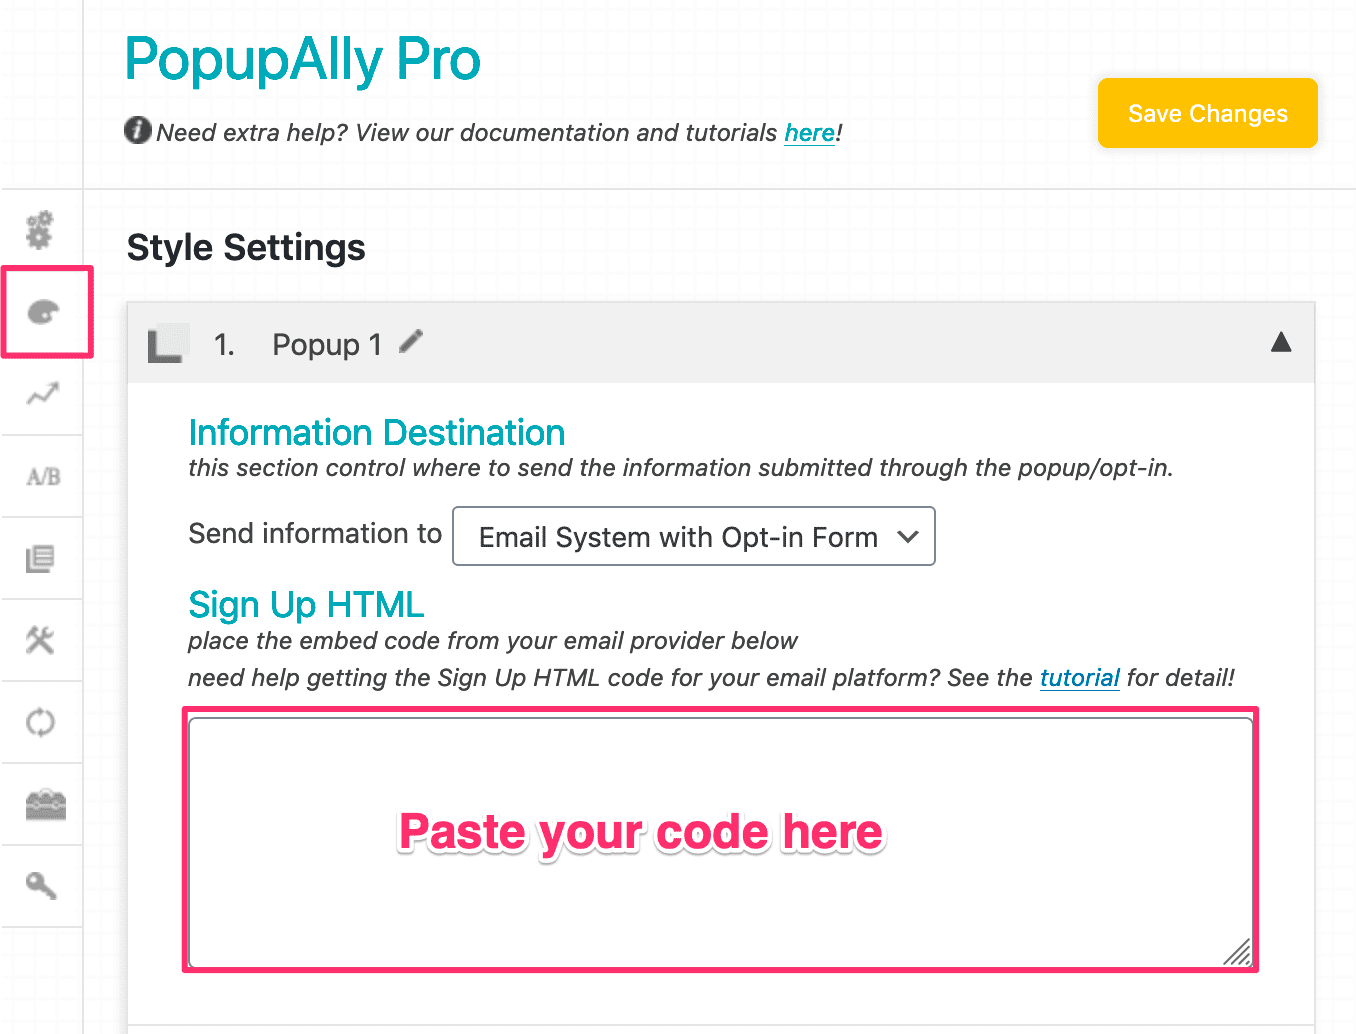
Here, you’ll see the HTML code – copy the entire code, and paste it into your PopupAlly settings inside the WordPress site.

If you’re not seeing the HTML option, you likely didn’t choose “SMART FORM” option when setting up the form initially (it’s an Ontraform instead).Your Ontraport form code can now be entered into the PopupAlly Pro settings.
Step 6: Add the HTML code to PopupAlly Pro
Now that you’ve copied the code, paste it into your PopupAlly Pro settings under Style Settings > Sign Up HTML.


