ARTICLE CONTENT:
Step by Step Tutorial
1. Create a Signup Form
Go to: Create > Signup Form
Make sure the correct list is selected in the dropdown, then click Begin.
2. Locate HTML Code
Under the Unstyled tab, copy the HTML code on the bottom right. It’s important to get all of it!
Step 3: Paste the HTML code in your PopupAlly settings
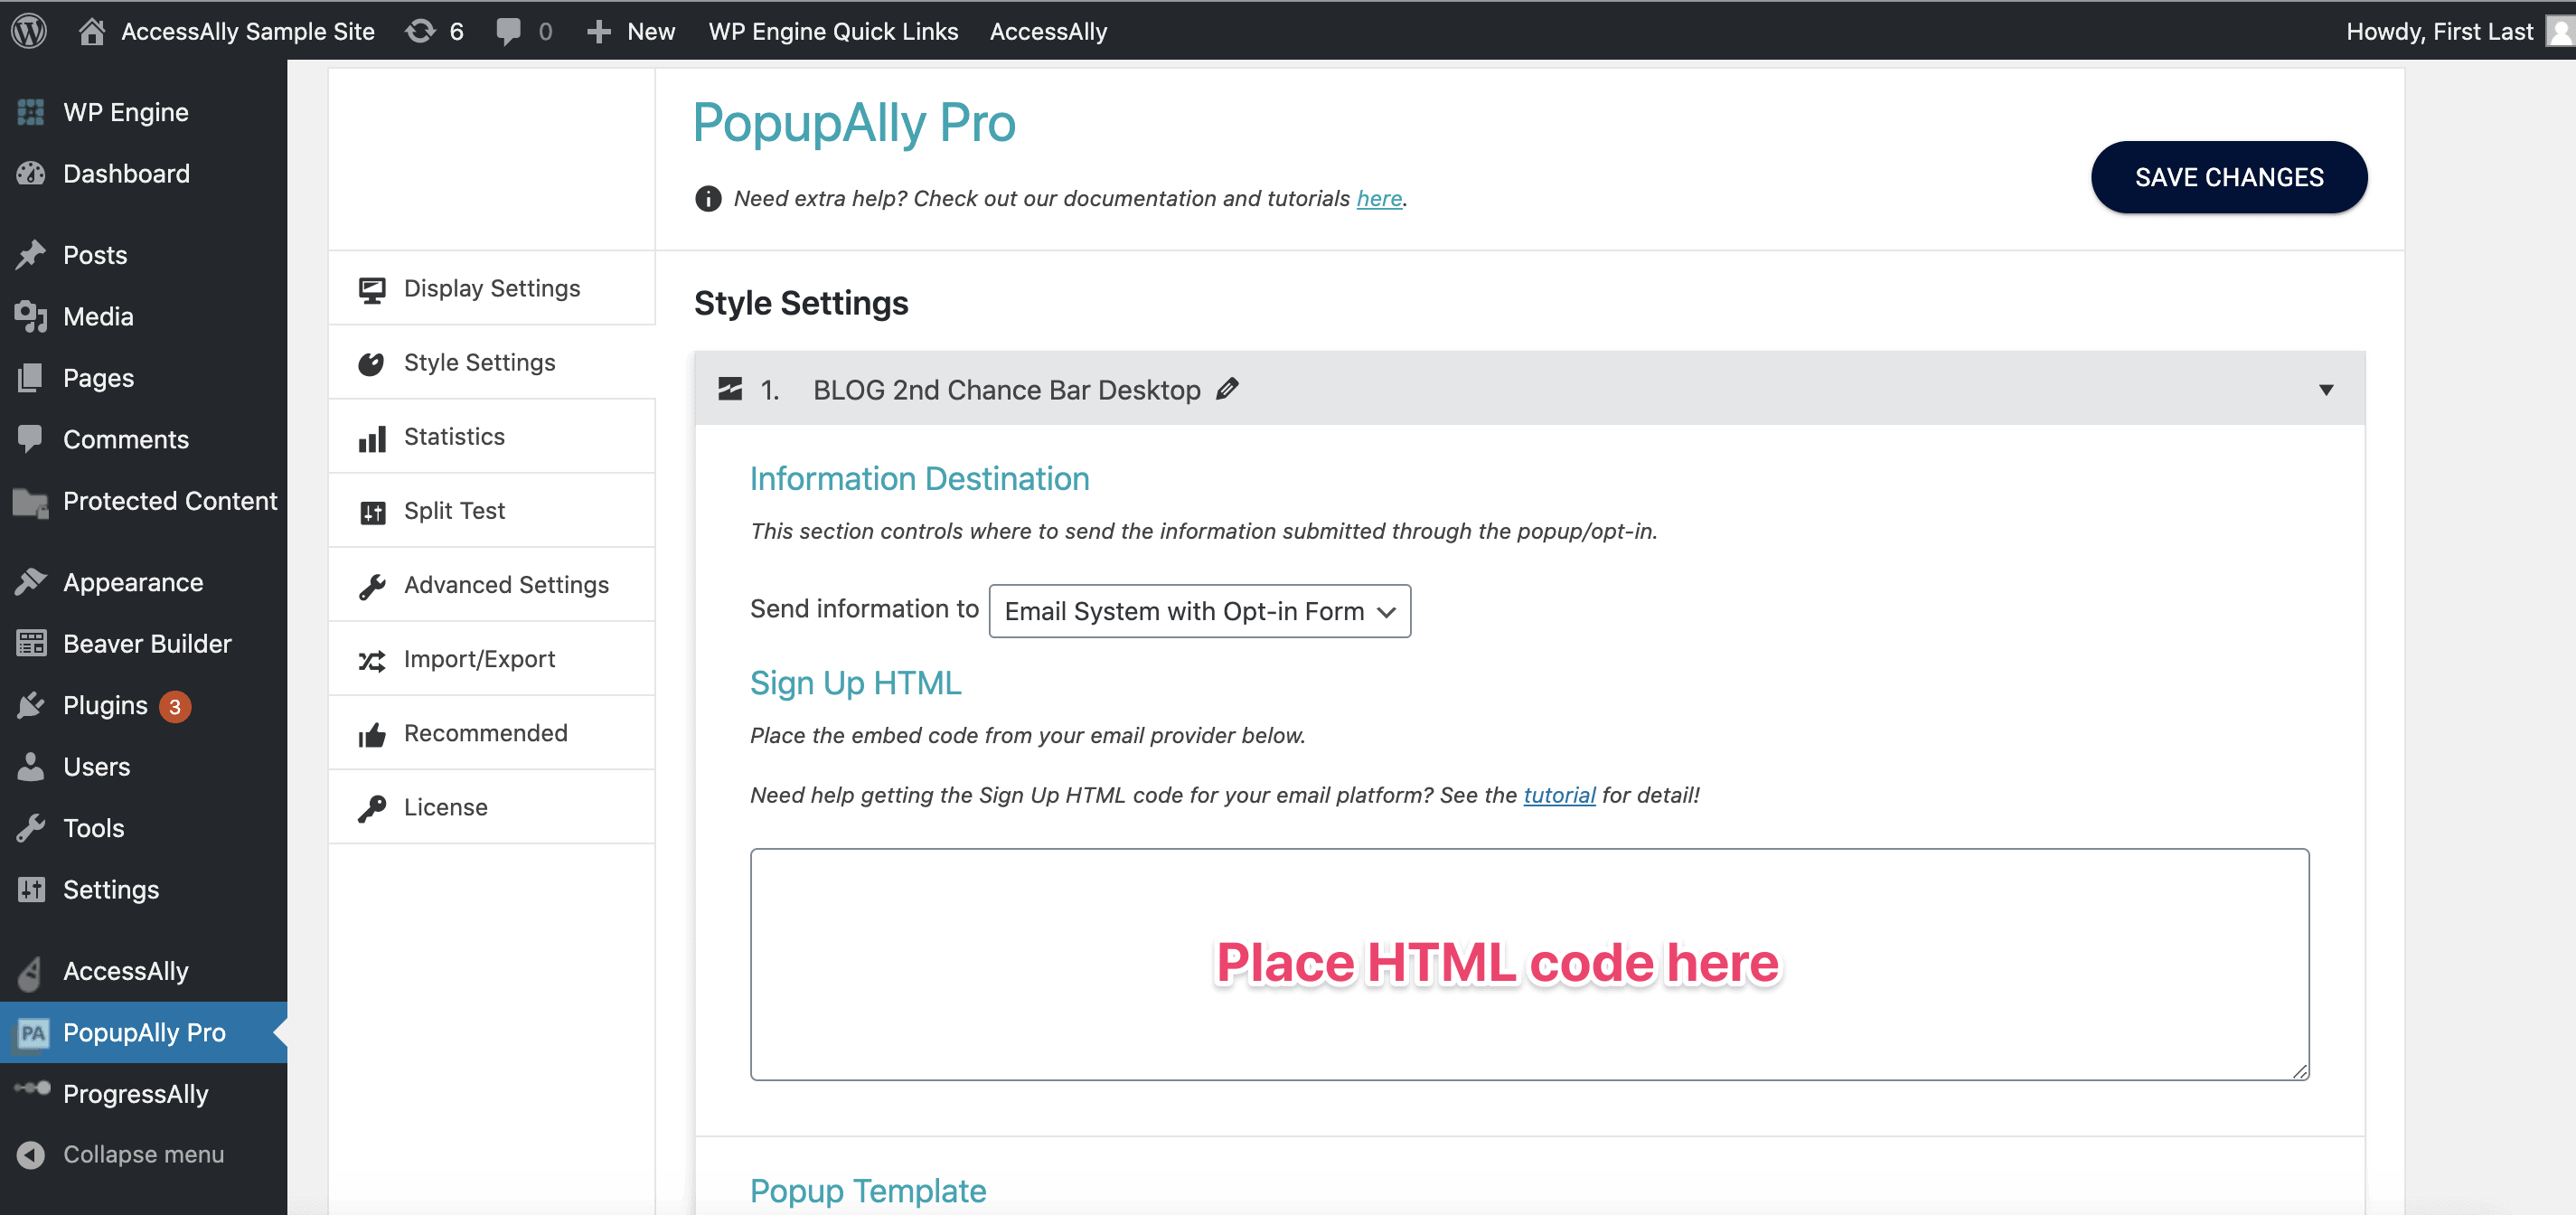
Now, paste the HTML code into the “Sign Up HTML” section in your PopupAlly settings (in the Style Settings tab).
Step 4: Set the thank you page

Warning: Although PopupAlly Pro gives you the option of showing a “thank you popup” after someone opts in, Mailchimp’s API blocks those new subscribers.
Instead, please make sure to use the Thank you page as shown here.
Finally, you’ll want to make sure that each person who signs up using your MailChimp Popup WordPress form gets redirected to a polite Thank You Page!
Inside MailChimp, go to Audience > Signup Forms > Form Builder. In the Forms and response emails section, select Confirmation thank you page from the dropdown. Then, designate the correct thank you page URL.
Now, Your MailChimp Popup WordPress Integration Is Ready to Go!
Step 6: Paste the code into your popup settings
Now that you’ve copied the code, paste it into your PopupAlly Pro settings. Go to: Style Settings > Sign Up HTML.
Testing
Test your opt in by opening an incognito or private browser. Enter an email address to test the process.