ARTICLE CONTENT:
1. Create a Sign Up Form
In your AWeber account, go to: Sign Up Forms > Create a Sign Up Form.

The “Simple Form” design that includes name and email is perfect for PopupAlly.

2. In AWeber, click Go To Step 2 to get to the Basic Settings
After creating the Thank You Page in your WordPress site, you can make sure the Basic Settings in your AWeber form is set to the page you created. Select Custom Page, and then place the URL in the space below.


Warning: Although PopupAlly Pro gives you the option of showing a “thank you popup” after someone opts in, Aweber’s API blocks those new subscribers. Instead, please make sure to use the Thank you page as shown here.
3. Click Save Your Form
4. Click Go To Step 3, and then select ‘I Will Install My Form’
6. Locate the ‘Raw HTML Version’ Code
This is the code you will need to complete the integration between AWeber and your popup plugin, PopupAlly. Be sure to uncheck the box below the code to remove the styling.

7. Paste the AWeber code into PopupAlly
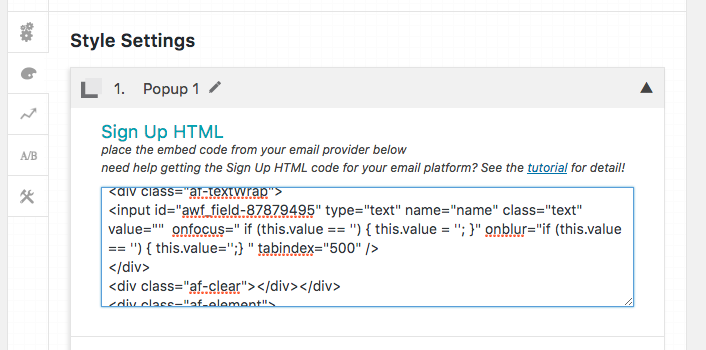
Simply copy + paste the code into your WordPress site: PopupAlly -> Style Settings -> Sign-up form HTML.
PopupAlly is now integrated with AWeber & ready to go!
8. Paste the code into your popup settings
Now that you’ve copied the code, paste it into your PopupAlly Pro settings. Go to: Style Settings > Sign Up HTML.


