When building out your courses with AccessAlly, there are two sides: the access/page protection side (handled by AccessAlly), and the visual/design side (handled by your Theme).
This tutorial will show you how to create a mockup for your course pages so that you can easily build it between AccessAlly and your theme.
ARTICLE CONTENT:
Step 1: Create a list of all course content
Create a bullet list or checklist of all the material you have prepared for your course.
- YouTube Video – Lesson 1
- YouTube Video – Lesson 2
- YouTube Video – Lesson 3
- YouTube Video – Lesson 4
- PDF Worksheet – Lesson 1
- PDF Worksheet – Lesson 2
- PDF Worksheet – Lesson 3
- PDF Worksheet – Lesson 4
- Quiz – Lesson 1
- Quiz – Lesson 2
- Quiz – Lesson 3
- Quiz – Lesson 4
Step 2: Decide How You Want To Control Access To Your Courses
Next, decide how you want to control permission to your course content when it’s inside your membership site.
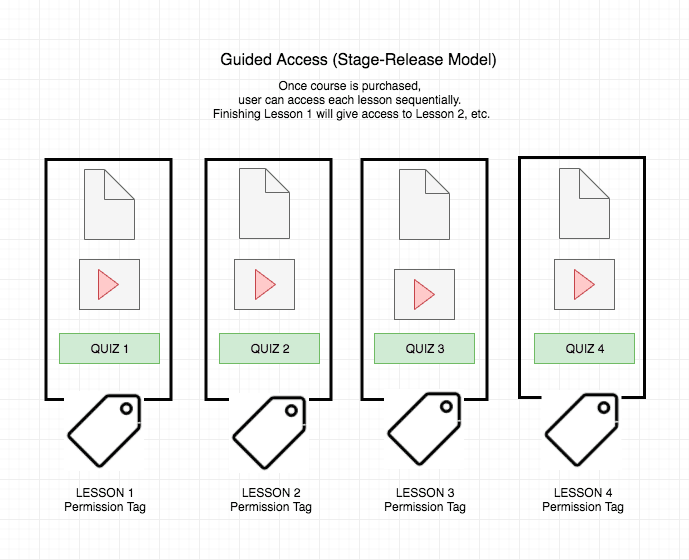
OPTION 1: The Stage-Release Model
Is it important that you control the access for individual lessons (or “modules”) inside the course? If so, this is known as a Stage-Release Course Model. If going this route, you’ll want to decide what content should be grouped together for release, with a quick mockup:

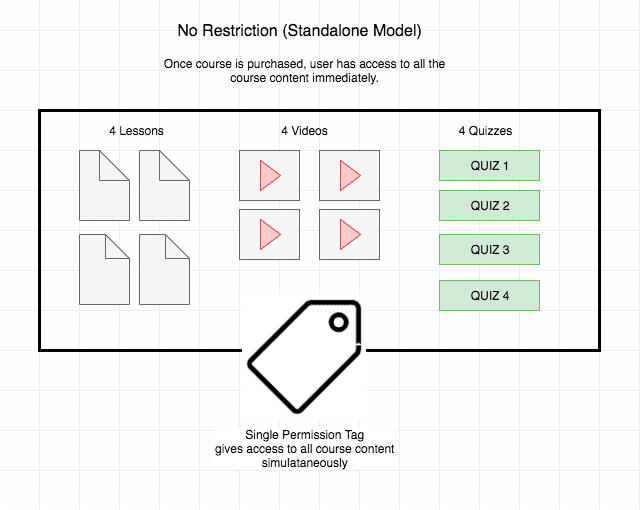
OPTION 2: The Standalone Model
Would you prefer to give access to all course content at once, with no restrictions? If so, this is known as a Standalone Course Model. If going this route, you’ll have a single permission tag to work with when building the course structure with AccessAlly.

Step 3: Create a page mockup
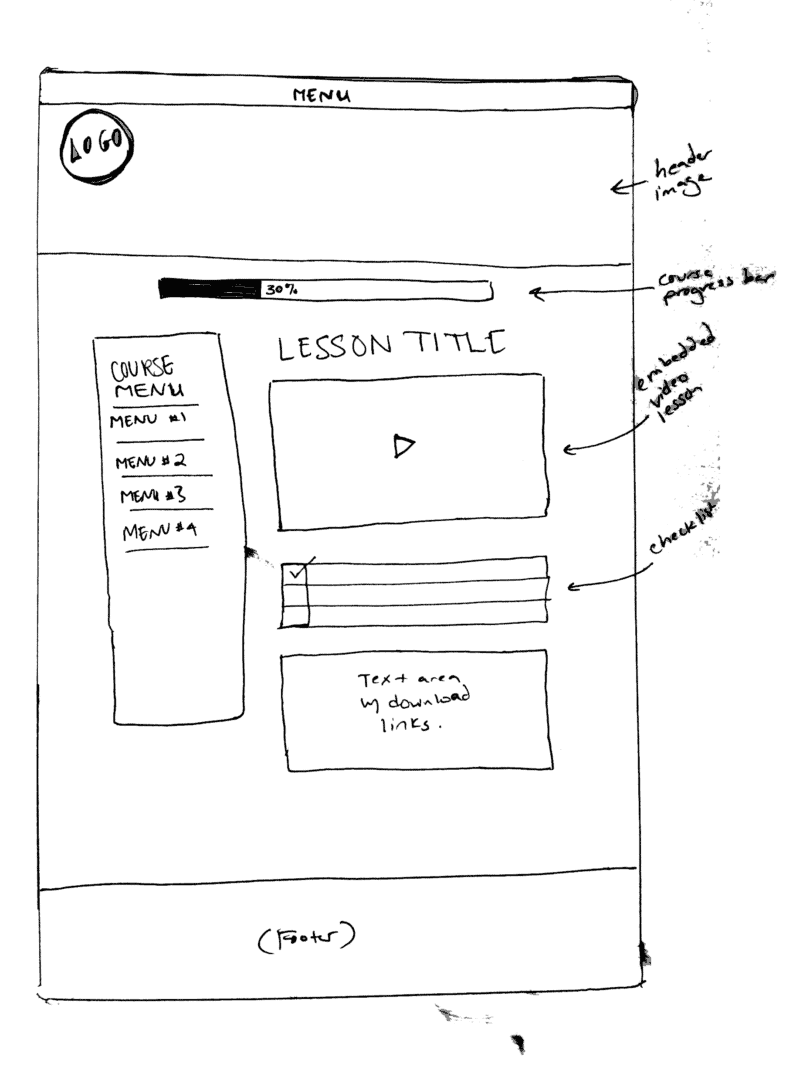
Finally, create a rough page mockup for each page in your course so that you know exactly how many pages need to exist.
In the example above, each lesson has three main elements:
- A YouTube Video
- Downloadable PDF
- Quiz
Depending on how you want your course to appear, you may wish to house all three elements on a single page. Or, you might decide to put the video and PDF together and create the quiz on a separate page.
Draw it out with enough detail so you can bring this to your web designer – or create the design yourself.

Next Step:
Two things need to happen now:
- The Course and content must be created with AccessAlly’s Offering Wizard.
- The page design must be implemented and applied to each of the course pages that were created with the Offering Wizard.
To find the corresponding tutorials, please return to: AccessAlly Offerings Guide

